In a previous article here, I discussed my efforts to fabricate new cross hatch aluminum interior pieces, specifically the center console or “ski slope” piece. Part 2 is going to address the remaining pieces, i.e. the gauge panel, the radio/ash tray panel, and the shifter surround.
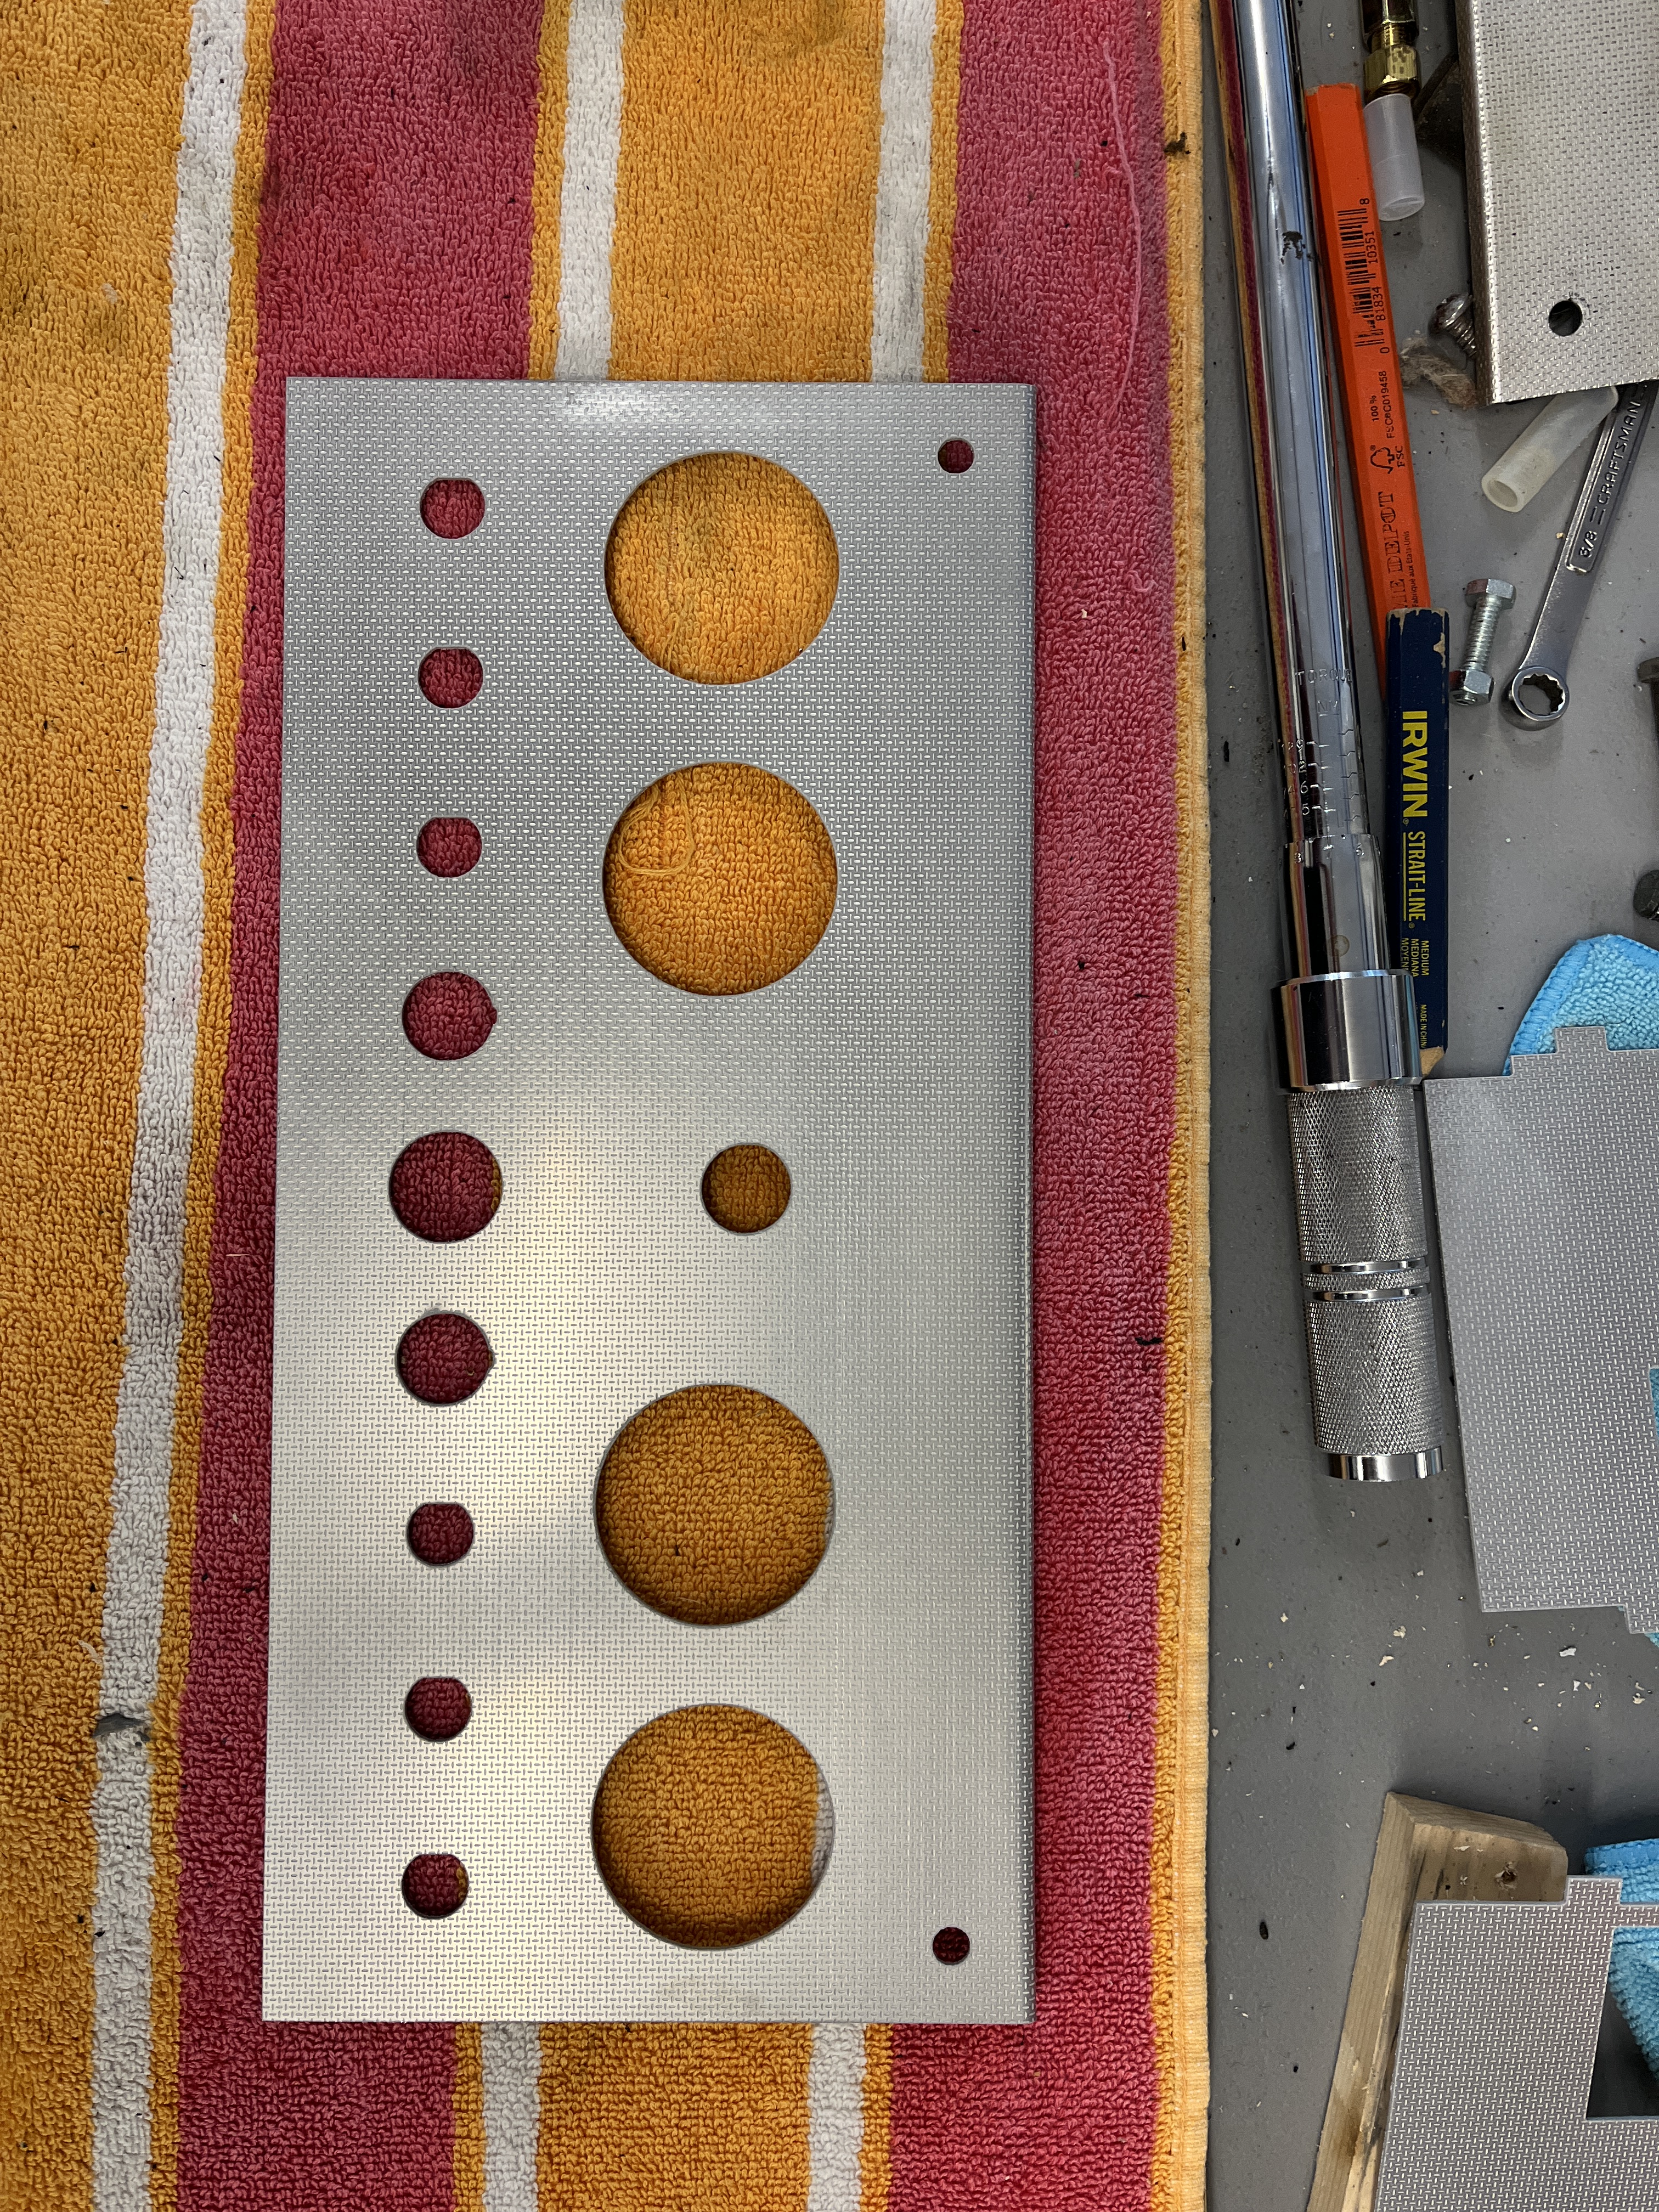
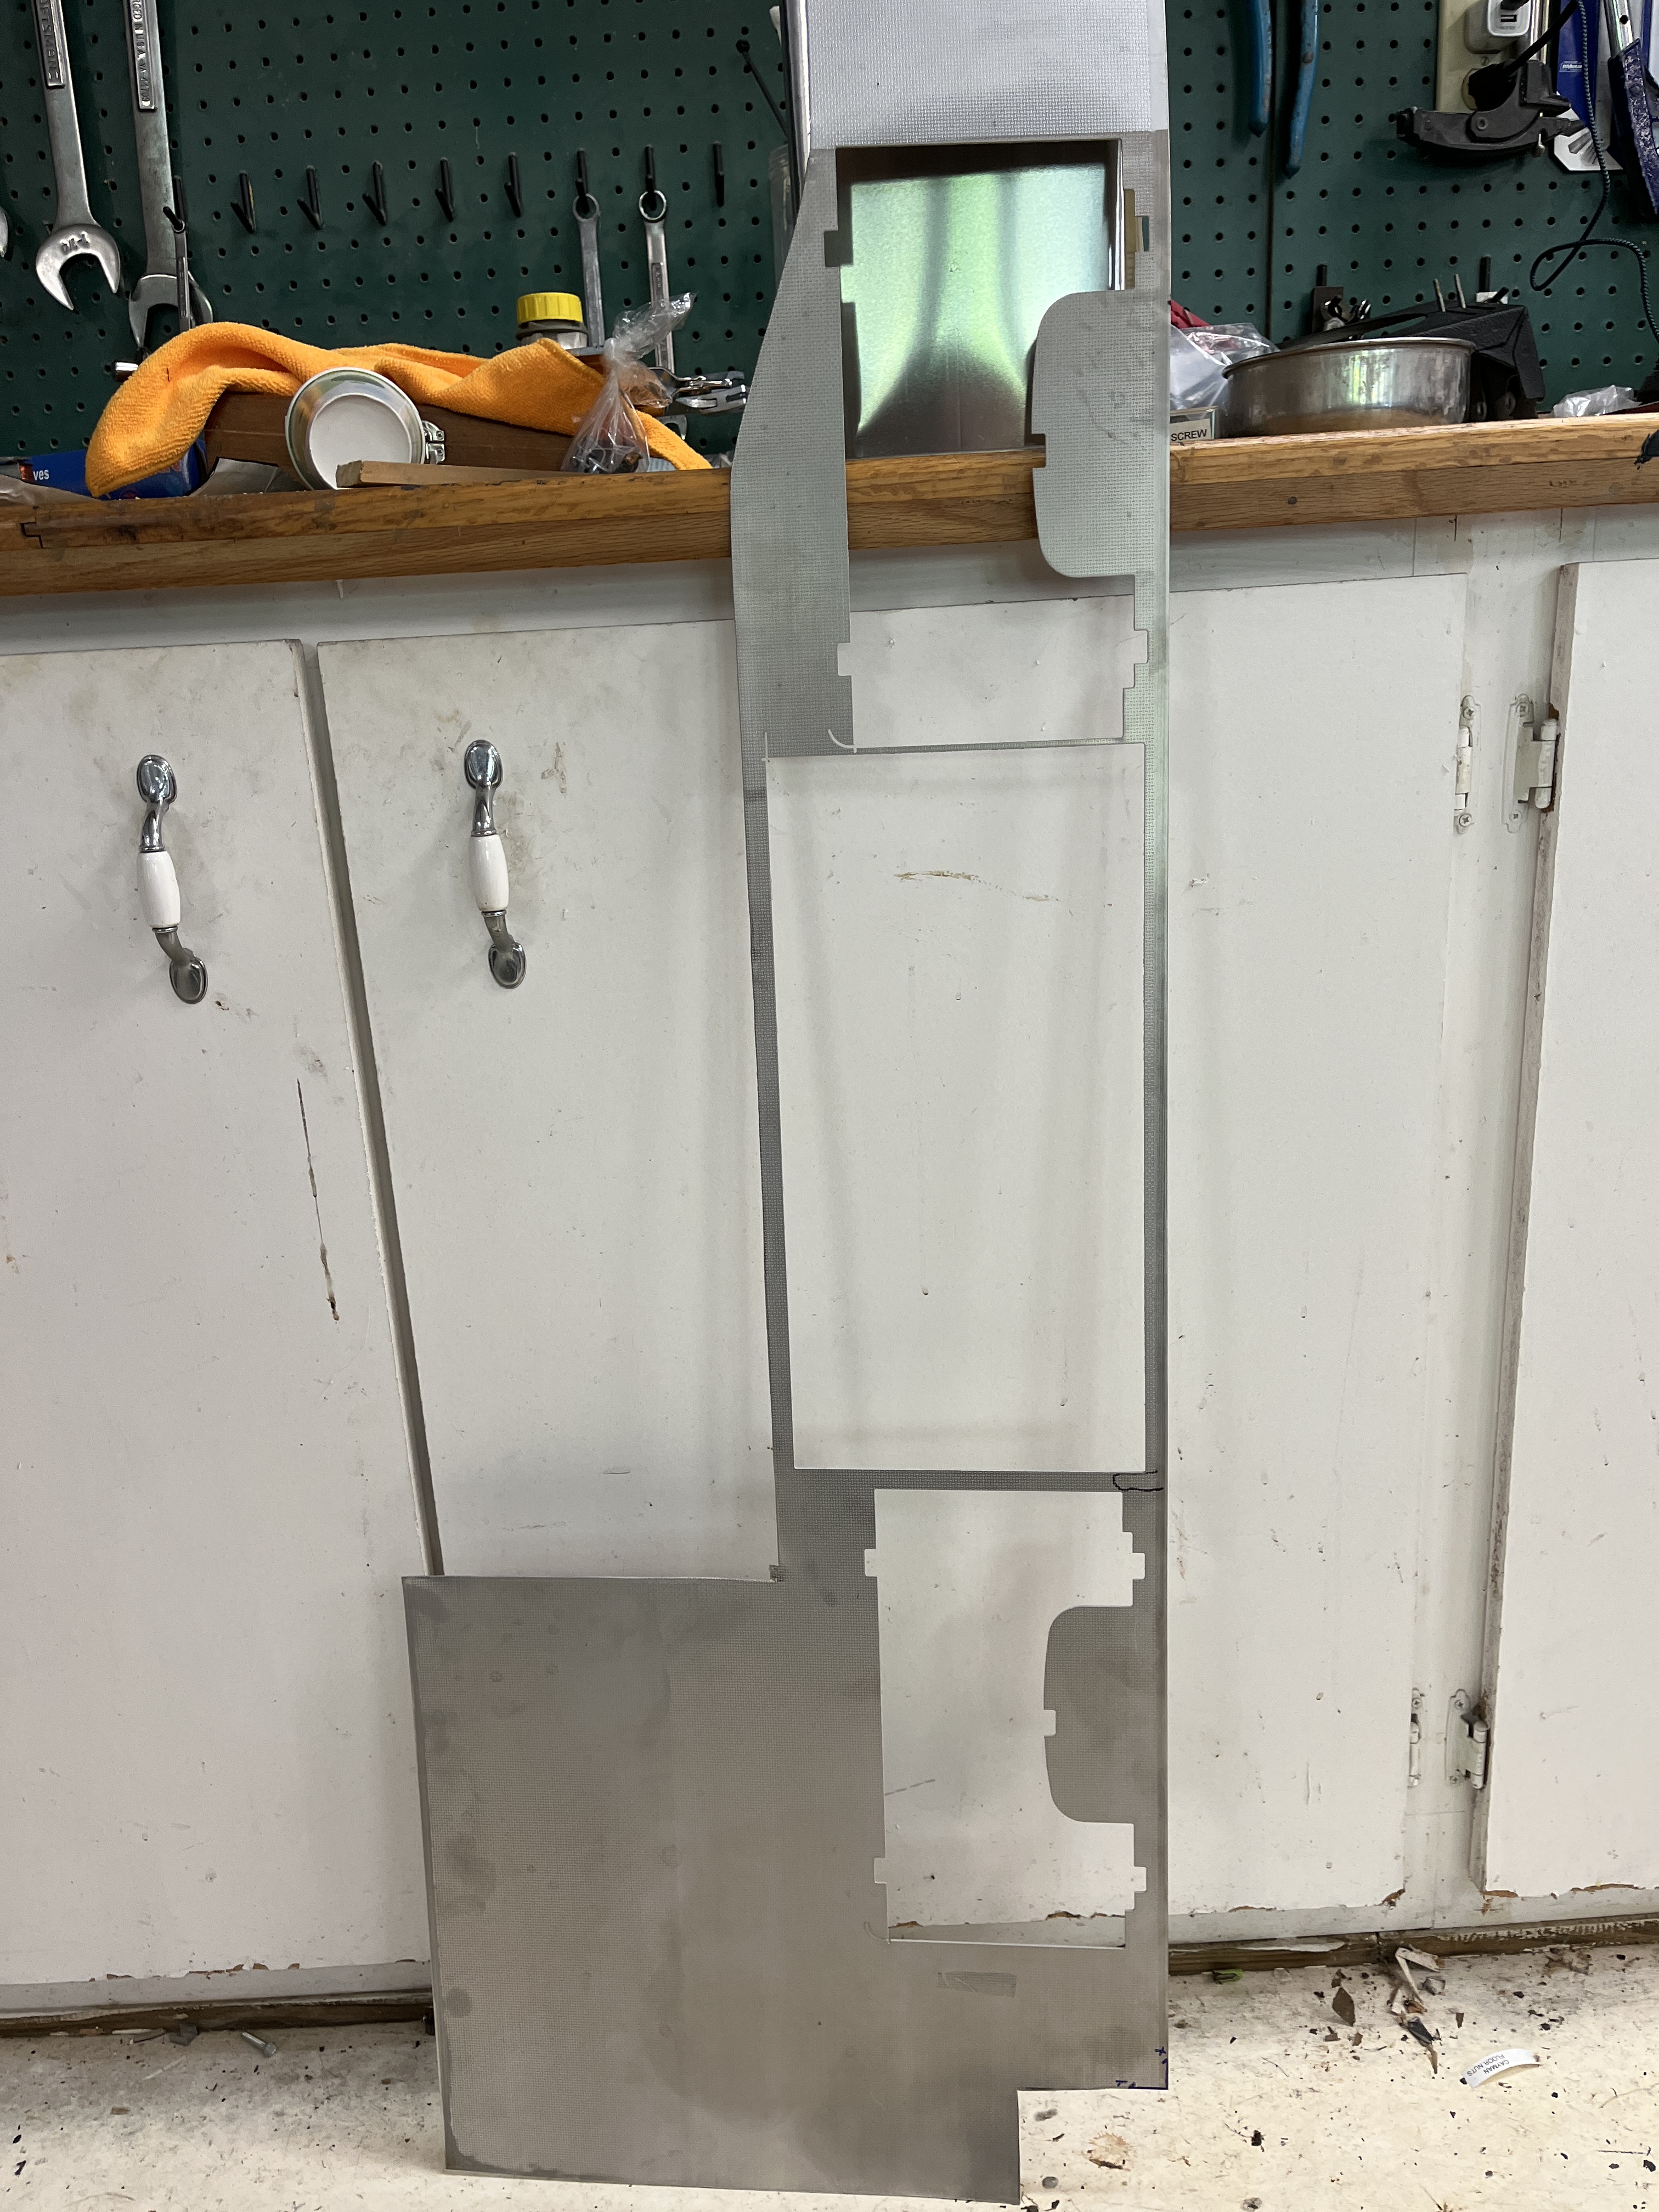
As a short recap, I had sourced new cross hatch aluminum sheet from Aston Martin Works in the UK. All I had to do was turn this into finished panels. Easier said than done! For instance, the gauge panel has a series of round holes. No problem? Well, yes it is a problem as it is hard to cut round holes in thin metal sheet. A drill bit just leaves a hot mess. A hole saw does better. A punch is the best. But what if the hole is D shaped? No hole saw can do that and a custom punch is required. Need 10,000 items. No problem, I’ll order a custom punch. Need one. Oh my! After consultation with my fabrication guru Rick, we decided that water jet cutting might be the way to go for a small batch job. Water jet cutting uses a slurry of water and sand, ejected at high pressure from a nozzle, whose position is precisely controlled by a computer aided machining (CAM) process. I contacted a local firm who said yes, they could handle it.
I sent my original pieces to Rick, who precisely measured them and developed a CAD (computer aided drafting) model of the two subject panels. He printed out a full scale pattern on paper, which he overlaid on the original pieces. Perfection but we are talking about Rick, who accepts nothing less! I double checked his work and could find nothing wrong. So he output a CAM (computer aided machining) file and I emailed this to the local water jet cutting firm. They cut test pieces out of plain aluminum. I went to pick these up and test fit against the original pieces. Again, perfection. I should note that logic would dictate that the hole pattern in an Etype gauge panel would be totally uniform and symetric. That was not the case. It was close but when measuring to a tenth inch accuracy, there were small descrepencies. Rick and I decided we had to be faithful to our orignal, which is the copper panel that resides behind the more cosmetic aluminum panel. This turned out to be the right decision, when it came time to fit the gauges and the toggle switches. Another example of how maddening it is to fabricate aftermarket Etype parts for a market greater than one.
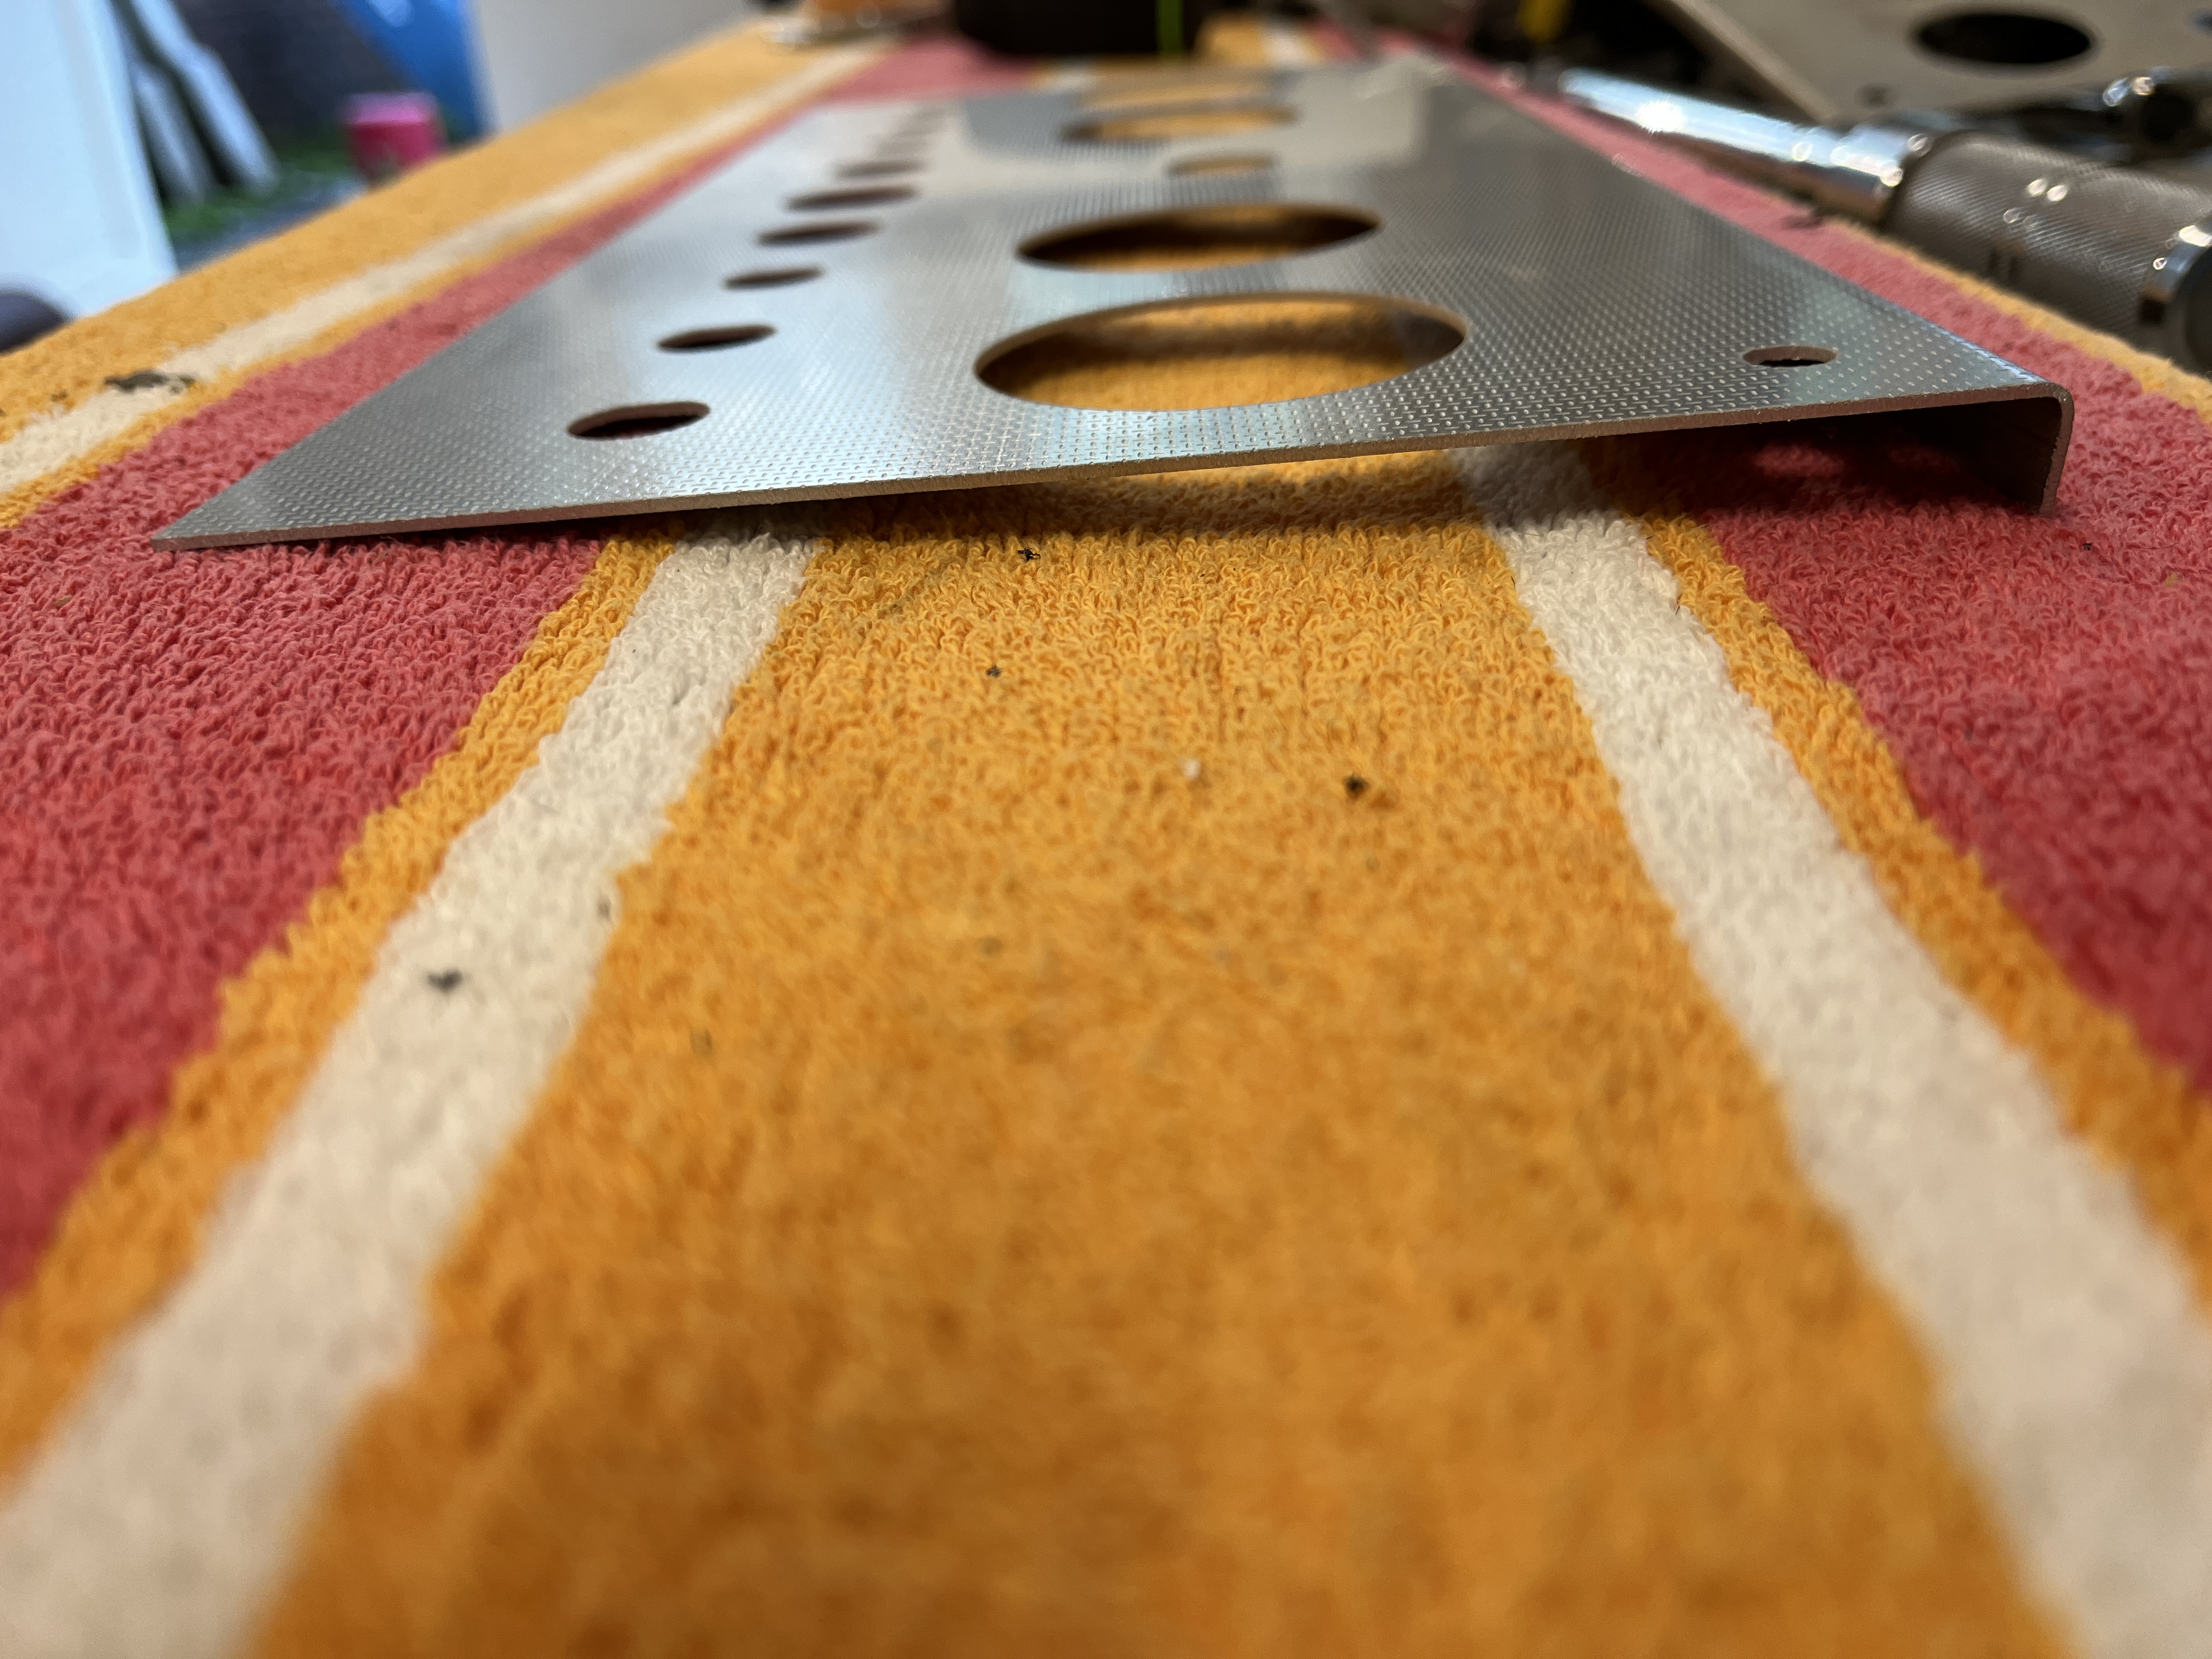
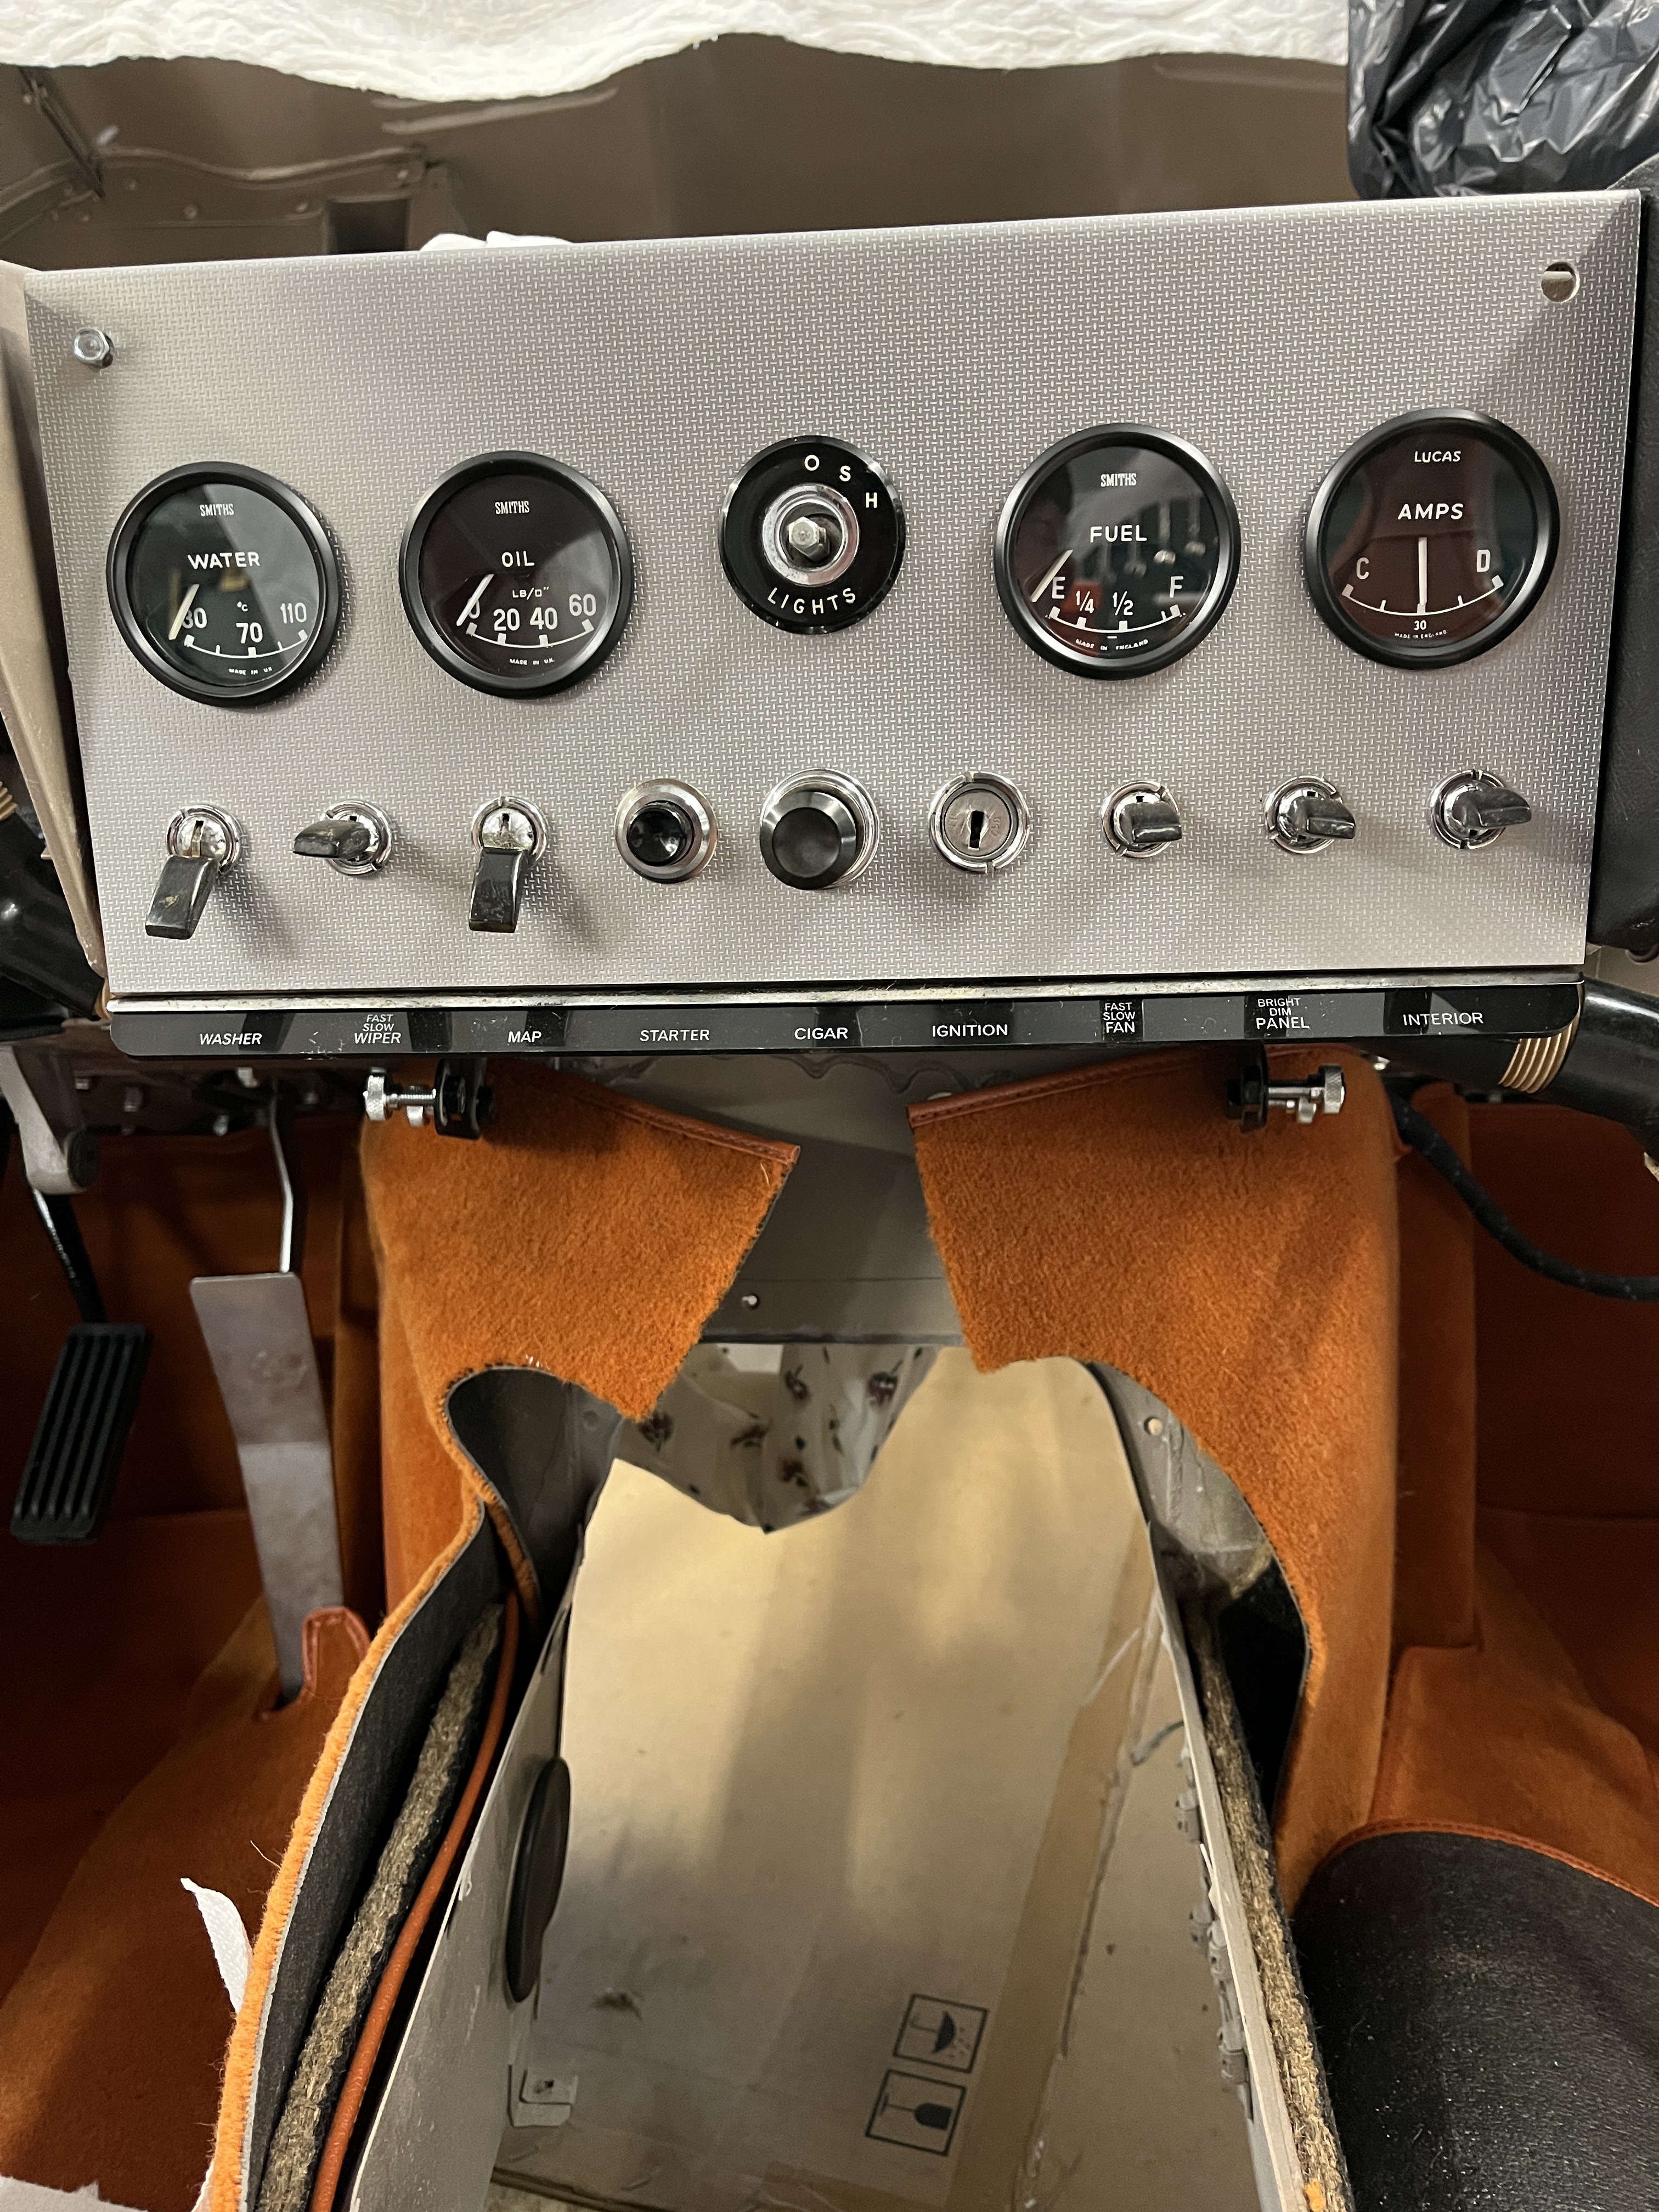
I delivered my precious cross hatch material to the water jet guys and a short while later they called me to say they were done. Ok, show time. I tackled the gauge panel first. Before I could do final fitment, I had to make a 90 degree fold on its top edge. This was done simply with a sandwich of wood and my hammer form tool. Finally, I mated it to the copper panel. It looked really good from a fitment standpoint. I wound up having to file a few holes, really just a matter of a 1/64″ or so. After I got a final fit, I cleaned it up one last time with the aluminum wheel cleaner and sealed it with a coat of Carnauba wax. It was pretty exciting to insert the various switches and gauges. Wow, it looked fantastic!
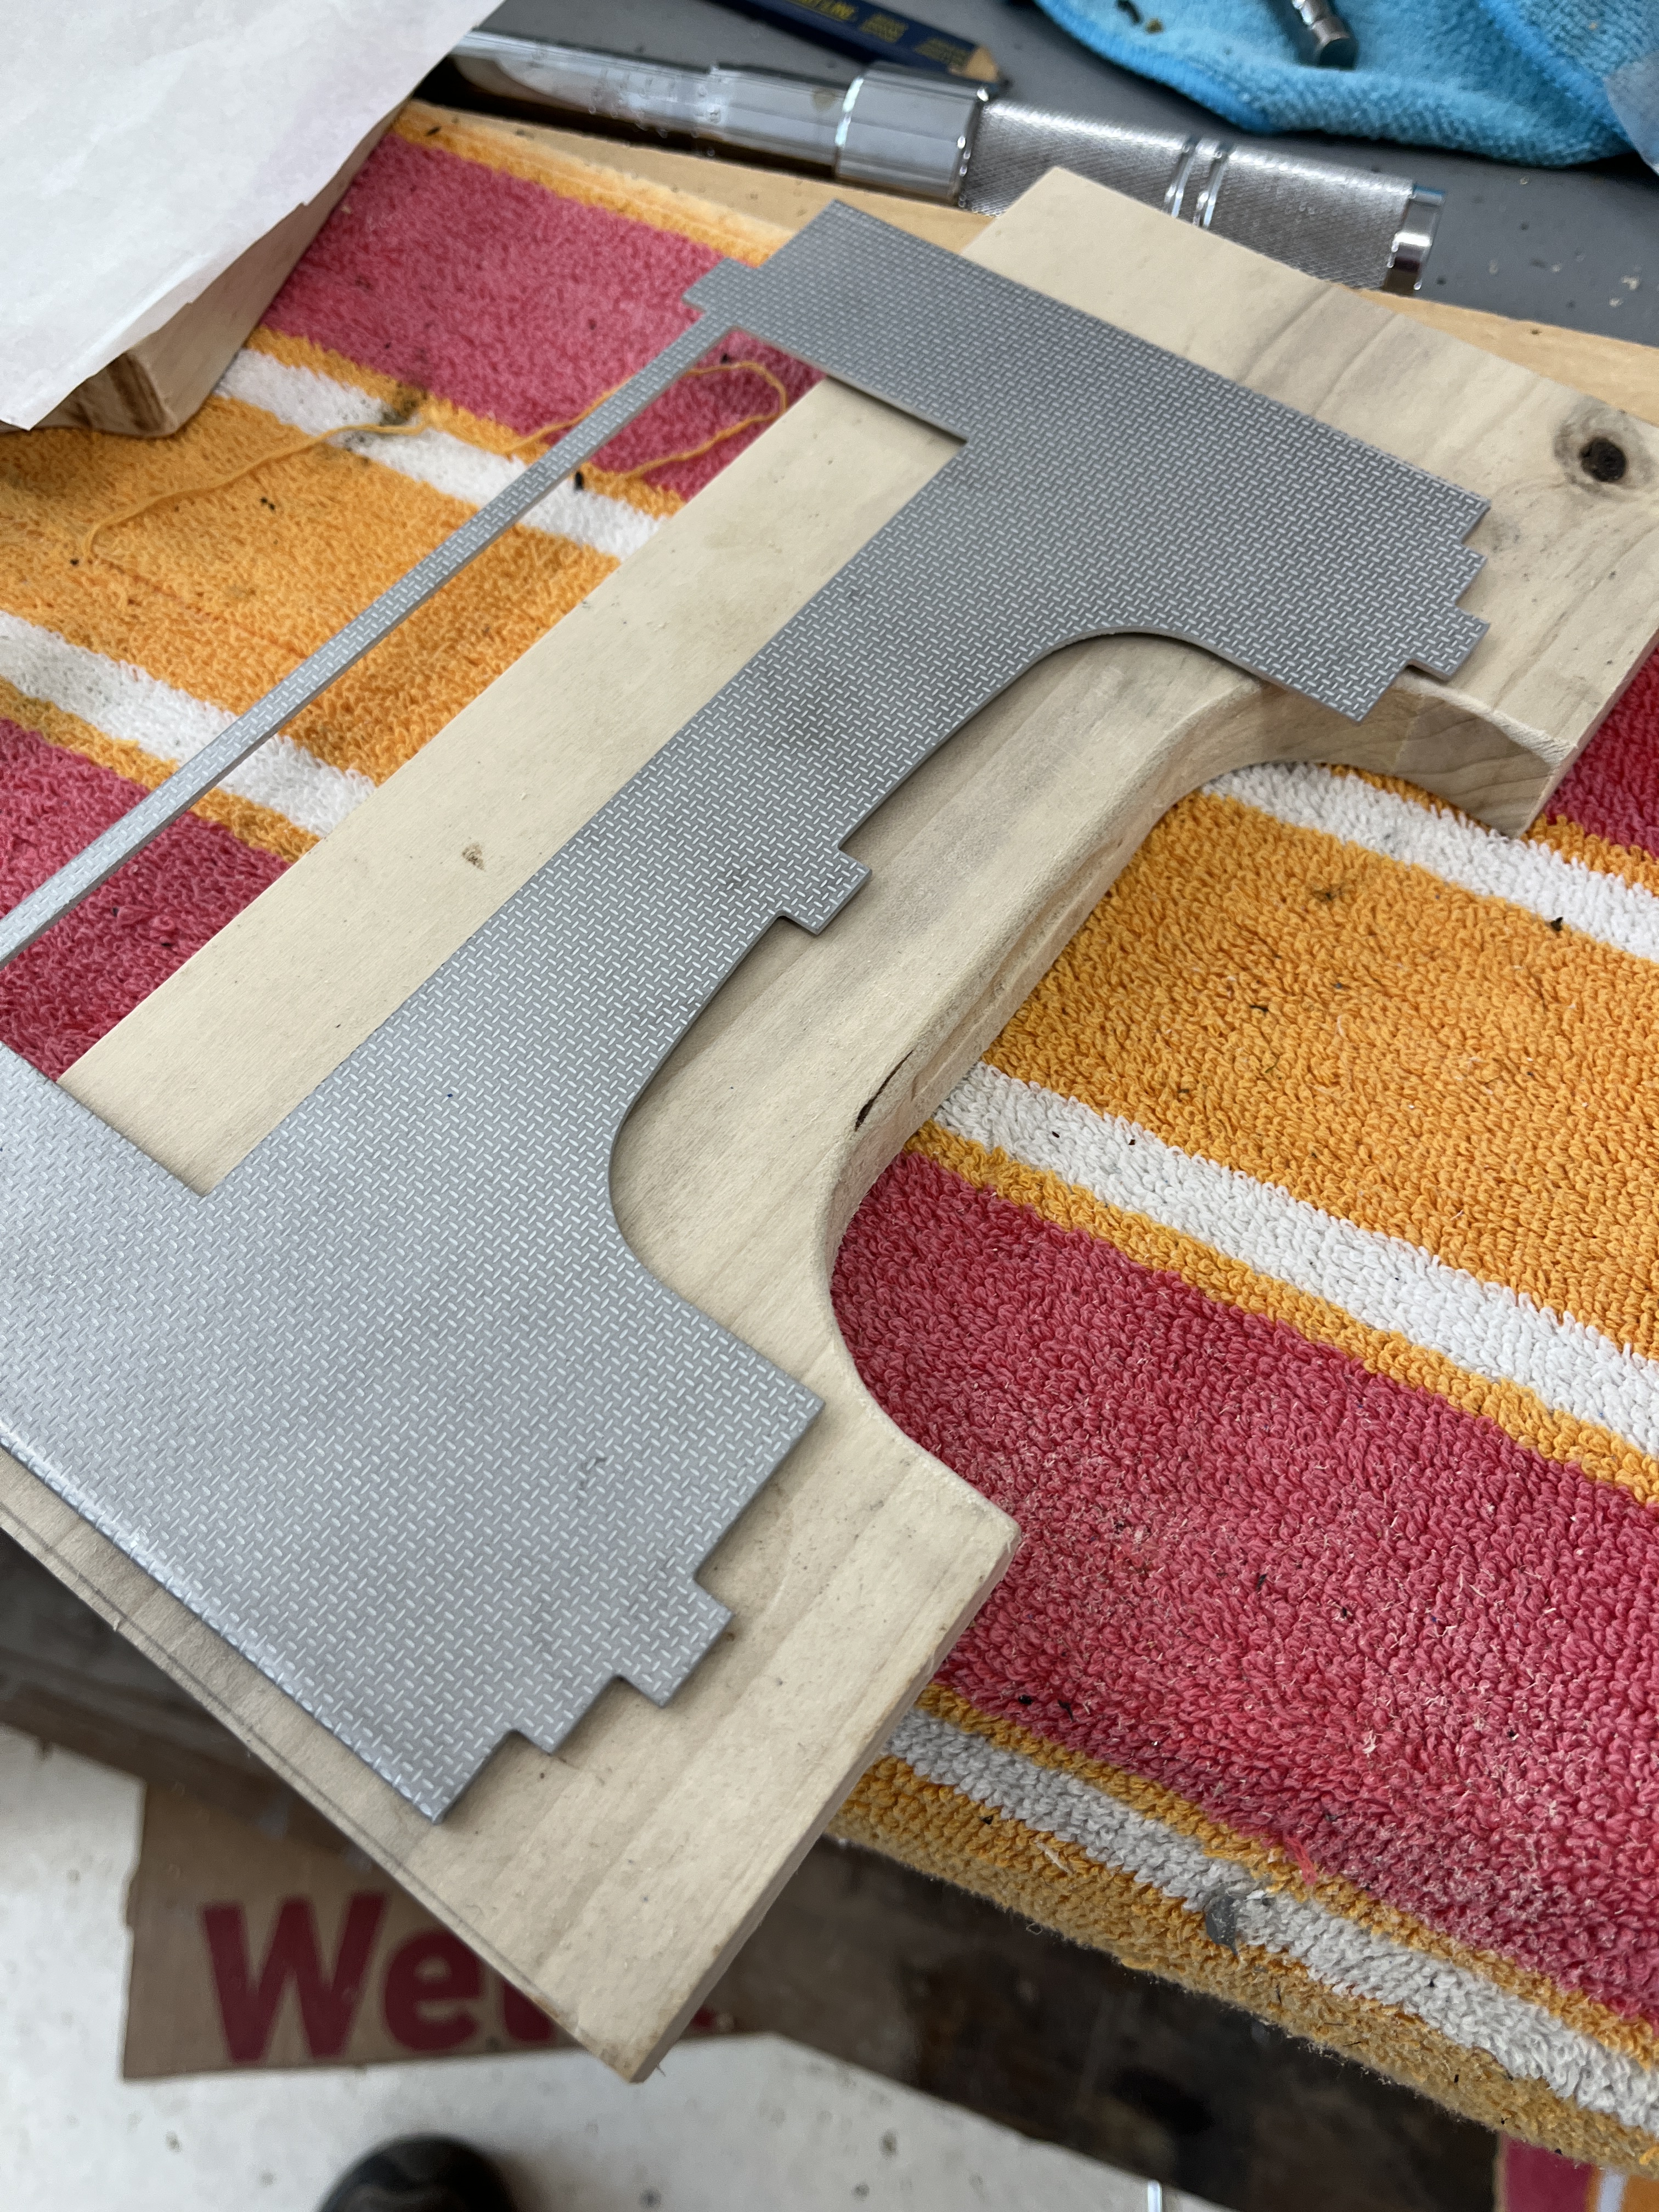
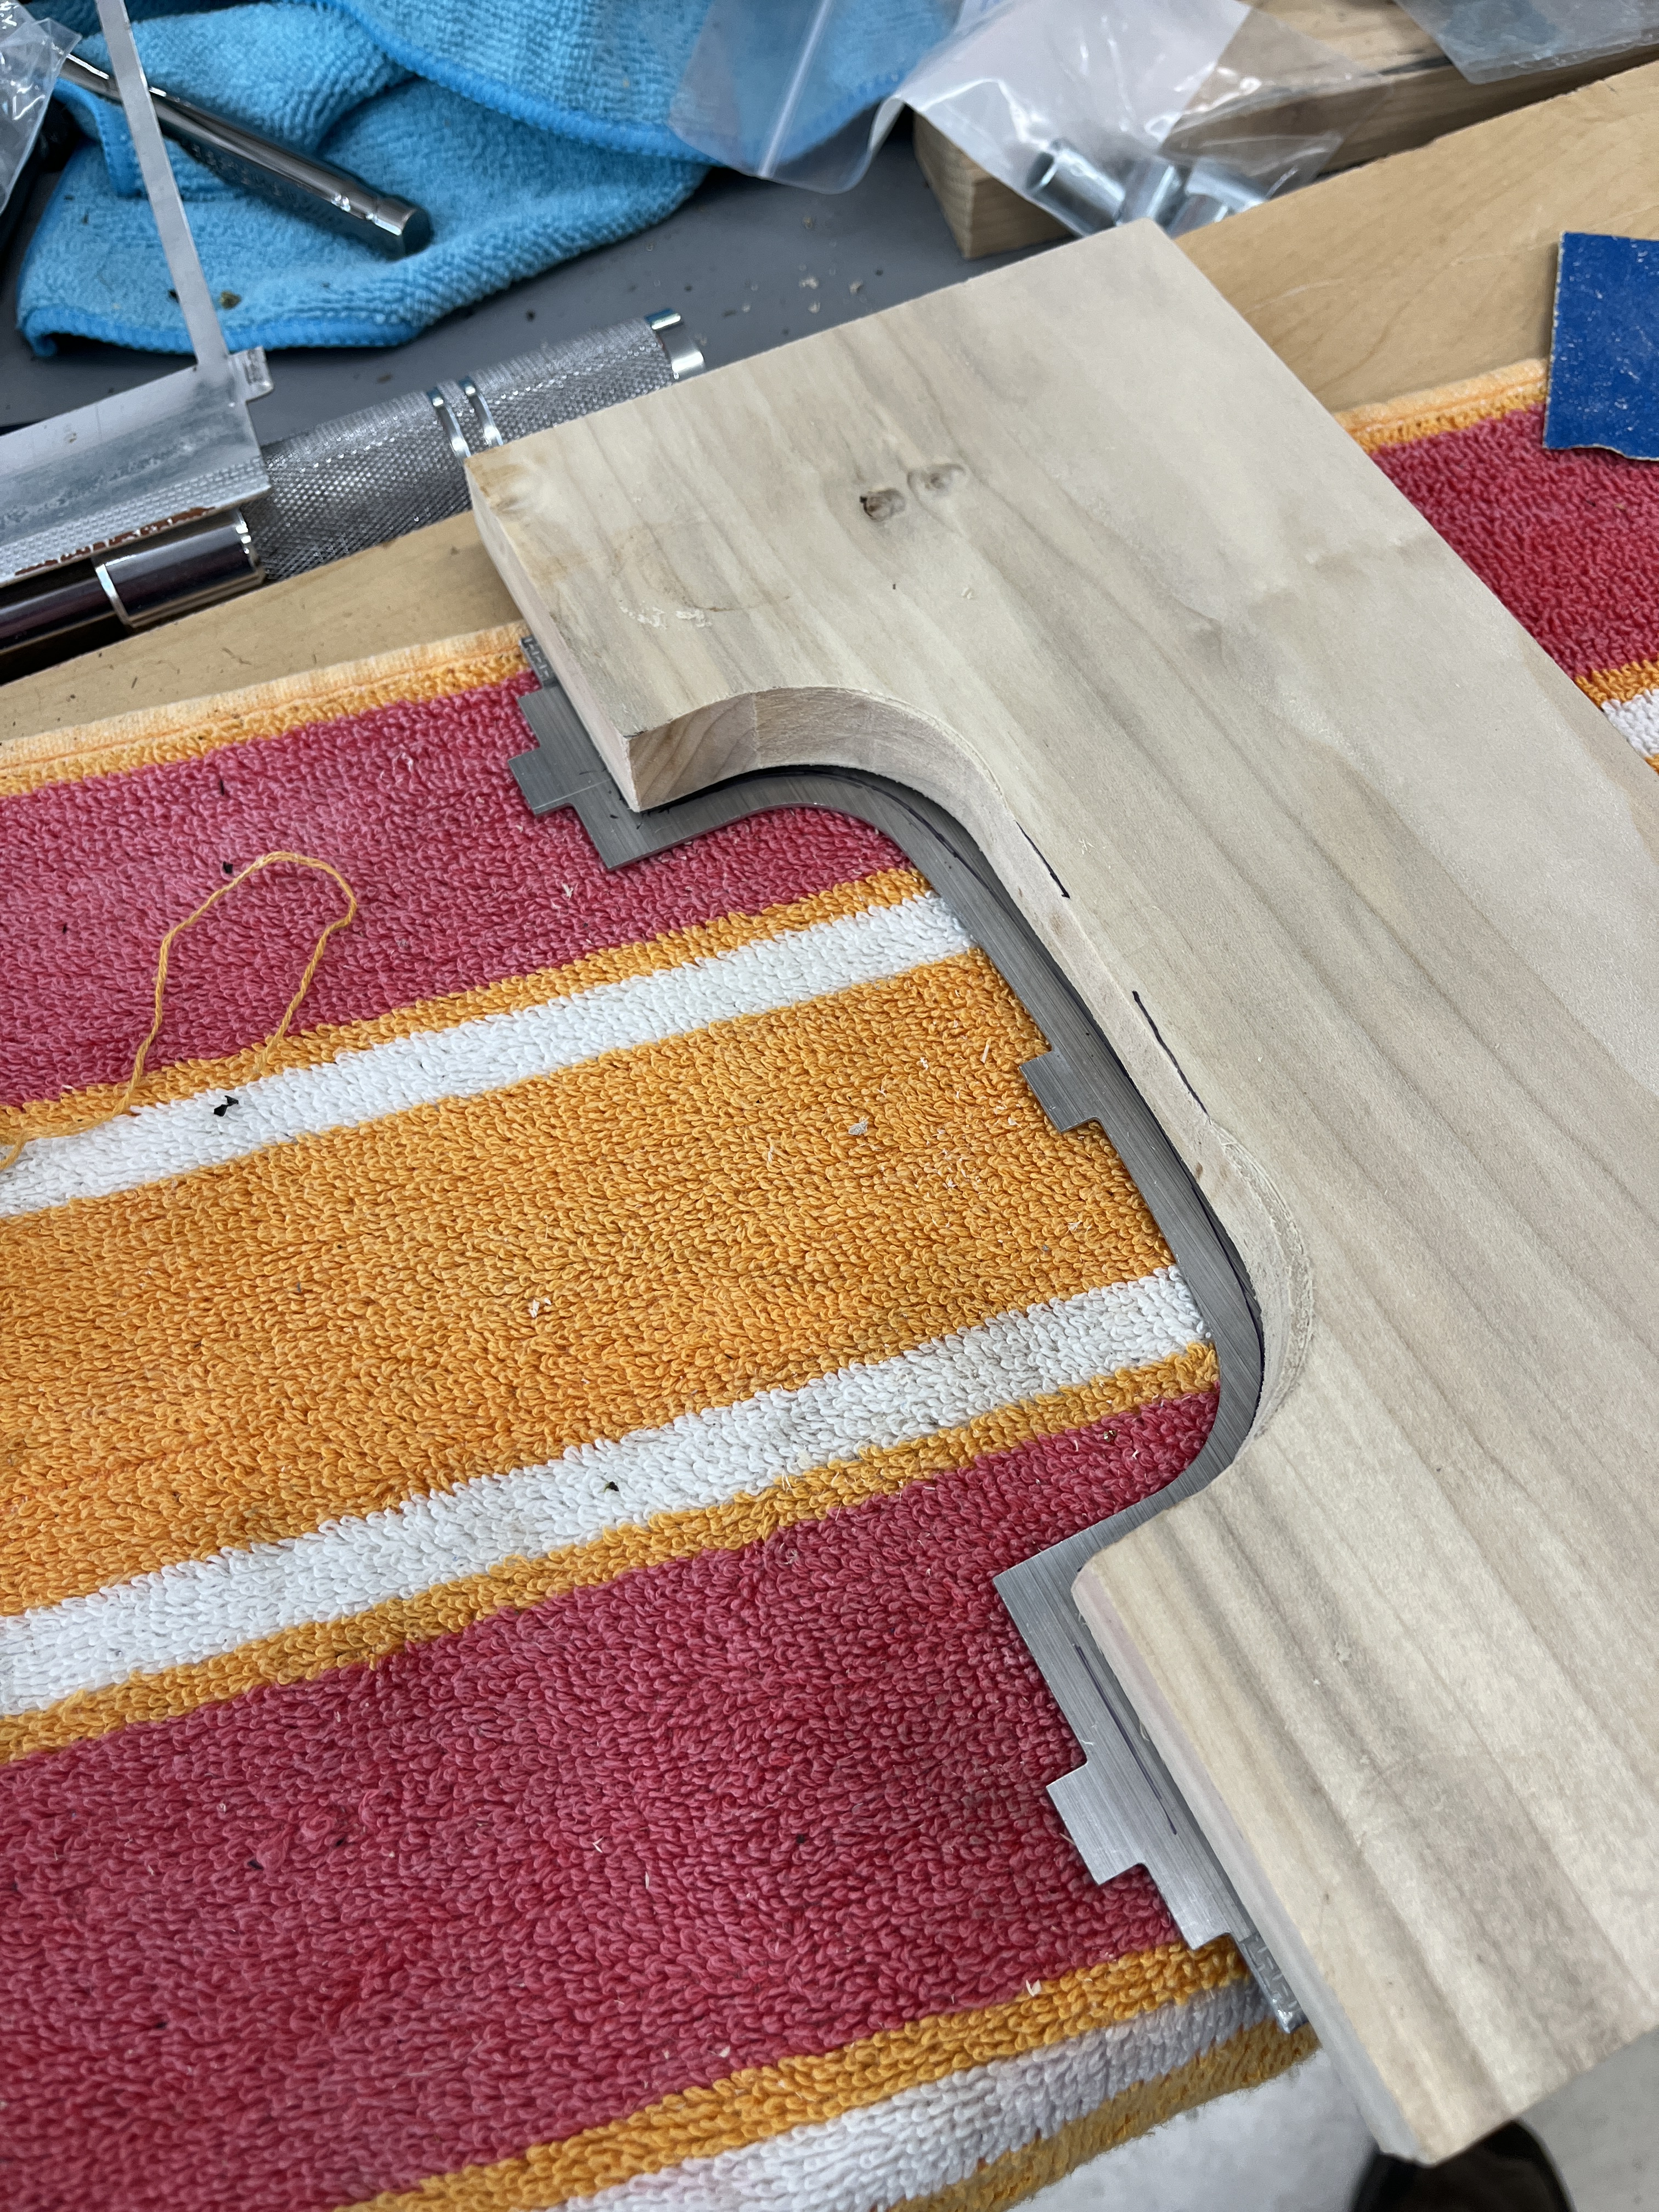
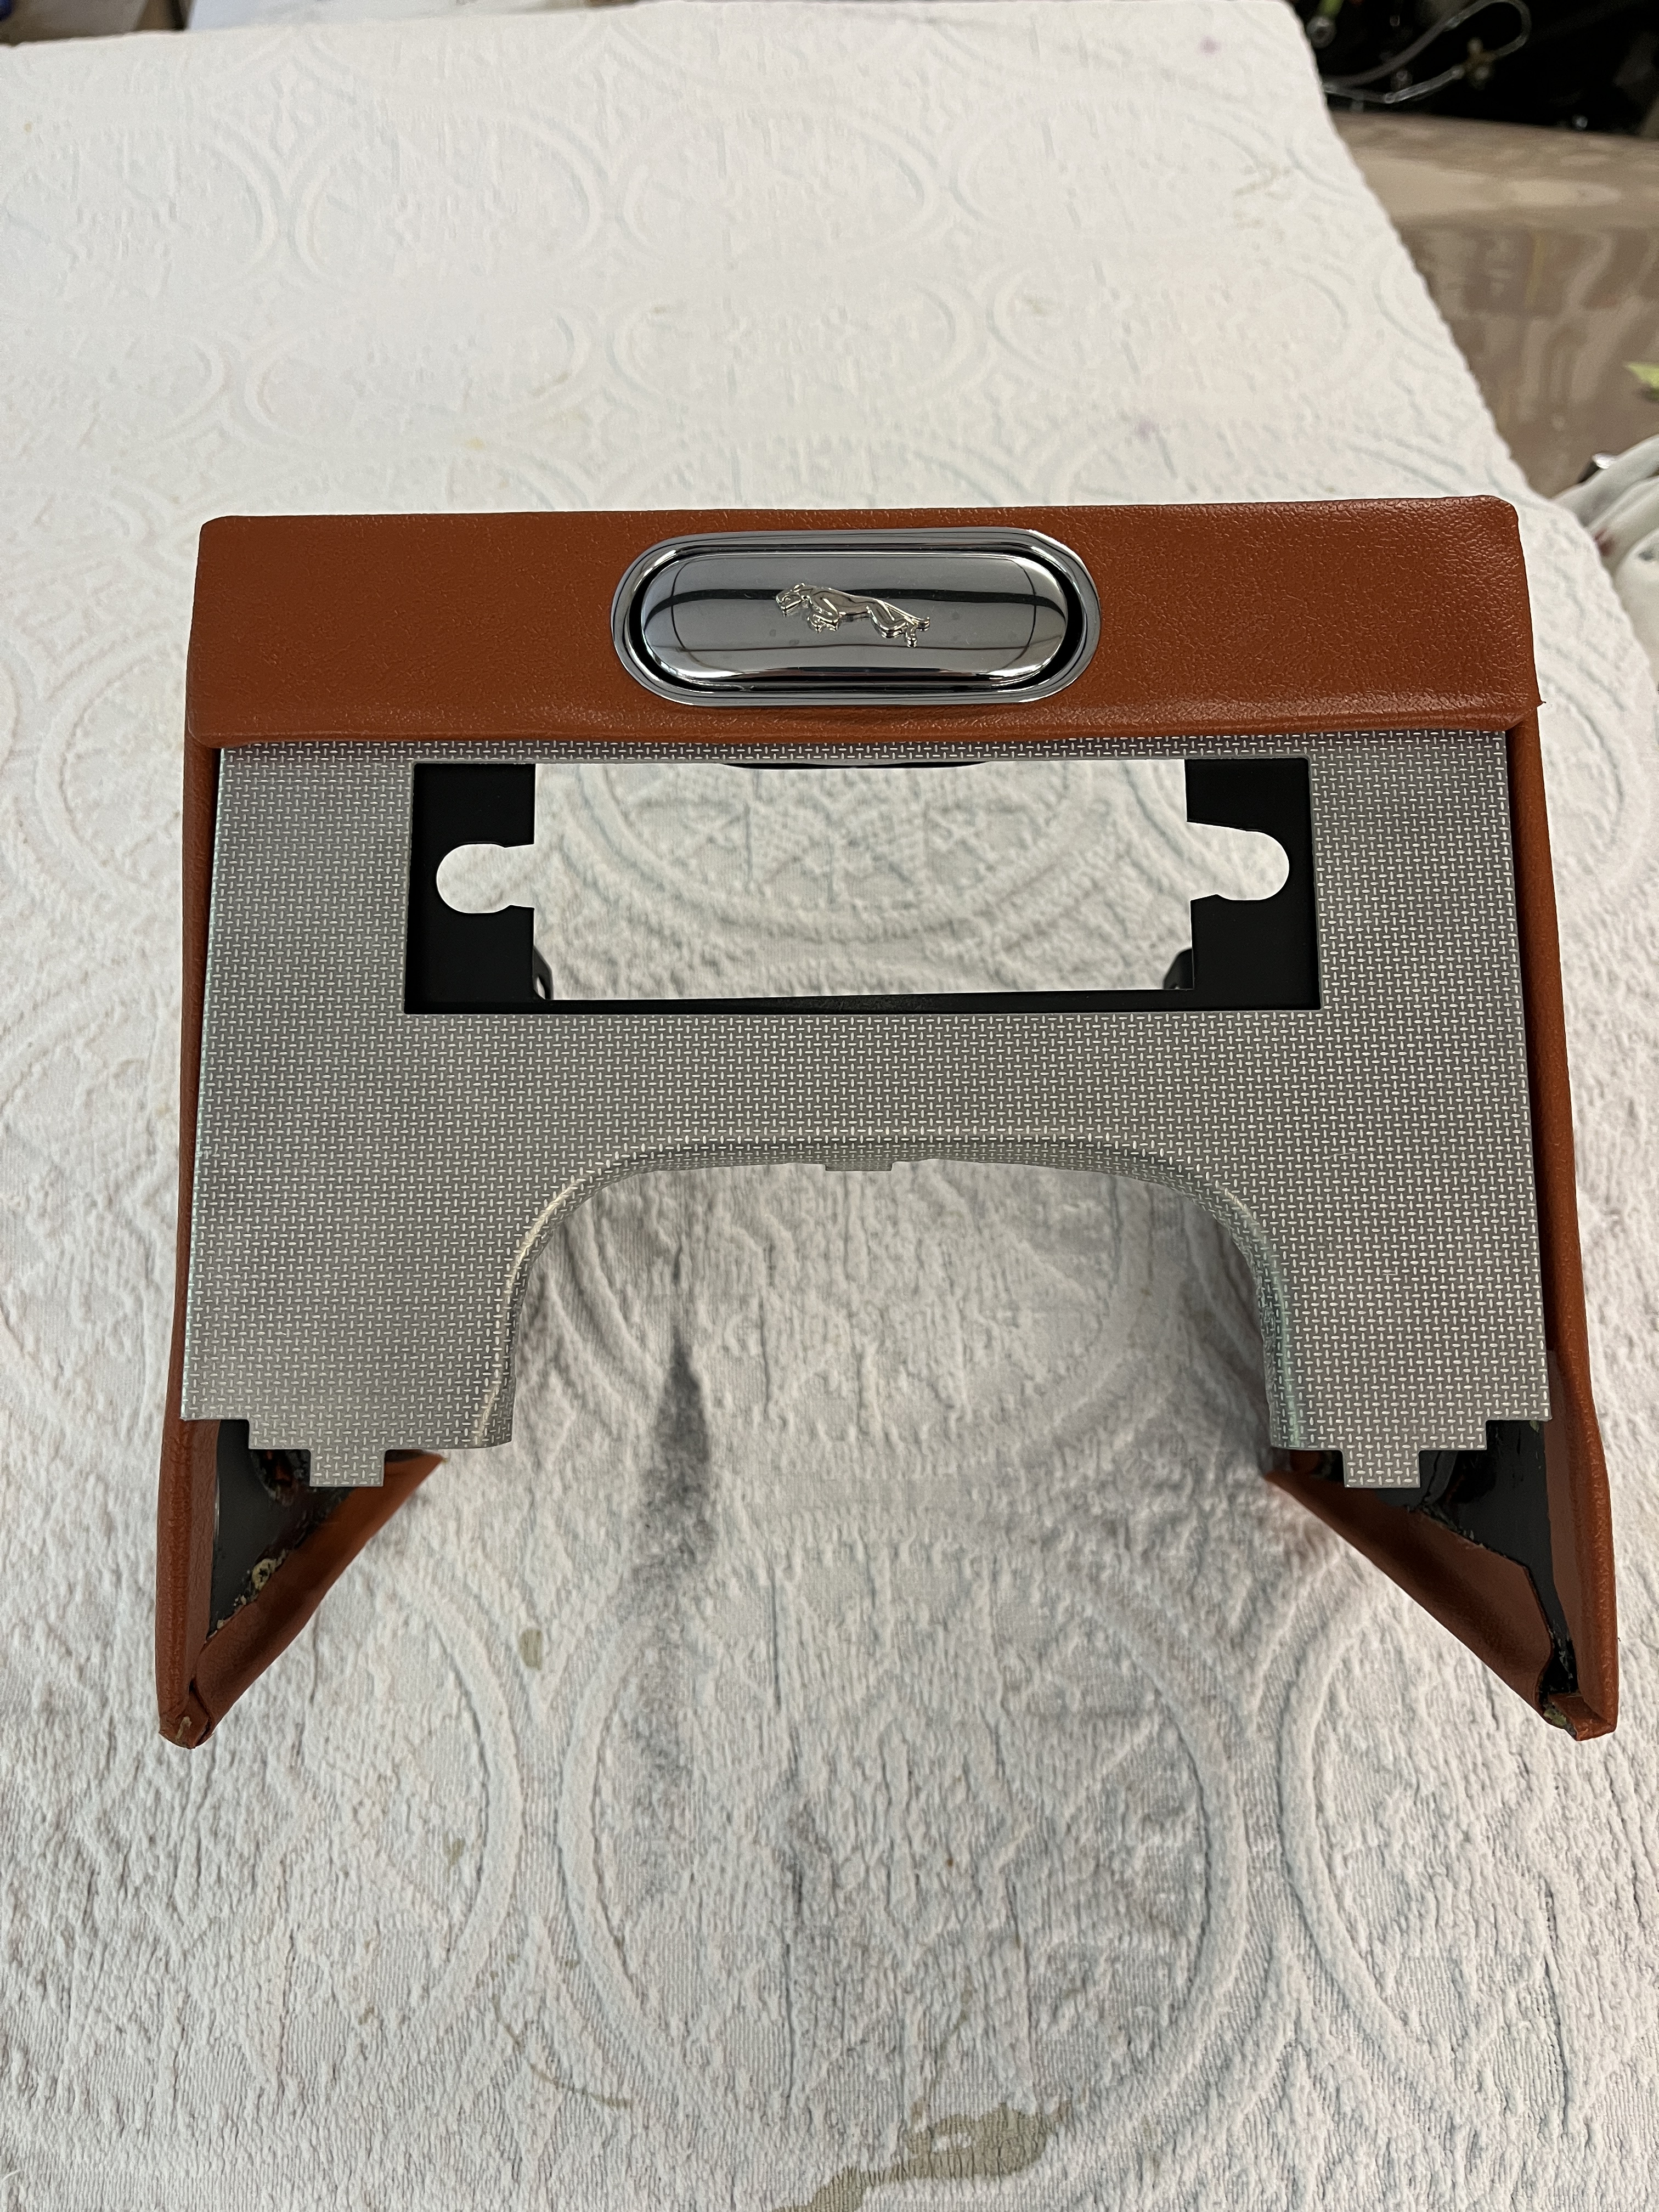
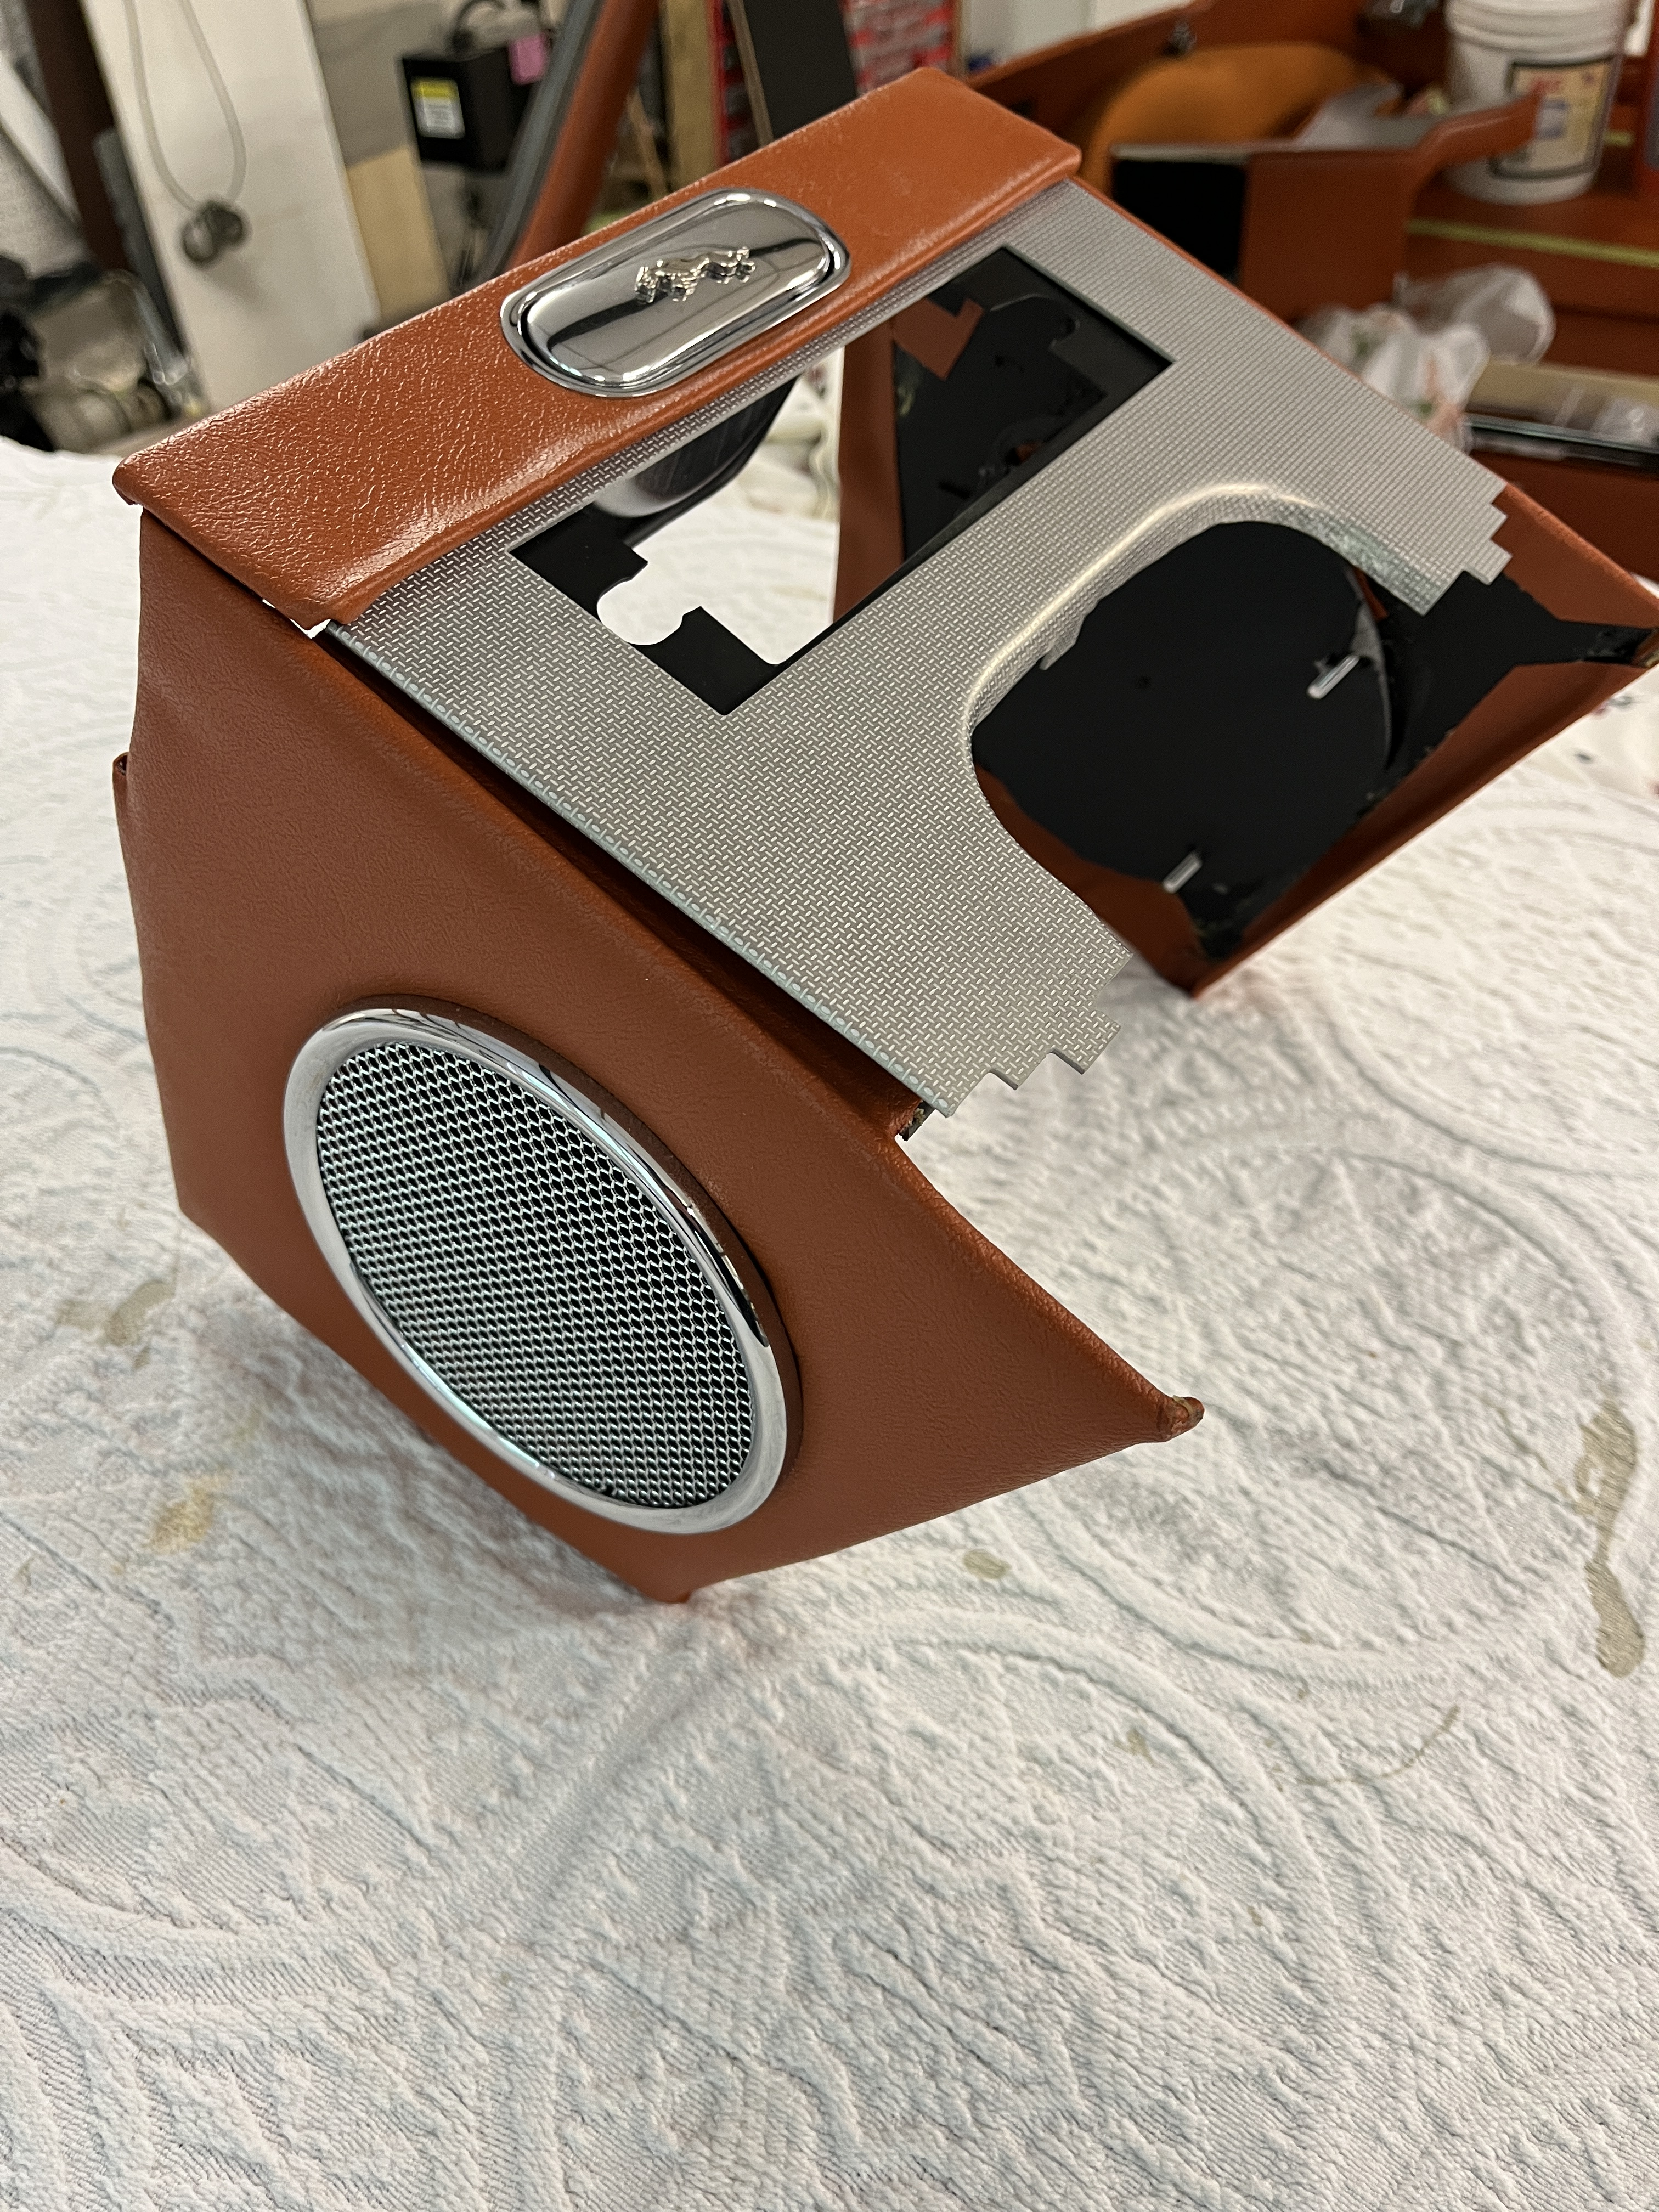
Next I turned my attention to the radio/ash tray panel. This one was more challenging, as it had a rounded opening in it with a 90 degree edge. I used the original to trace out the shape onto a piece of popular wood, which I cut out with a combination of a hole saw and a router. As usual, the opening in my original piece was not a symetric shape. A bandsaw would have been better/easier but the router can be used to “freehand” curved lines. I made two pieces and clamped the aluminum between them. Then I carefully hammer formed the rounded opening. In this case you are making a 3 D shape, which requires bending and stretching of the metal. Being 0.045″ aluminum, it didn’t fight me too much. Finally, I made a 180 degree fold on both sides. Although this piece is basically complete, I am holding off on final assembly. I need the transmission to be installed, so I can work my way out, aligning the various pieces that envelope the shift lever.
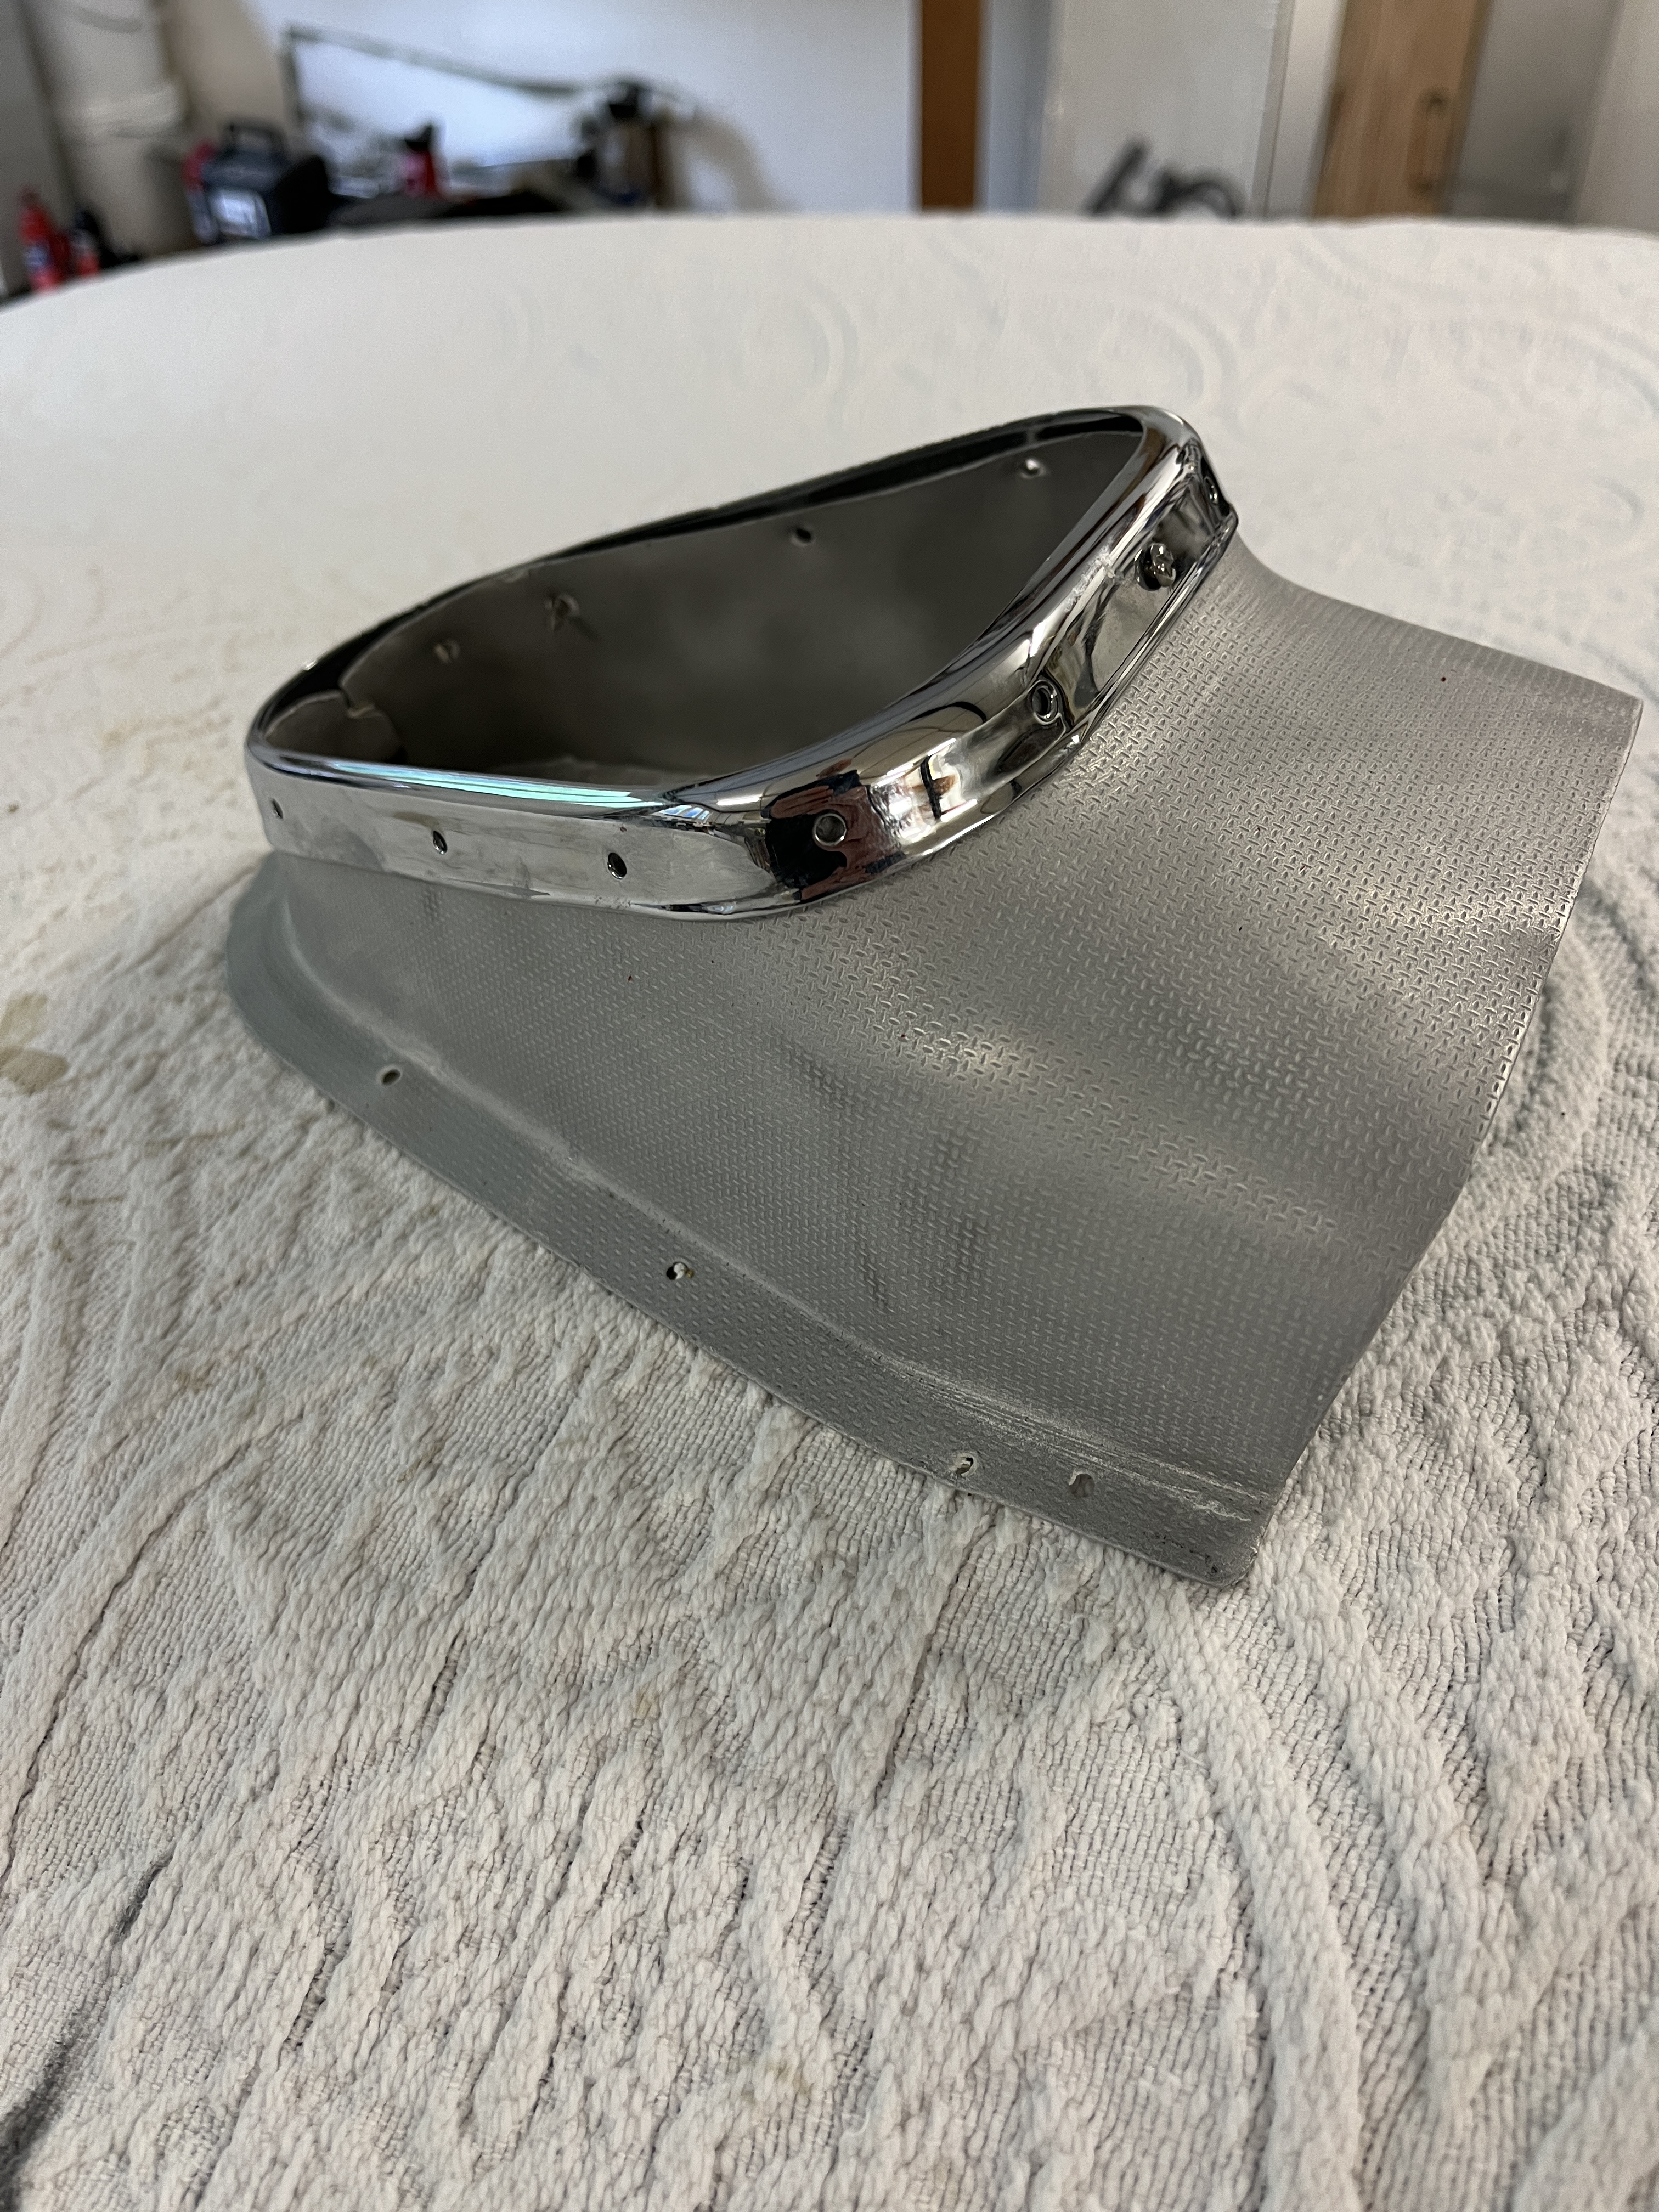
Speaking of the shift lever, the final piece in the puzzle was the dome shaped piece around the shift lever. I had looked previously at what it would take to fabricate a new piece and I was intimidated. It is a complex 3D shape. The one I had was in marginal condition. I was worried that it would look shabby next to all the new pieces. At some point, I found a piece at RW Auto Classics in the Seattle area that looked to be in pretty good shape, so I bought the one they had. I found it had been “bead blasted” which is why it looked so good in the pictures. I set to work cleaning it up with the aluminum wheel cleaner and various sand paper from 600 grit through 3000 grit. I was able to bring its appearance up to be equivalent to my other pieces. That saved me the difficult task of making a new piece.
I should mention costs to get me this far.
$1200 – Two sheets of cross hatch material. One sheet is enough to make the 3 panels.
$300 – Two jobs from the water jet cutting firm
$75- Clear oak and popular planks
Various shop tools- Table saw, router, clamps, aviation snips, C clamps, hole saws, drill press, grinding wheel, files, vice, hand drill, bits, sand paper, random orbital sander, Carnauba wax. You get the idea. If you had to tool up for this one job, the cost would go through the roof.
6 stitches at the Emergency Room- The bills are still coming in!
Rick O’Brien – Priceless!
So I am pretty happy with my results. It will be a while before I get everything assembled in place but I think it is going to look great. It is a little crazy to think that my installation will be one of a handful that exist in the world with new cross hatch material!

Discussion
Comments are closed.