At some point a few weeks ago, I hit a wall with the development of replacement aluminum “hatch pattern” pieces for the interior consoles. Hopefully I will be able to report a happy conclusion soon but in the meantime I moved on to some things with a shorter installation timeline.
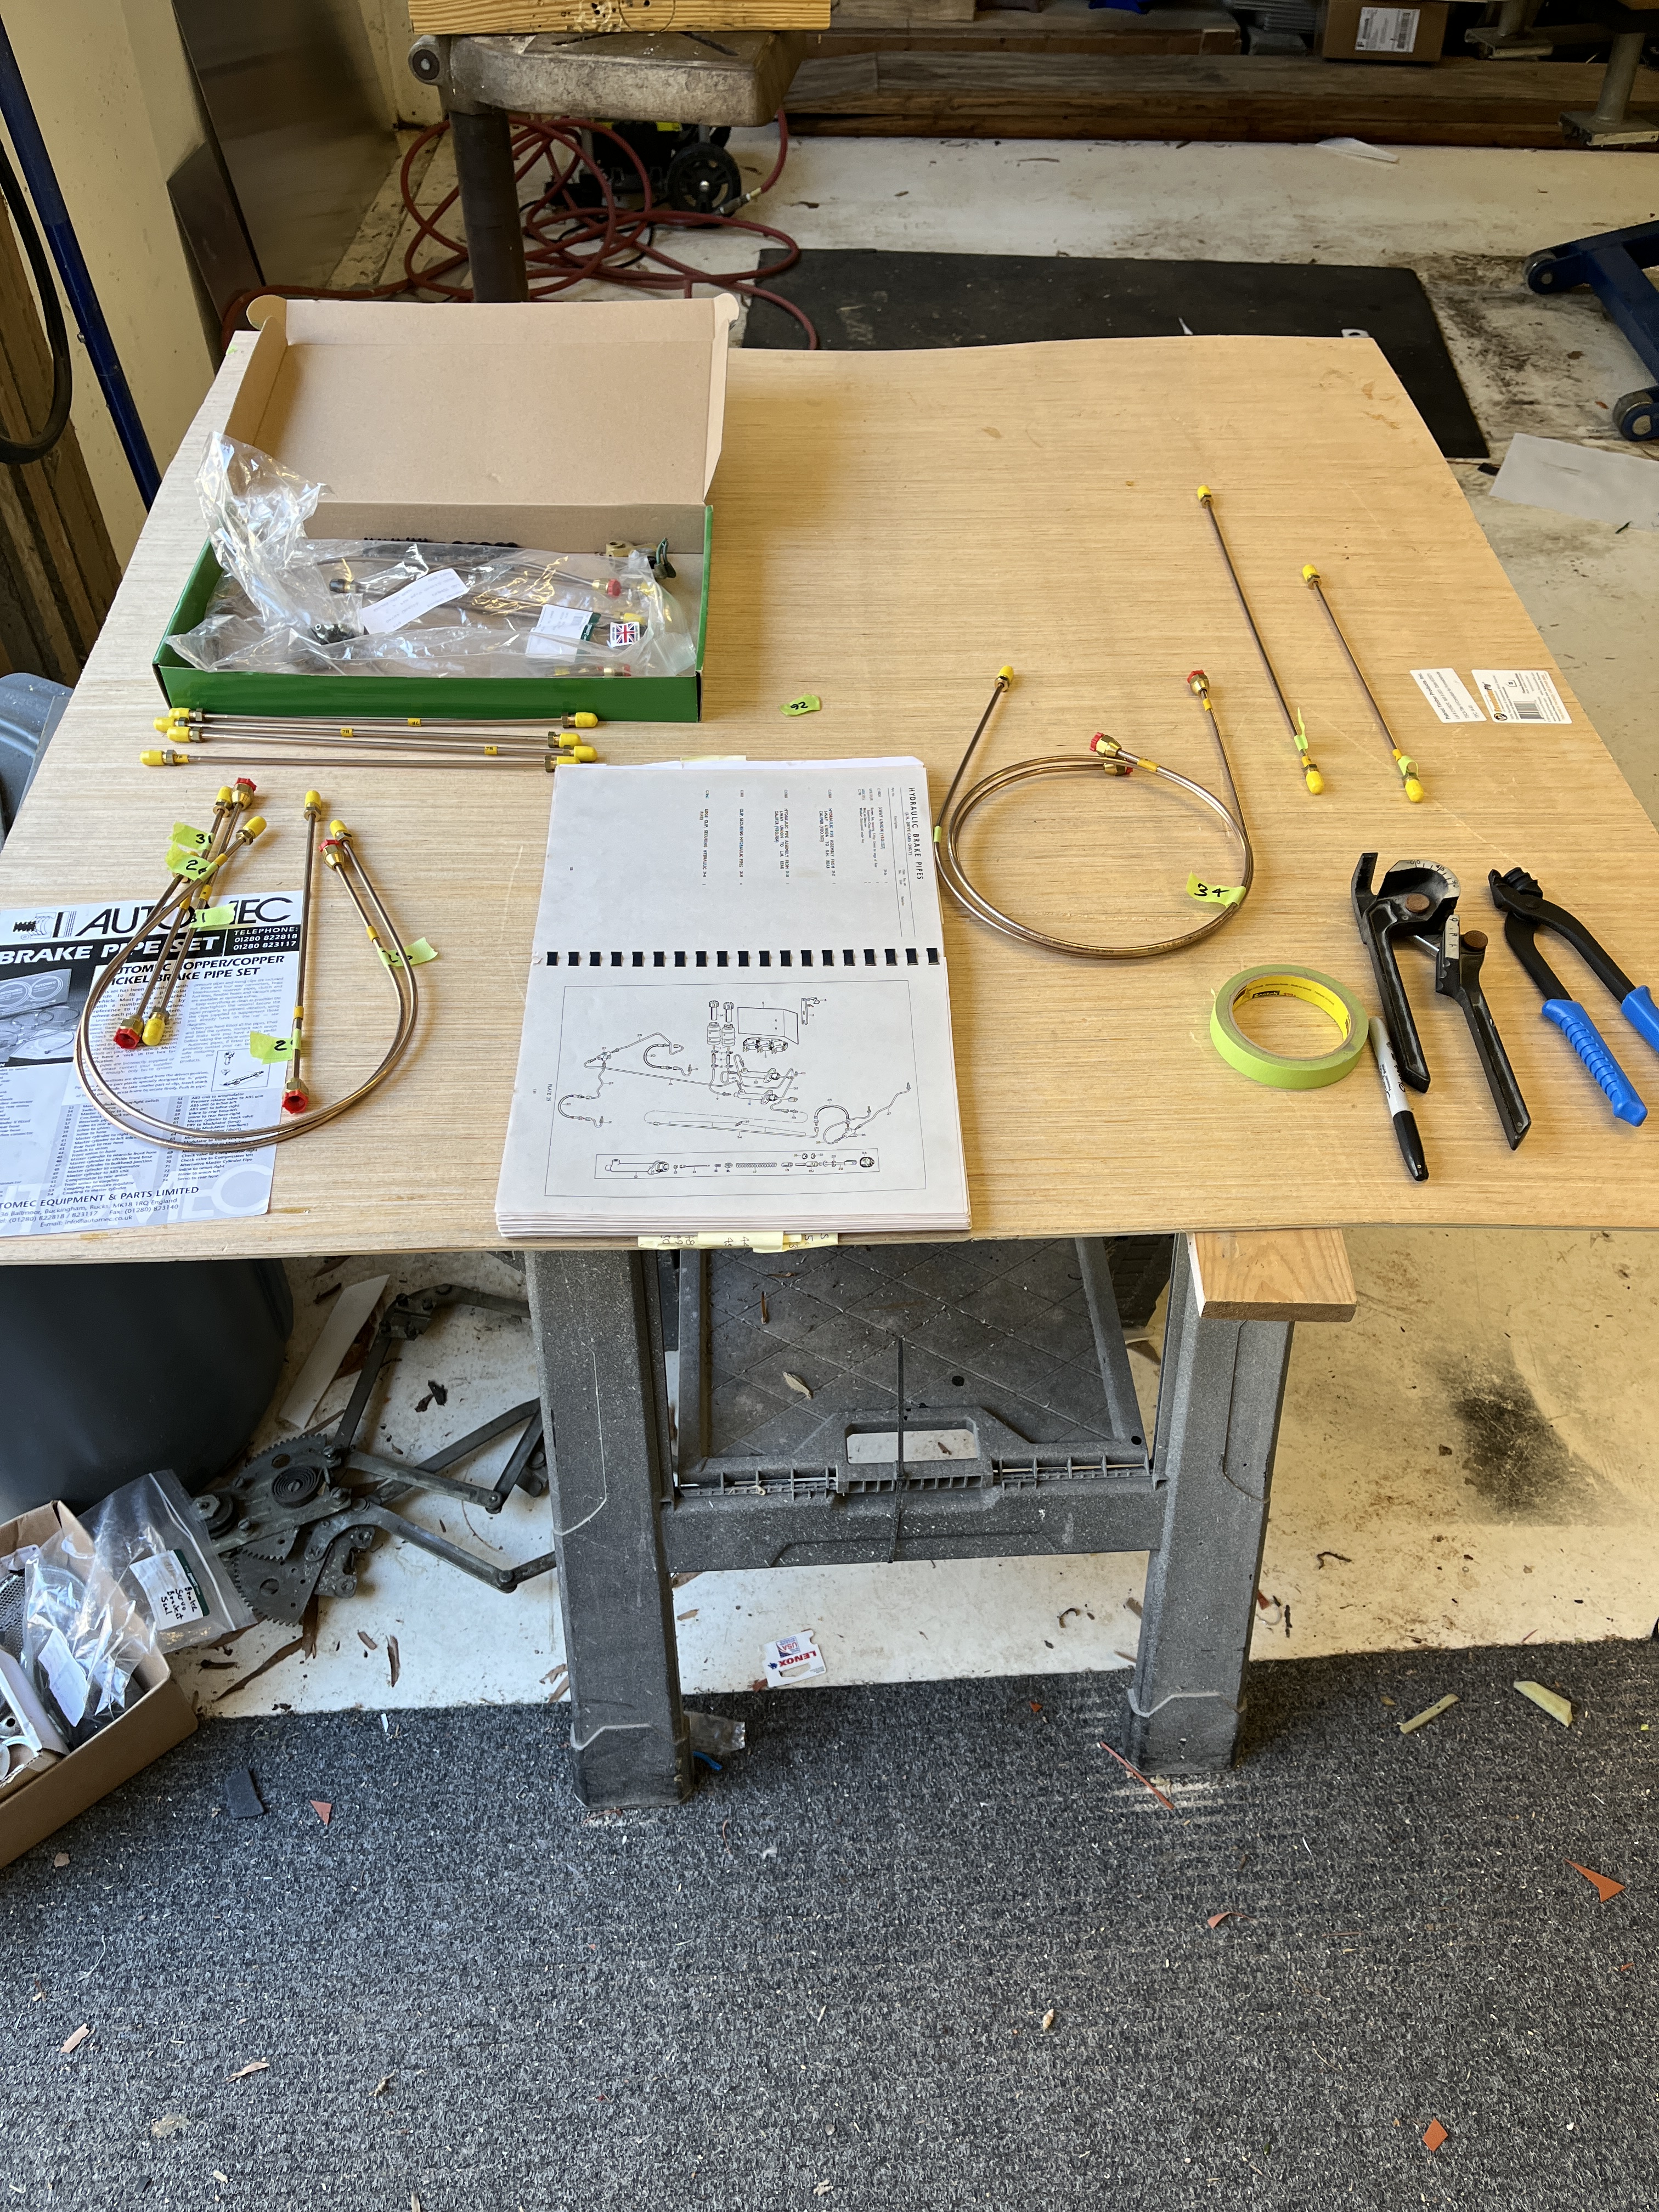
First up was brake lines. At some point last year, I had ordered and received pre-bent lines from Classic Tube. They looked very nice but when I got into actual fitment, they just were not going from point A to point B correctly. I decided to return them and go an alternate route. I purchased a set of Automec lines from SNG. These are not pre-bent but they are cut to length, with the correct flares and fittings installed. They are made out of a copper-nickel alloy that meets modern standards and requirements. They are quite easy to bend. I studied a variety of my go-to reference cars to establish the general routing. First I installed my master cylinder and pedal assembly (previously discussed in the article here). This established one set of endpoints. In general, the other endpoints were the brackets at the two front wheels and at the rear of the car, where the flexible rubber hoses attach. Also, there are two lines on the IRS to be bent (the crossover lines on the calipers were previously installed). I’m not going to say it was easy but I found it to be rather straightfoward to bend the required lines. I established a rough configuration using electrical wire. I then practiced with some 3/16″ steel tube that I purchased from NAPA. Finally I bent the actual copper-nickel lines. I also did the clutch lines but seem to have forgotten to take pictures of those. One drawback to this approach is that I believe the original lines were galvanized steel and thus silver in color. My lines have been sent to my zinc plater. When they come back, it should be a quick job (uh-oh, I just jinxed myself!) to install them.


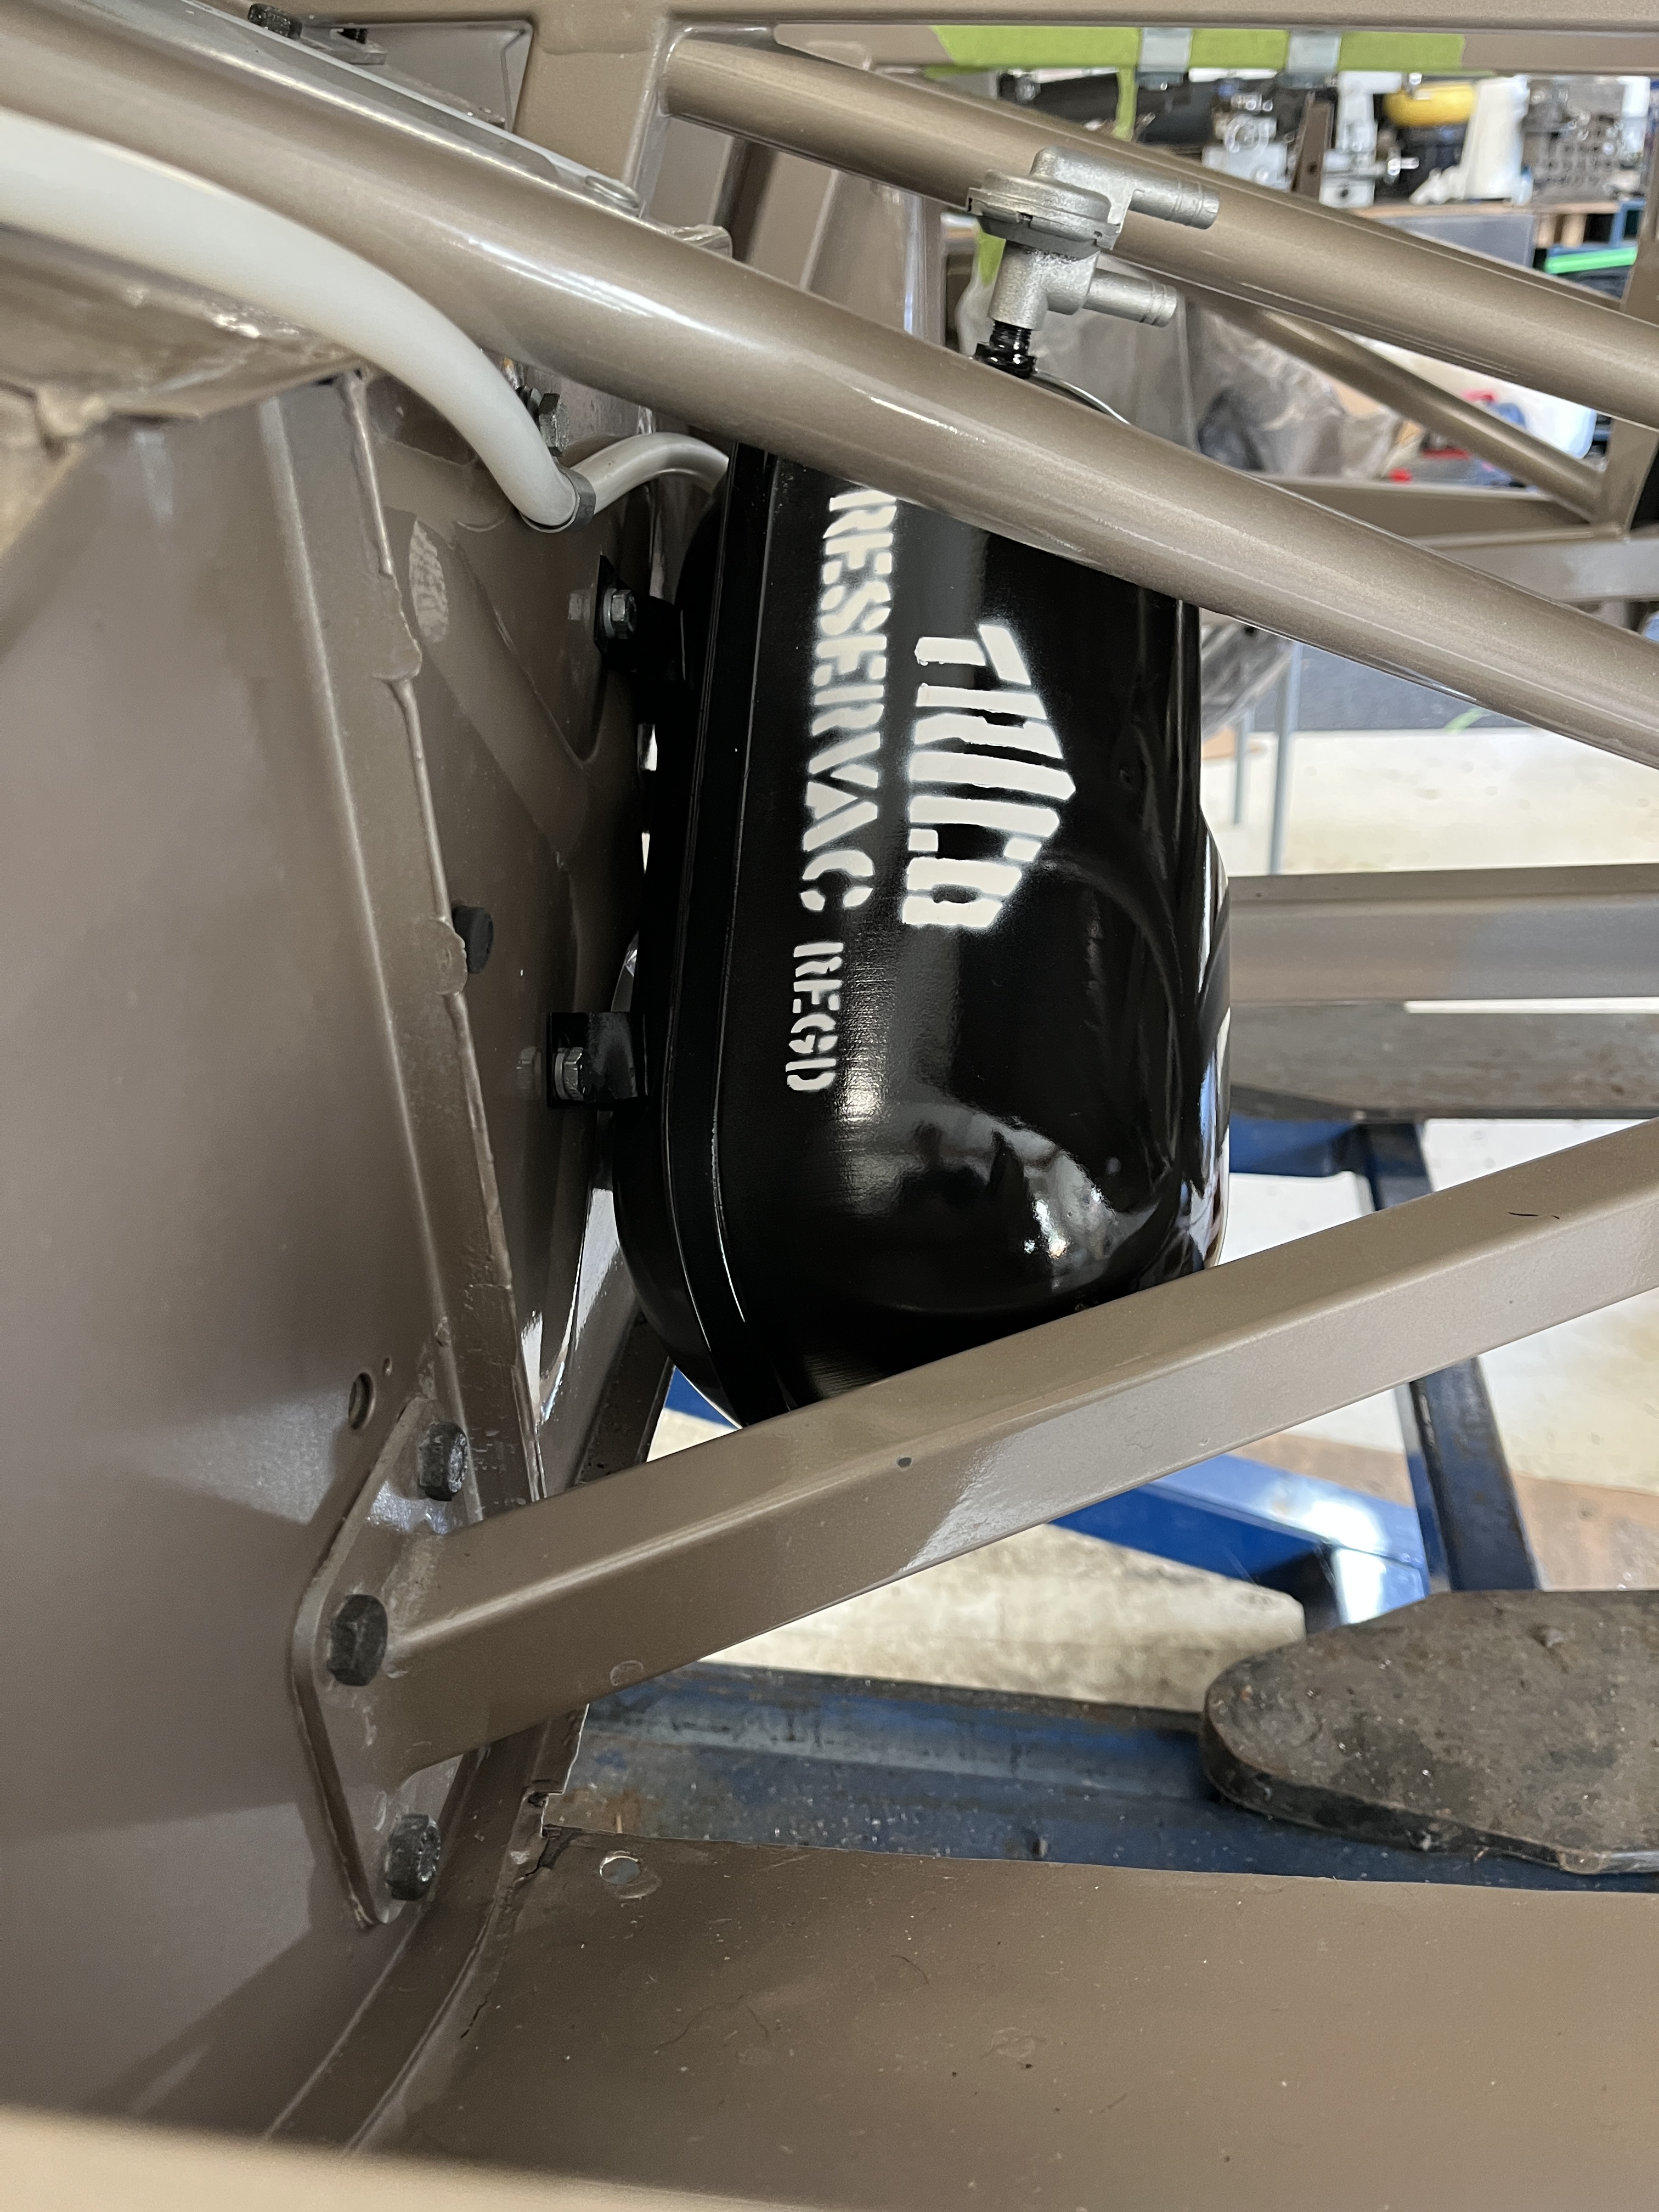
Moving on, I wanted to tackle the brake booster reservoir. This reservoir is supplied with engine vacuum. If your engine suddenly dies, the reservoir gives you one or two stabs of power braking. Mine was shabby but per usual, a session in the bead blast cabinet and some rattle can black enamal paint returned it to it former glory. Haddock and Mueller report original cars with and without the Trico logo. Since I think that is kind of a cool artifact, I decided to do mine with the logo. An accurate to scale pdf of the stencil is available at the UK Etype forum. Reports are that the finished logo should look like it was done by an apprentice in a hurry. I was able to acheive that look without trying!
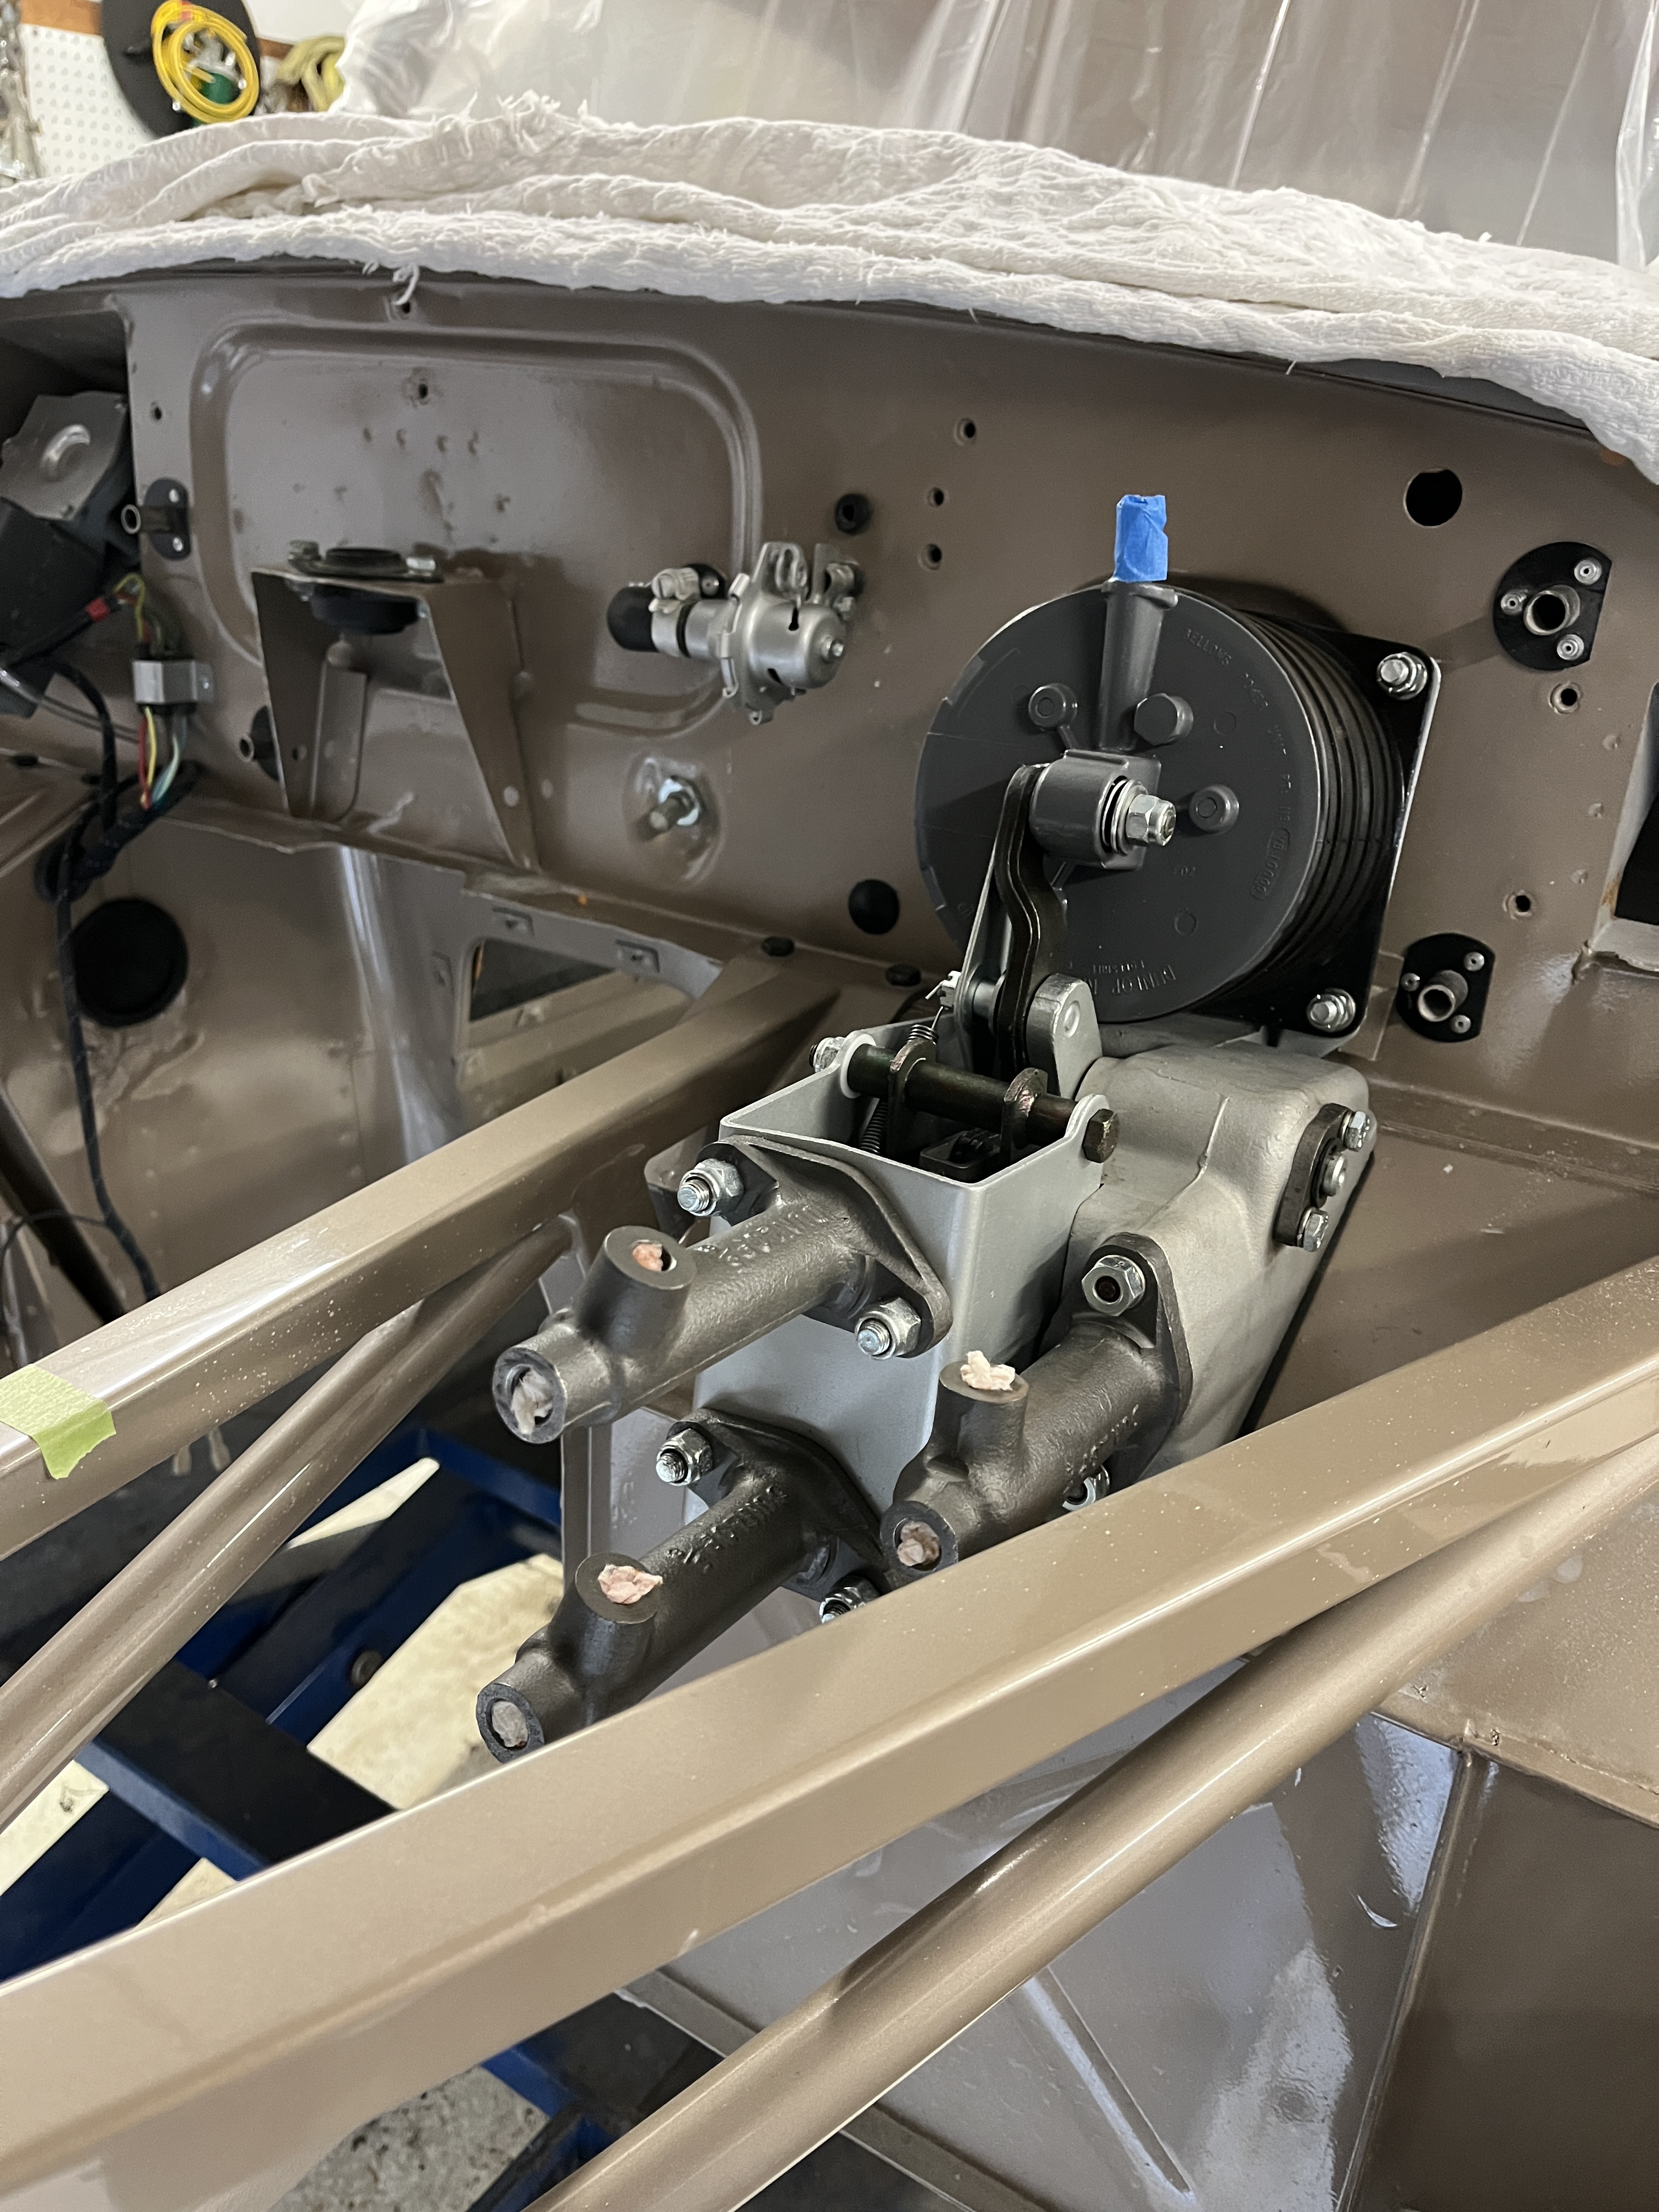
When test fitting the reservoir, I found the position of the 4 captive nuts on the firewall to not make sense. After some head scratching, I realized that I had installed the replacement footwell panel upside down! I wasn’t going to tear out the panel but I was able to drill holes in the correct position. The old holes are sealed with rubber plugs. If you ever get a chance to look at this car when it is done, you are welcome to peer down there and say “Well, that’s not correct!”.


Next up was the fuel line from from the boot to the fuel filter. You really really want to install this line before you install the IRS, as access is pretty much impossible after the IRS is installed. This was fairly straightforward. Most of the necessary clips already existed on the car, after paint. I suspect that the originals were not body color but they were there and in good shape, so I moved ahead. I did a quick bead blast and paint of the fuel filter and the bulkhead fitting in the boot. At that point, routing the new line was pretty straightfoward. BTW, before you call me out, careful review of the SPC indicated that the fuel filter on my car did not have a paper mesh filter, rather there is a wire mesh screen, which is not visible unless you get down very low and look up.


Yet another task was to evaluate my 3 SU carburators. There was no doubt, they needed to be nicely restored. In this case, I decided to defer to the expert, that being Joe Curto in NYC. I talked to him and knew that was the way to go. On the cast aluminum bodies, he does a 3 step process. They are first cleaned in an ultrsonic cleaner. Next they are bead blasted. This leaves an appearance that is clean but too “frosty” for lack of better word. Finally, Joe has a media tumbler that achieves a fresh cast look. He of course replaces all the gaskets and makes sure the throttle shafts are sealing correctly. So I boxed the 3 carbs up and sent them to him. In the process, I found out that I was missing some linkage pieces. They are available from SNG and aren’t cheap. Sigh! BTW, my “domes” had been previously polished so at least that part is done.

So let’s call that good for now.

Discussion
Comments are closed.