As discussed in my previous articles, the 928 has been treated to a “rolling restoration”. It came to me in relatively good condition and there was certainly no need to tear it apart and take it off the road for an extended period. Having contemplated putting it up for sale soon, I took a serious look at the paint. As you might expect, as a car with over 95000 miles, it had its share of battle scars. The paint is Grand Prix White. It would appear to be a “single stage” paint finish. As opposed to a Basecoat/Clearcoat finish. This simply means that the color and clear are mixed together and applied in a single stage process. This is fortunate, in that the vast majority of the “blems” were small areas where the white paint was chipped, exposing the dark colored primer underneath. A typical chip was maybe 1/8″ in diameter. This lends itself to a very common cosmetic repair process, discussed on various Youtube videos. Basically you obtain a bit of color matched single stage paint. You dab a bit of paint in the chip area. In most cases, as this paint has almost no thickness when dried, you may have to dab paint multiple times until it comes to the level of the surrounding paint. You sand this down and voila, the chip is repaired. That is the process from a high level standpoint. The video linked here is one of the better ones I have found that describes the process.
If this all seems too good to be true, I will point out some areas that are problematic. Number one is color matching. Keep in mind that as any automotive paint ages, it will change color. This can be subtle. The surface of the paint can “oxidize”, which reduces the reflectivity and thus the shine. Very simply, the surface of the paint, original very flat and smooth, becomes rough. This causes light reflections to be scattered and the eye sees less shine. There are products out there where they seem to just wipe them on the paint and it looks a lot better. Have you ever looked at your paint when it is wet? It will generally look much better for that short period where the water is smooth on the surface. These products mimic that effect. It lasts longer but is not a cure. Another problem is that the pigments in the paint will change their chemistry when exposed to ultraviolet (UV) light. The color will fade. All this means that when you are trying to buy some touch up paint, it may or may not match. In my case, I started with a tube of genuine Porsche touch up paint in Grand Prix white. It was close but not a perfect match. The newer your car is the more likely it is that factory touch up paint will match. It is worth a try but not a guarantee.
The next step for me was to take off the flap over the gas filler and take it to an automotive paint store. There, one of the employees was able to match the paint. I don’t know the details of what he did but he has been working there for 40 years and knows his stuff. Unfortunately, automotive paint stores that will mess with small batches of paint, custom matched, are getting to be fewer and harder to find. Most cater mainly to the insurance based collision repair business. When Doug retires, I don’t know where I will go.
If you have a basecoat/clearcoat paint job (most are these days), you may still be able to effect a repair yourself. For small areas like a chip, the color and the clearcoat can be mixed together. But now you may need to also add an activator or a catalyst. For chip repair, I actually mix the paints using medicine droppers. If this sounds like more than you want to deal with, you are probably not alone. If you have a metallic color i.e. you see little sparkles in the paint, things get much tougher. Those sparkles are little metallic bits. When sprayed on the car with the paint, they settle with an orientation that reflects the light. This is very hard to replicate with a brush. In effect, your chip repair area will probably not sparkle. If you can find a body and paint shop that will take your job, they have the benefit of having bought all the component parts of the process, like sandpaper and catalysts, from other jobs.
Regardless, as discussed in the above linked video, if you have a solid color and can find a good match in the touch up paint, you can probably greatly improve the appearance of your car. Once you dab the paint into the chip, you can carefully sand it flat with fine grit (1500, 2000) sandpaper. I have found these grits to be available at Lowes Home Improvement. This sanding will dull the area locally around the chip, so you still have some work to do. I go over it with 3000 grit finishing pads and then use my Rupes random orbital polisher with their yellow and then white compounds, to get the area at the repair site to blend in with the rest of the paint. Note that there are thousands of Youtubes out there on detailing, including using polishers and compounds. I’ll let you learn from them, not my writing.
In the case of the 928 I had several things going for me. White is a forgiving color. The paint was single stage. The chips were small. I was able to make vast improvements to the paint. What also made a vast improvement was a thorough pre-wash, followed by a clay bar treatment. At this point, there were numerous places on the car that were streaked with something other than white. Not a paint defect, just grime. I found that 409 cleaner was able to make a lot of these go away just through hard scrubbing. In some places, I carefully used lacquer thinner. Be careful, get too aggressive and you may dissolve your paint. Most paints are not lacquer but some still will break down in its presence.
Of course, I went over the entire car with my Rupes polisher, which perked the 40 year old paint up quite a bit. I didn’t want to be too aggressive, as my paint meter readings showed I wasn’t working with much paint thickness. I also went over all the black trim with The Chemical Guys Vinyl, Rubber, and Plastic treatment. It worked great. An interesting factoid on the 928. The hood, front fenders, and doors would not stick to a magnet, which tells me they are aluminum.
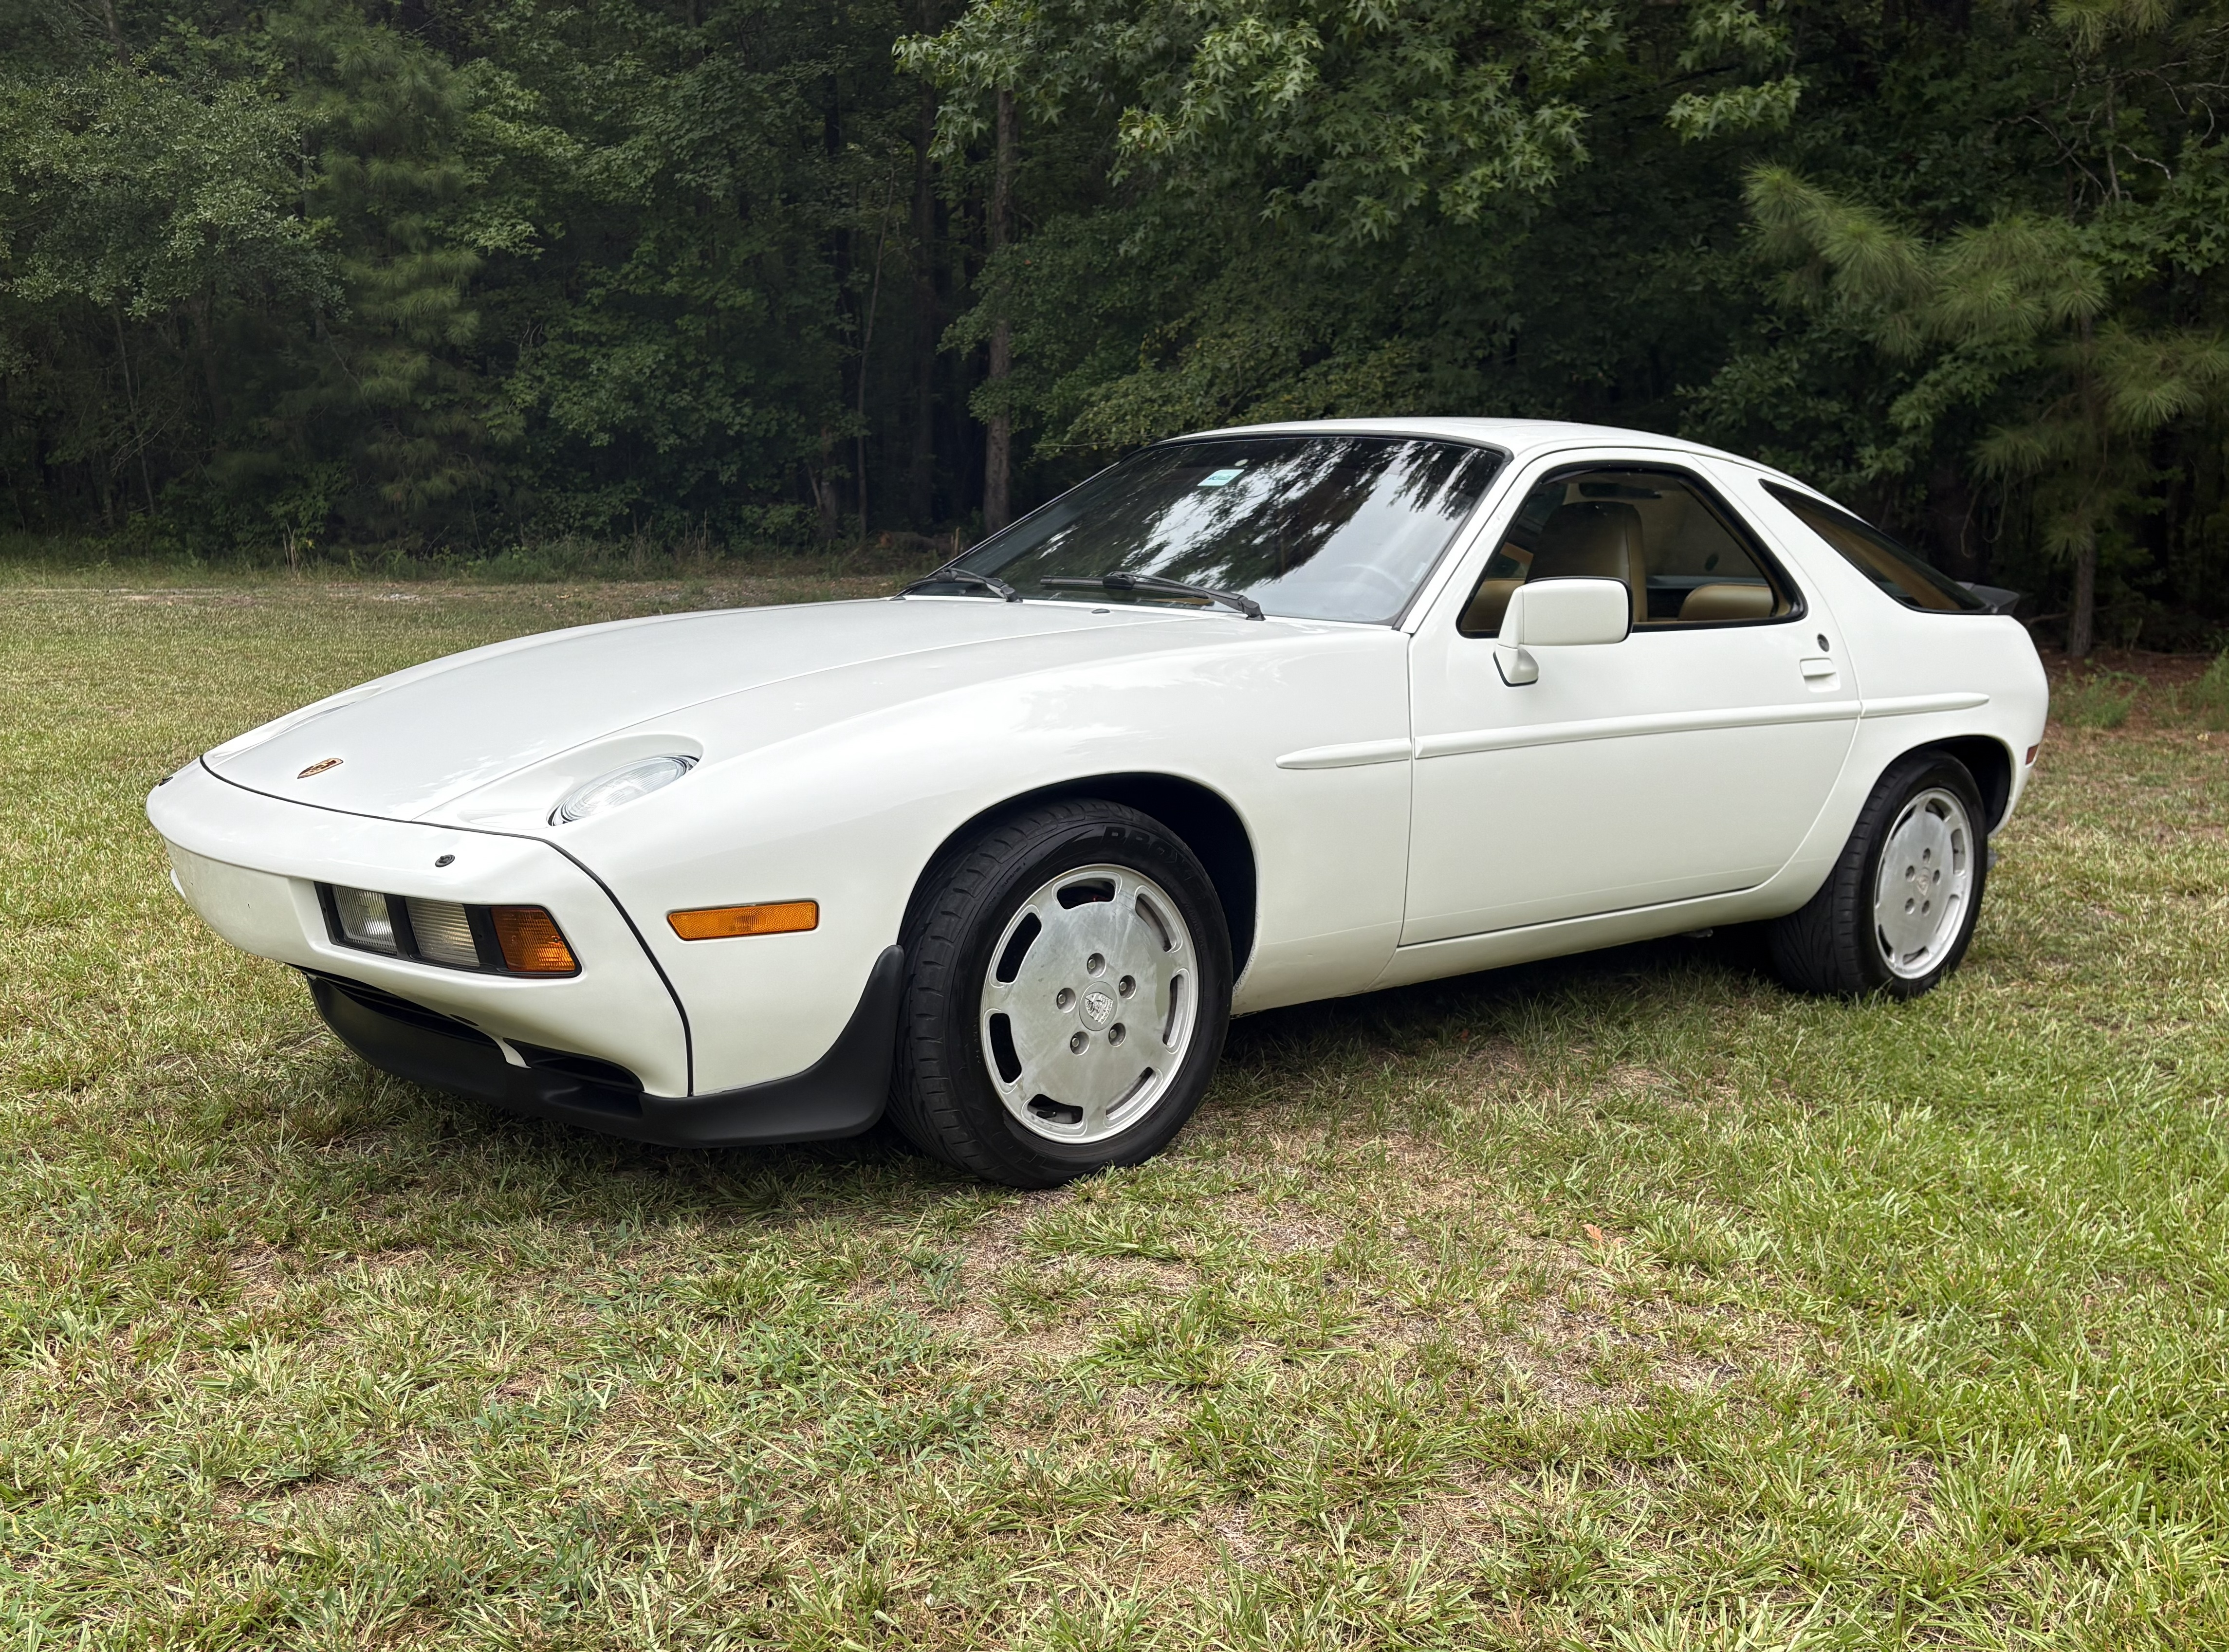
So you may be asking, where are the pictures? I got the car all cleaned up the other day and took it out for a photo shoot. Yep, white car, in a field. I probably could have shown it to you before all this work and it would have looked about the same. But I know that I have made great strides in the cars appearance.


Discussion
Comments are closed.