Well, that’s my working title. Let’s see if I still like it when I’m done venting.
Wow, I’ve spent the last several days installing the rubber seals on the drivers and passenger side doors. My previous project, a 1967 Etype 2+2 coupe, was a “door slammer”. That term can mean different things to different folks but to me, it is a car where you kind of have to slam the door shut to get it to latch. There can be several reasons for this. If you have installed new rubber seals and they are poorly manufactured, they may be too stiff or too thick. The latch mechanism can be worn such that the door has to “overshoot” in order to spring back to place the door in a correct flush condition. Worn hinges can also contribute to the problem. My current project had all three problems!
In the process of doing body work in preparation for paint, I determined that the hinges were “saggy”. I took them apart and installed new pins. Then I precisely hung the doors and installed a temporary seal on the rear shut face. Coupled with the orignal latches I had on hand, I was able to hold the door in the desired final position while I did bodywork.
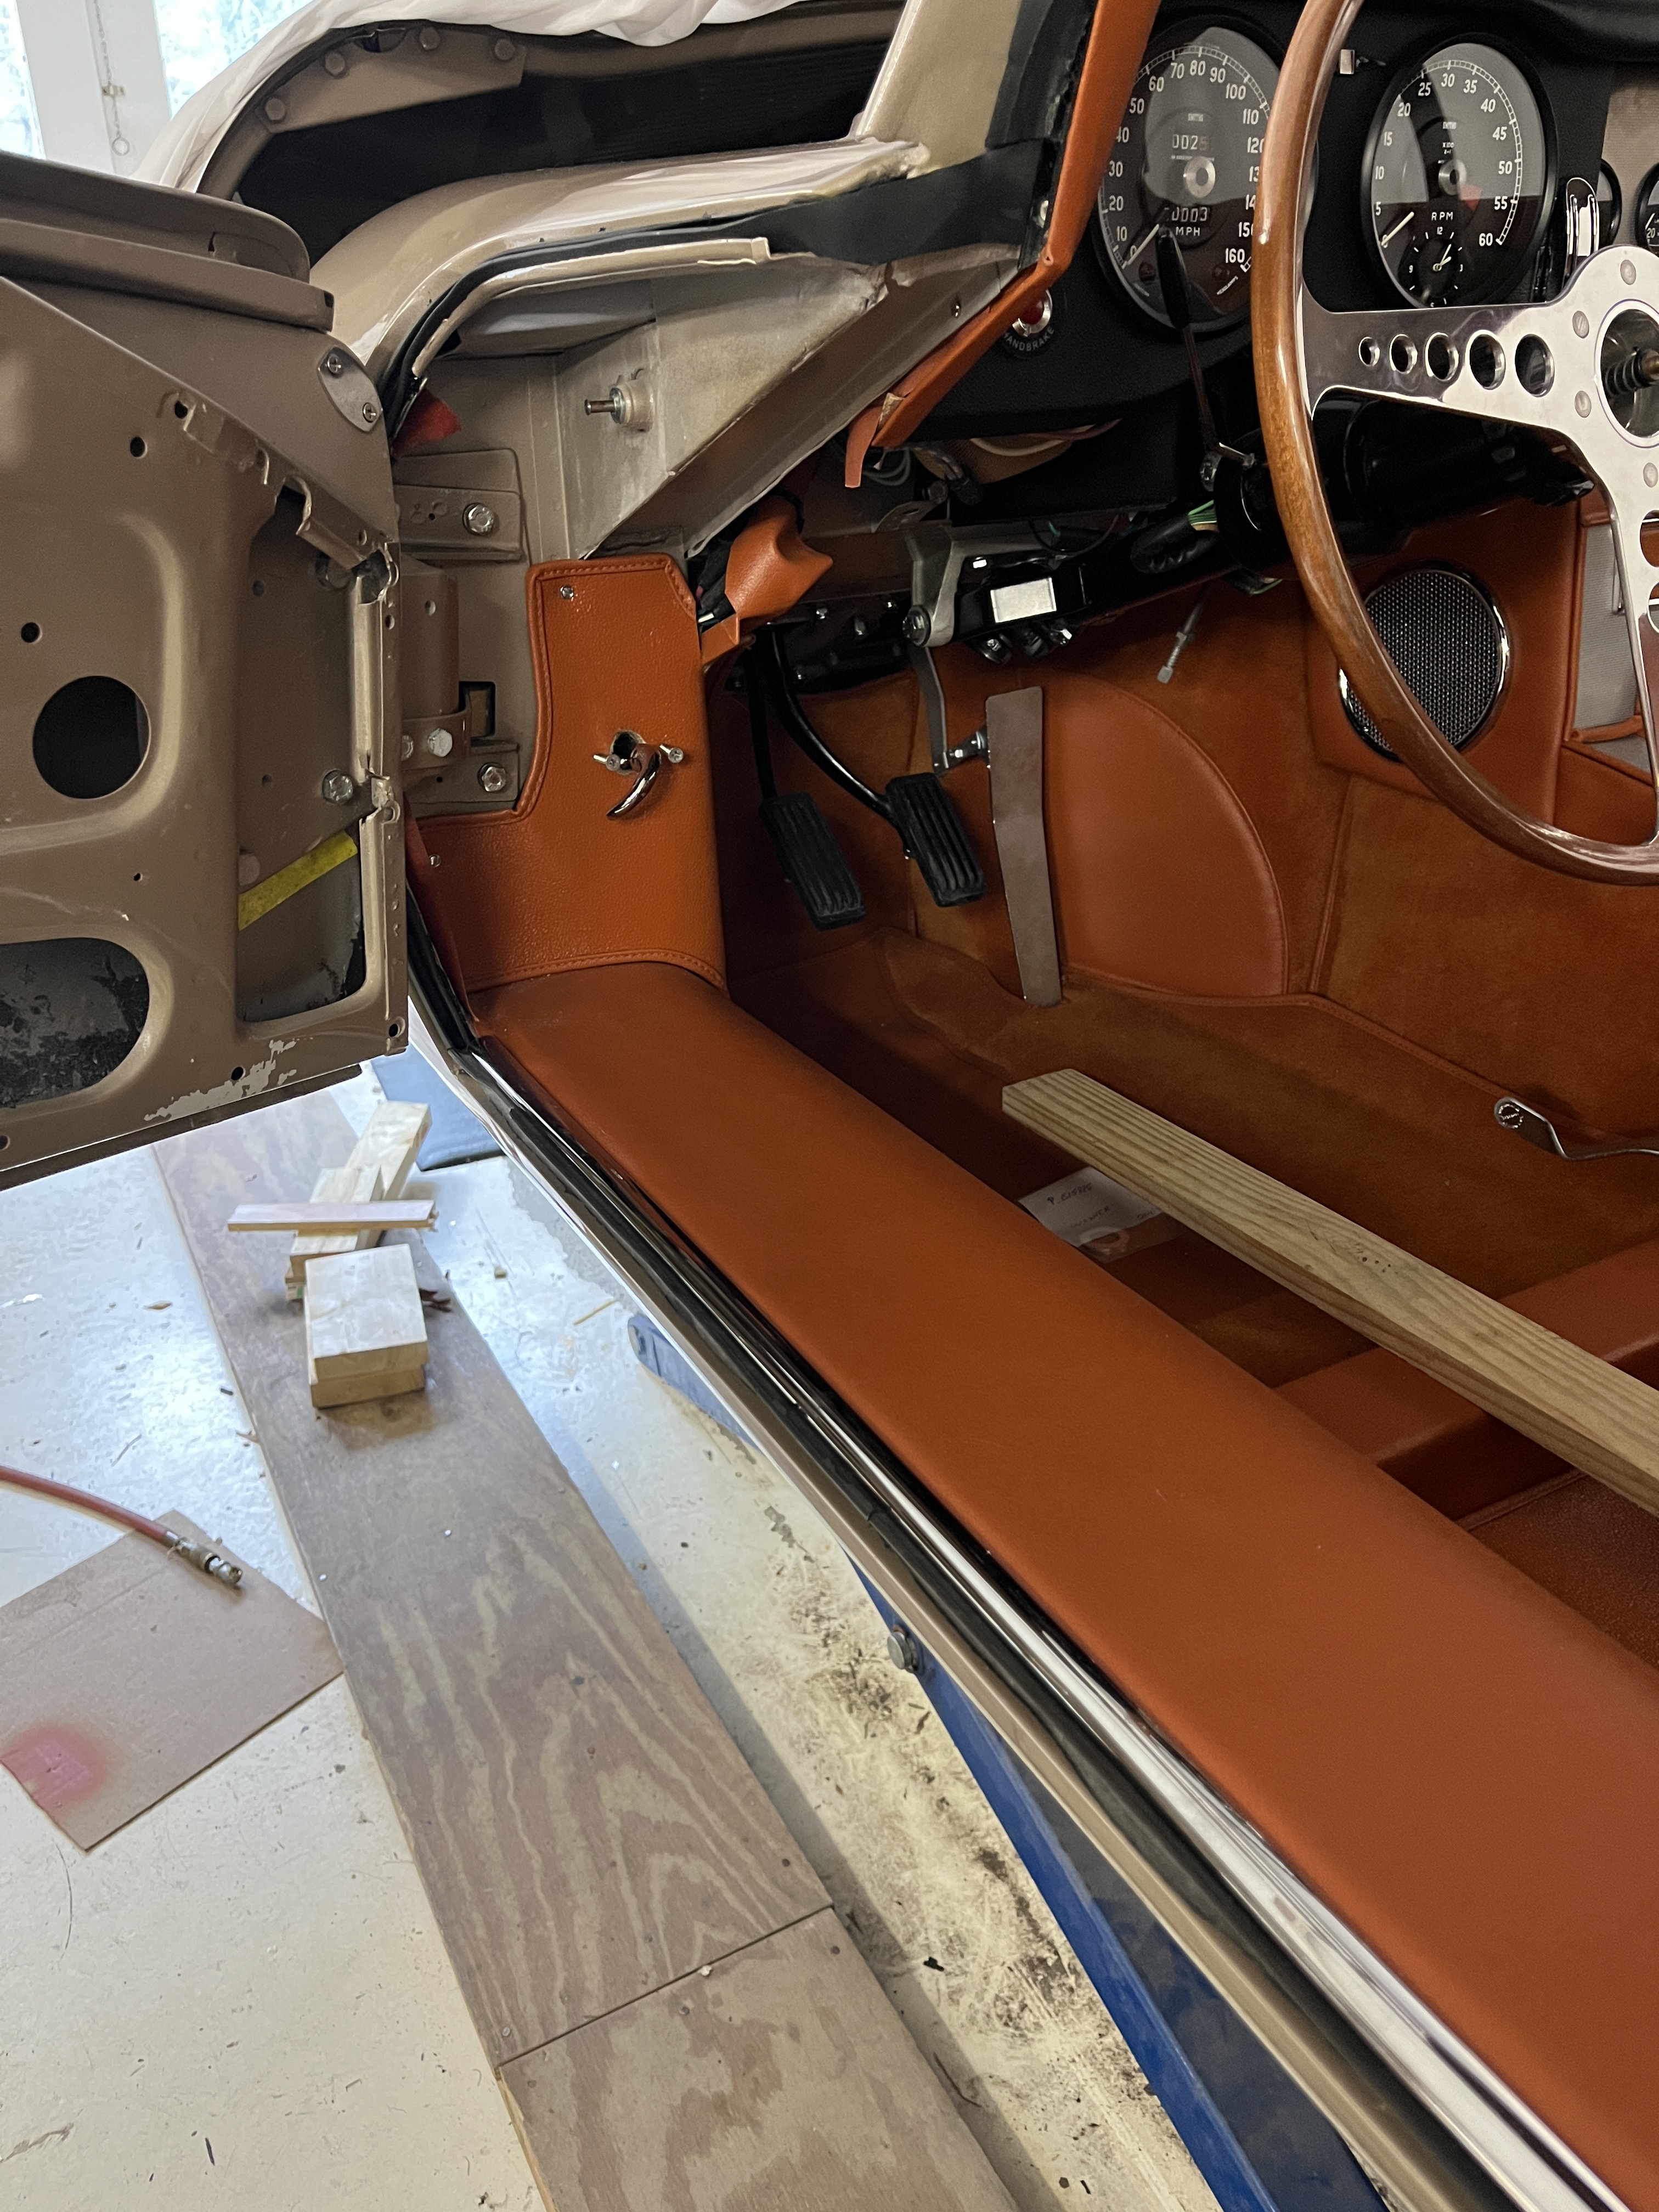
Of course, at some point after the painting process, these doors were removed and put in a safe place while I spent many hours reaching through the door openings to work on upholstery. But now upholstery is basically done and it was time to reinstall the doors. Which leads me to vent about the Etype door hinge arrangement. Unlike a door on your house or even your Toyota, there is only one hinge. There are 4 bolts that attach the hinge to the door and 4 bolts that attach the hinge to the body. The bolting points use “captive nuts” which have some play in them, such that you can adjust the position of the door up/down/in/out. This hinge design is much more sensitive to slop in the pins than a two hinge door would be and you basically have to hold up the weight of the door with one hand while you adjust the hinge bolts with the other. It is a bit of a 3D puzzle but eventually I got the door to where it was centered in the opening in the body and closed flush.
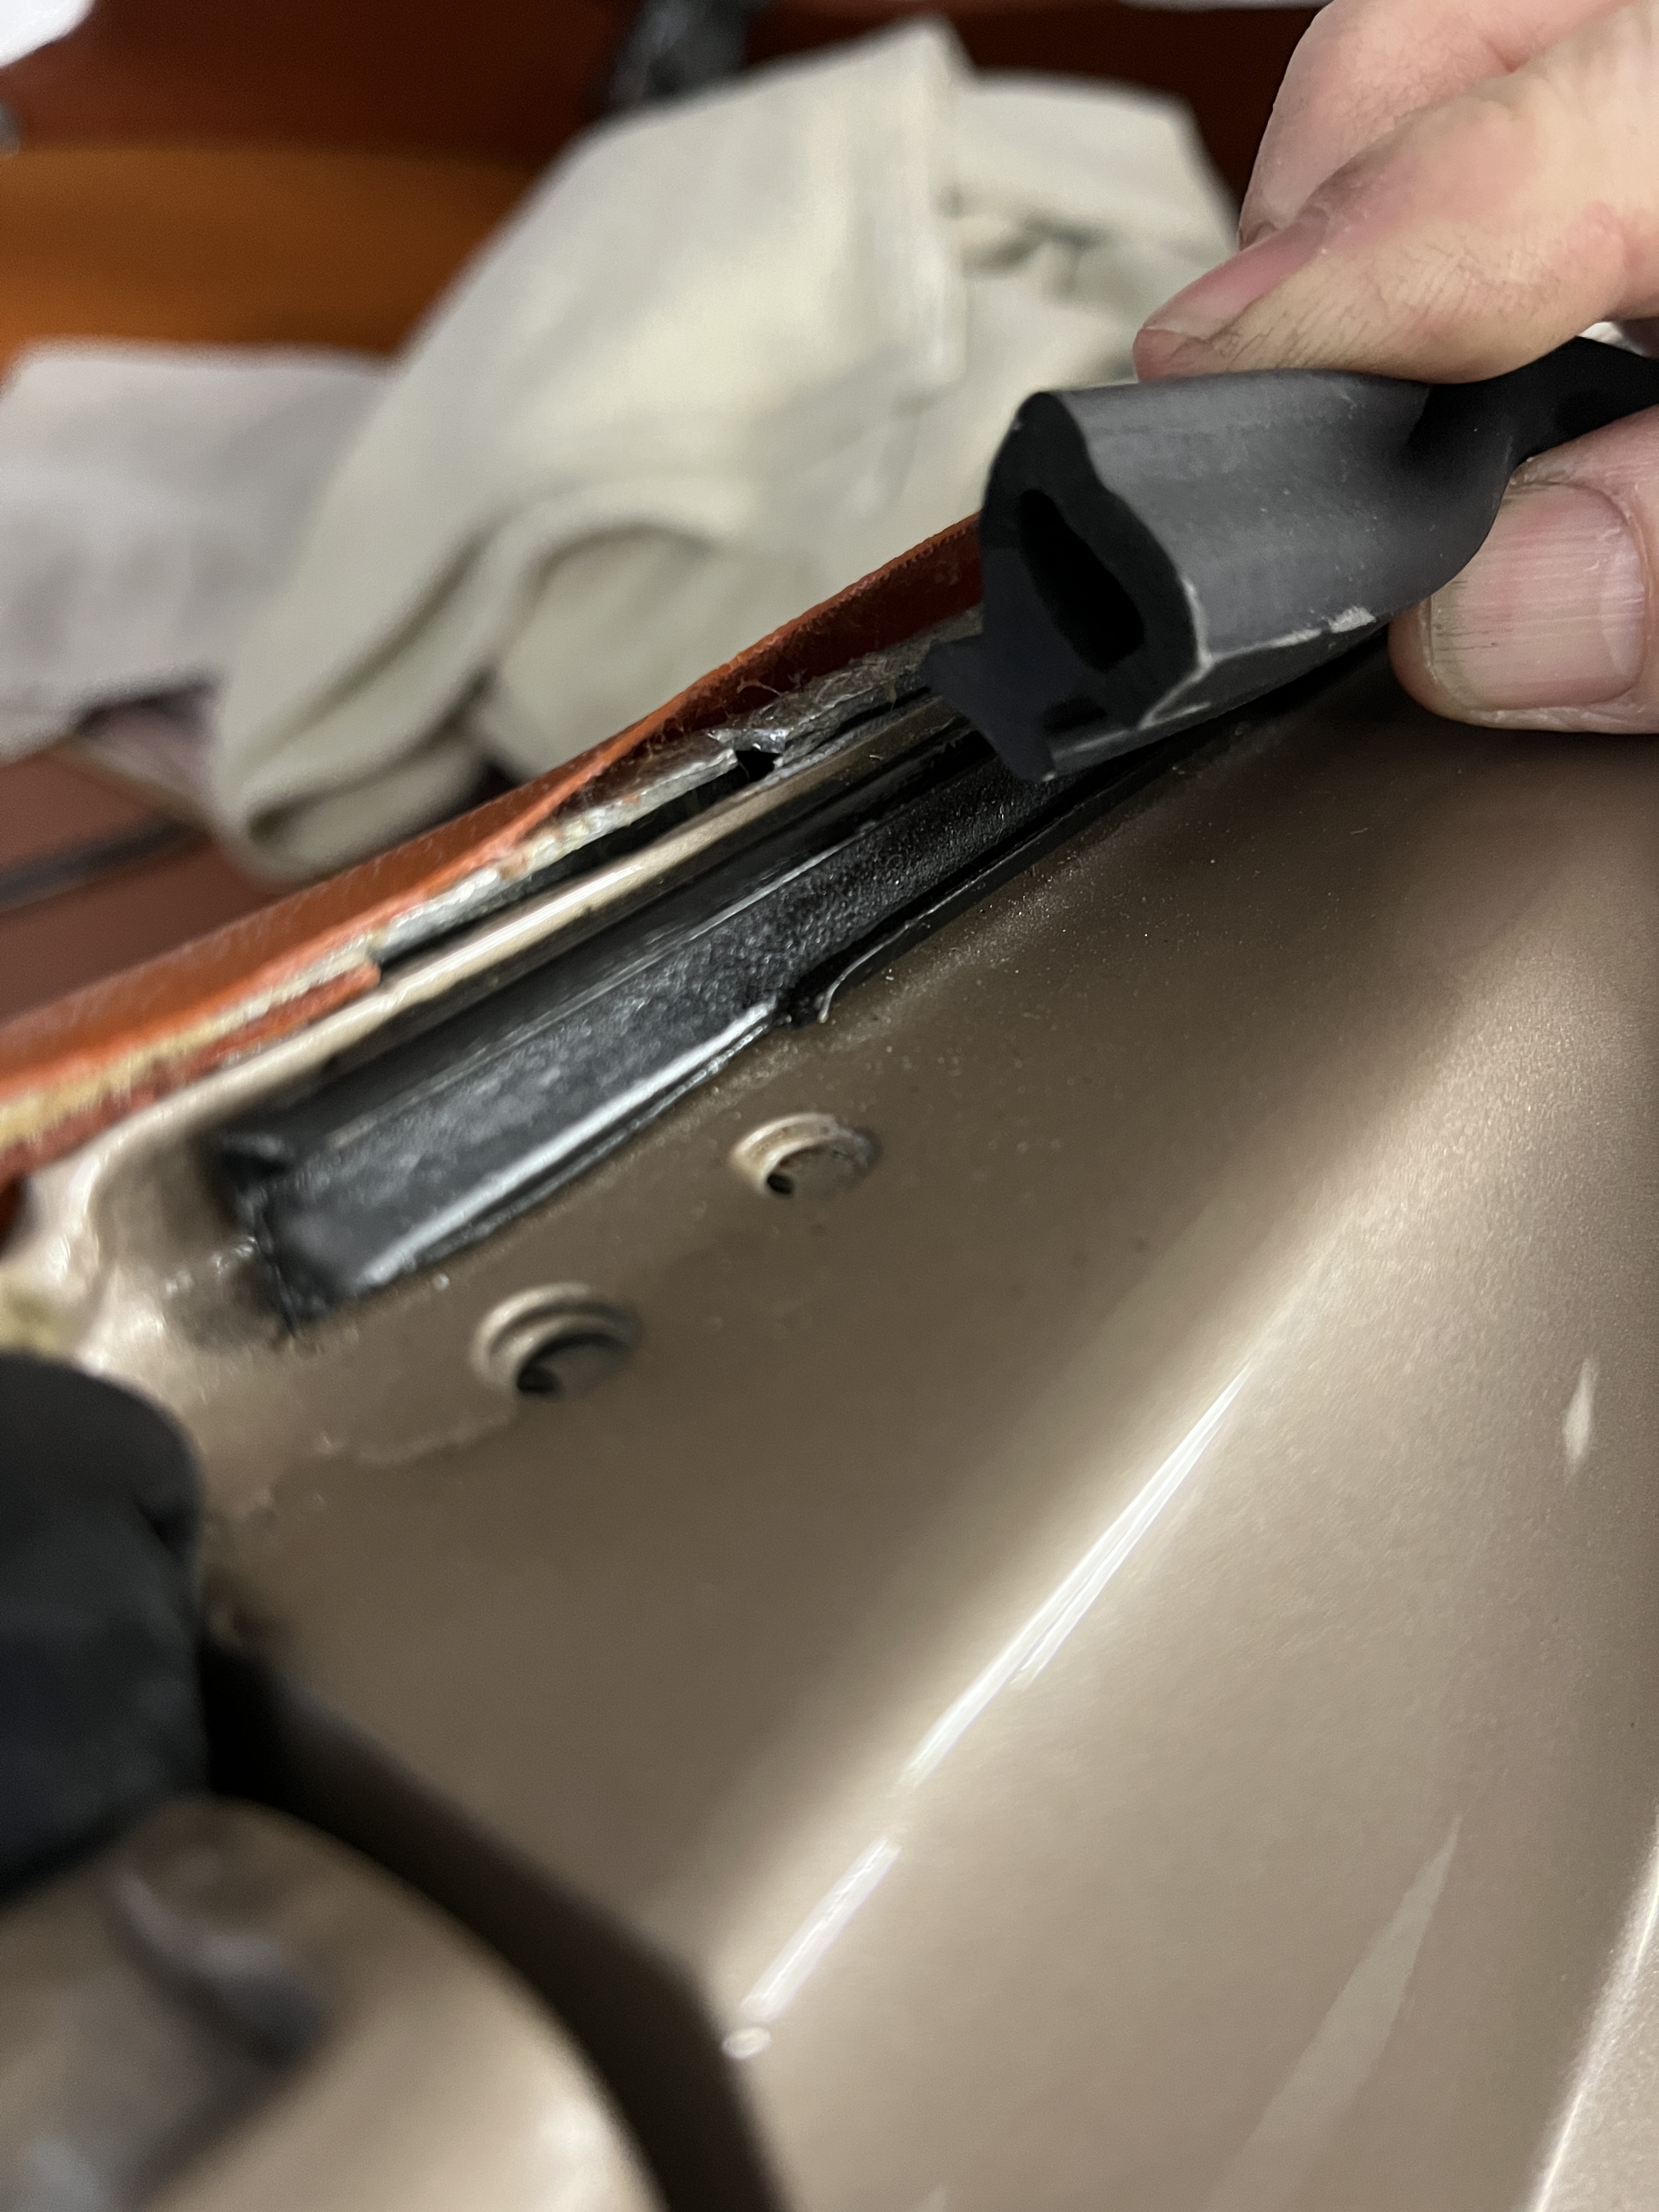
This was the starting point of installing the rubber seals. I purchased my seals from SNG, who sources them from a reputable firm in the UK, COH Baines. Baines has a good reputation on the forums. I have been reasonably pleased with their products. The seals are pretty soft, which is important. I have to assume the profiles are correct, although this is a hard thing to verify. BTW, the Spare Parts Catalog does have little “exploded views” of the various seal profiles. Based on my initial attempts, I could see that Baines sized them “generously”. I understand, a seal that is too small will simply not seal. When I did a trial fit of the seals, they were clearly too big in places, for my specific car. The door stopped inches short of closing.
Here is the big reveal. My secret weapon is a bench grinder. My bench grinder has a wheel on it that is suitable for removing metal. It has no trouble chewing up a rubber seal. I generally remove material from the back side i.e. the side that will be glued to the body. This in effect makes the seal thinner. It is a trial and error process. Fortunately, in the great scheme of Etype restoration, the seals are not that expensive so if you go too far, you can lick your wounds and buy another seal and start over.
The seals I like the least are those that “snap” into a C shaped track. In theory, this should go pretty quickly. But we are dealing with rubber and it really doesn’t like to “snap”. I generally wind up engaging one side of the seal in the track and then using a flat bladed screwdriver to pry the opposite side into the track. One screwdriver width at a time! It is laborous and will get your fingers aching in short order. I do find that newer cars have snap in seals that really work much better.
A trick that sometimes helps with the snap in seals is to glue the seal down at one end. After the glue is well set, you can grab the free end of the seal and pull on it. This has the effect of reducing the profile of the seal and makes it easier to snap into the track. You can let the seal relax after it is installed. There are situations where you can apply glue to the seal, stretch it out, and glue it down. This works best with traditional contact cement. It does run the risk that the glue will fail long term and the seal will go back to its unstretched state, so keep this in mind.
Although I am not at this point yet, the frame around the window glass does allow for some adjustment. Basically, at the bottom of the frame, in the bottom of the door, there is an attachment point that is slotted. You can displace the bottom of the frame one way and top moves in the opposite direction. It pivots about a point that is at the top of the door. This adjustment is very important to the fitment.
Another potential culpret is trapped air in the cockpit restricting door closure. I have not experienced this but saw it as a point of discussion on a Youtube video by a UK restorer. A very simple test is to try closing your door with and without a vent window open. The UK restorer actually adds an air vent behind the license plate on Series 1 and 2 cars. He noted that the Series 3 cars already have a vent.
The door frame on my Etype had a combination of glue in and snap in seals. After multiple hours of work, I got the seals where I wanted them. The door closes with gentle pressure. See linked video below. I’m not done yet, as I have yet to install the frame that encloses the window glass. The frame is being held hostage at the chrome plater.
So back to In Defense of Door Slammers. If your car is a door slammer, it is not cosmic karma paying you back. As discussed in the article, there can be multiple causes. Door hinges, latches, seals, mis-alignment, and backpressure can all contribute. Hopefully this has given you some ideas on how to proceed to evaluate and fix your Door Slammer.
My article series Some Assembly Required is available on my webpage http://www.newhillgarage.com.

Discussion
Comments are closed.