In Part 1 and Part 2 I discussed the arduous efforts I made to fabricate aluminum interior pieces from scratch. Now I can show you how it all came together. I am quite pleased with the results.
It is a well known problem with the Etype that if you don’t get things right, it is difficult, if not impossible, to get the center gauge panel to rotate down and allow access to the fuses. I had learned on my 2+2 restoration that modifications to the various parts may be required. In the last article, I had fitted gauges into the gauge panel and set it on its pivot points. There is basically zero adjustment vertically of the gauge panel. What really sets the end result is the vertical position of the center console. I probably did trial fitment of the various parts several dozen times. Without the fibreglass transmission cover installed, everything looked pretty good. But as soon as I installed the transmission cover, the center console would not seat low enough. The difference was probably only 1/2″ but that was a 1/2″ too far. The gauge panel would not rotate down. I looked at the various factors and decided I was going to have to remove material from the transmission cover. Basically, everything rearward of the shift lever was too high and had to go. So I cut it away. After that, the height values worked to let the gauge panel open. In order to keep heat and noise out of the cockpit, I fabricated an aluminum piece to replace the part I cut out. And I inserted generous amounts of foam insulation. I’m not going to post a picture because it is butt ugly but it is functional, so that is what counts.
From there, there were several things required to get to the end. One was the fitment of the cross hatch shift lever “dome”. This is the one piece that I did not fabricate, as it is quite complex. I purchased a fairly nice OEM piece from RWAutoClassics. The next thing was to attach the leather gaiter to it. A small chrome ferule tops off the gaiter as it passes over the shift lever. The next step was to apply piping around the interface of the dome, the horizontal console, and the radio/ashtray piece. This is a little tricky as you don’t want a bare end to show. I wound up cutting the center rope a little short and wrapping the vinyl around the end. Oh, and speaking of the radio panel, I had to wrap the radio blanking plate and mount it into position. And without further discussion, here is the end result!
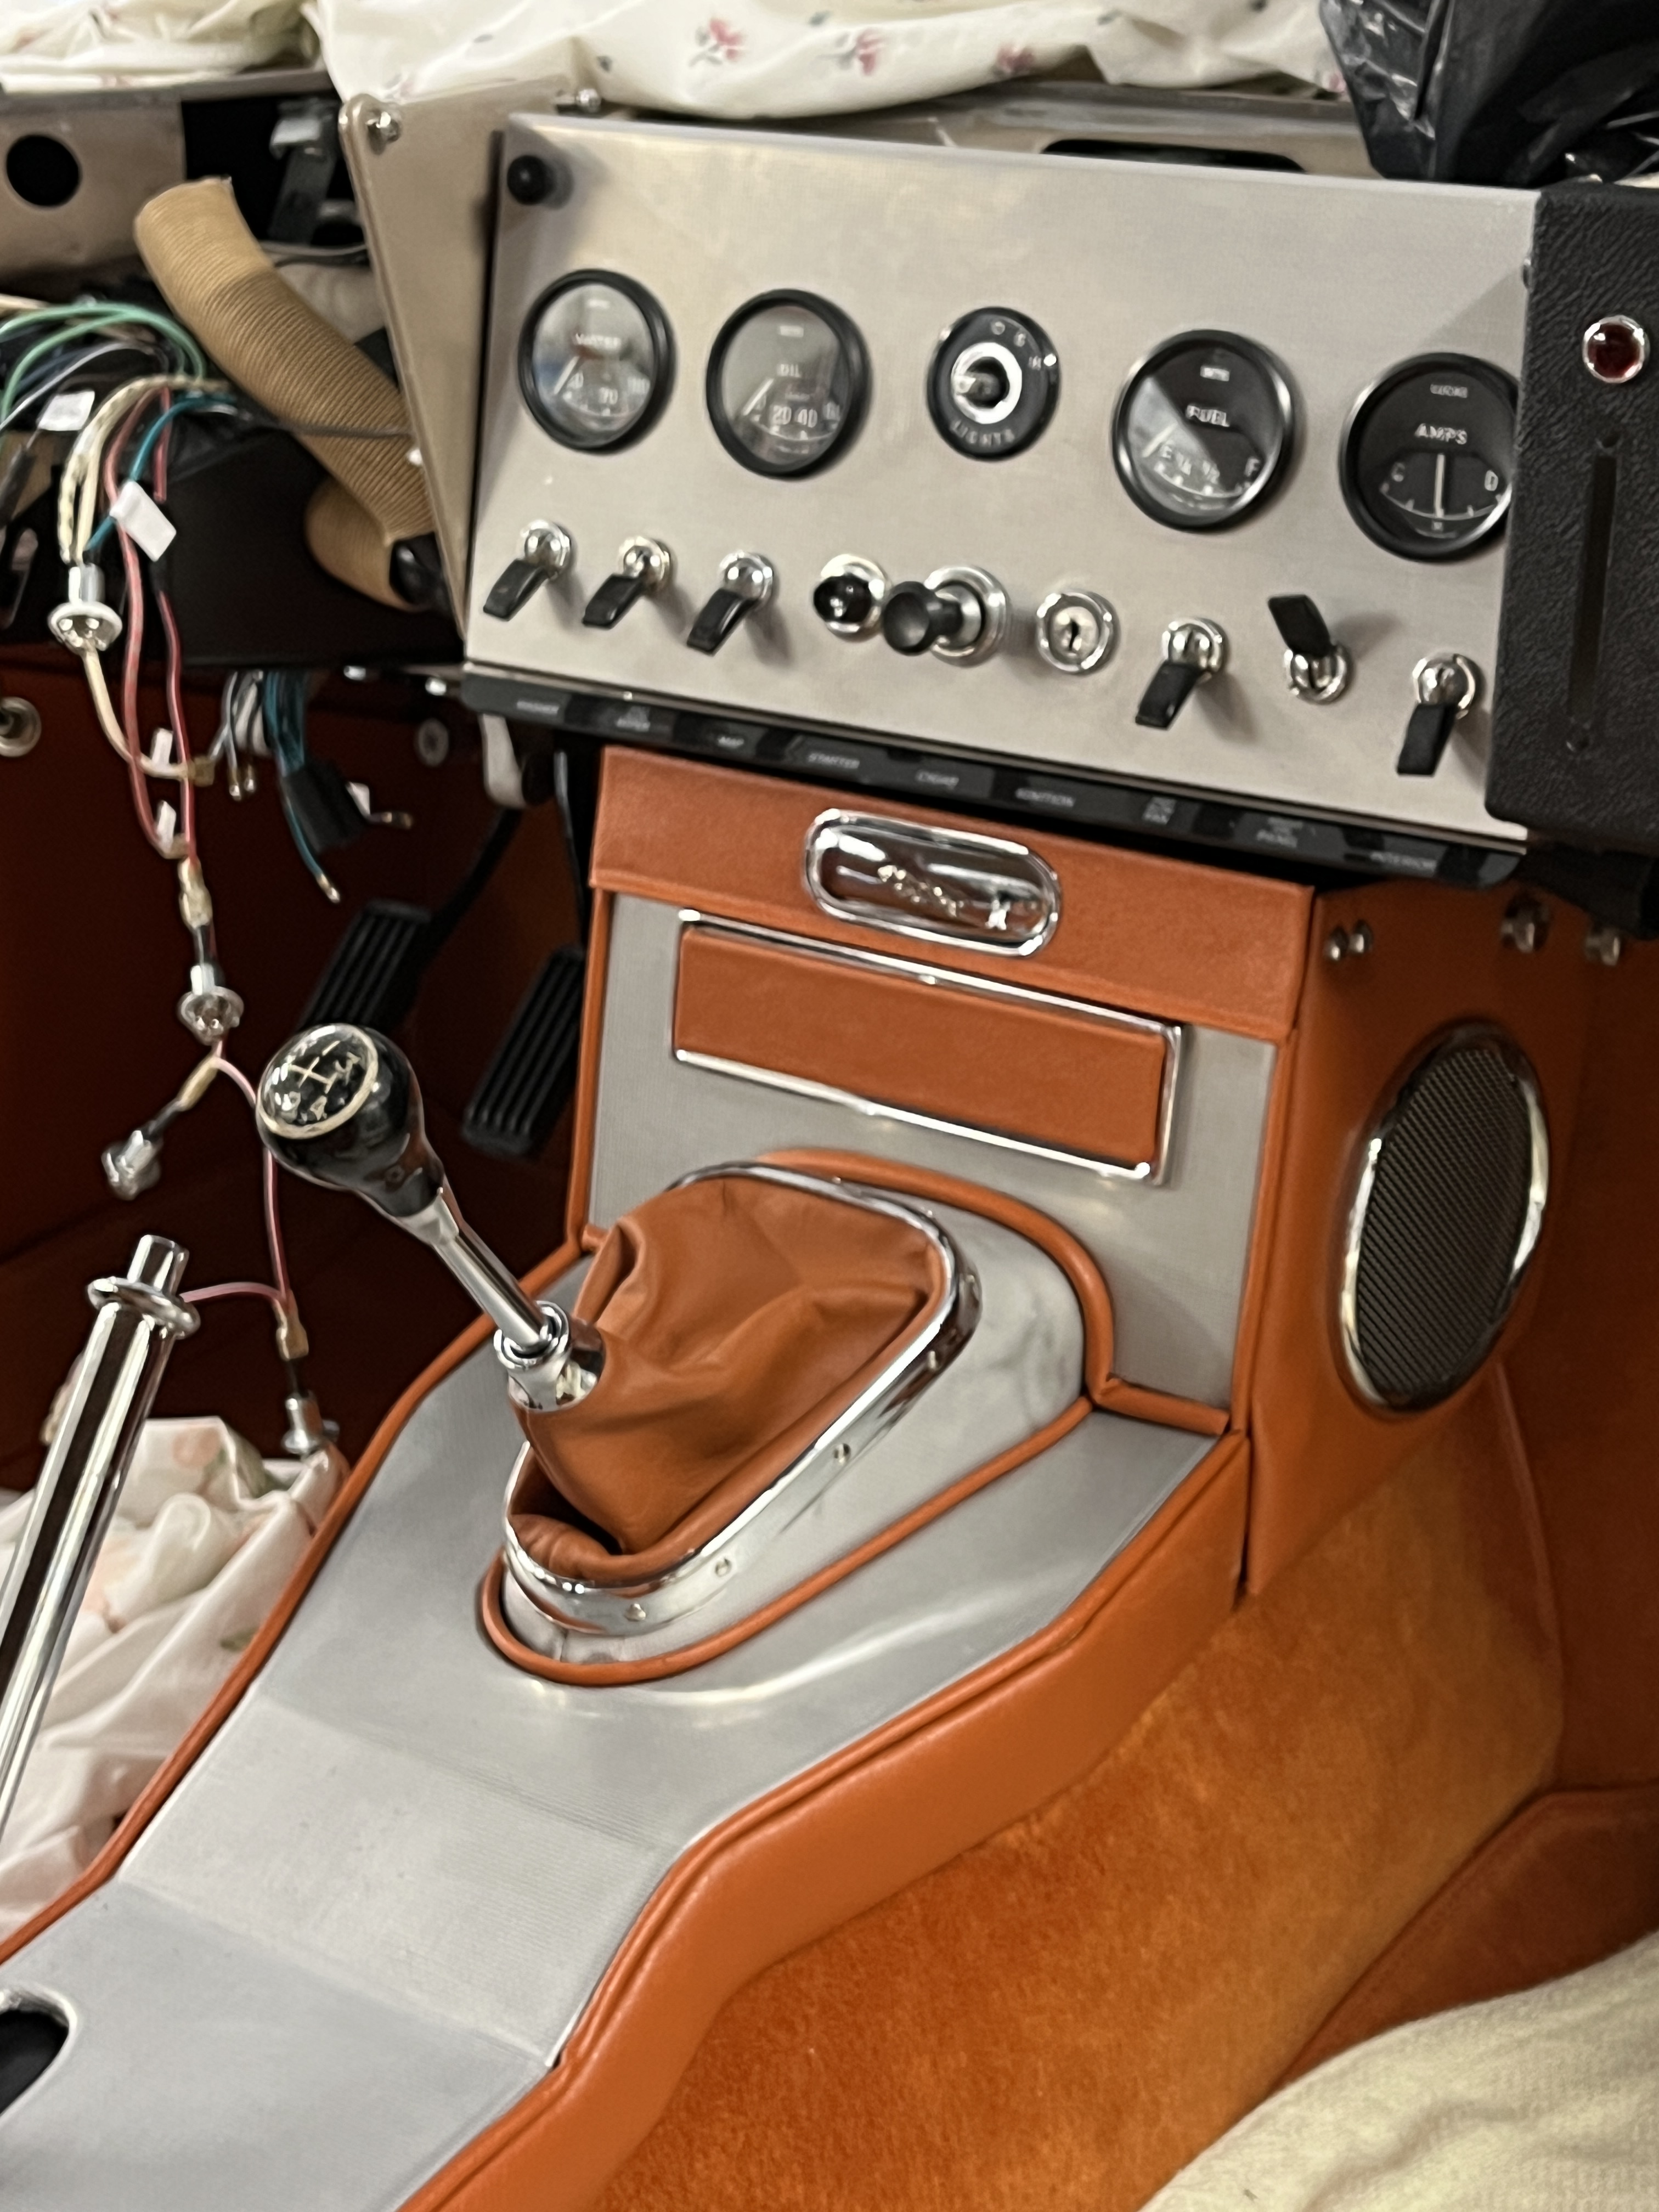

BTW, in the uppper picture, there is a rather innocuous detail that is important. That would be the fasteners on the side of the radio console. They are very specific to this generation car. Two single slot pan head screws towards the front. And two knurled knobs at the rear. If you start to look, you will see all manner of none authentic hardware used here. It is a small detail but definately one of my “tells” when evaluating a restoration.
I am glad this part of the restoration is behind me. It took a lot of time, money, and pain.

Discussion
Comments are closed.