Painting has begun on the 1963 Etype FHC restoration. This might seem a little early in the process but let me explain. As near as I can tell, the factory assembled the bodies fairly completely and then painted them, inside and out, with either enamal or laquer paint. Both products have fallen out of favor for use as modern automotive paints. Almost all cars built today are dipped in a anti-corrosion bath and then painted with urethane based paints. Most cars are painted with a basecoat (the color) and a clearcoat (the shine and durability). Somewhere in there, they must have a step where they smooth out minor imperfections in the body but it all goes pretty quick and is largely done with robots in a very clean environment.
I am not a robot (check the box) and my environment is not so clean as theirs. As I have discussed in previous articles, I use a more time and labor consuming but methodical approach. As a general approach for this car, I had the body shell media blasted, Then I made metal repairs that required welding or adhesive bonding. Then I had the body media blasted again, just earlier this week. I also had a bunch of loose items like the bonnet fenders, doors, bonnet air ducts, bonnet underpanel, and bonnet diaprhagms bead blasted. All of these items were moved into a low humidity environment (my paint booth) and I proceeded to apply paint. Everything received 2 coats of epoxy based primer. Then I diverged into two paths. The body shell interior, underside, and firewall were continued with the application of a color tinting basecoat and a clearcoat. This was done as a wet on wet process. The remaining components will receive much more prep work before final painting.
What is a wet on wet process. The epoxy primer and the urethane basecoat/clearcoat are catylist based paints. They set up based on a chemical reaction. Air drying, so to speak, is a separate and less critical process, mainly involving the evaporation of solvents. If you can apply a series of paint products in sequence, within certain time restrictions, each coat bonds to the undercoat chemically. It is called wet on wet in that the paints are not exactly wet when you apply the next layer but they are still chemically active and willing to exchange bonds between the coats, resulting in good adhesion and durability.
If you aren’t able to apply the products wet on wet, all is not lost, indeed this is the most common scenario for restoration. The bond between layers is formed mechanically. If you spray a primer coat and come back more than 24 hours later, you get to sand the primer coat to obtain a “scratch”. Just like it sounds, the sandpaper leaves scratches in the paint. The bigger the number on the sandpaper, the finer the scratch. The paint technical manuals suggest the sandpapers to use. So say with a primer, you may sand it with 320 grit paper. Then you paint it with a “high build” primer, which is not meant to adhere to bare metal as much as it has a generous film thickness that you can sand to a very smooth contour. This may take several applications to get where you need to be. This “primer” is typically sanded with 600 grit paper. When this coat of paint is literally perfect, it is time to apply the color basecoat. Unless you screw up and have to take a step back, you typically spray 2 coats of color basecoat, wait 30 minutes, and then spray 2 or more coats of clearcoat. If you don’t need to do “post processing” on the clearcoat, you are done.
There are two reasons why I chose to apply basecoat and clearcoat to the 3 locations mentioned above. The primary reason is that all are less visible in the final sense. Indeed 90% of the interior is covered by upholstery. The more practical reason is that it is very hard to sand these locations with 320 grit and 600 grit sandpaper. There are just too many odd shapes, forms, and bumps. Using the wet on wet process, I was able to basically media blast, blow it out with compressed air, give it a quick wipe with a metal cleaner on a rag, spray 2 coats of epoxy primer, wait 30 minutes, spray 2 coats of the basecoat, wait 30 mintues, and spray 2 coats of the clearcoat. Granted this all took the better part of a day.
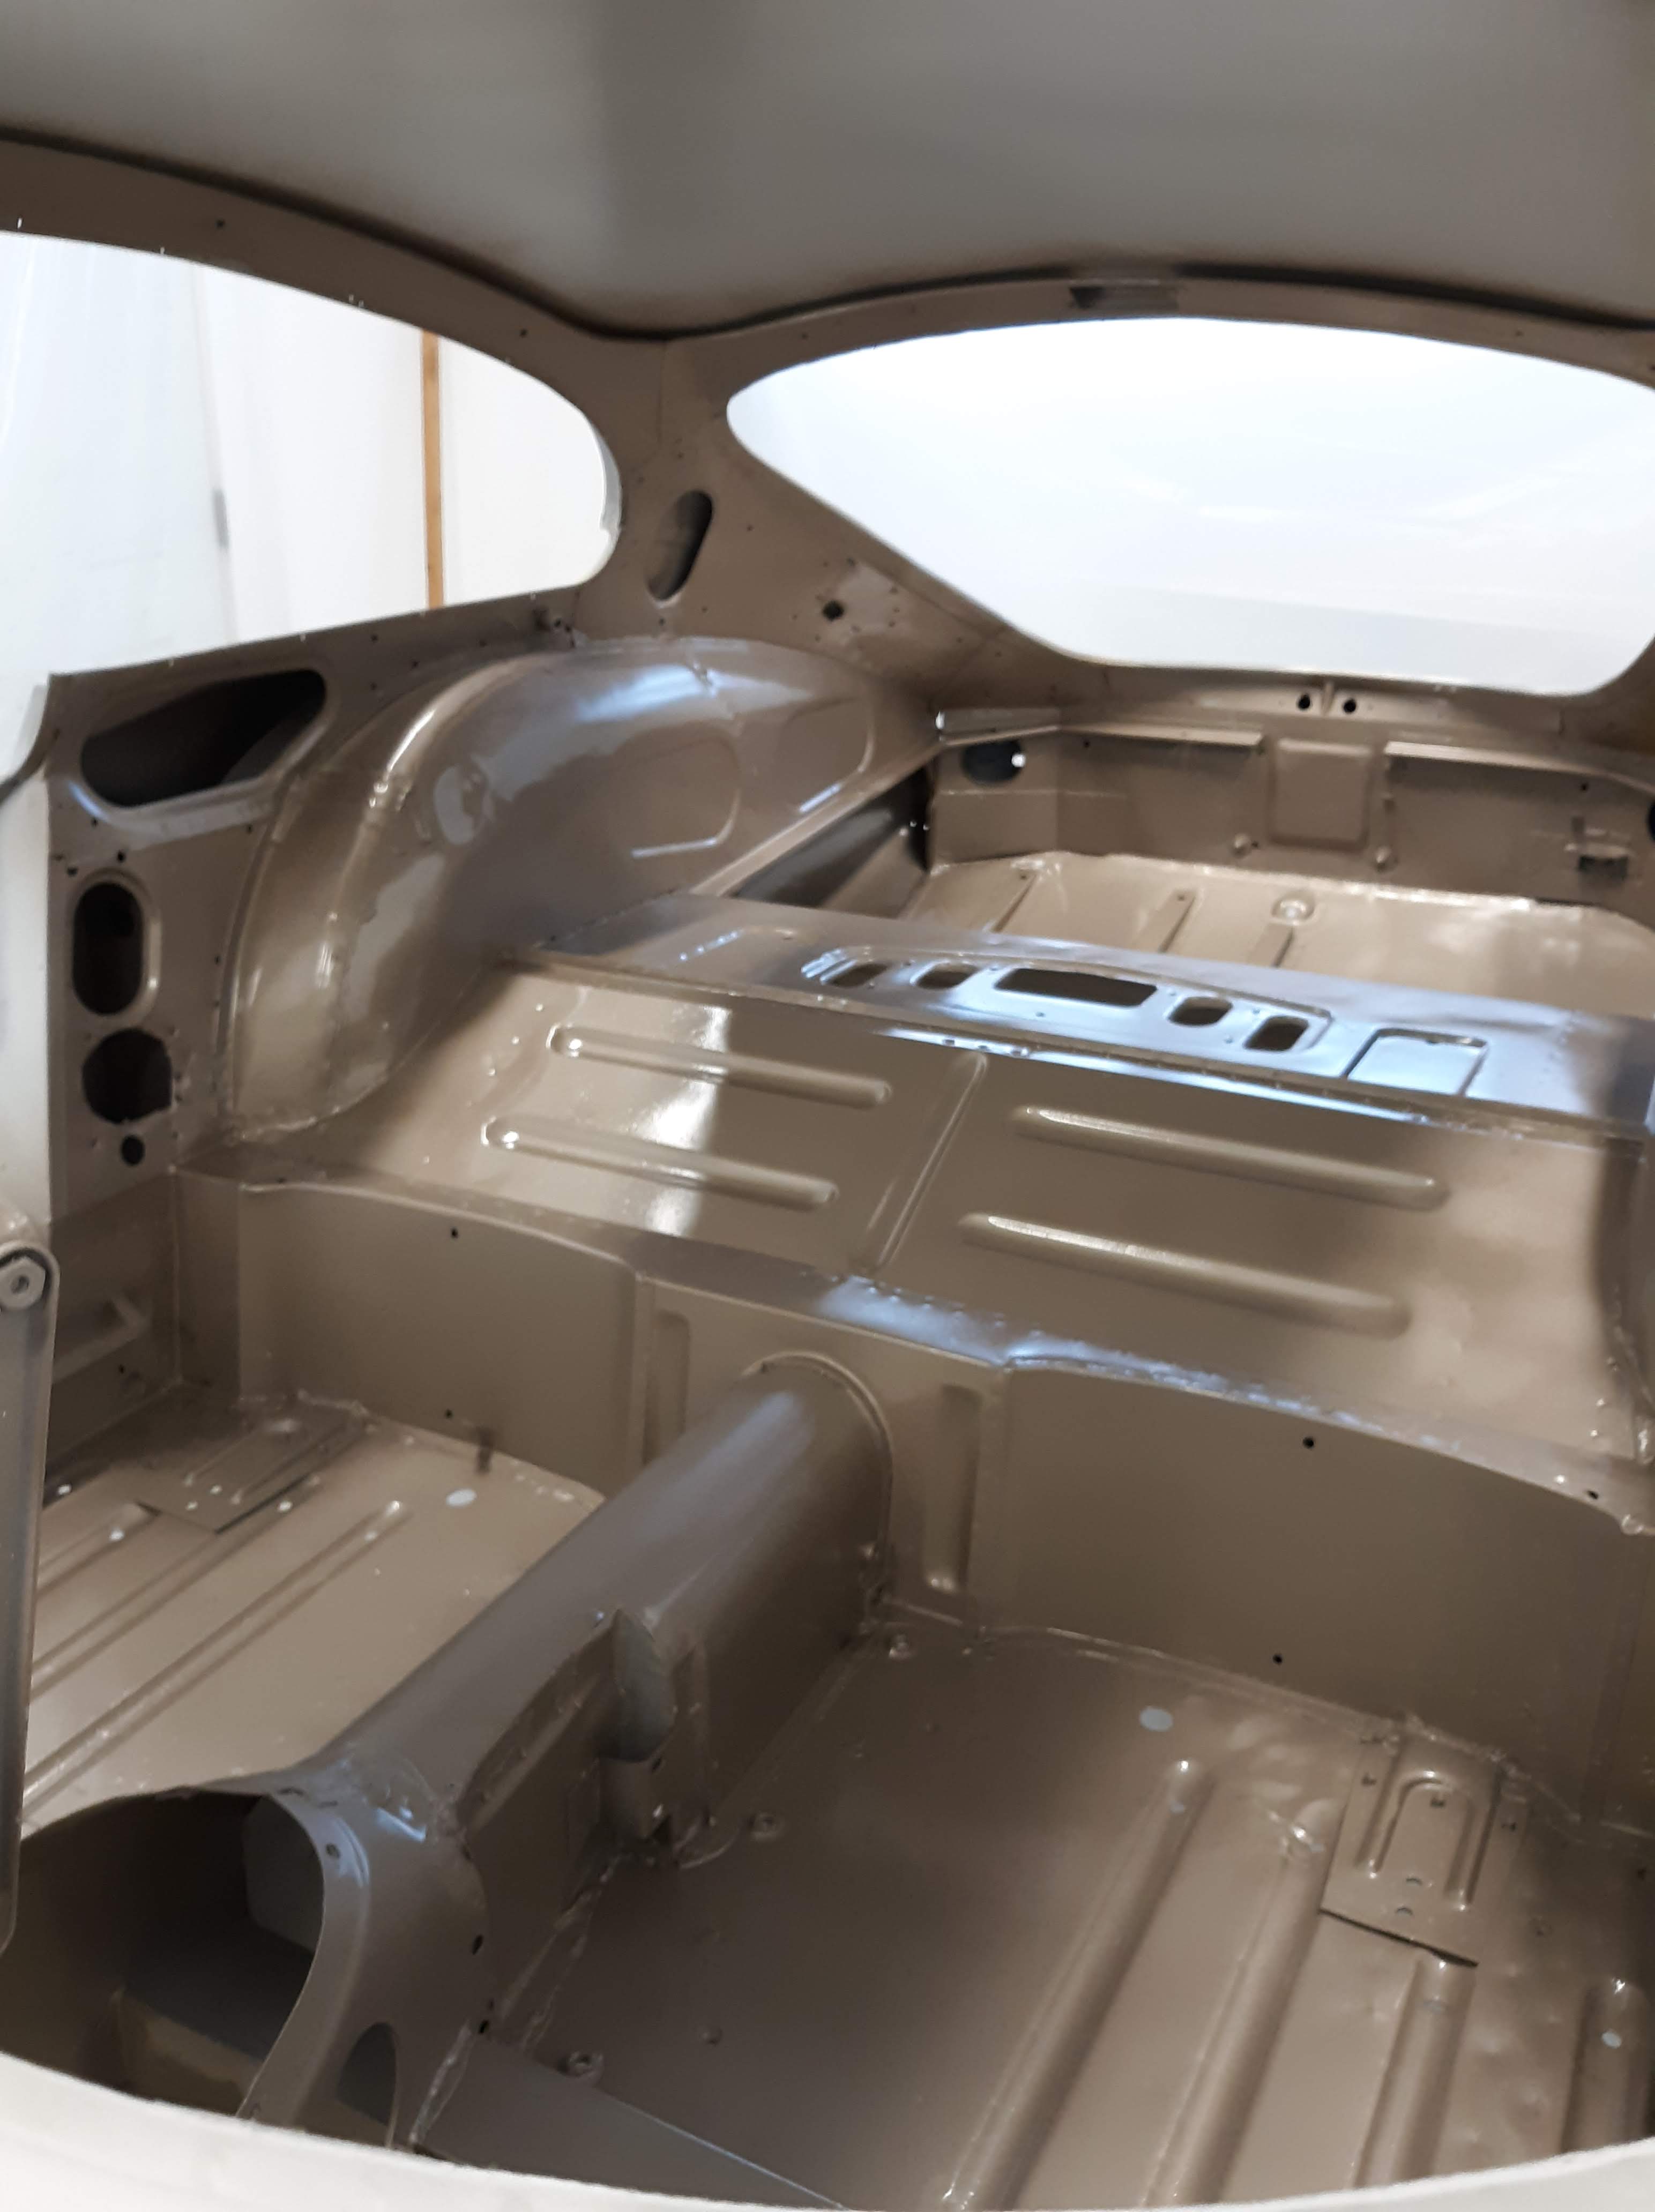
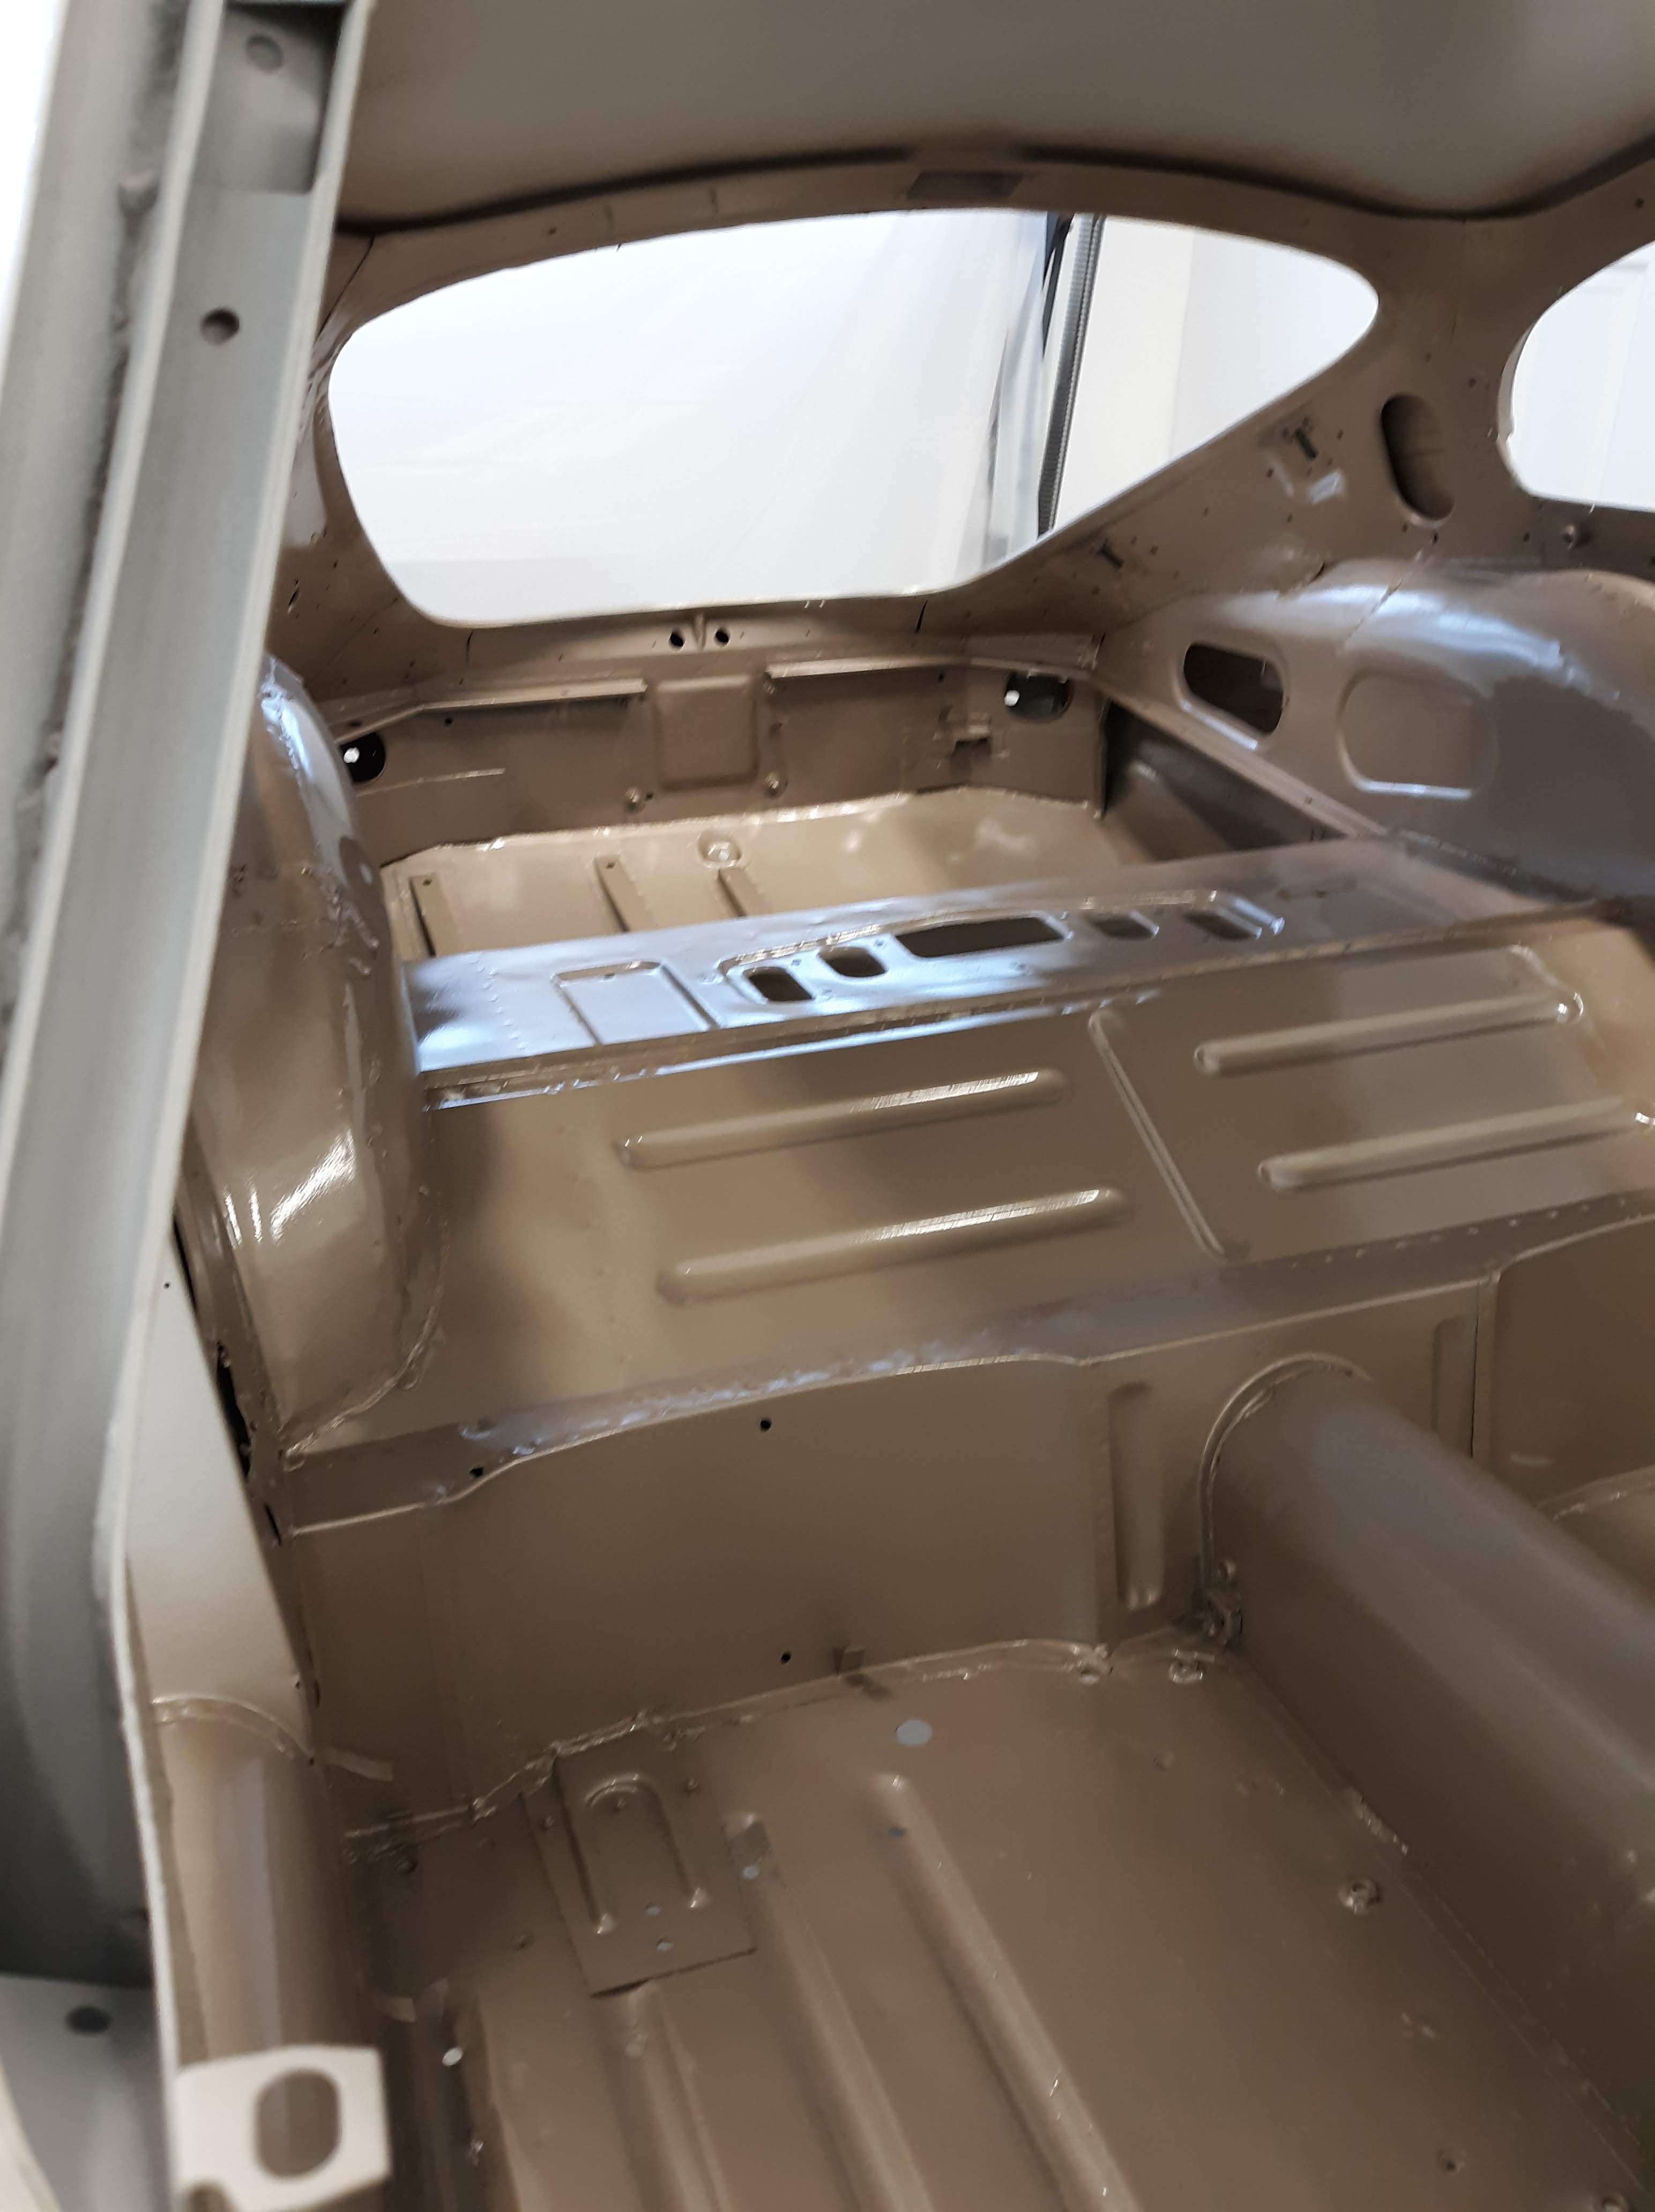
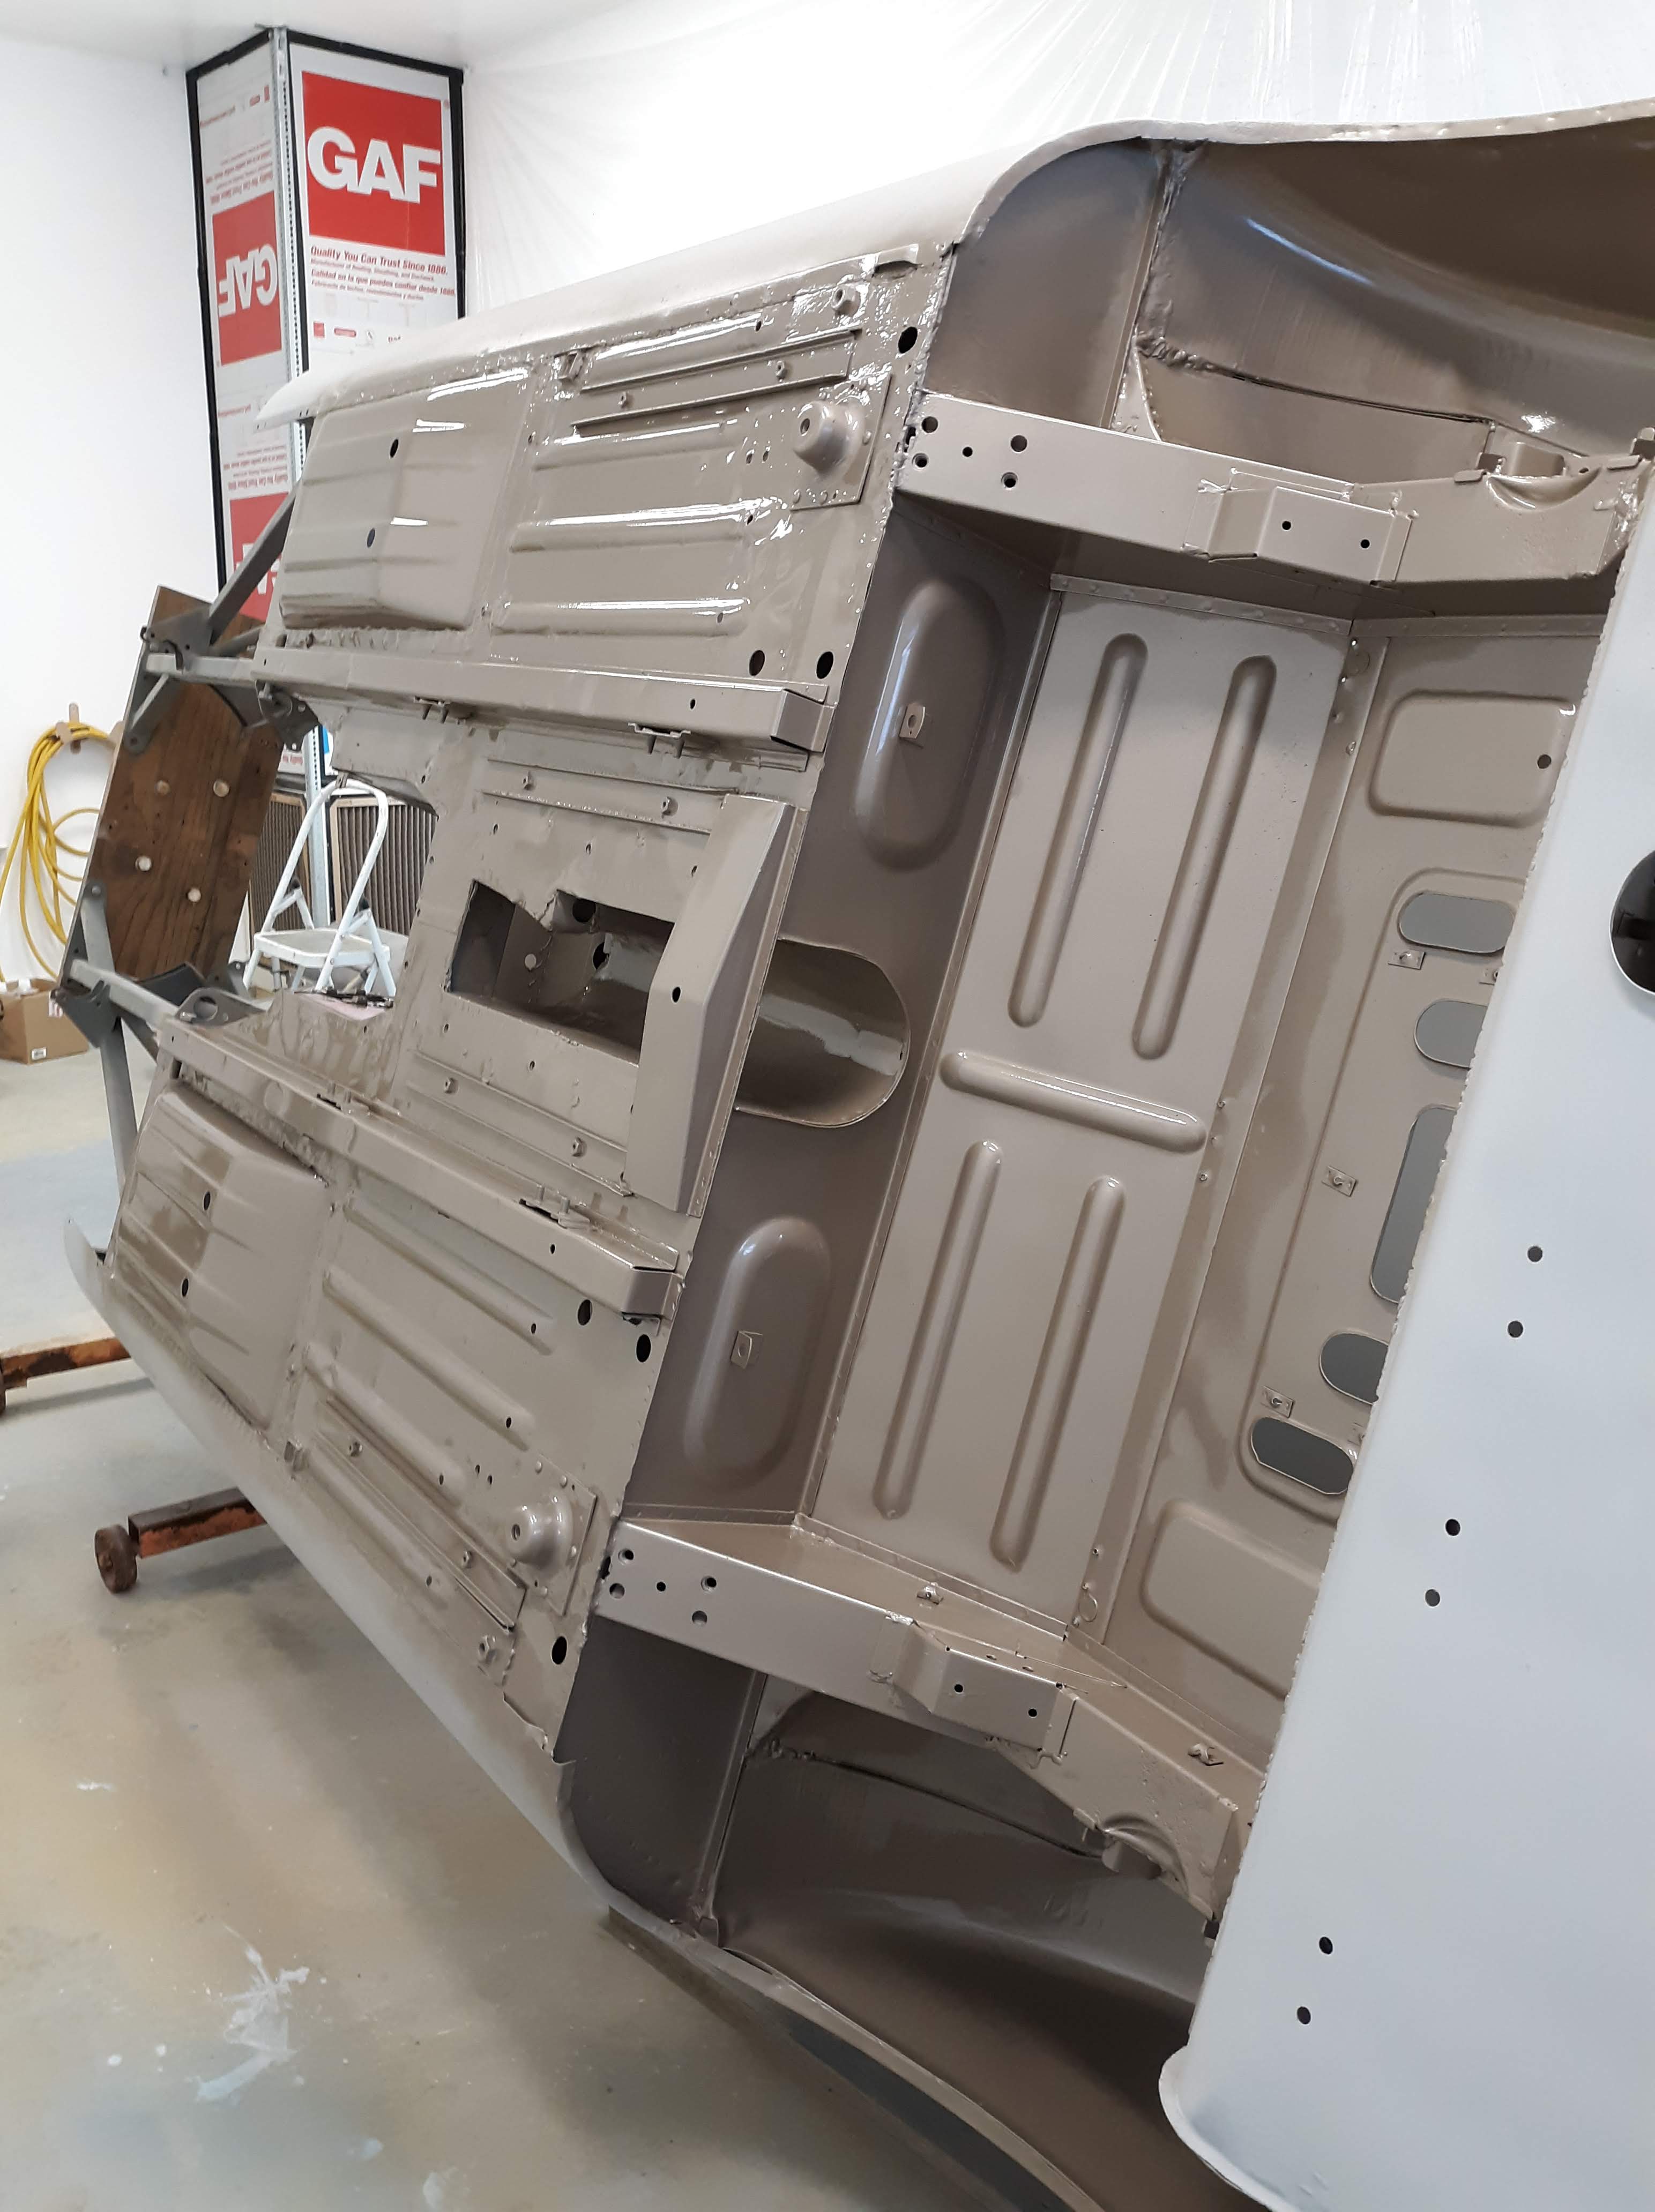
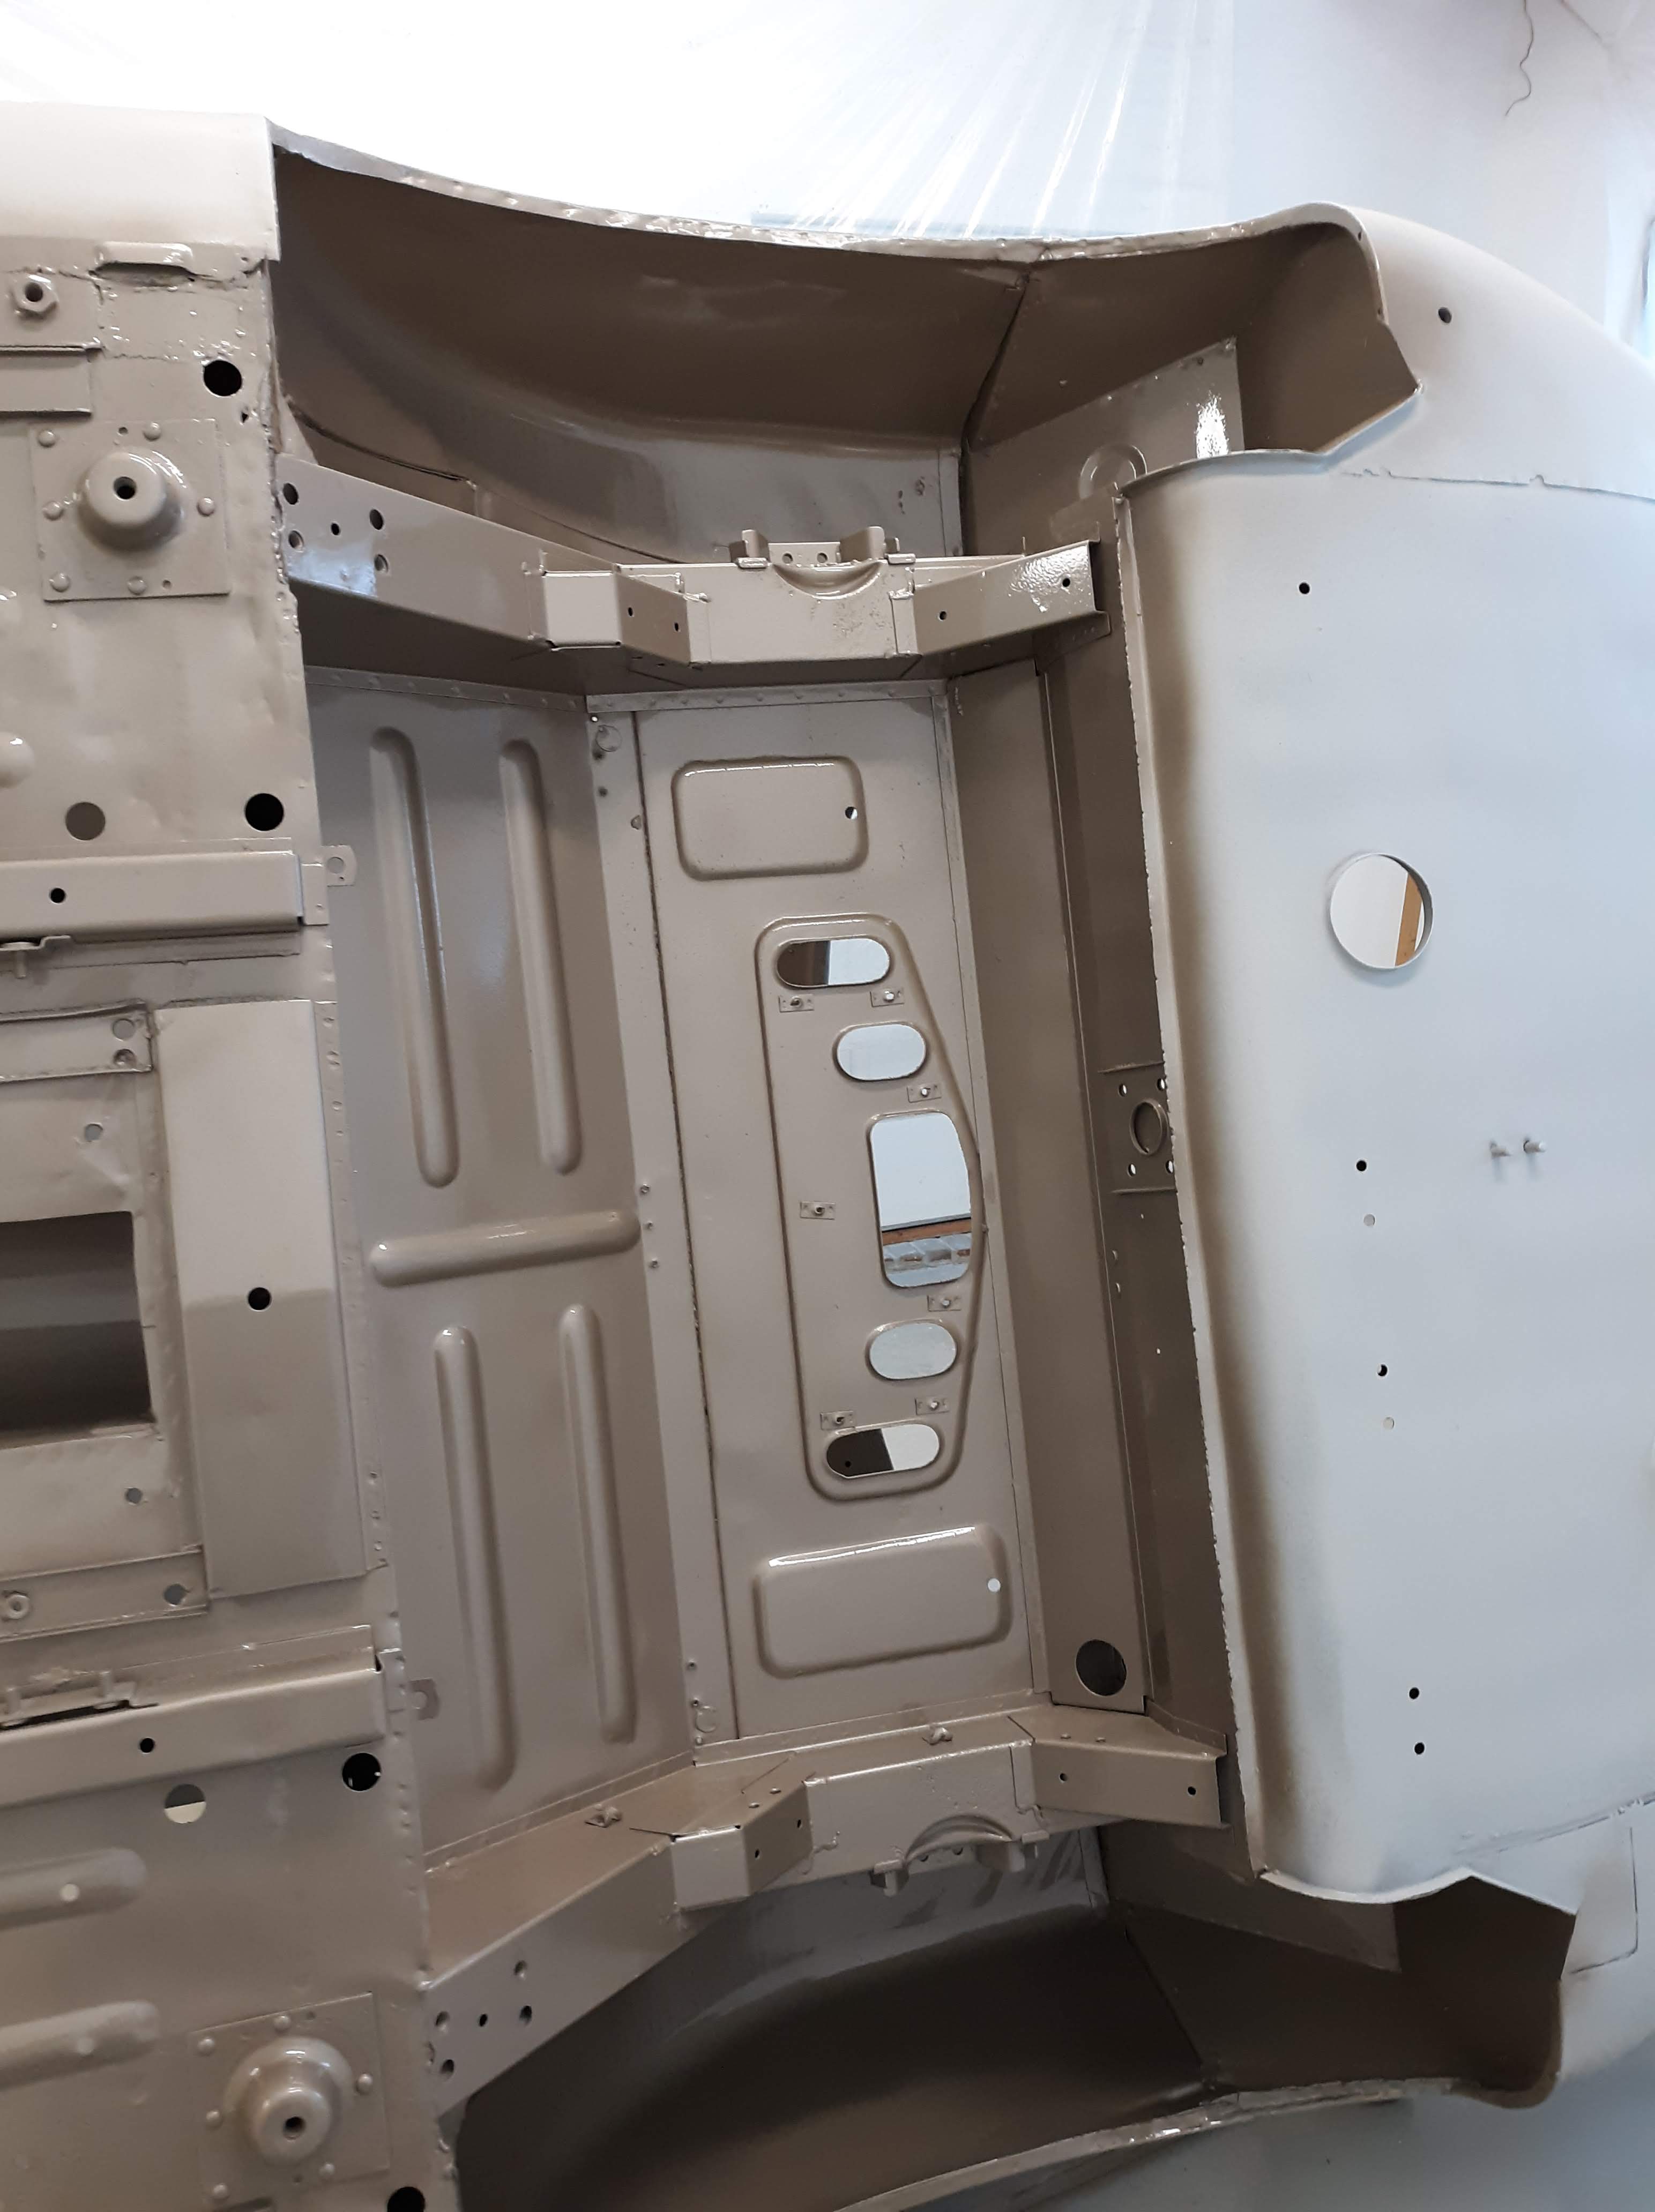
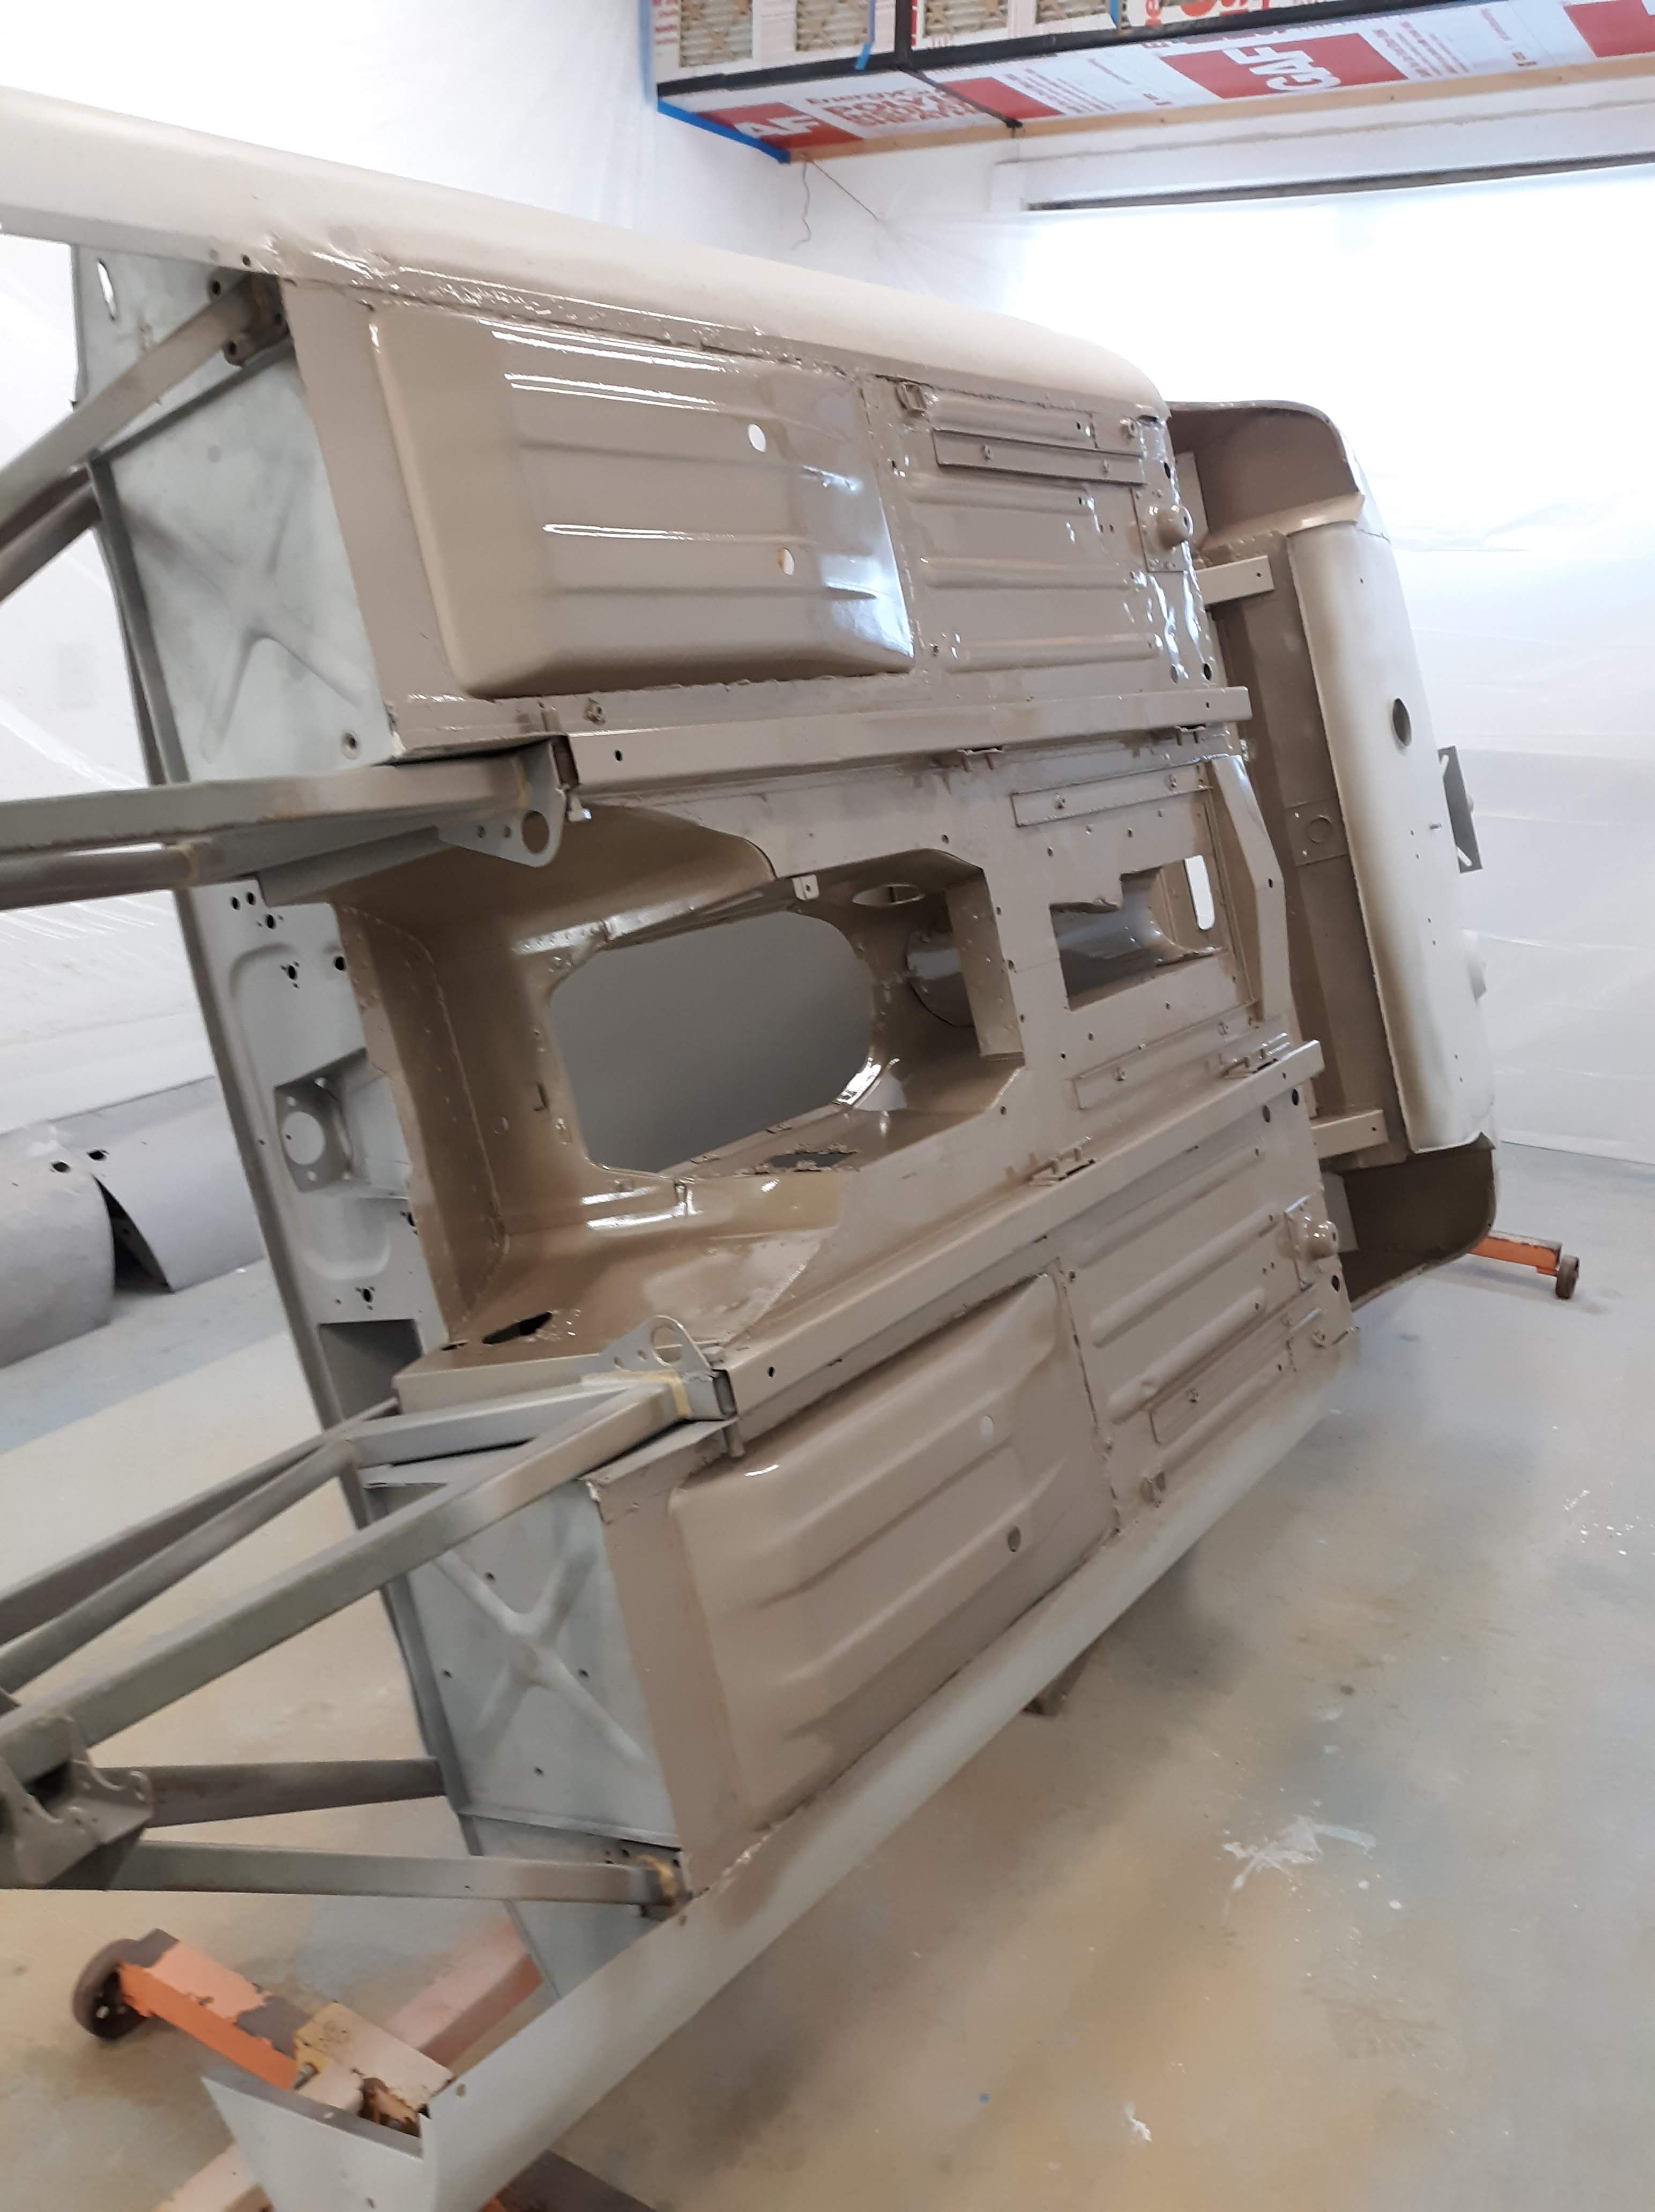
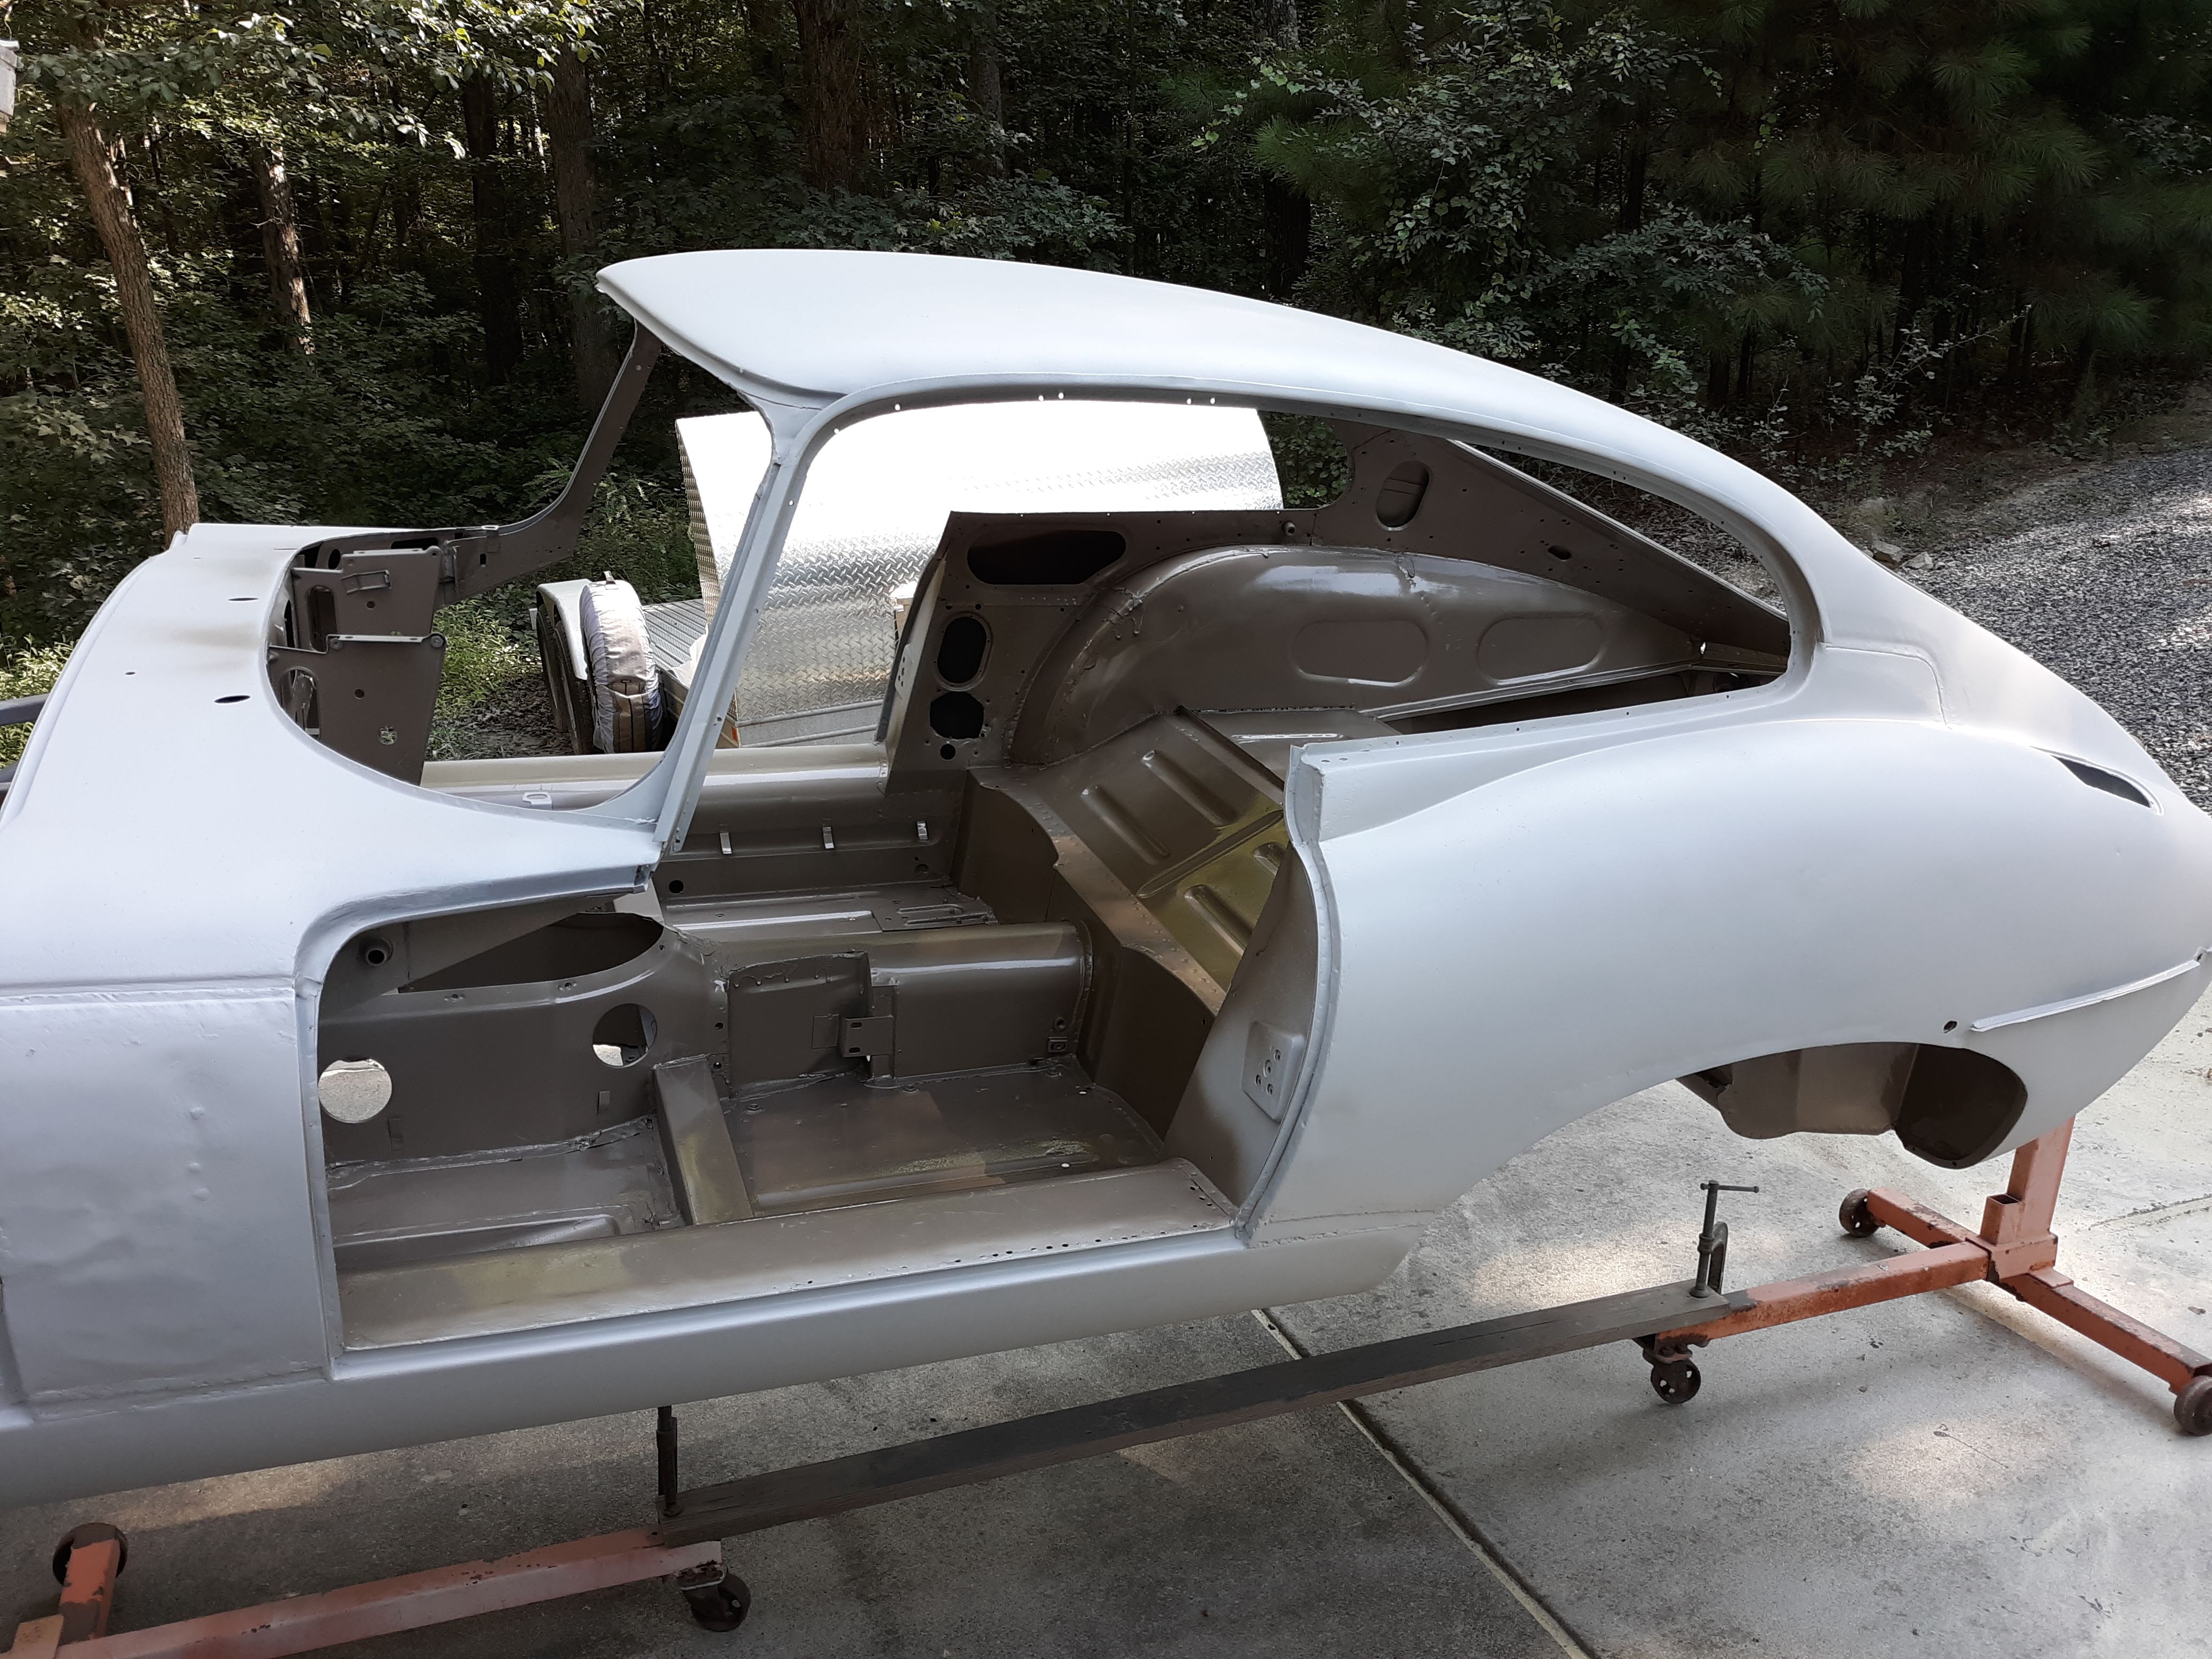
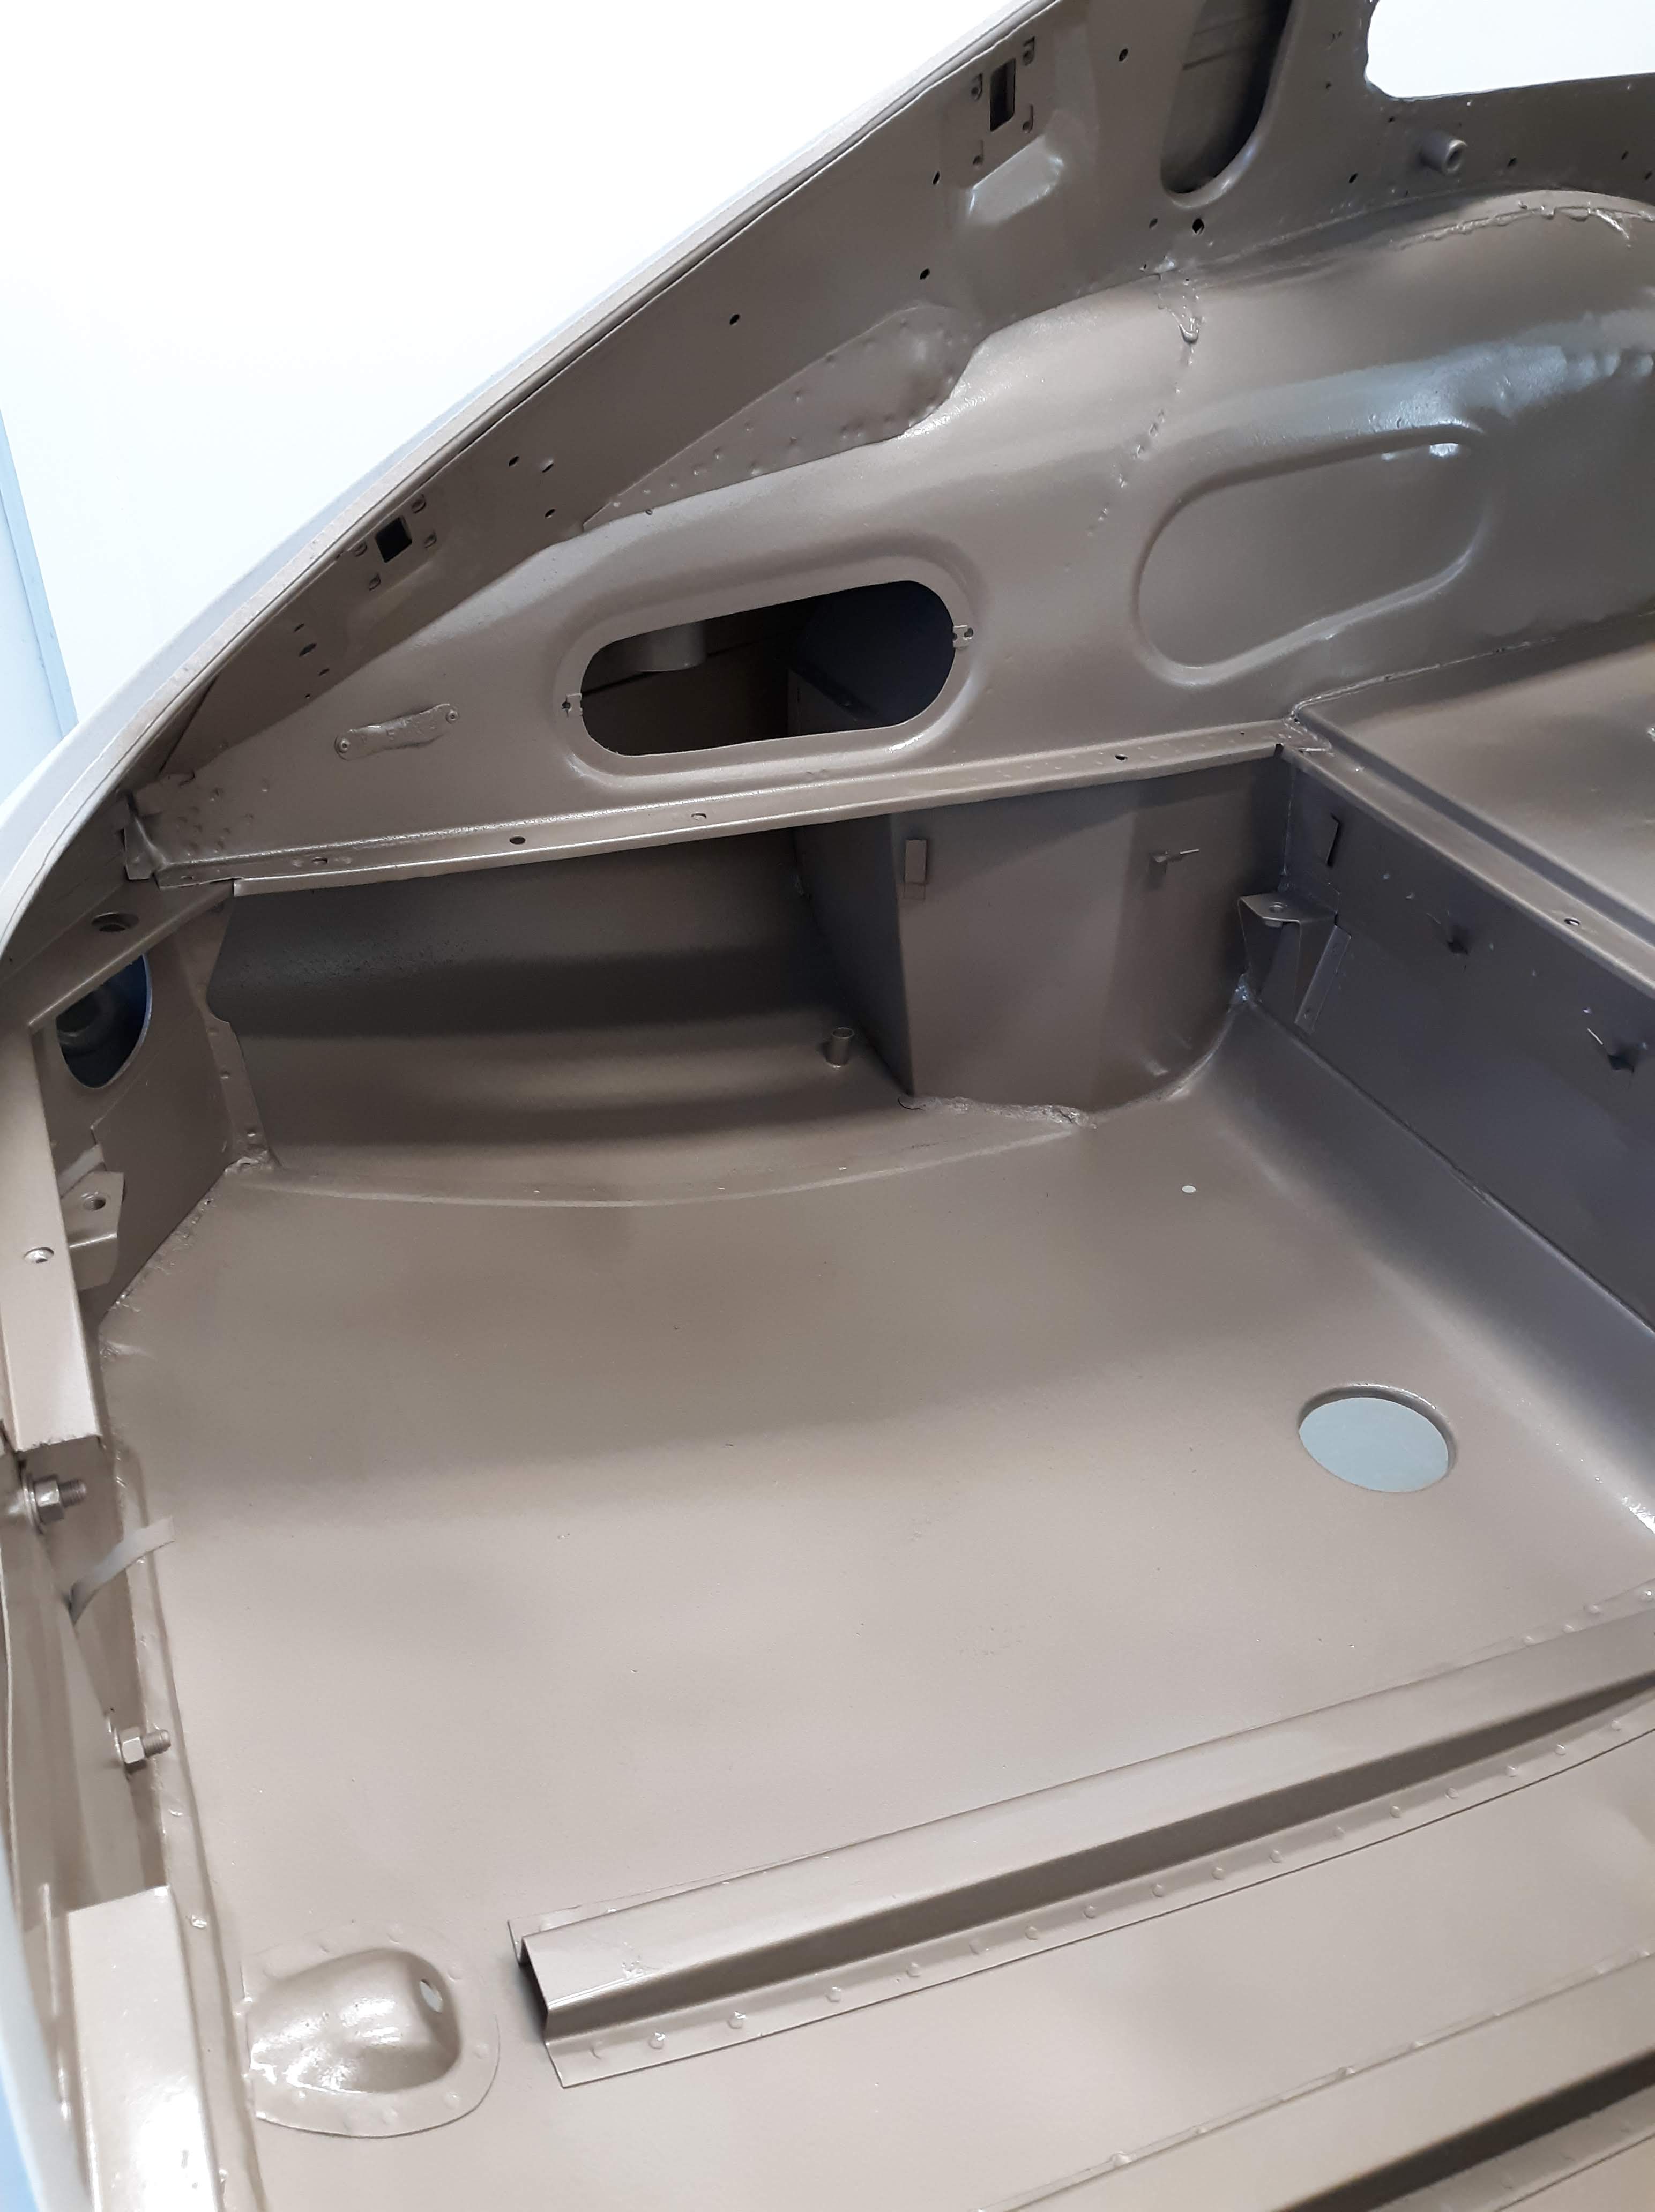
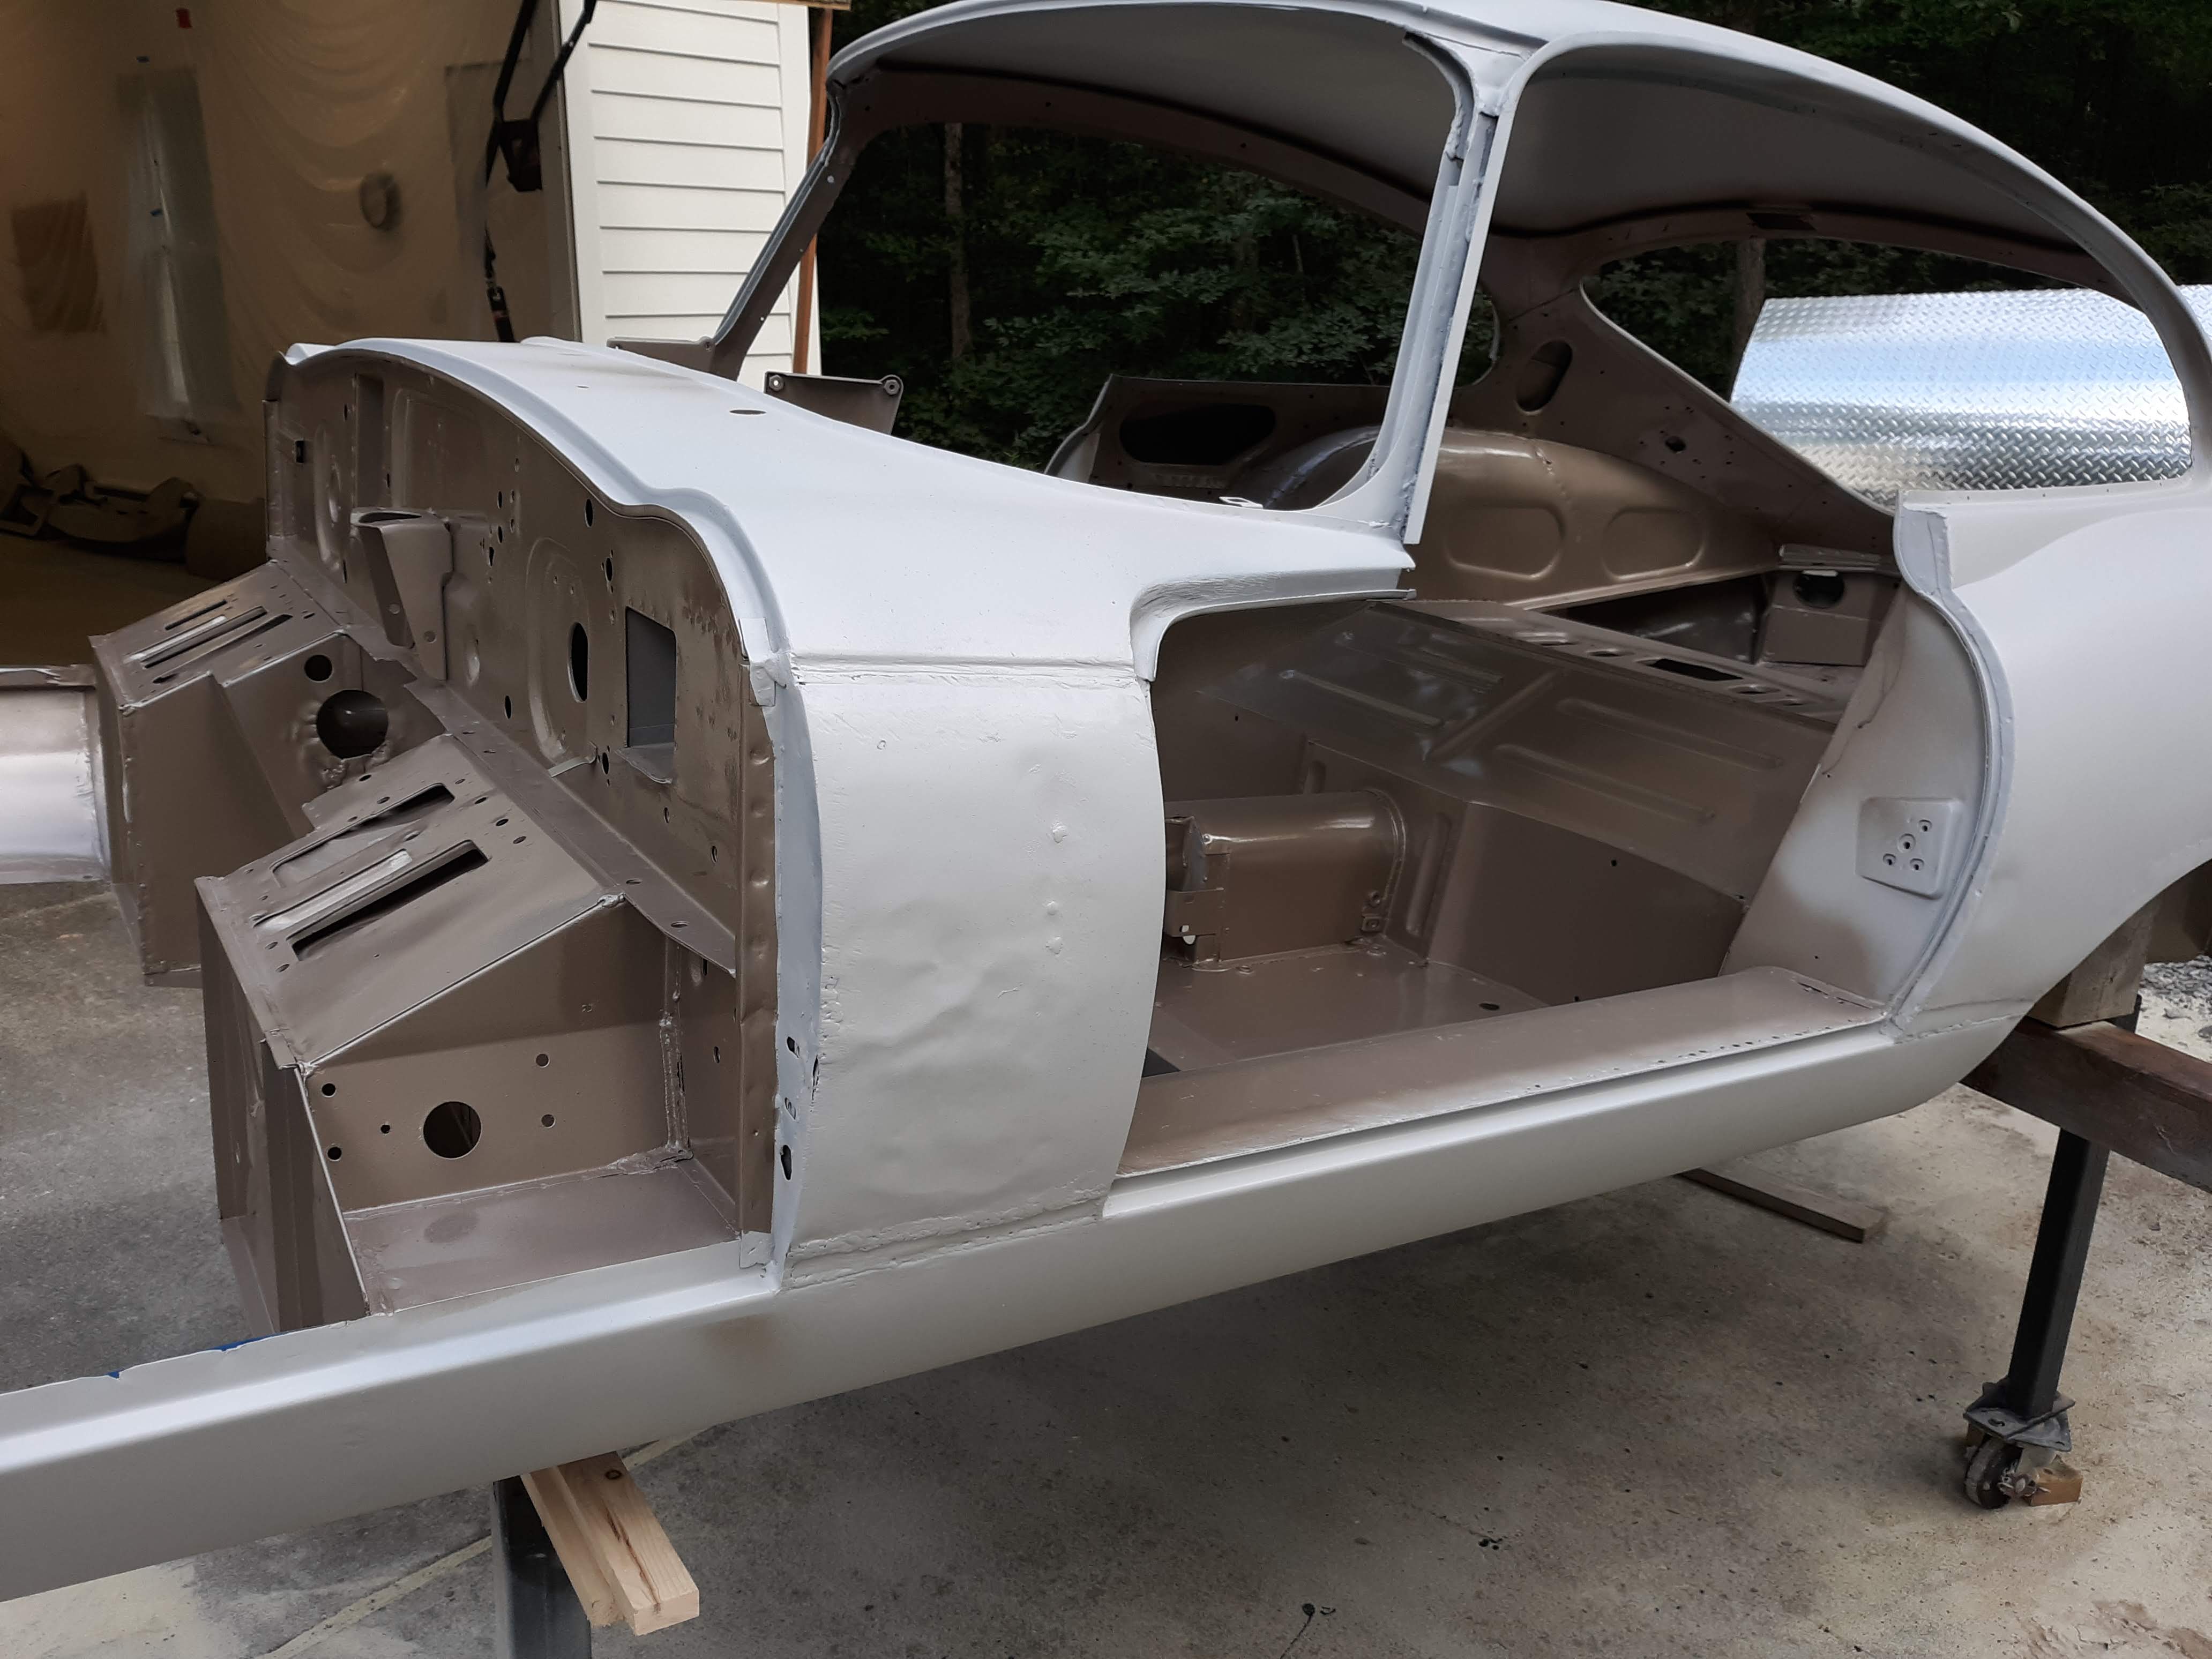
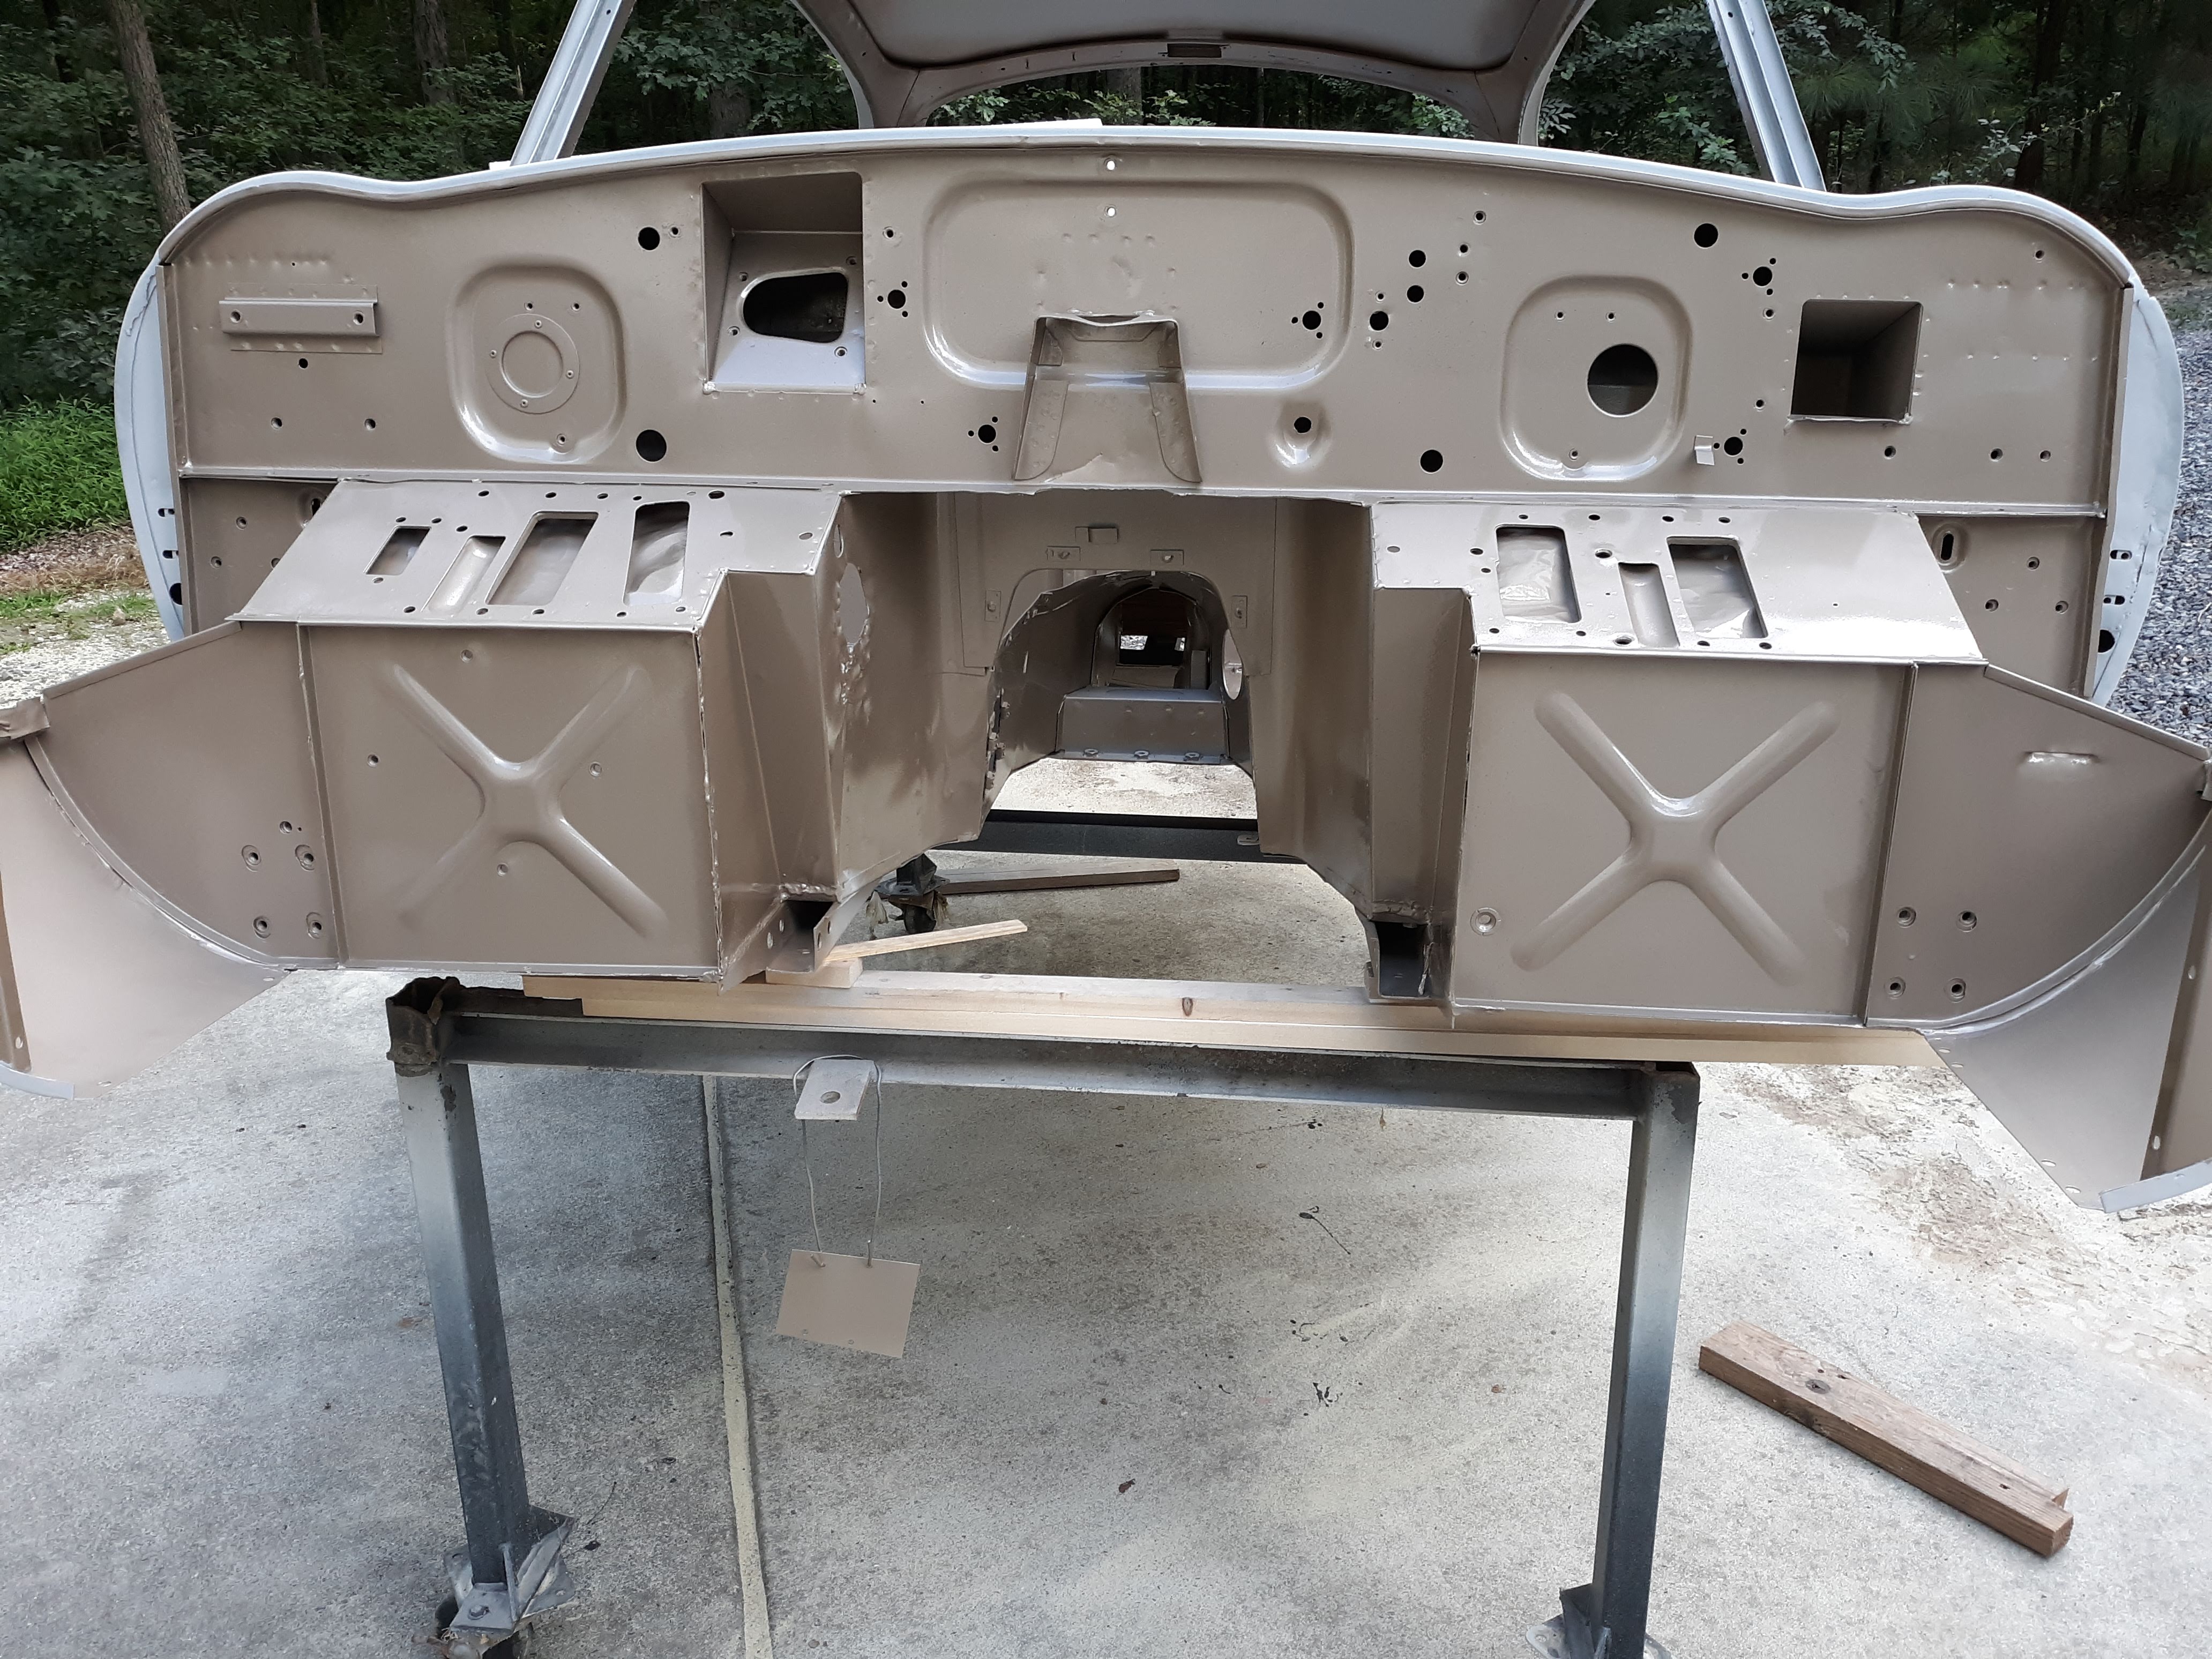
So that was the tutorial, here are some pictures. The color is Opalescent Golden Sand, as she was built with back in 1963. The epoxy primer is grey.
Here are 2 videos of the body shell immediately after the 2nd media blast. If you look closely you can see where I removed the lead loading at the various body seems. These videos and pictures shall serve as my final proof that the car is rust free!
Walkaround after media blast 1
Walkaround after media blast 2
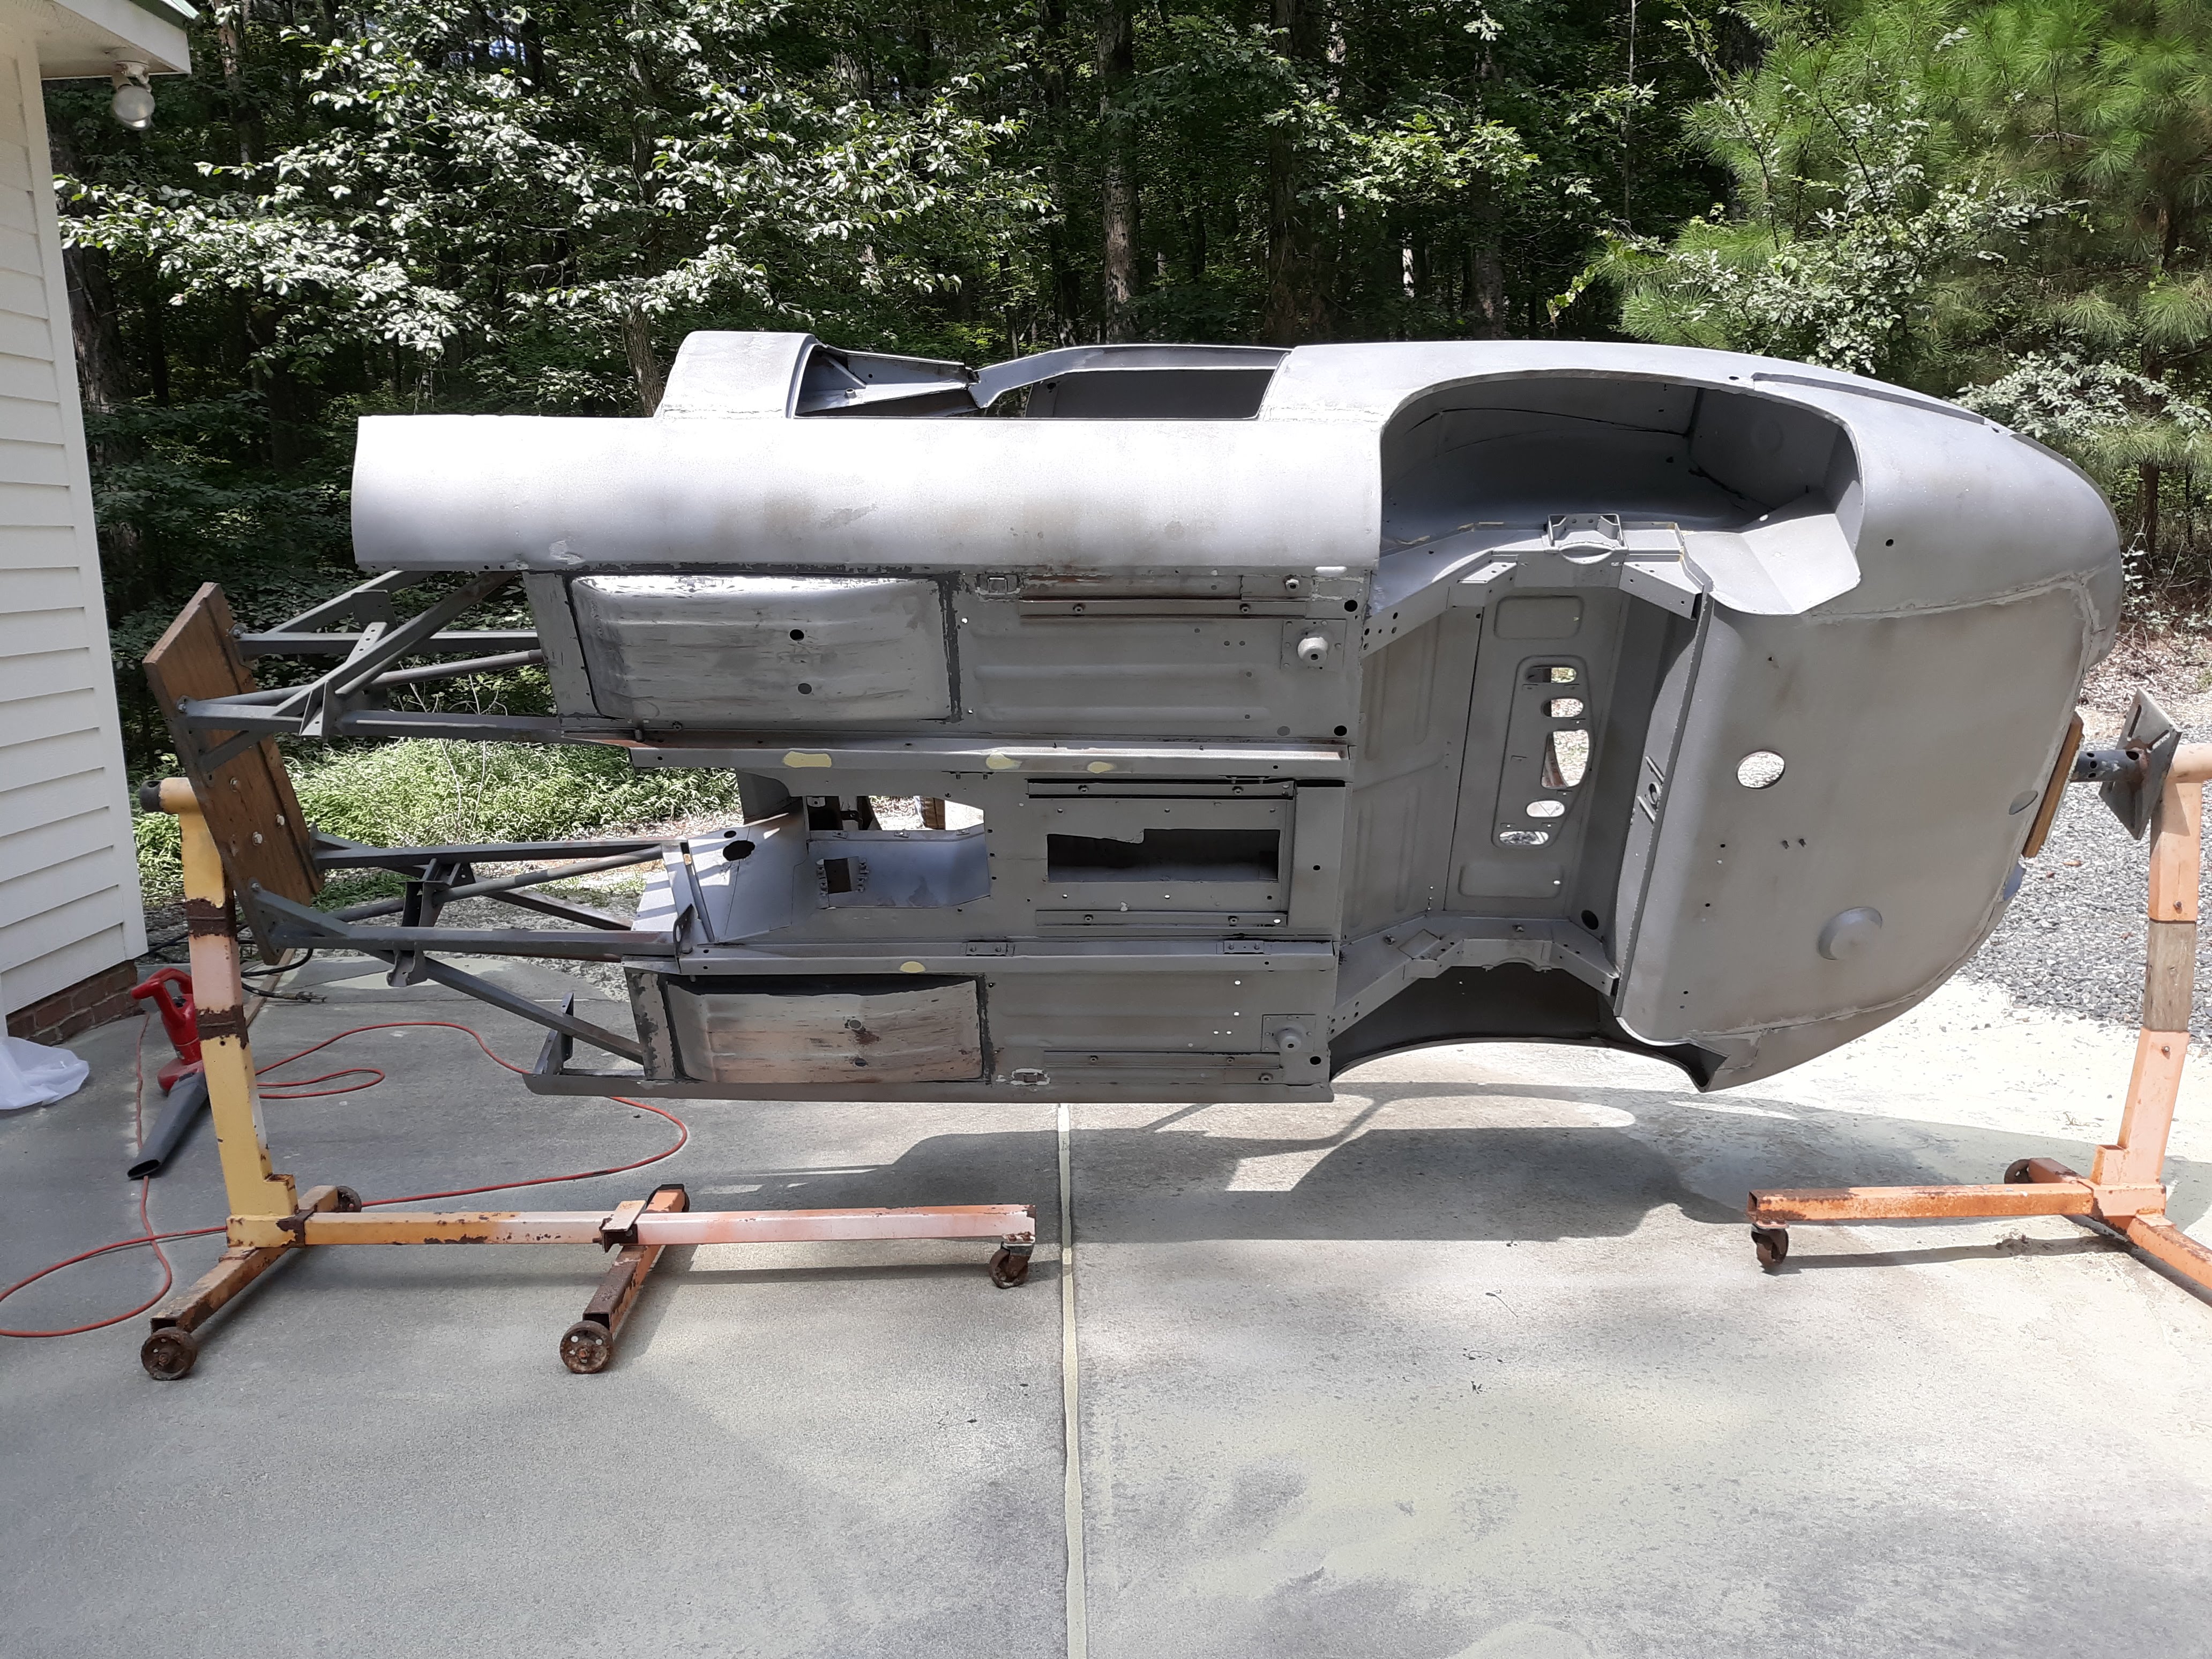
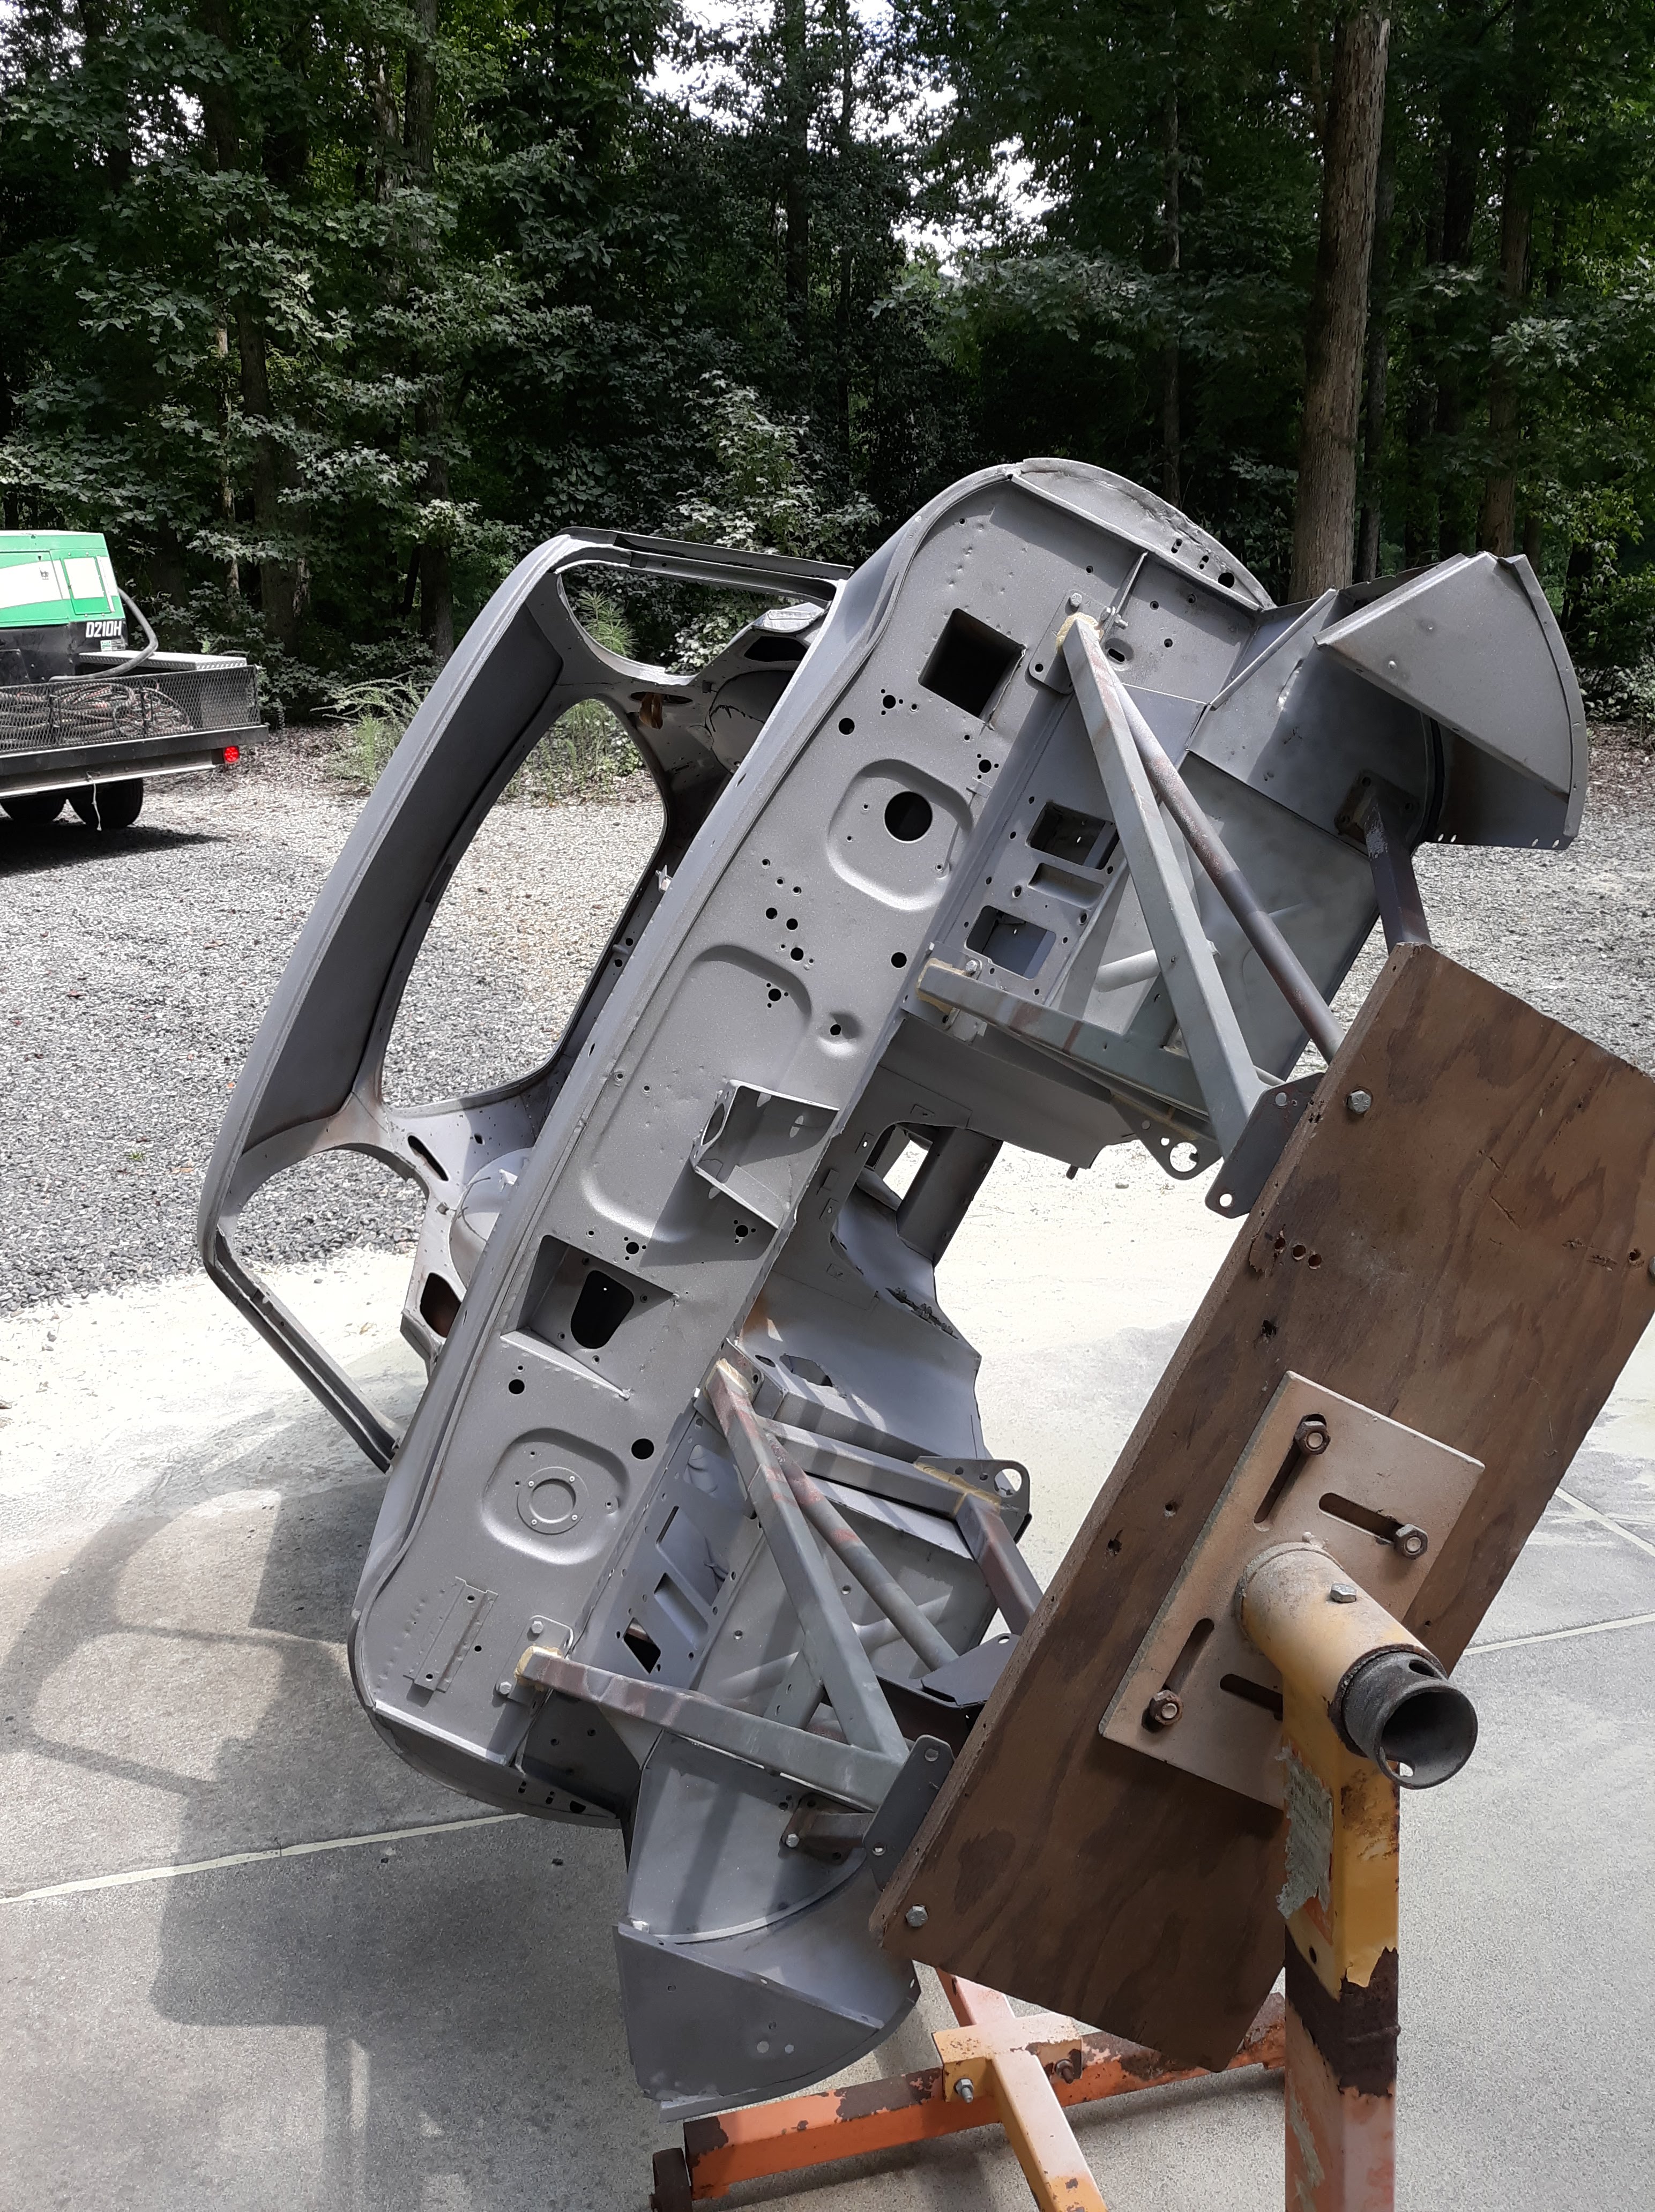


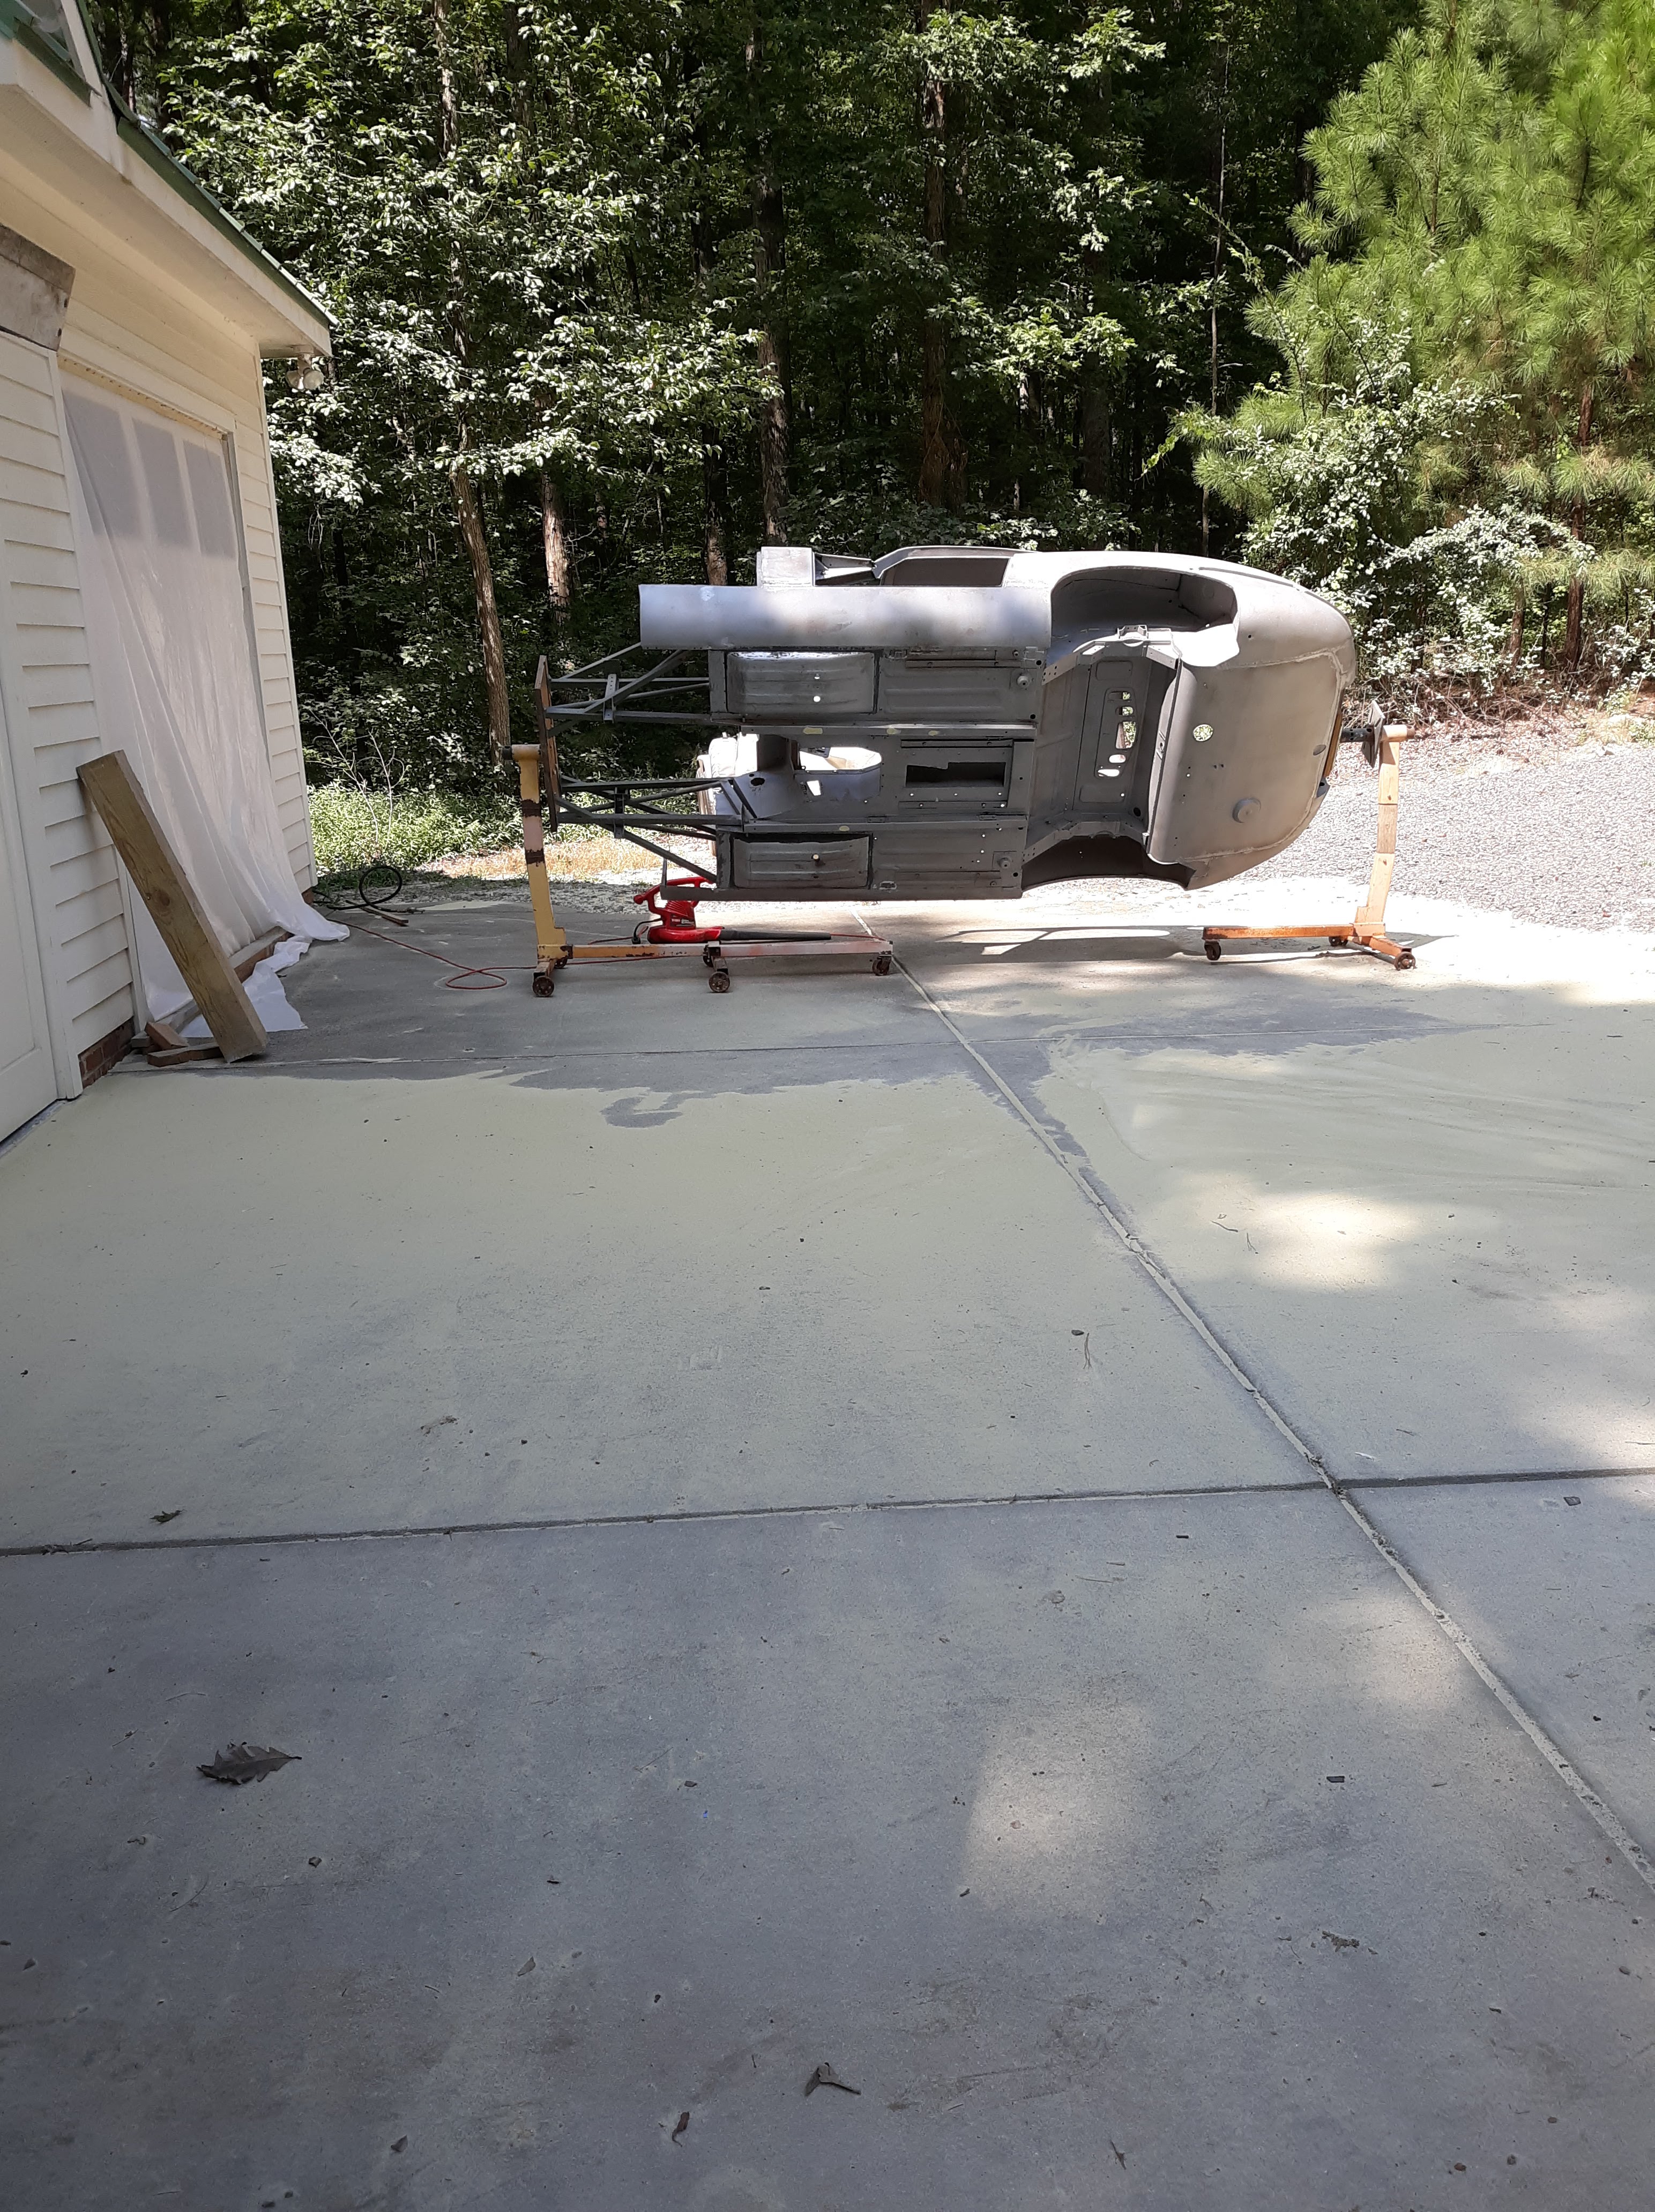
After media blasting – I’m having a sale on leftover sand!

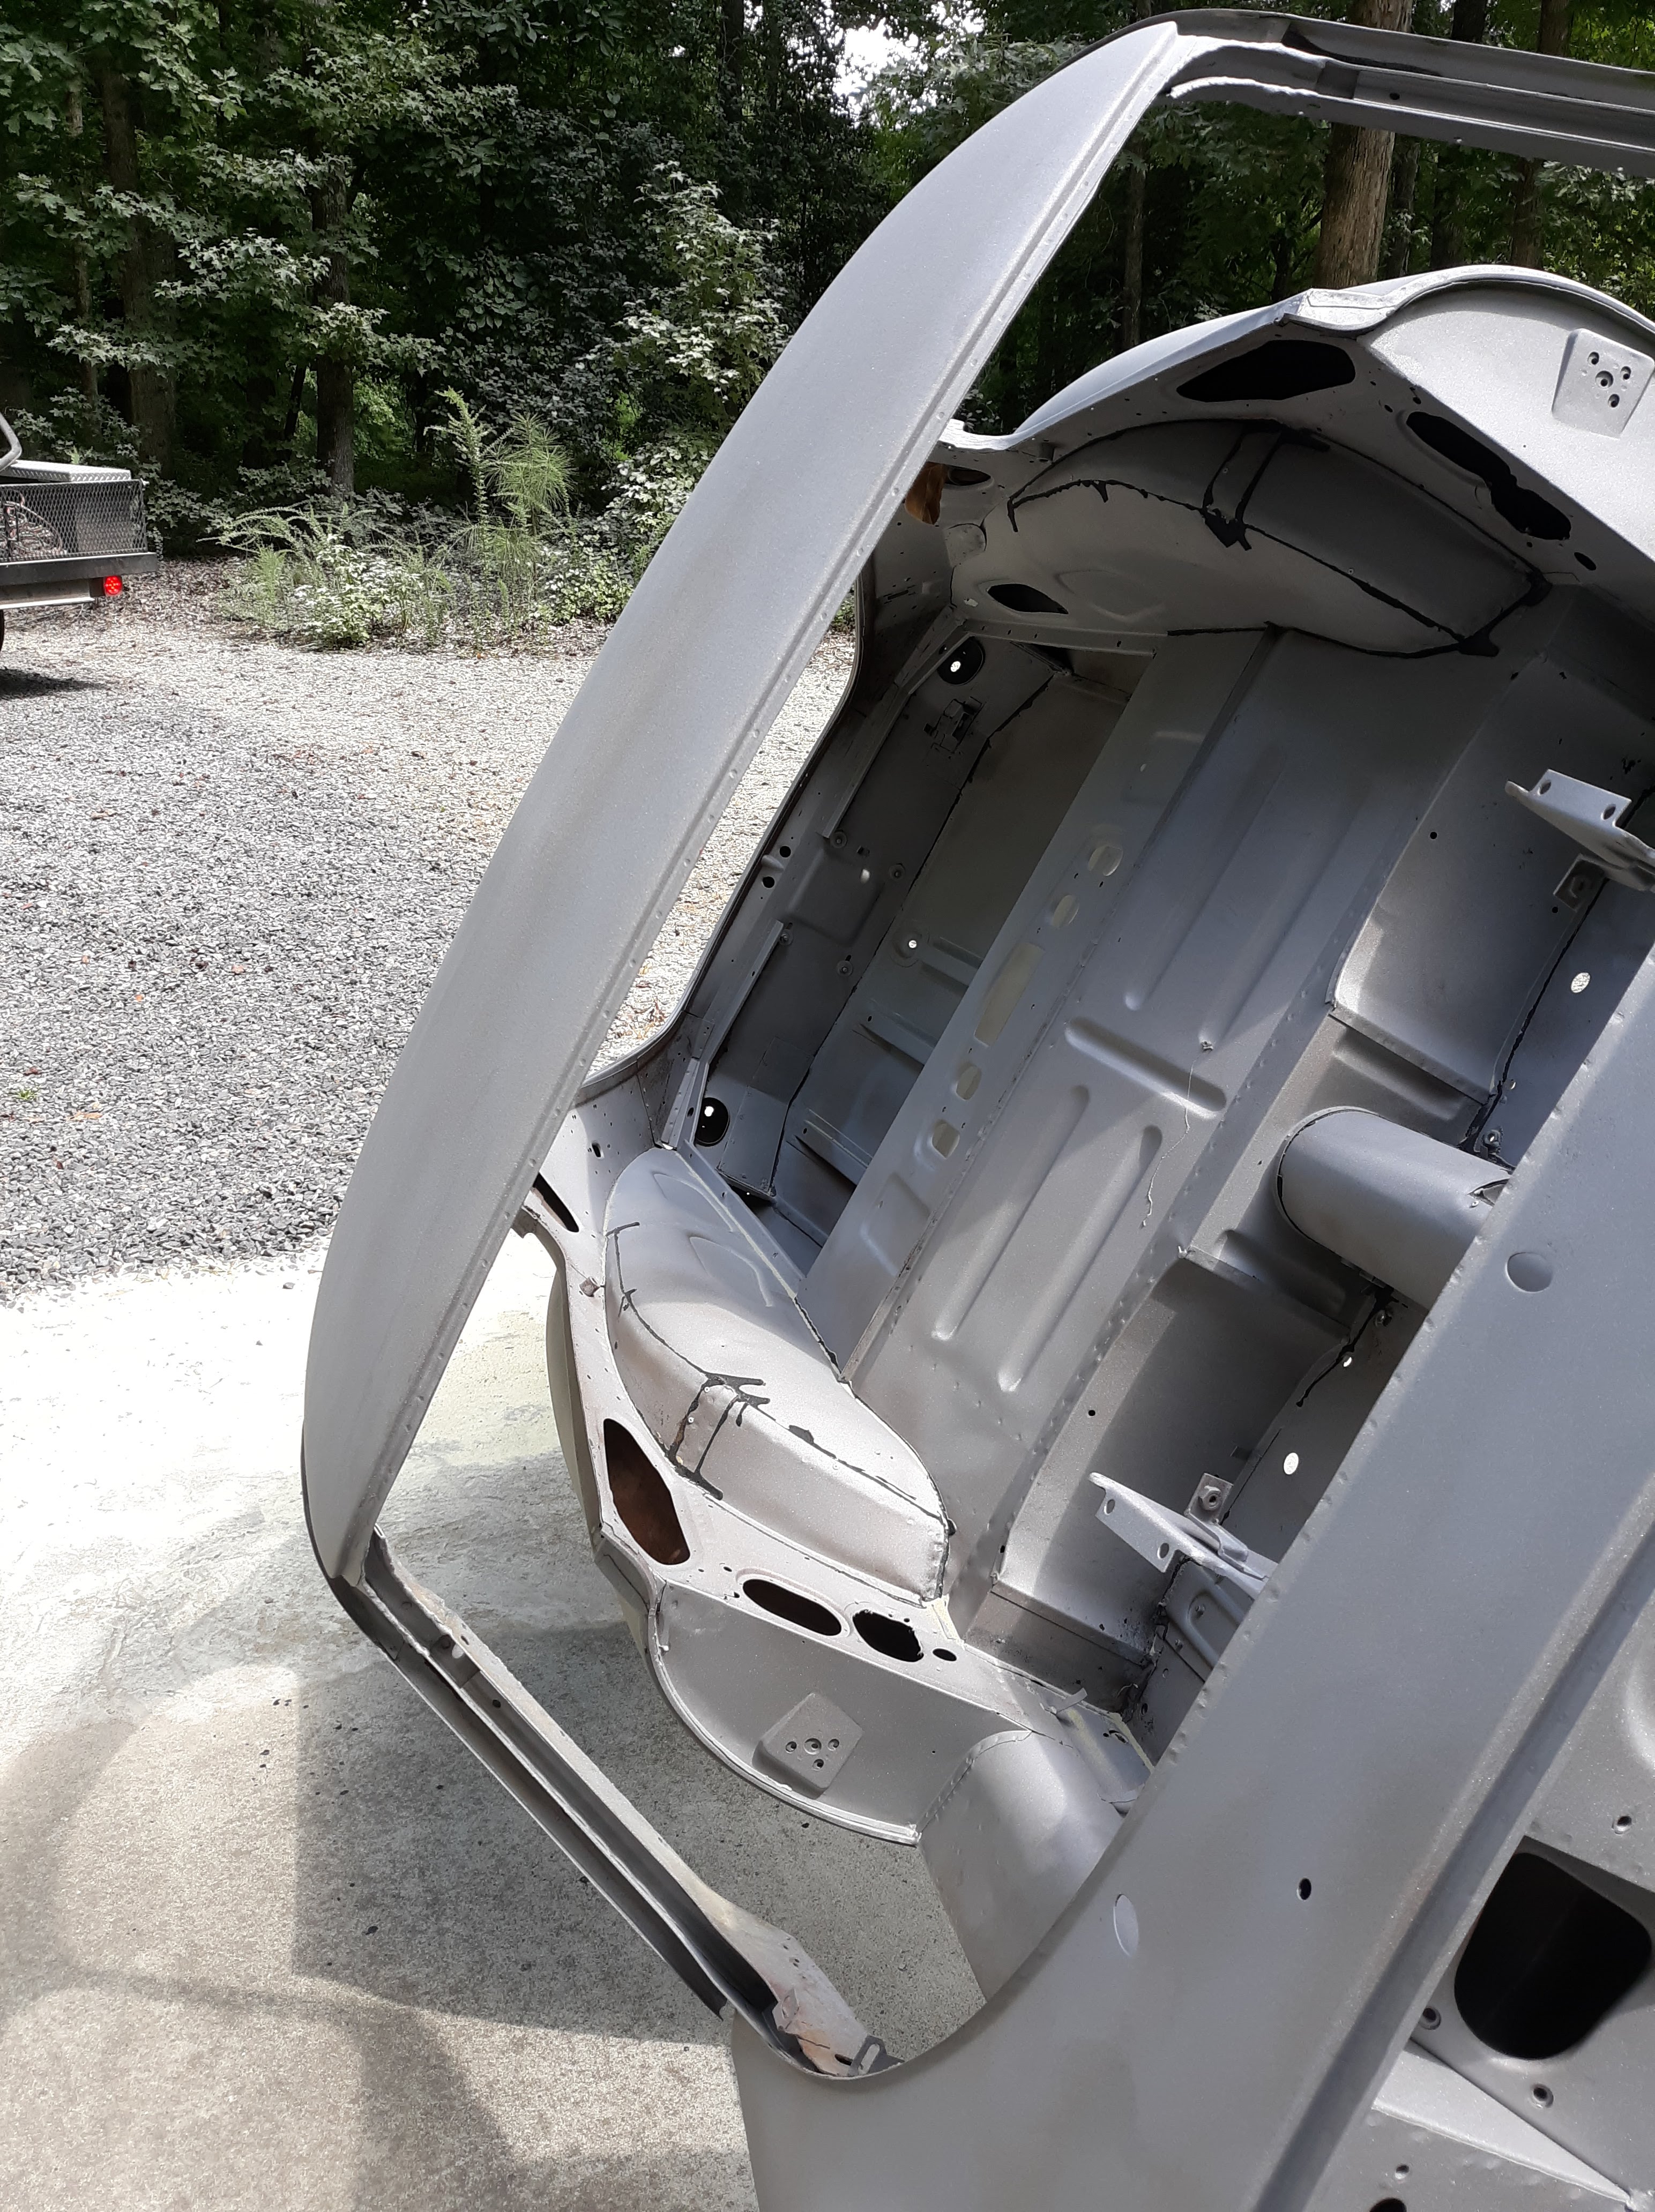
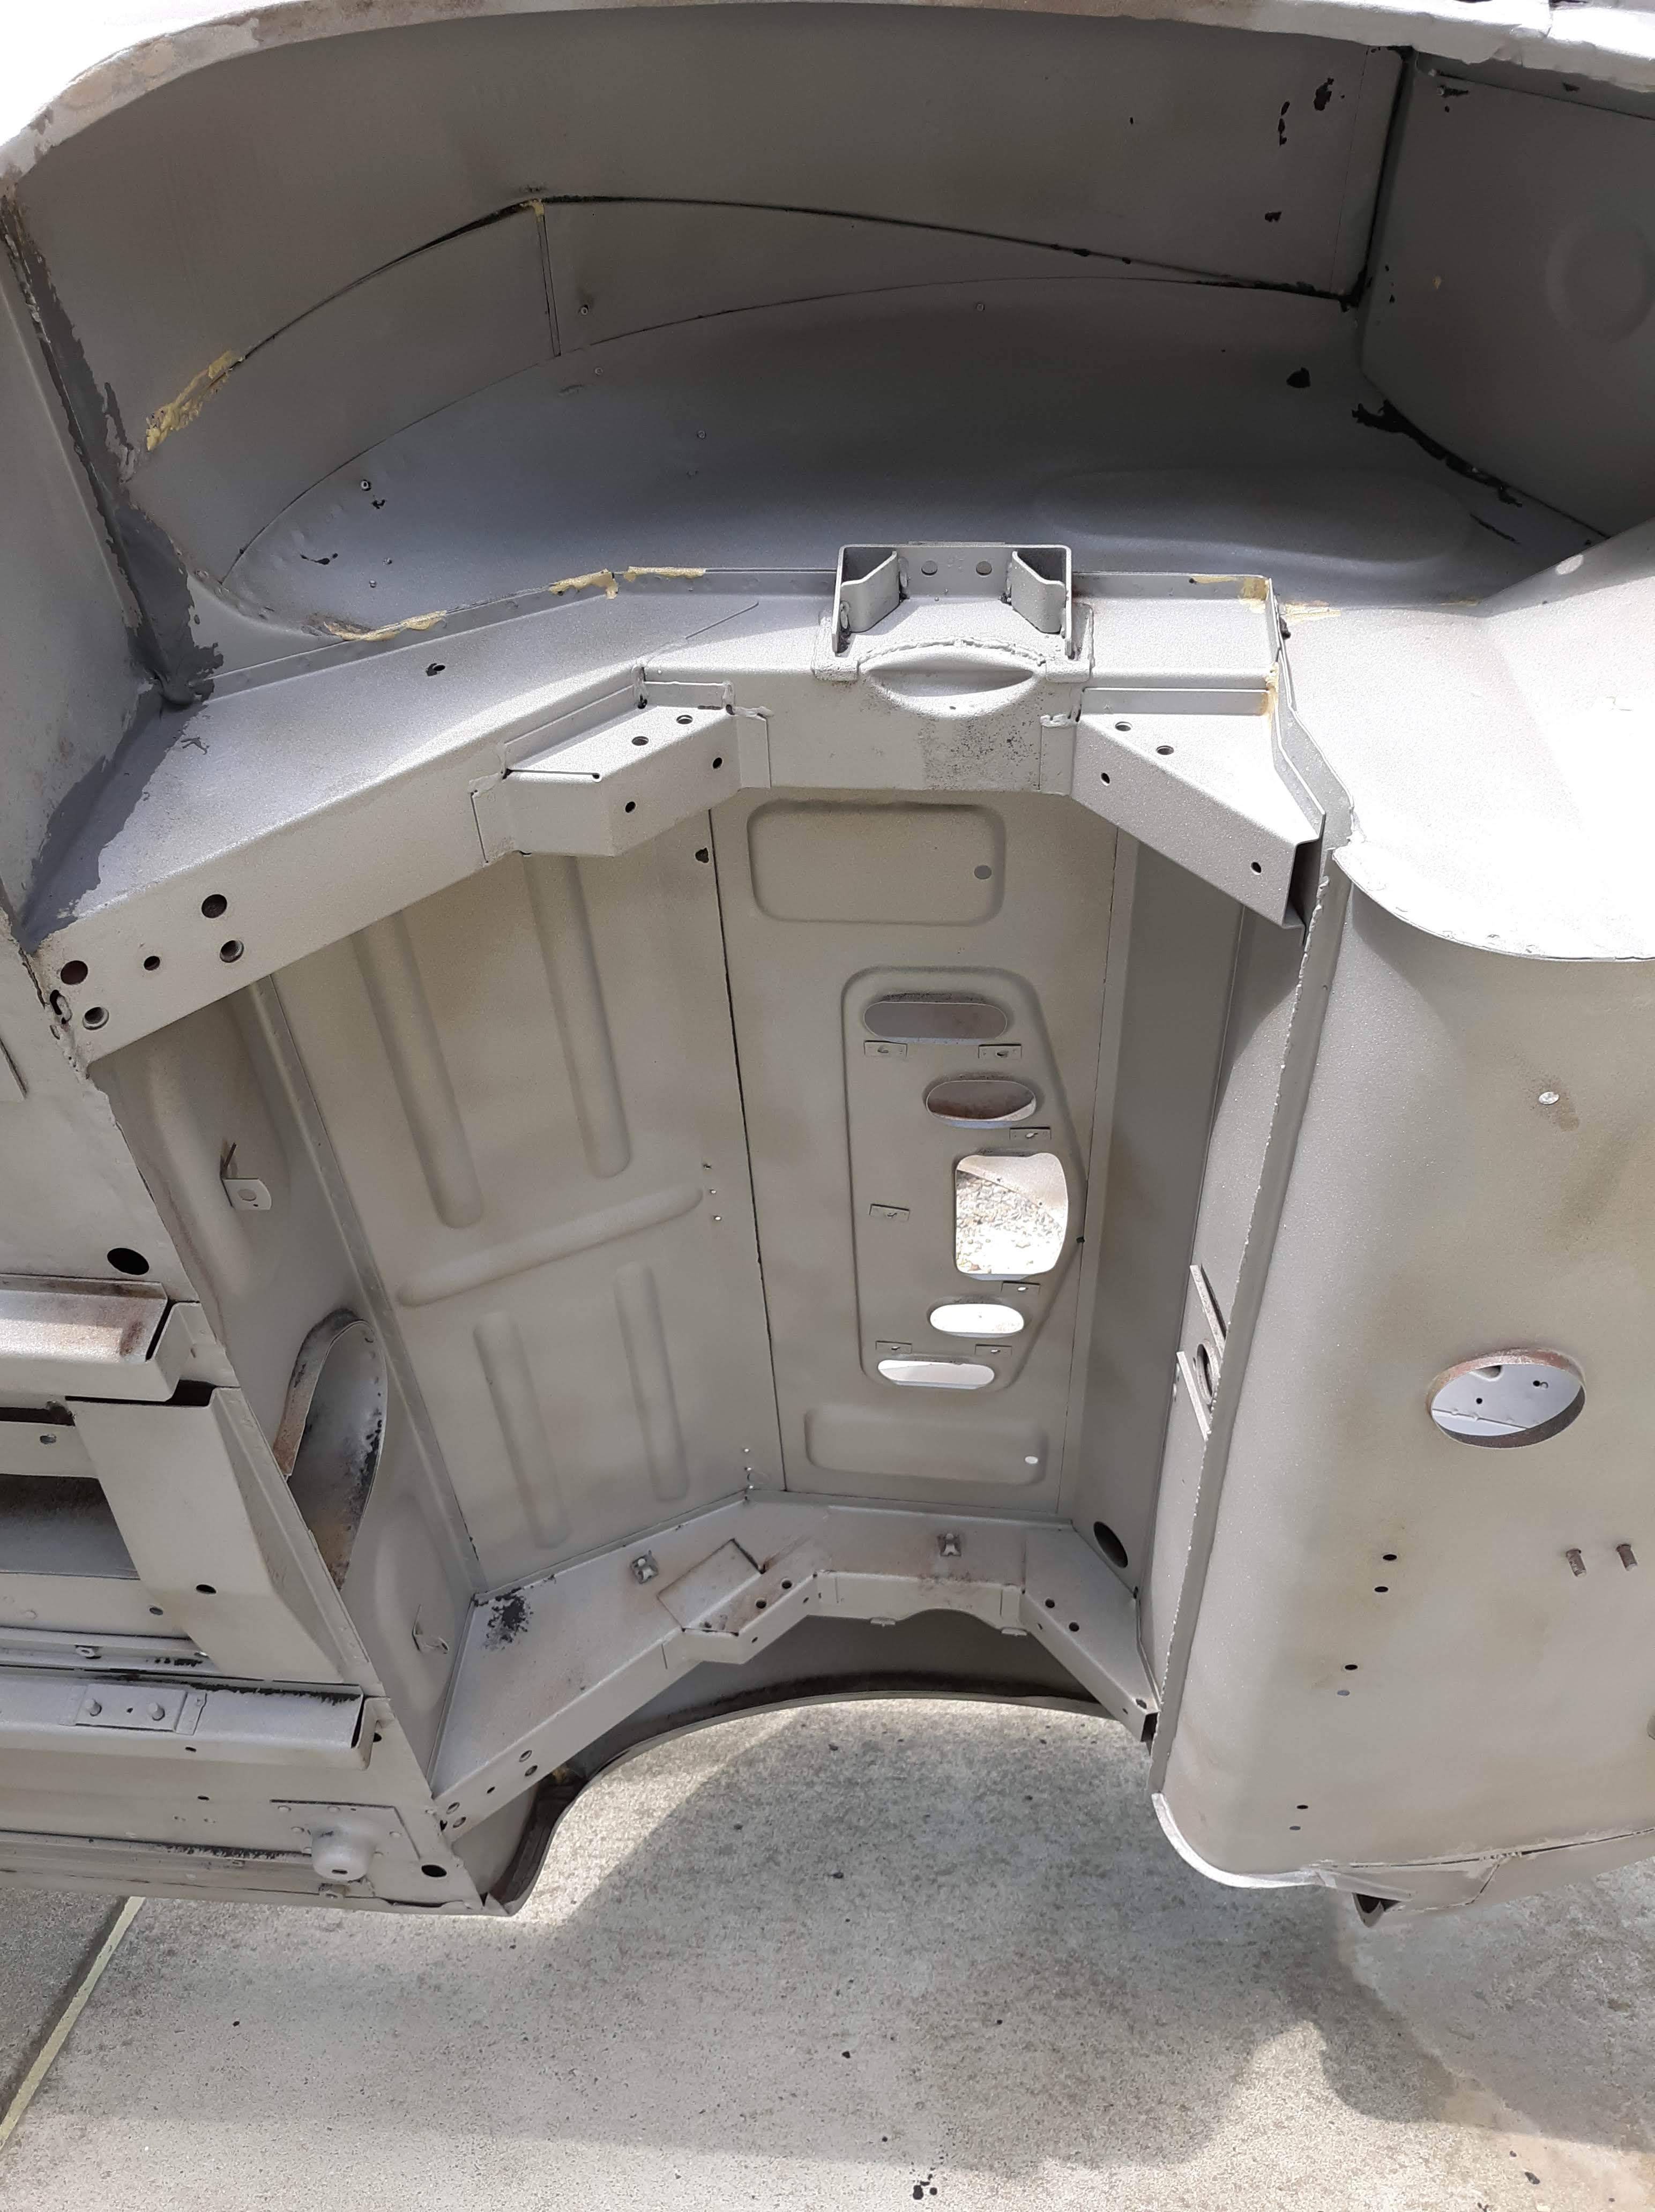
The following pictures show the results after applying epoxy primer.

Metal cleaner used as a final prep on the bare metal.
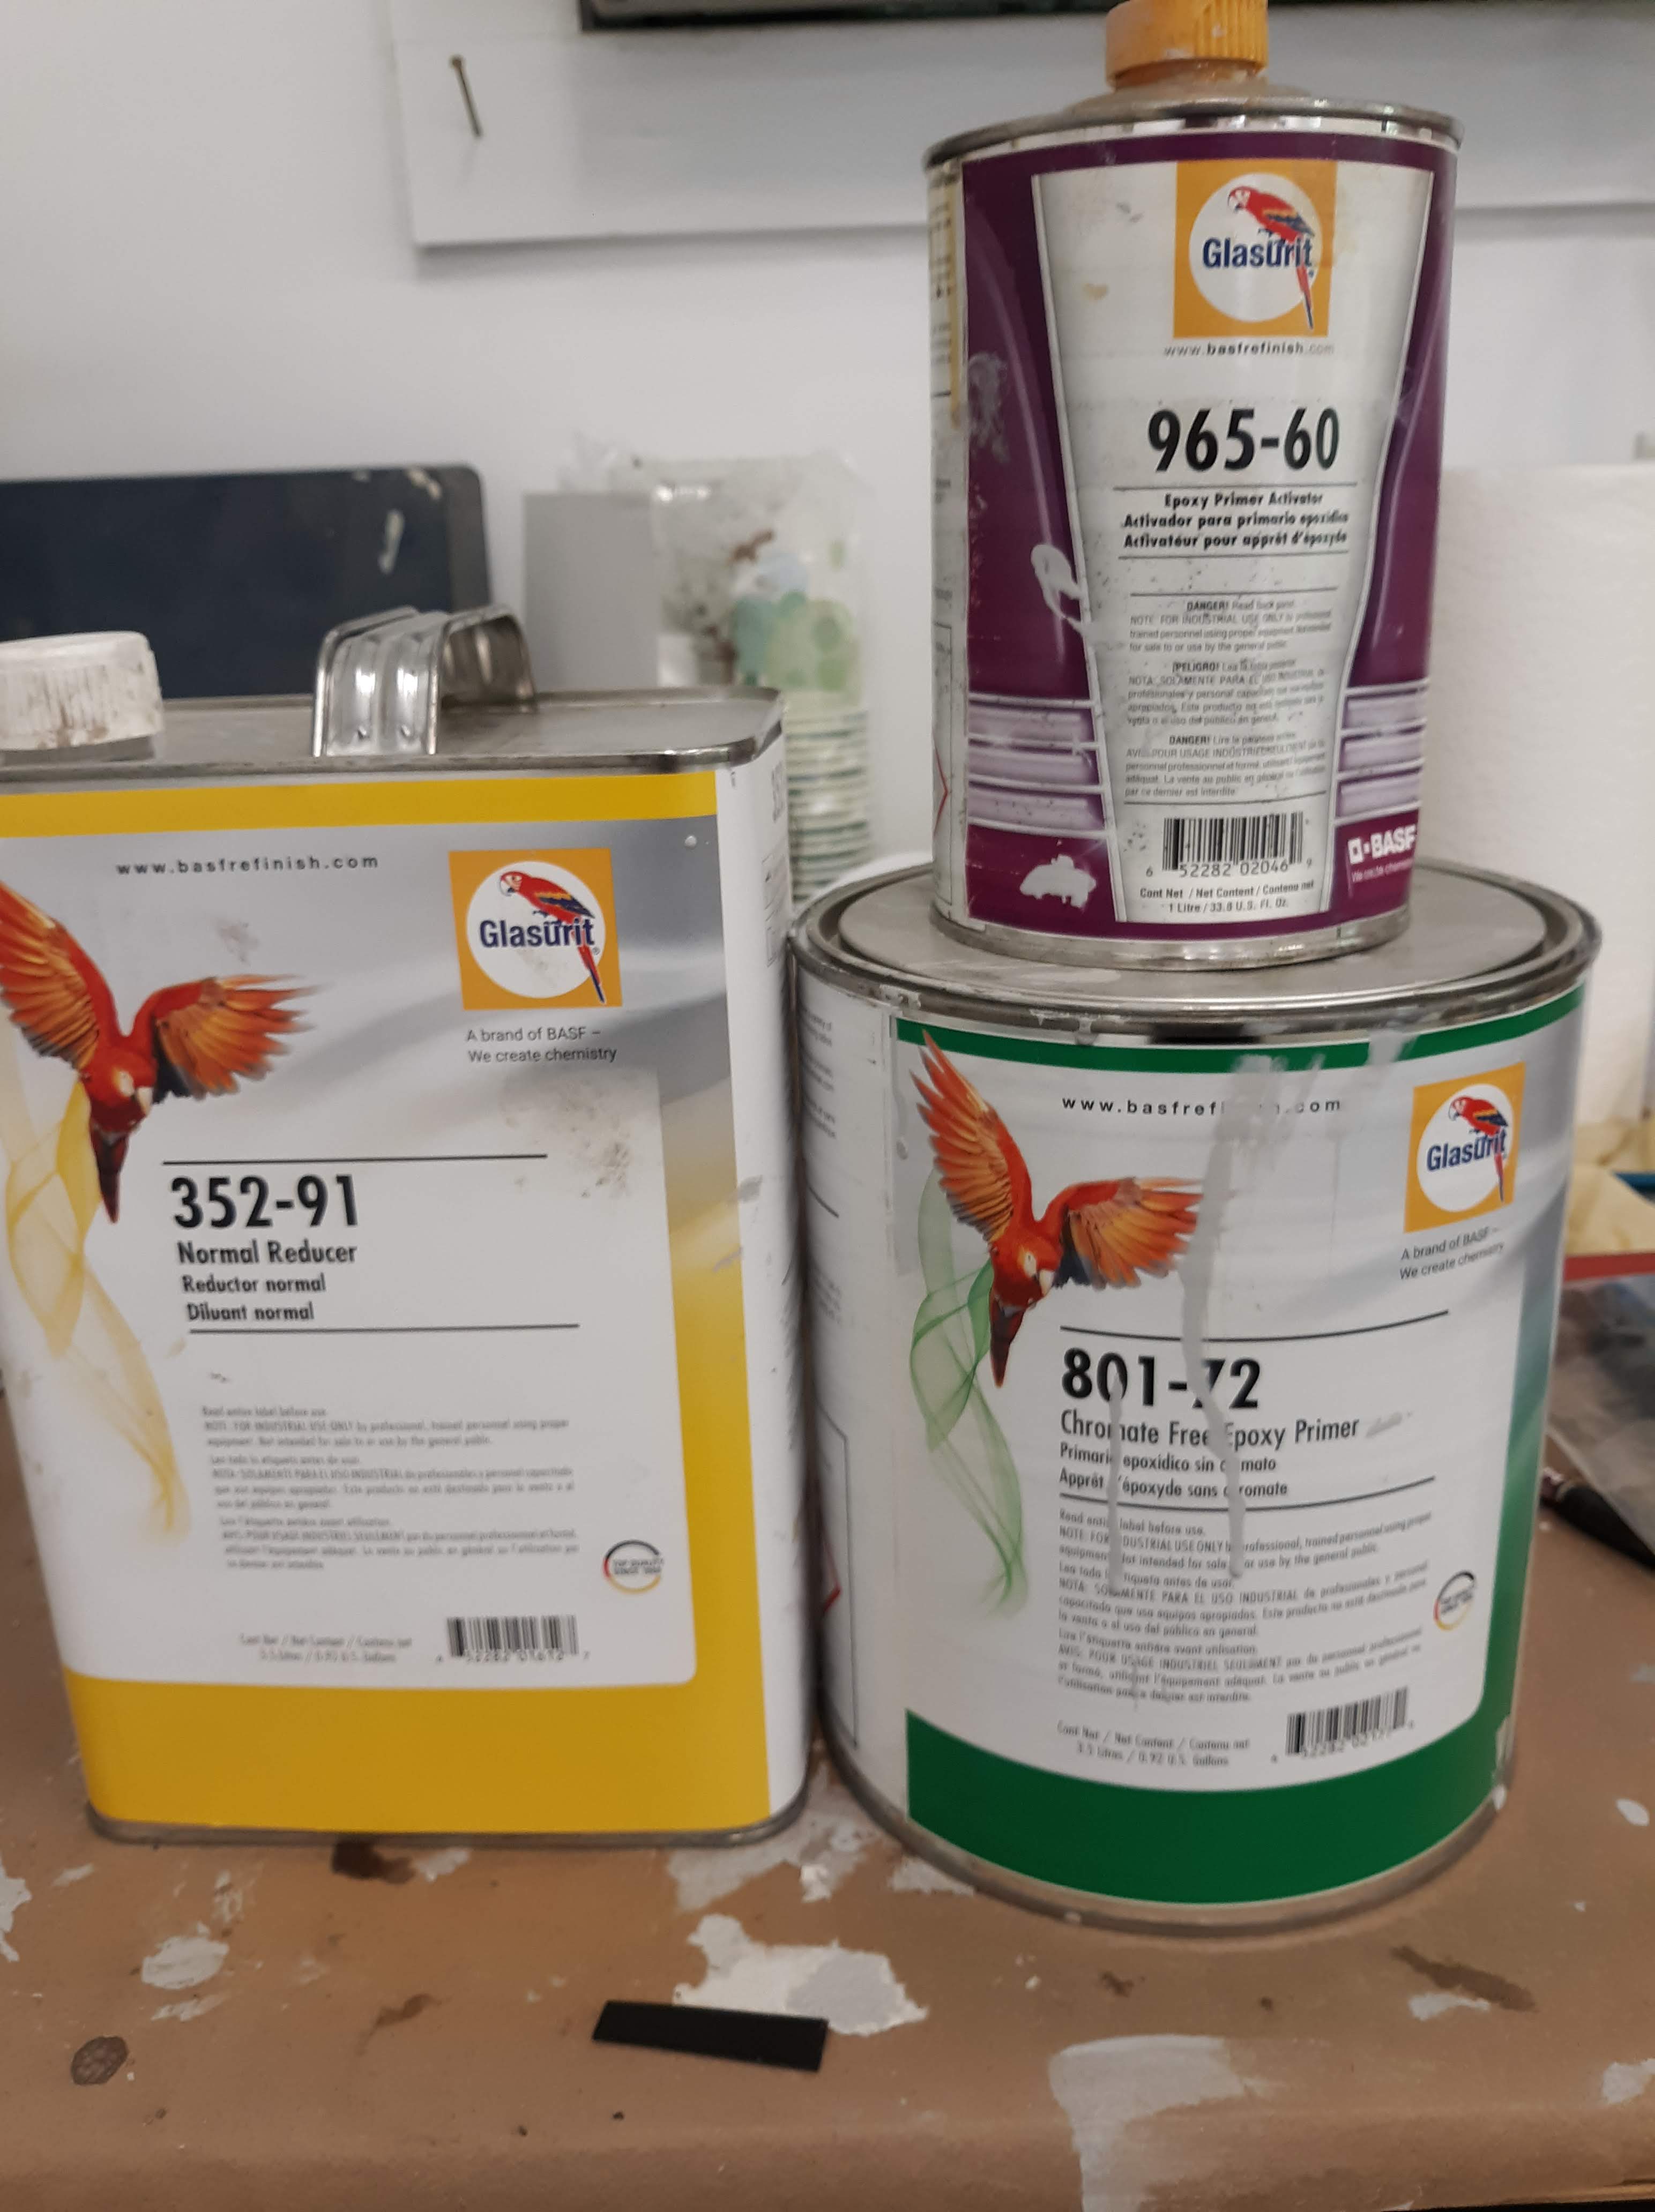
Epoxy primer components.


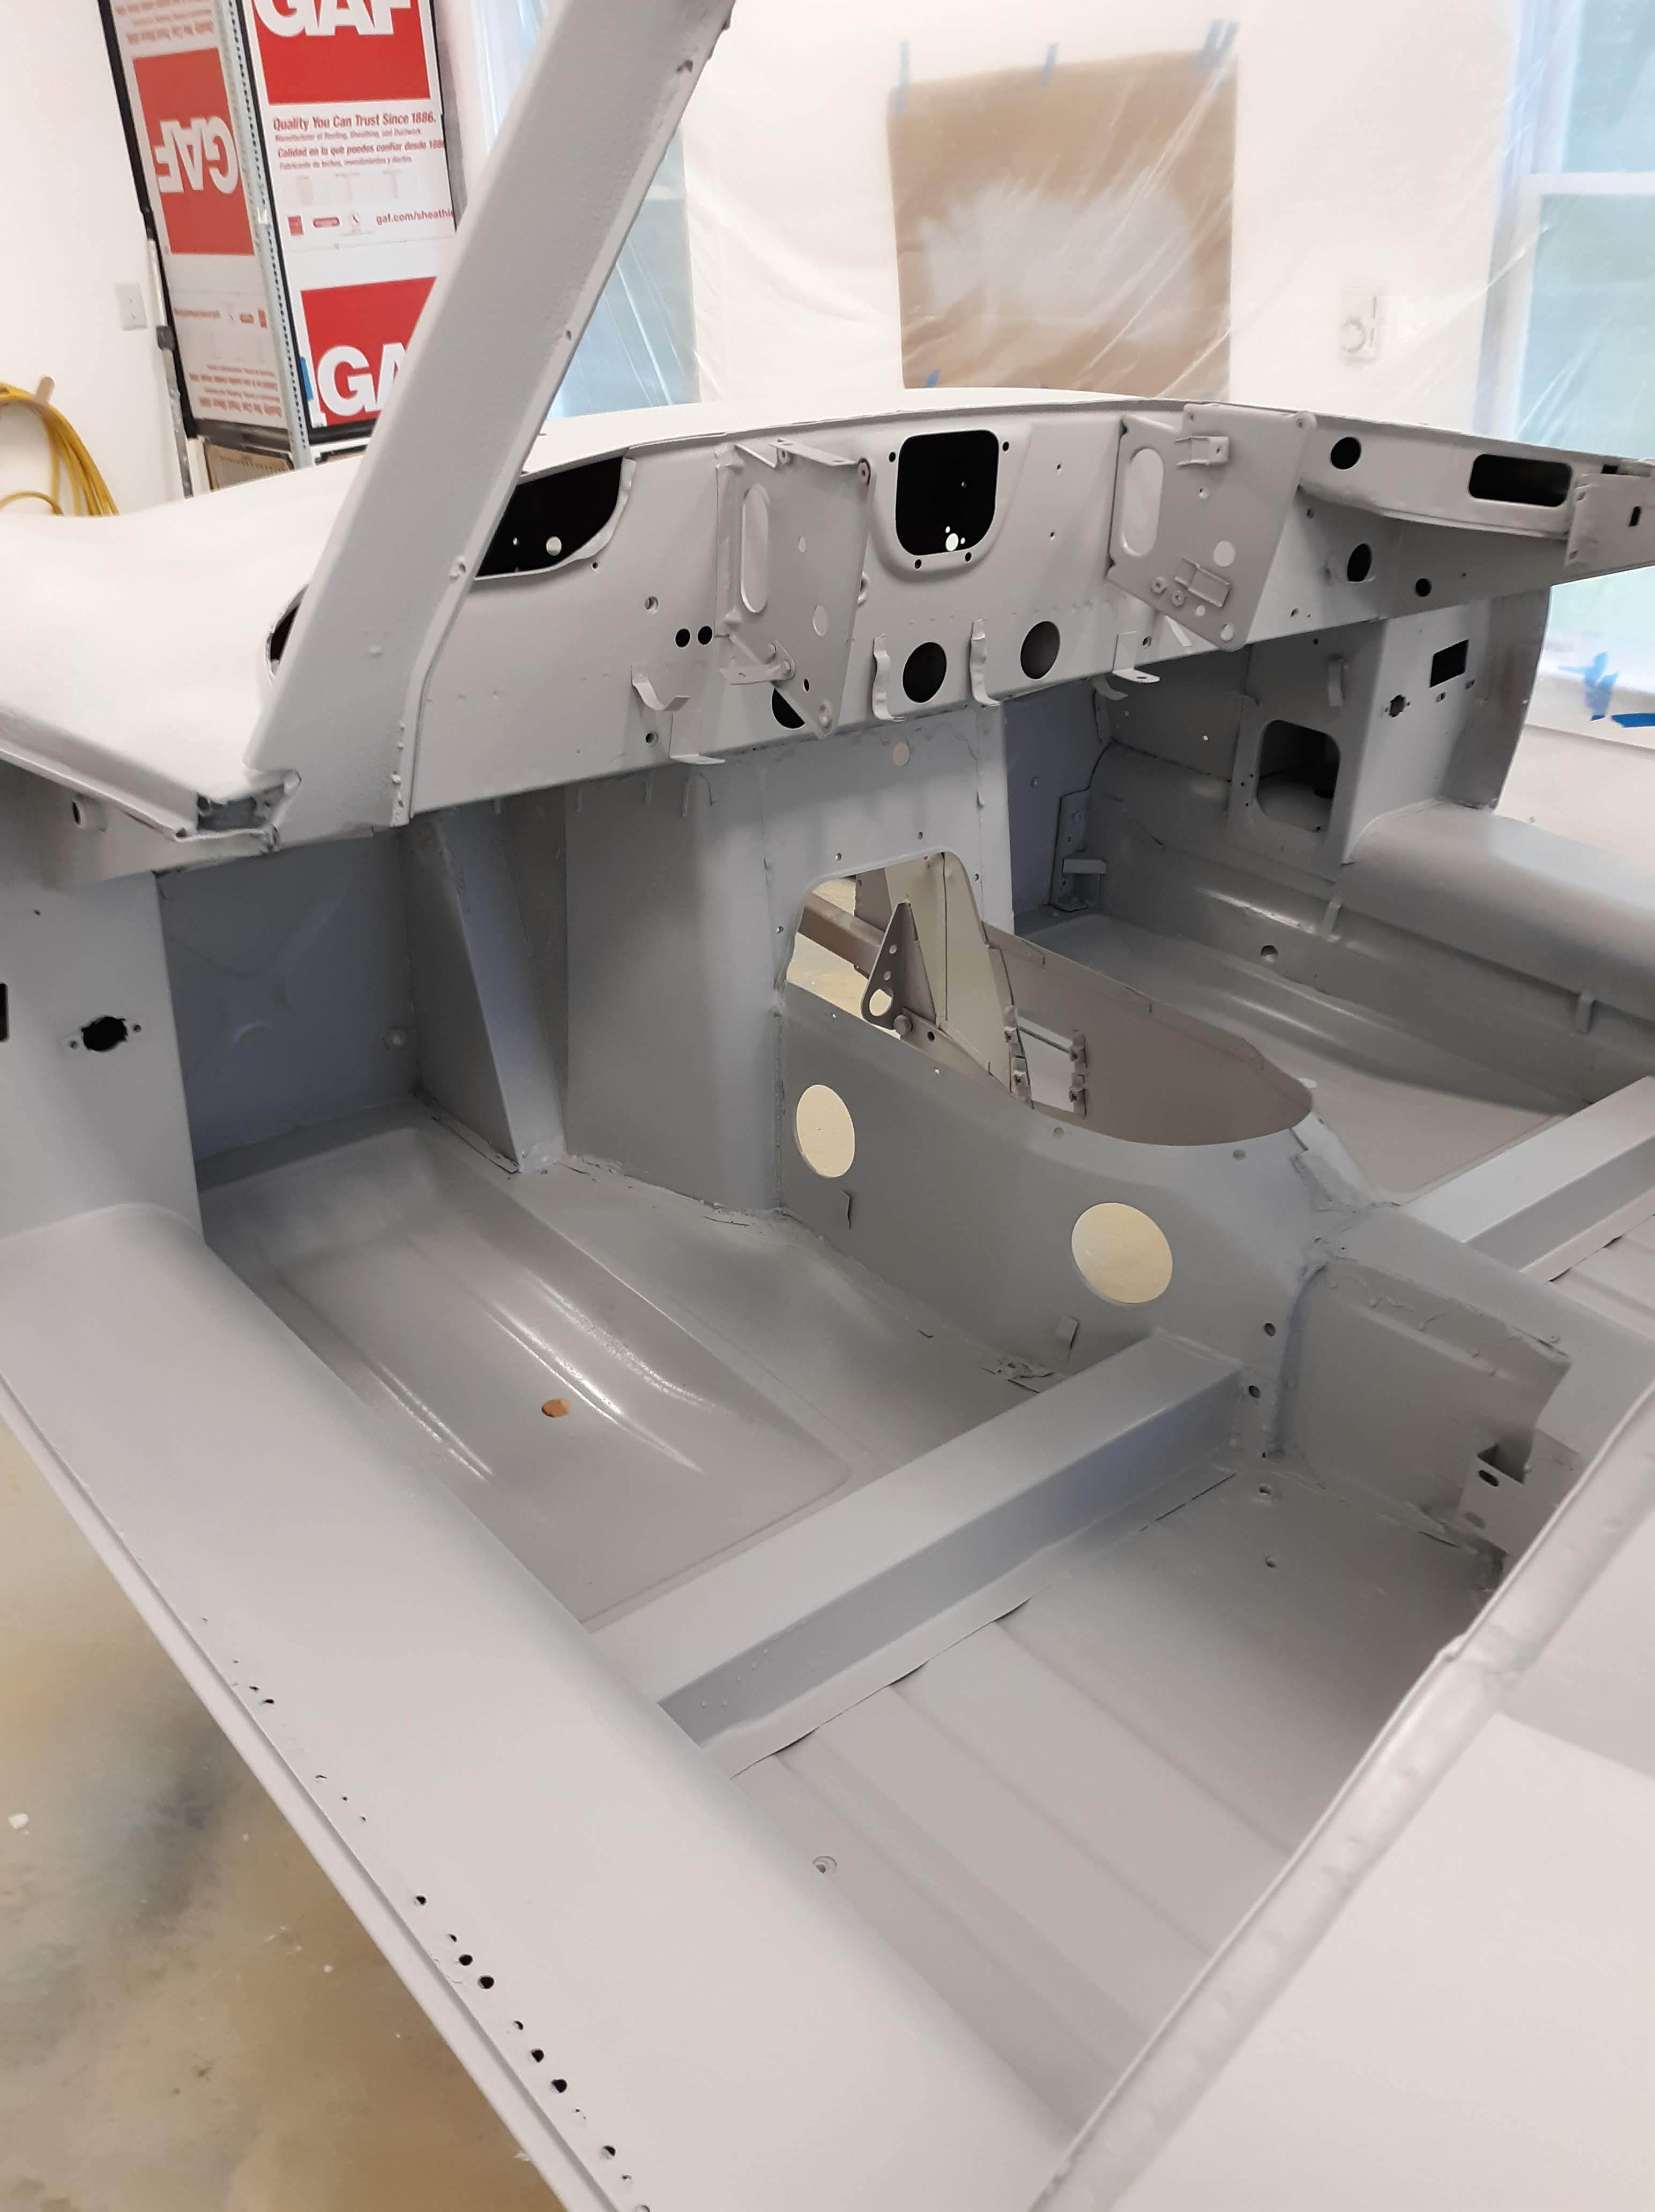

There are many individual pieces that have to be painted.
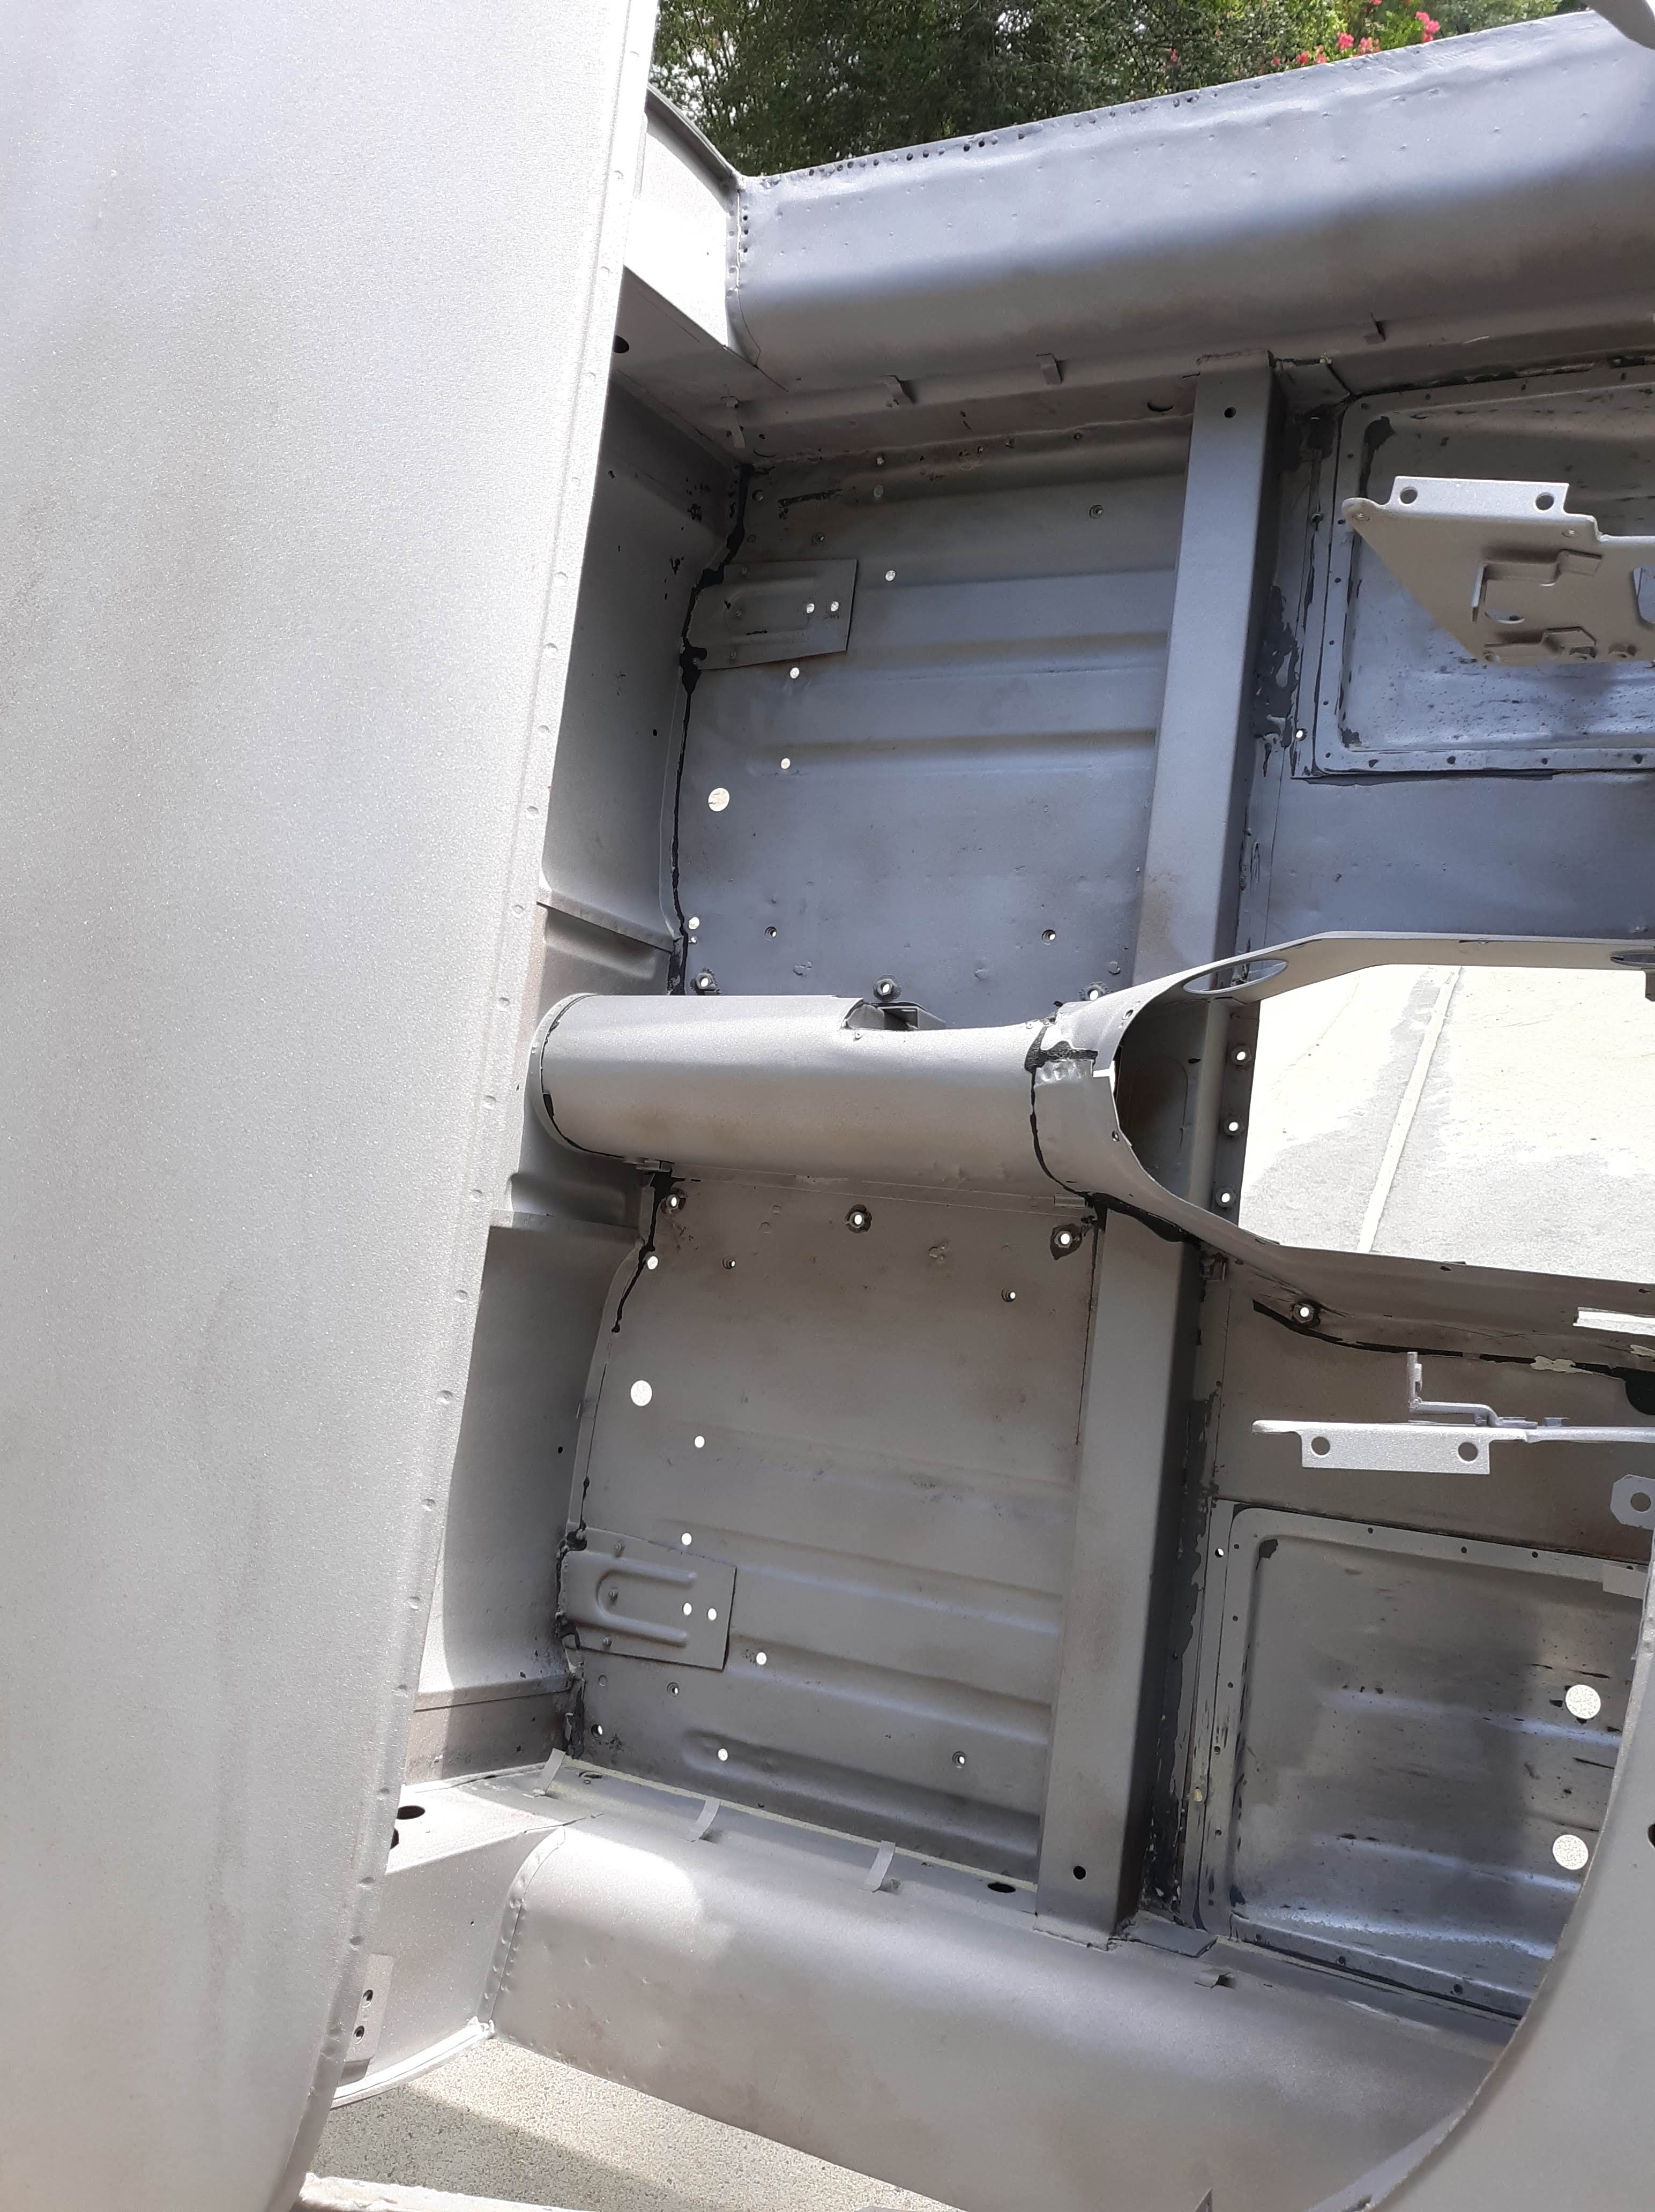
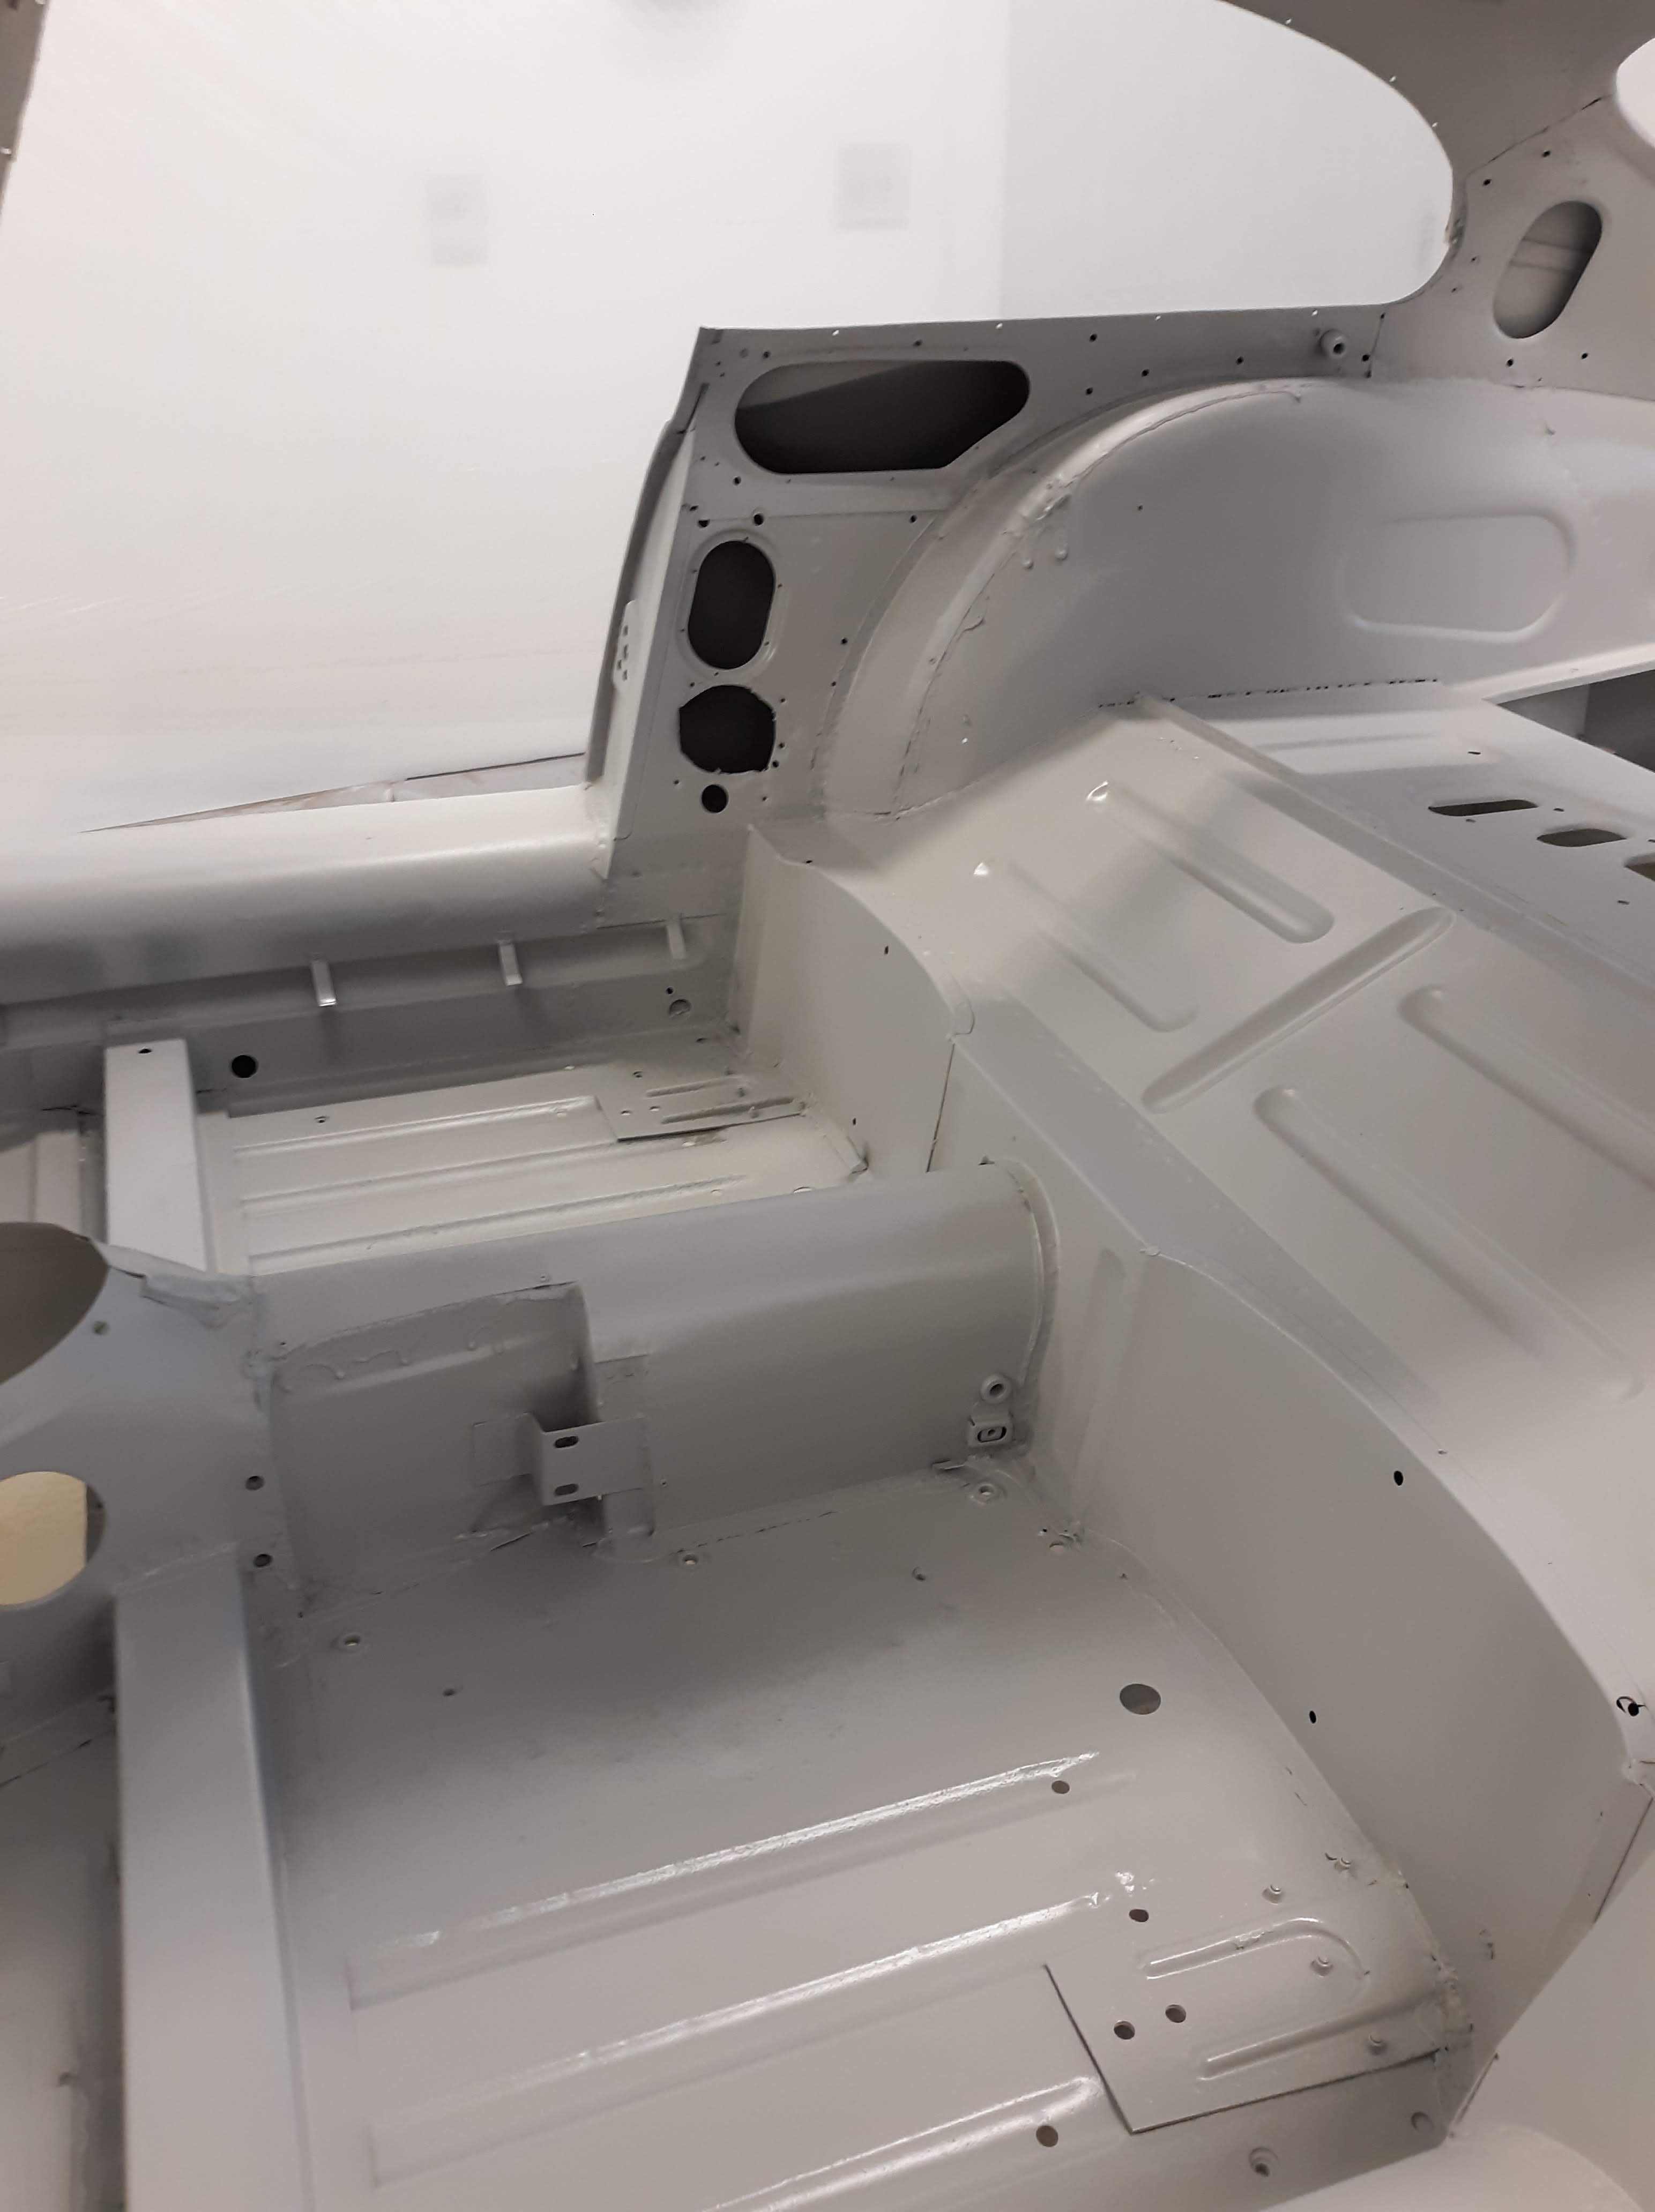
Basecoat/clearcoat applied on the interior, underside, and firewall. BTW the underside has an extra step, which is the application of a Rocker Guard. This product goes between the basecoat and the clearcoat. It is a clearcoat in its own right but is advertised to be super hard and thus give extra protection from stone chips. It does not have a texture.

Here are the basecoat components.

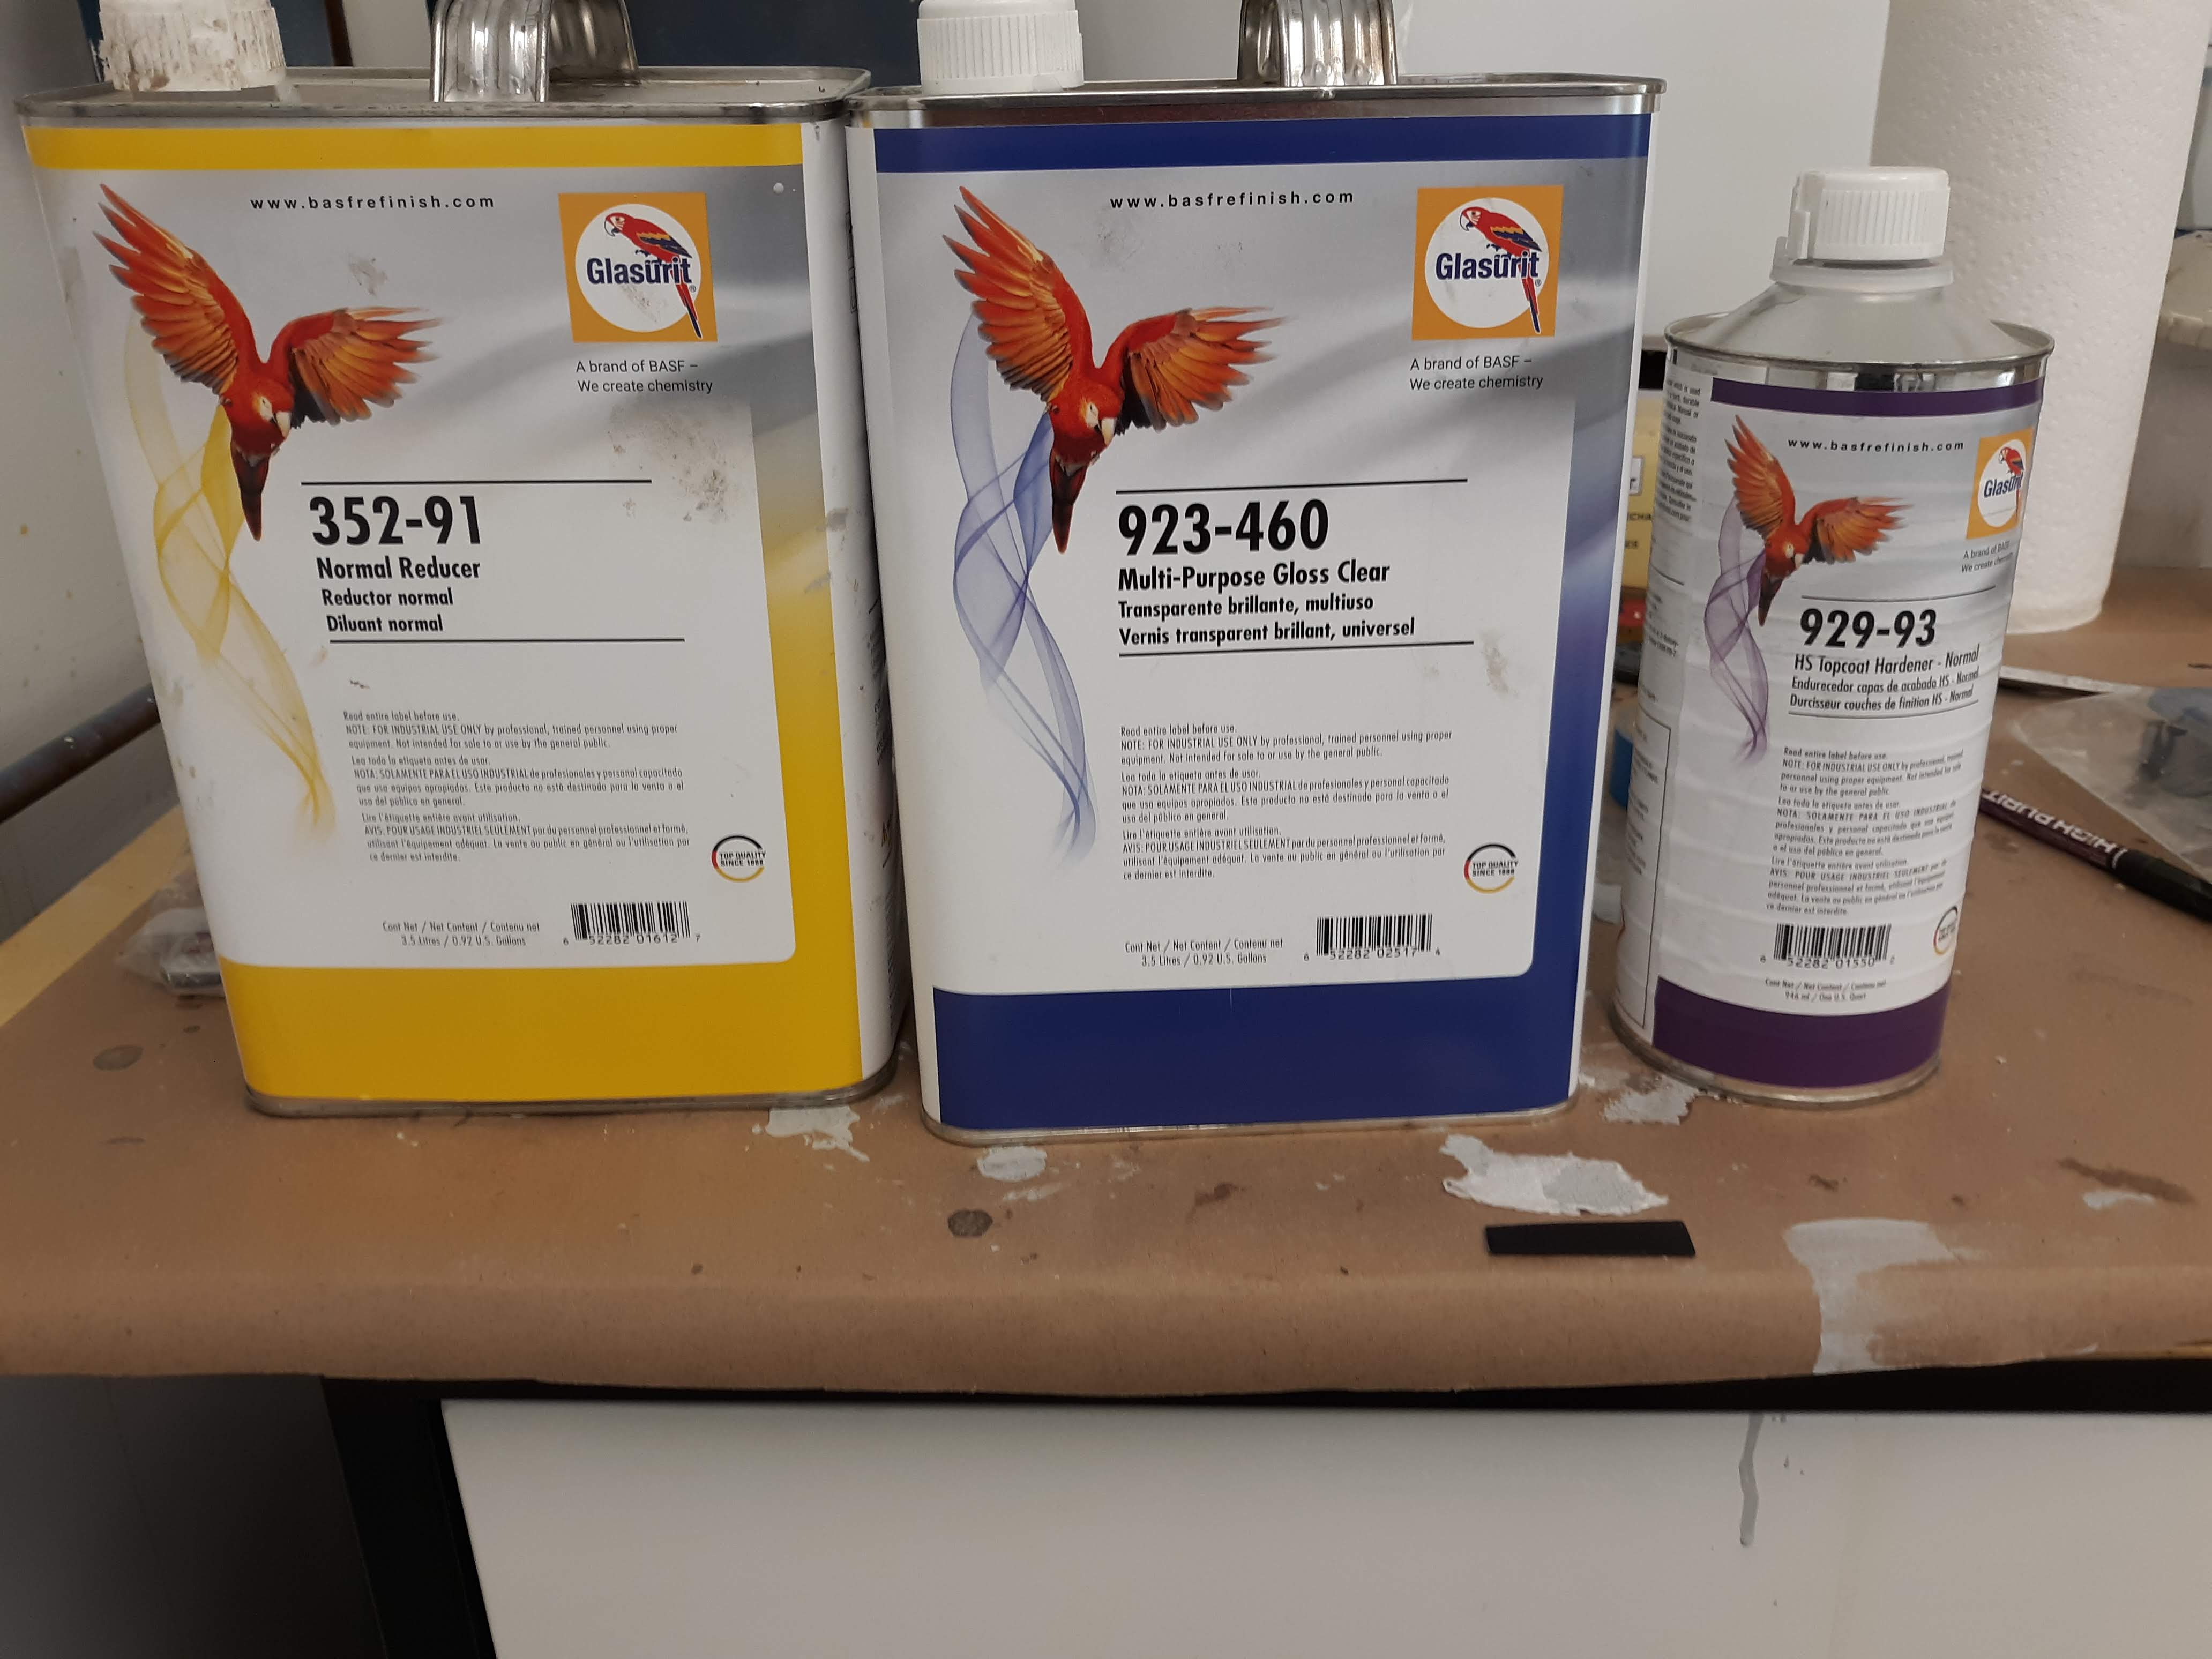
Here are the clearcoat components.
And here are the results.


Discussion
Comments are closed.