Sometimes while performing a restoration you reach a roadblock or realize you have spent an inordinate amount of time doing something that would seem to be pretty simple. Early in the restoration, when roadblocks are met you can many times jump over to something different, just to keep moving. This first installment of Odds and Ends covers a few things that I have done that don’t really warrant a full article but are noteworthy all the same.
First the roadblock. Procuring paint. The Heritage Certificate for my car indicated the car was originally painted in Opalescent Golden Sand. After a little research I determined that BASF/Glasurit still maintains the original RM paint code. I obtained a small sample, sprayed it out, found it to be a good color, and decided to commit to the full line of Glasurit paint products, from primer to clearcoat. Many will say that Glasurit is one of the finest automotive paints made. Most will say it is the most expensive! I guess it should come as no surprise that even here in the capital of NC, Glaurit isn’t a standard item for the paint suppliers. I am now in my 3rd week of negotiations with the local paint rep and the regional Glasurit rep to make sure that I am ordering the correct products. Some have to be special ordered. The current promise is that my paint will be ready next week. So in the meantime, I’m trying to get everything done on the inside and bottom of the body shell, which will get painted wet on wet i.e. I will spray the primer, basecoat, and clear all in one session. No sanding. So in preparation, I’ve been studying and fixing the body shell to make sure it is ready to go.
One small item. The jacking point on the drivers side was corroded. This is probably due to the fact that when you actually jack from there, the body flexes a little locally, which cracks the paint, and allows corrosion to start. The jacking point is right under the outer end of the crossmember reinforcement that goes under the seats, so it is more robust than other possible spots. But apparantly not robust enough. So I cut a rectangular hole where it goes and put in heavy duty 1/4″ thick stiffener plates. Its very stout now. I did the same on the passenger side.

Jacking point reinforced with heavy plates.

Much stronger now.
Another item was to weld up a plate at the hole for the radio aeriel. Esthetically, I’m not a big fan of attachments to the car that interupt the classic lines of the Malcom Sayer designed body. Aeriels are mainly for AM radio reception. Not a priority in my life.
Another action I took was to retain the services of a painter. Although to this point, I have done all my own painting, I got cold feet when presented with the prospect of applying a metallic paint. Richard has been painting cars, including working in restoration shops, for 40 years. He has agreed to generally look over my shoulder during the prep stage. He will actually shoot the paint when it comes time to apply the basecoat/clearcoat to the body shell exterior and the bonnet. One thing he recommended after our first get acquainted visit was to remove the lead used as filler at all the body seams. He said sometimes the lead will look fine but fail in the presense of modern paint products. We are going back with a modern product called All Metal. I removed the bulk of the lead by heating it with a propane torch.

All the lead is out and on my shop floor!
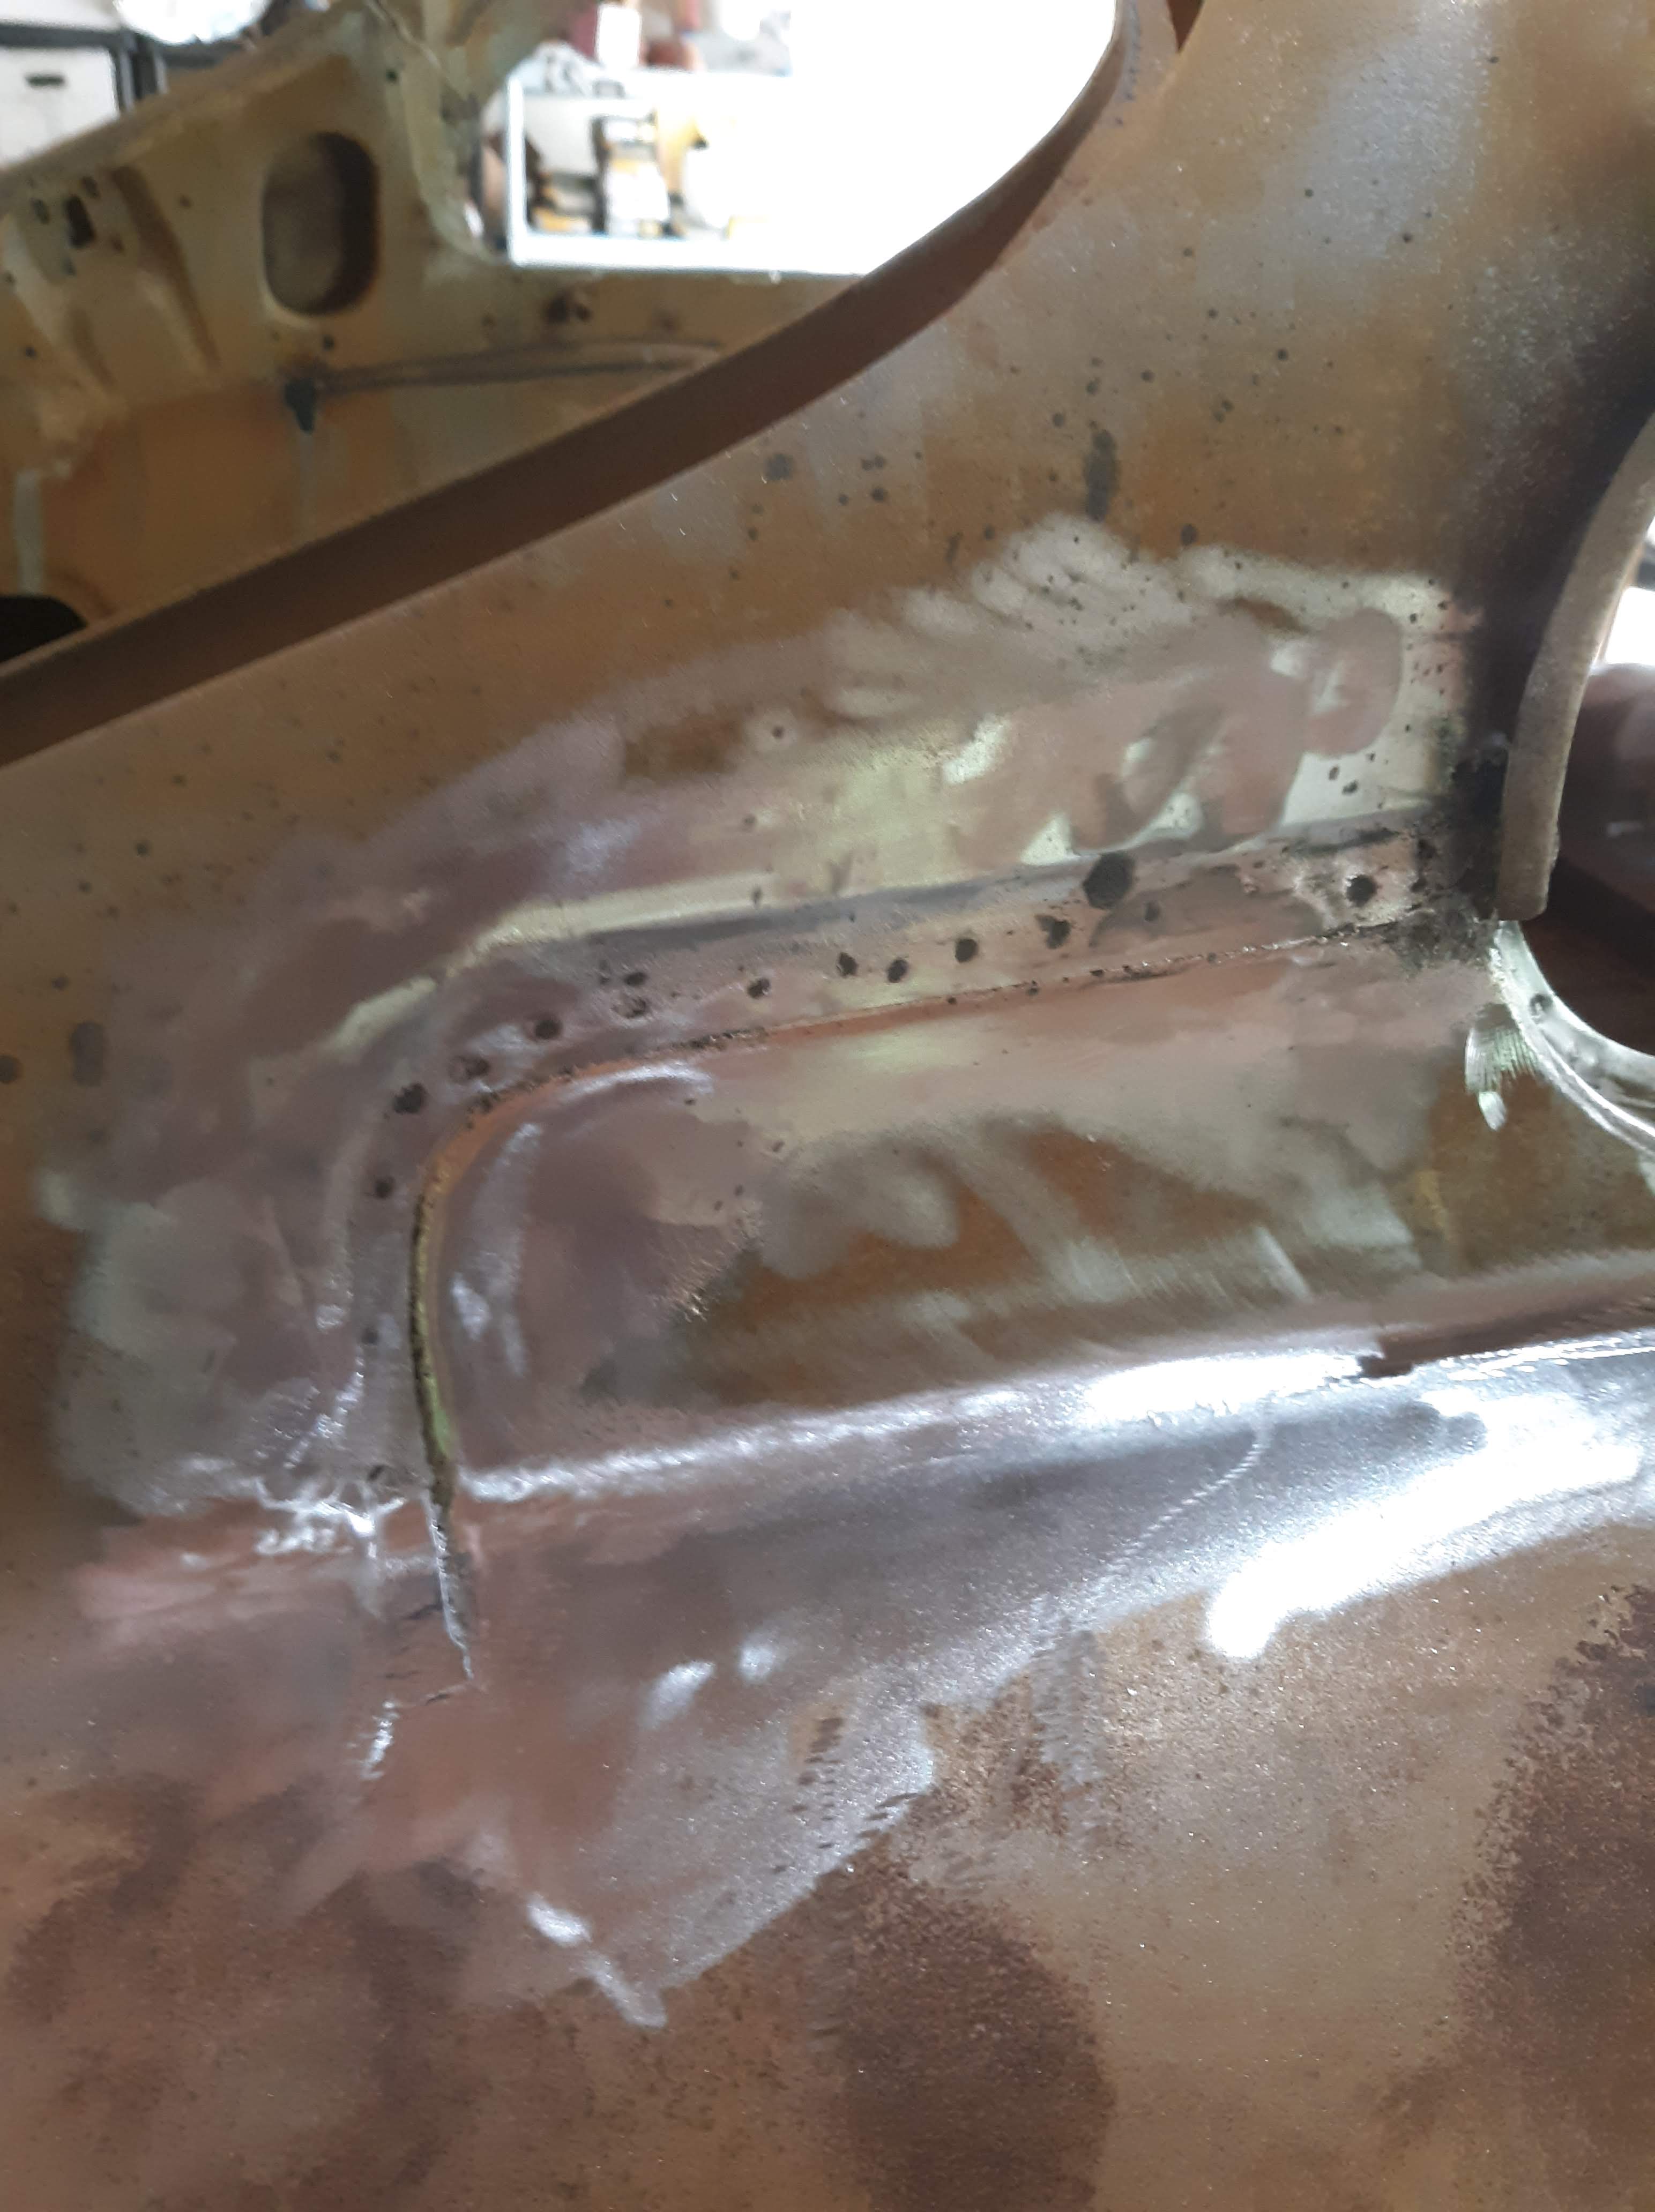
Something you rarely get to see. The original body seams on an Etype. This shot is just behind the pop out window.
A shot of the seams at the A pillar.
I didn’t get a picture but I spent the better part of the day lining up the holes for the bracket that supports the air cleaner. It sounds pretty straightforward. It wasn’t. The bracket I got was about an 1/8″ too long. Doesn’t sound like much but it would have forced the forward sill plate out of position. I cut out a section and welded it back to make it shorter but maintain the configuration of the ends. The sill closure plate did not come drilled with a hole. I found out at some point that there is a captive nut on the inside. I had to match drill for it. And get everything lined up vertically. And on and on.
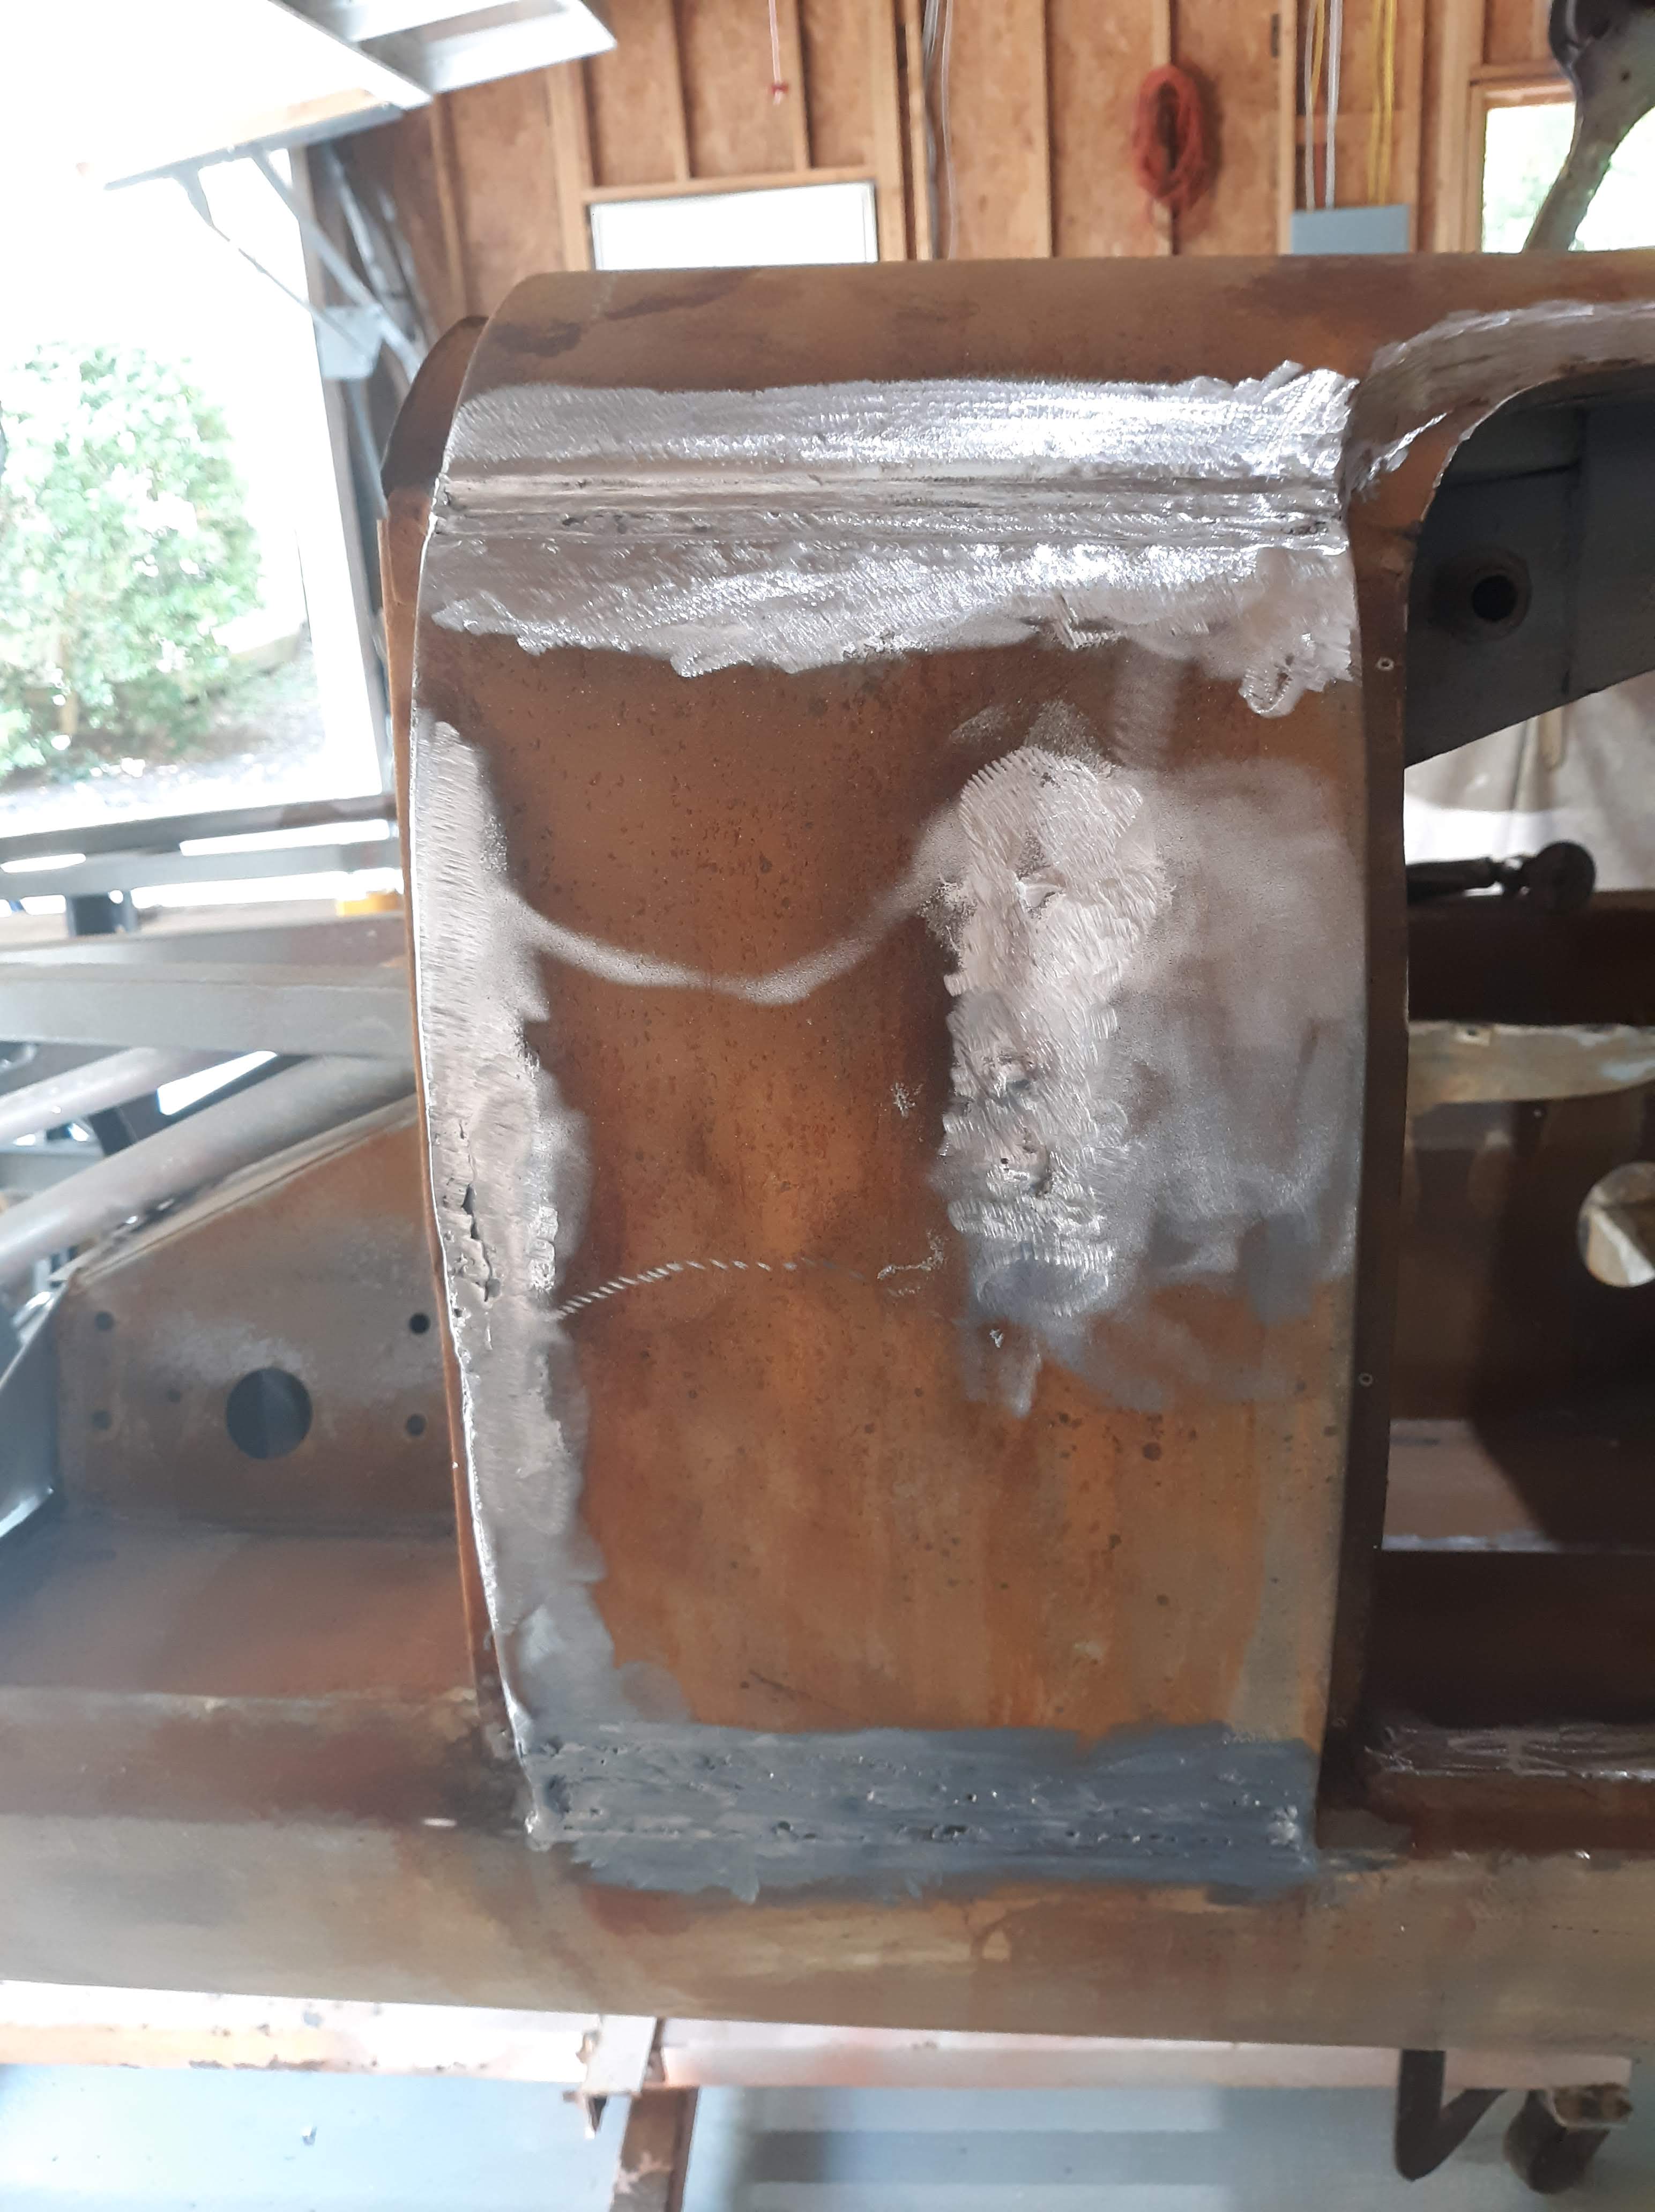
Rear bumpers and taillights. Holy crap, those were an adventure. I had always heard that it’s a good idea to fit these while you still can modify either the component or the body to fit. I started first with the tailights. I found some original taillights in one of my boxes. I checked with my plater, Pauls Chrome. They said they can be chromed but that I should drill out the rivets, etc that hold the internals and just send them the casting. I did this. I wound up grinding material on the casting to make it fit well with the body.

Taillight casting ground as required to fit the contour of the body.
The bumpers were the real adventure. You really need to get the gap between the bumper and body about 3/16″ +/- 1/16″ in order to accomodate the rubber seal. When I first presented my bumpers to the body I thought no way in hell. I got there eventually. The only saving grace is that the bumpers were “pinching” the body up at their forward tips. Much easier to remove material than add. I wound up grinding over 1/4″ of material off the tips of the bumpers. I also had to elongate the holes in the body where the bolts go through. Finally, I had to play with the overriders to get them straight up and down and vertical. I spent several days on this effort. It will be worth it at the time of final assembly!

Rear bumpers and taillights mounted and in good position with respect to the body shell.
While I was there, I dropped the rear hatch in. Thank goodness, it fits pretty well. There is little that you can do if the hatch is out of whack. Also, while I was there, I dropped in my new gastank from SNG. The fit on it was good. By the way, this is the 2nd gastank I have bought from SNG. Both have fit well. Hot tip- don’t put the gastank in at final assembly until after you have the bumpers mounted. Otherwise you’ll never reach the middle bolt for the drivers side bumper. Also there is a bracket at the forward right hand corner of the tank. This bracket is bolted in and must be uninstalled until after you put in the tank. Otherwise you’ll never get the tank. installed.

Gastank test fit, successfullly.
I spent a fair amount of time repairing small defects to the floor pan. There were quite a few gouges and some through holes that resulted from having to cut out the previous metalwork in the floors. My go to for this kind of repair is a 2 part epoxy clay that I buy from POR15. It is easy to mix and dries hard as nails. It is more usuable than say JB Weld as, being a clay, you can form it and squish into cracks and holes.
As I noted in my article about the Etype Fabs engine frames, I test fit them to make sure all the bulkhead nut plates and holes were aligned and good to go. They were!
Not very exciting but I have tried to spend a few hours every day for the last few weeks bead blasting hardware. I have carefully saved all the orignal nuts and bolts that came with the car. I also put new hardware in my 2+2 and saved all the original hardware that it came with. I bead blasted my entire stash and sent a 35 pound box of hardware to Industrial Electroplating in Gastonia, NC for zinc plating with a clear phosphate coating. It is no secret that the fasteners on the original car were plated with cadmium. It is also no secret that cadmium is now listed as a carcinogenic material. I decided not to burden the environment with more nasty stuff. I had already used the clear coated zinc on my 2+2. It is very presentable and is very corrosion resistant in it’s own right.
For the last few days, I have been collecting all the front suspension components that would have originally been cadmium plated. Someone previously had painted them all black. These are now blasted back to bare metal and will be sent out for plating soon.
Last but not least, the seats. I had been looking at the car on it’s rotisserrie and thinking how much easier it would be to install the headliner with the car upside down. This got me to thinking about procuring my upholstery kit now. I’ll write a more extensive article later about upholstery but my investigation of upholstery suppliers caused me to realize that the seats for a OTS and a FHC are different. The OTS seats are narrower to allow the convertable top to clear them when it is being lowered/raised. This led me to discover that the seats that came with the car are OTS (roadster) seats and they are from an early car with a more upright seating position. The complete thread is here on Jag-Lovers but the upshot is that I placed an order for the correct seat frames from Monocouque Metalworks. I have two seat frames that are correct for an early (prior to mid 1962) OTS that are for sale. If someone is interested see my contact info under the Services tab on my homepage.
The early seats have a modest recline angle, about 10 deg. The later seats tilt back around 20 deg.
So that’s about it for this installment of Odds and Ends. Cars in boxes. Always an adventure!

Discussion
Comments are closed.