I just recently finished a protracted struggle to get a good fit for the bonnet of my 67 Etype 2+2. I thought I would write down some of the things I learned during the process, before the pain subsides 🙂

This is going to take awhile so bear with me. In a perfect world, the process starts at the beginning of a restoration, where the bonnet will ultimately be painted before final assembly. If painting the bonnet is not part of your game plan, don’t despair but the process does become more difficult to get an outstanding fit. So what do I mean by an outstanding fit. Well, first of all, let’s admit that my definition of an outstanding fit most likely exceeds what would have come from the factory at Browns Lane. Theirs was an assembly line process, all the various parts built to an average size and shape that had to be dealt with in probably just a matter of a few minutes for each car, on the line. They achieved an ‘acceptable’ fit. In my world of an outstanding fit, the ‘panel gaps’ would be uniform throughout and the curvature of the bonnet versus the ‘scuttle’ (the fixed section of metal where the wiper arms come through) would match very closely. The bonnet would close and latch without undue force and, once latched, their would be minimal play so as to discourage rude metal to metal noises as one was driving over rough roads. To summarize 1) consistent panel gaps, 2) smooth even transition for the rear edge of the bonnet to the front edge of the scuttle, and 3) minimal play of the various parts when driving over rough roads. BTW, what is a good target panel gap? I like to use a standard wood paint stirring stick as a gauge but a recent discussion on Jag-Lovers forum suggested 5/32″. It does seem to be a little optimistic to be working to a 1/32″ of an inch tolerance but that is what I read! It’s really your call at the end of the day, depending on your goals and the gaps for the rest of the car. I would say it is very good to have the bonnet gaps and the door gaps be roughly the same. My judge’s eye tends to look for gross differences, rather than exact numbers.
Again, in a perfect world, you would start to attack items 1 and 2 as almost the first thing you do during a restoration. You want the car on it’s tires (or suitable jack stands on the axles stubs) and you want basically the full operational weight of the car to be present. For instance, once you remove the engine, the engine frame relaxes a bit and the gap at the scuttle will change, most likely opening up. On the flip side, if you get the scuttle gap very nice and then add the engine weight, the gap will close up. Ask me how I know 🙂 So before you do much of anything with your restoration, you want to evaluate and correct as much as possible for 1 and 2.

“Scuttle” shown on the left. Bonnet center section shown with the power buldge and the air vents. The “wing” is in the foreground, at the right.
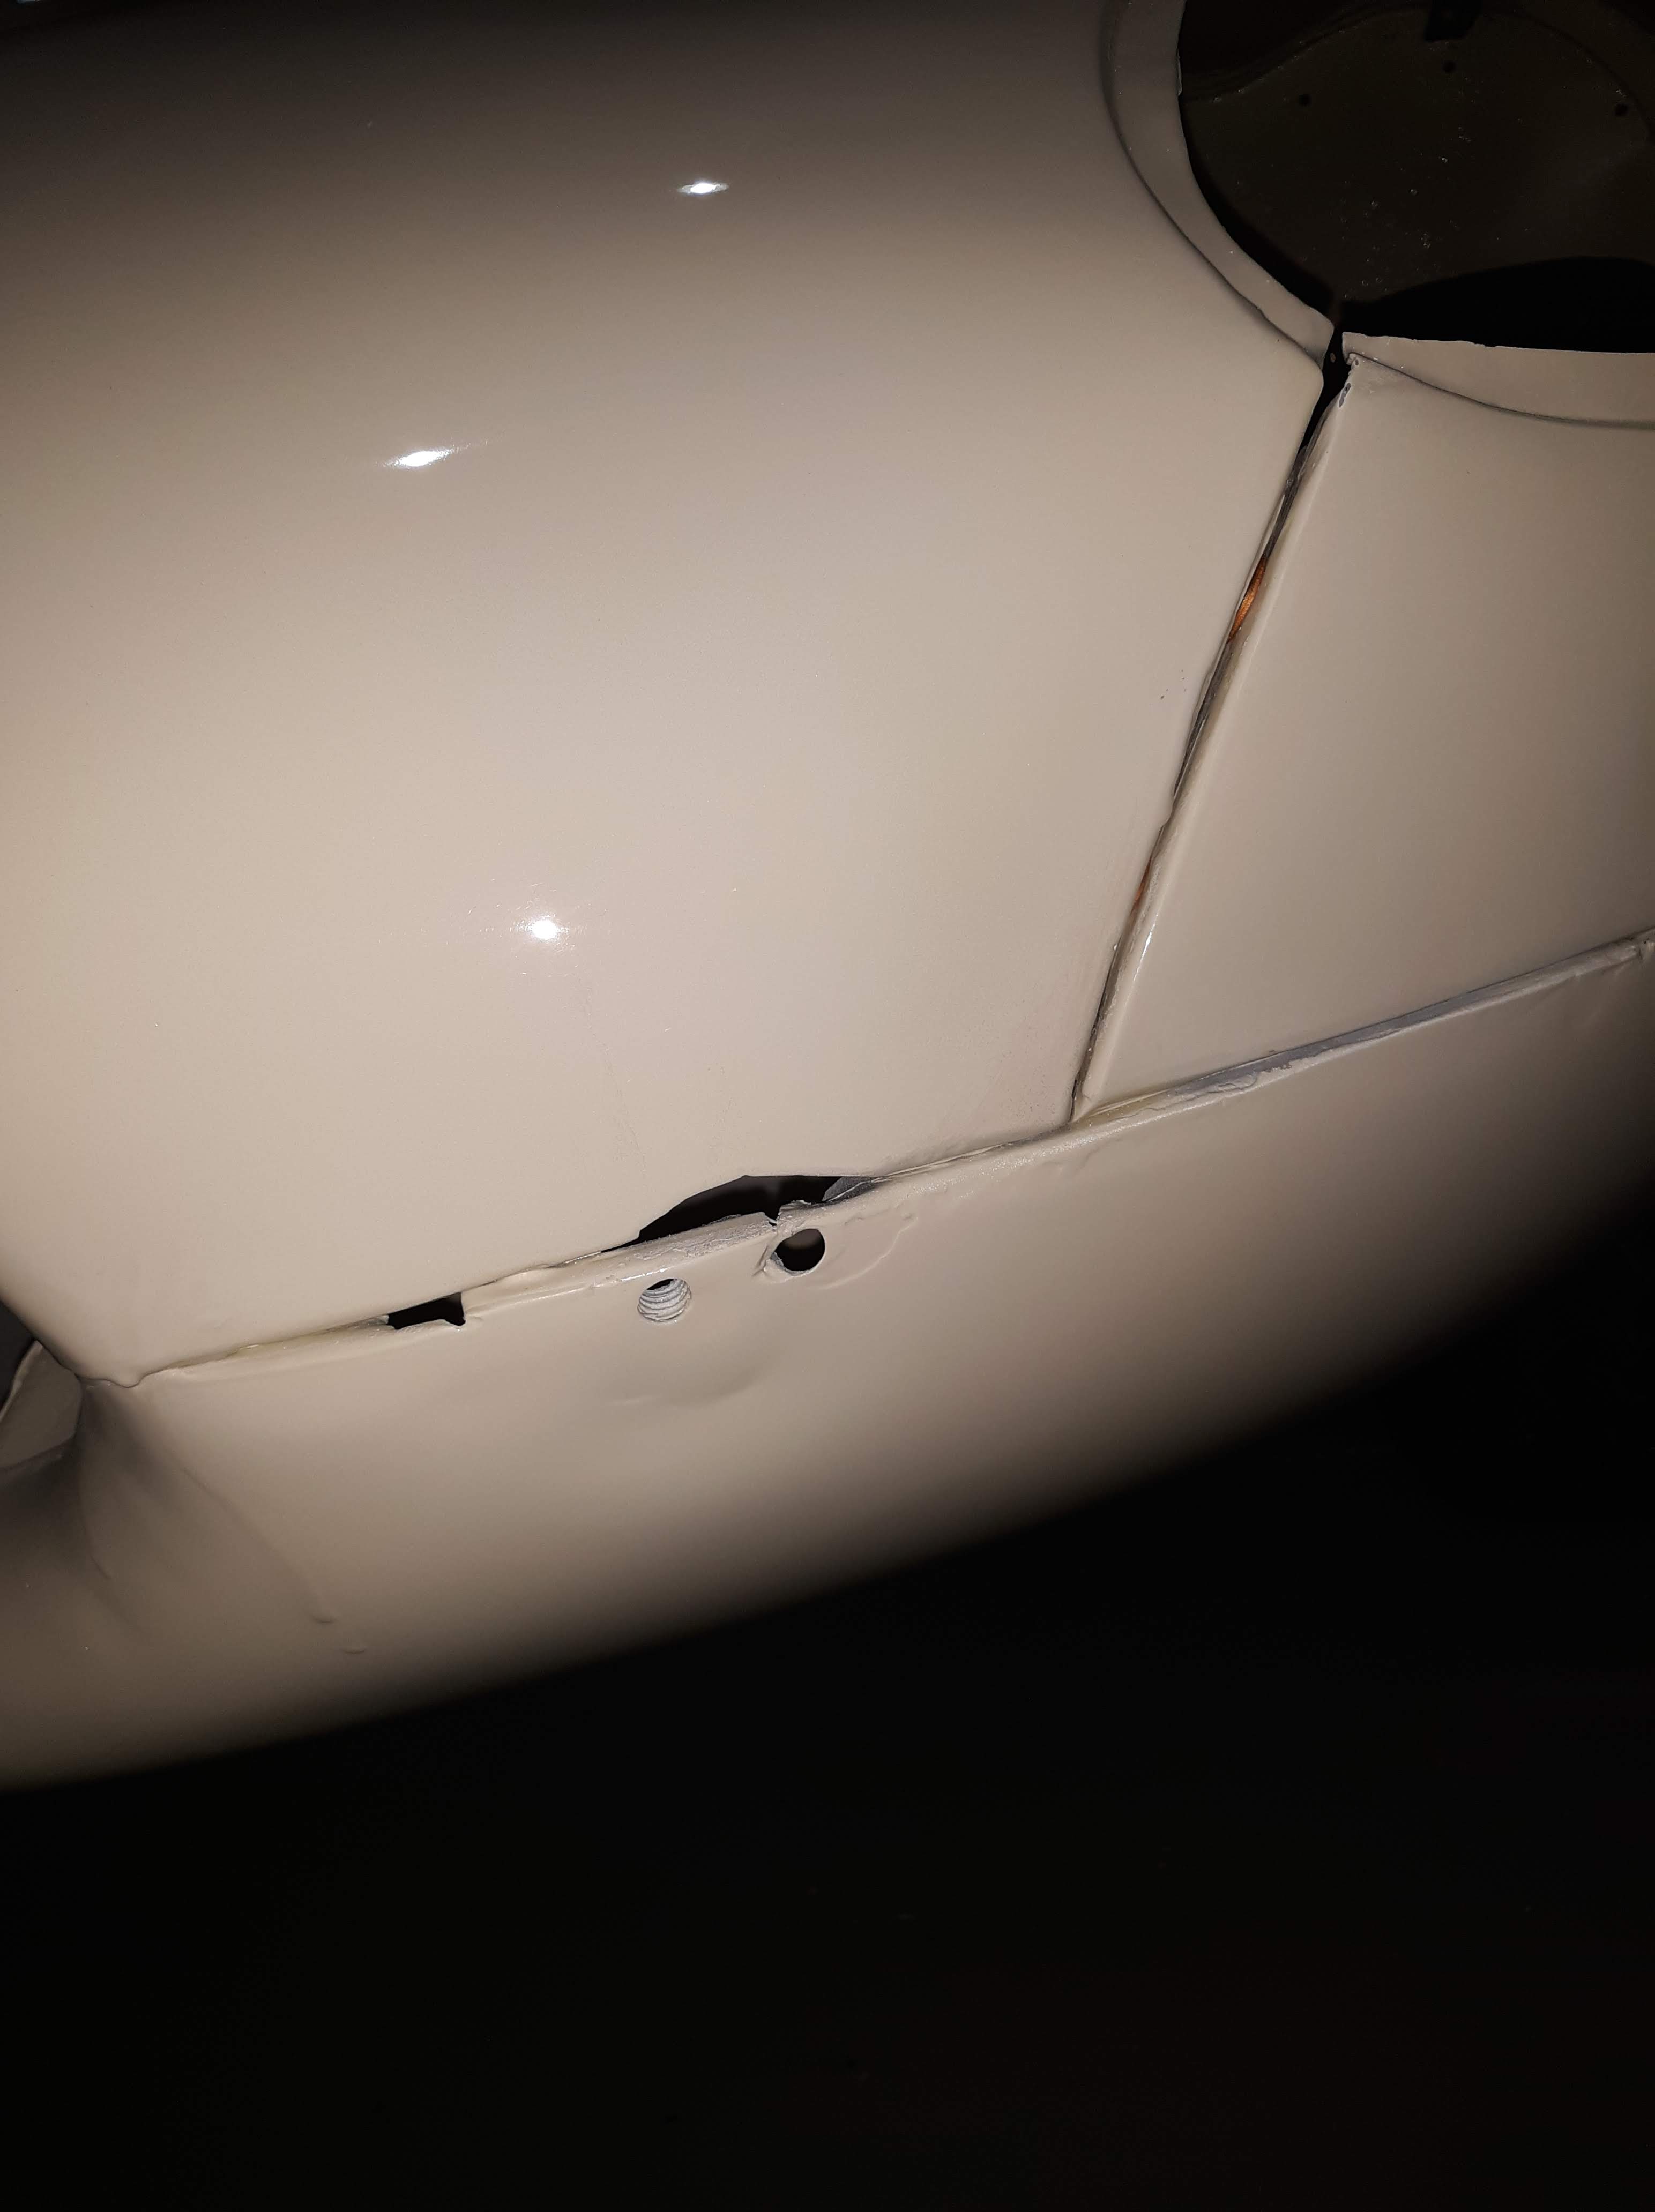
Regarding the alignment at the scuttle, there is the central ‘power bulge’ then on either side the curvature of the bonnet goes to a low point before sweeping upward a bit, then falling off on the sides. On my car, the two low points were higher than the shape of the mating scuttle. I drilled some small holes at the trailing edge of the bonnet and inserted some sheet metal screws into the stiffener below. Voila, I was able to pull the metal down and make it match the scuttle. The “stiffener” is a formed metal section below the bonnet sheet metal that provides the necessary stiffness to hold things in position. This section is what the screws are pulling into. The stiffener may or may not be ‘glued’ from the factory. You could try to glue the items in place. But in my case, I wanted to make sure so I drilled additional holes and welded the sheet metal to the support section. As you can see, at this point, you have locally trashed your paint job! I suppose that the same could be done with the careful application of padded clamps and modern adhesives, although it is hard to check your fit with a clamp in the way.

Curvature of the sheet metal held in the correct location with a weld.
We will get into more detail later but in general the bonnet has a lower nose section (the piece below the opening for the radiator), a center section (the piece with the power bulge), and two wing or side panels.

Lower nose section (below opening). Bonnet center section (above opening).
Joint between center section and wing, below headlight opening.
As they came from the original fabrication process these panels have their curvatures built in. But while you are messing with the existing fit, note that there are small pieces in 2 places at the rear of the bonnet, with 4 screws, that serve to hold the relationship of the center section to each of the side panels.

If you loosen these 4 screws, you can make minor adjustments to the local arc or curvature at the joint. For instance, if your side panels stick out proud of the scuttle on both sides down near where the latches are you can loosen the screws, pinch the wing in, and re-tighten the screws to obtain a better ‘passive’ fit, even before you engage the latches. The latches of course have a great deal to do with the final fit but more on them later.
So let’s talk about the bonnet hinges for a minute. These are found underneath the car, at the 2 forward corners of the bonnet support frame. The hinges have 4 bolts, 2 facing forward and 2 facing upward. They should engage a set of captive nut plates placed in pockets fabricated inside the nose piece. BTW, these captive nuts plates should be free to move around a little bit. If they are fixed due to rust or whatever, that needs to be dealt with. There may or may not be shims or spacers between the hinge and the nose piece. Note that replacement hinges are available from SNGB at a very reasonable price.

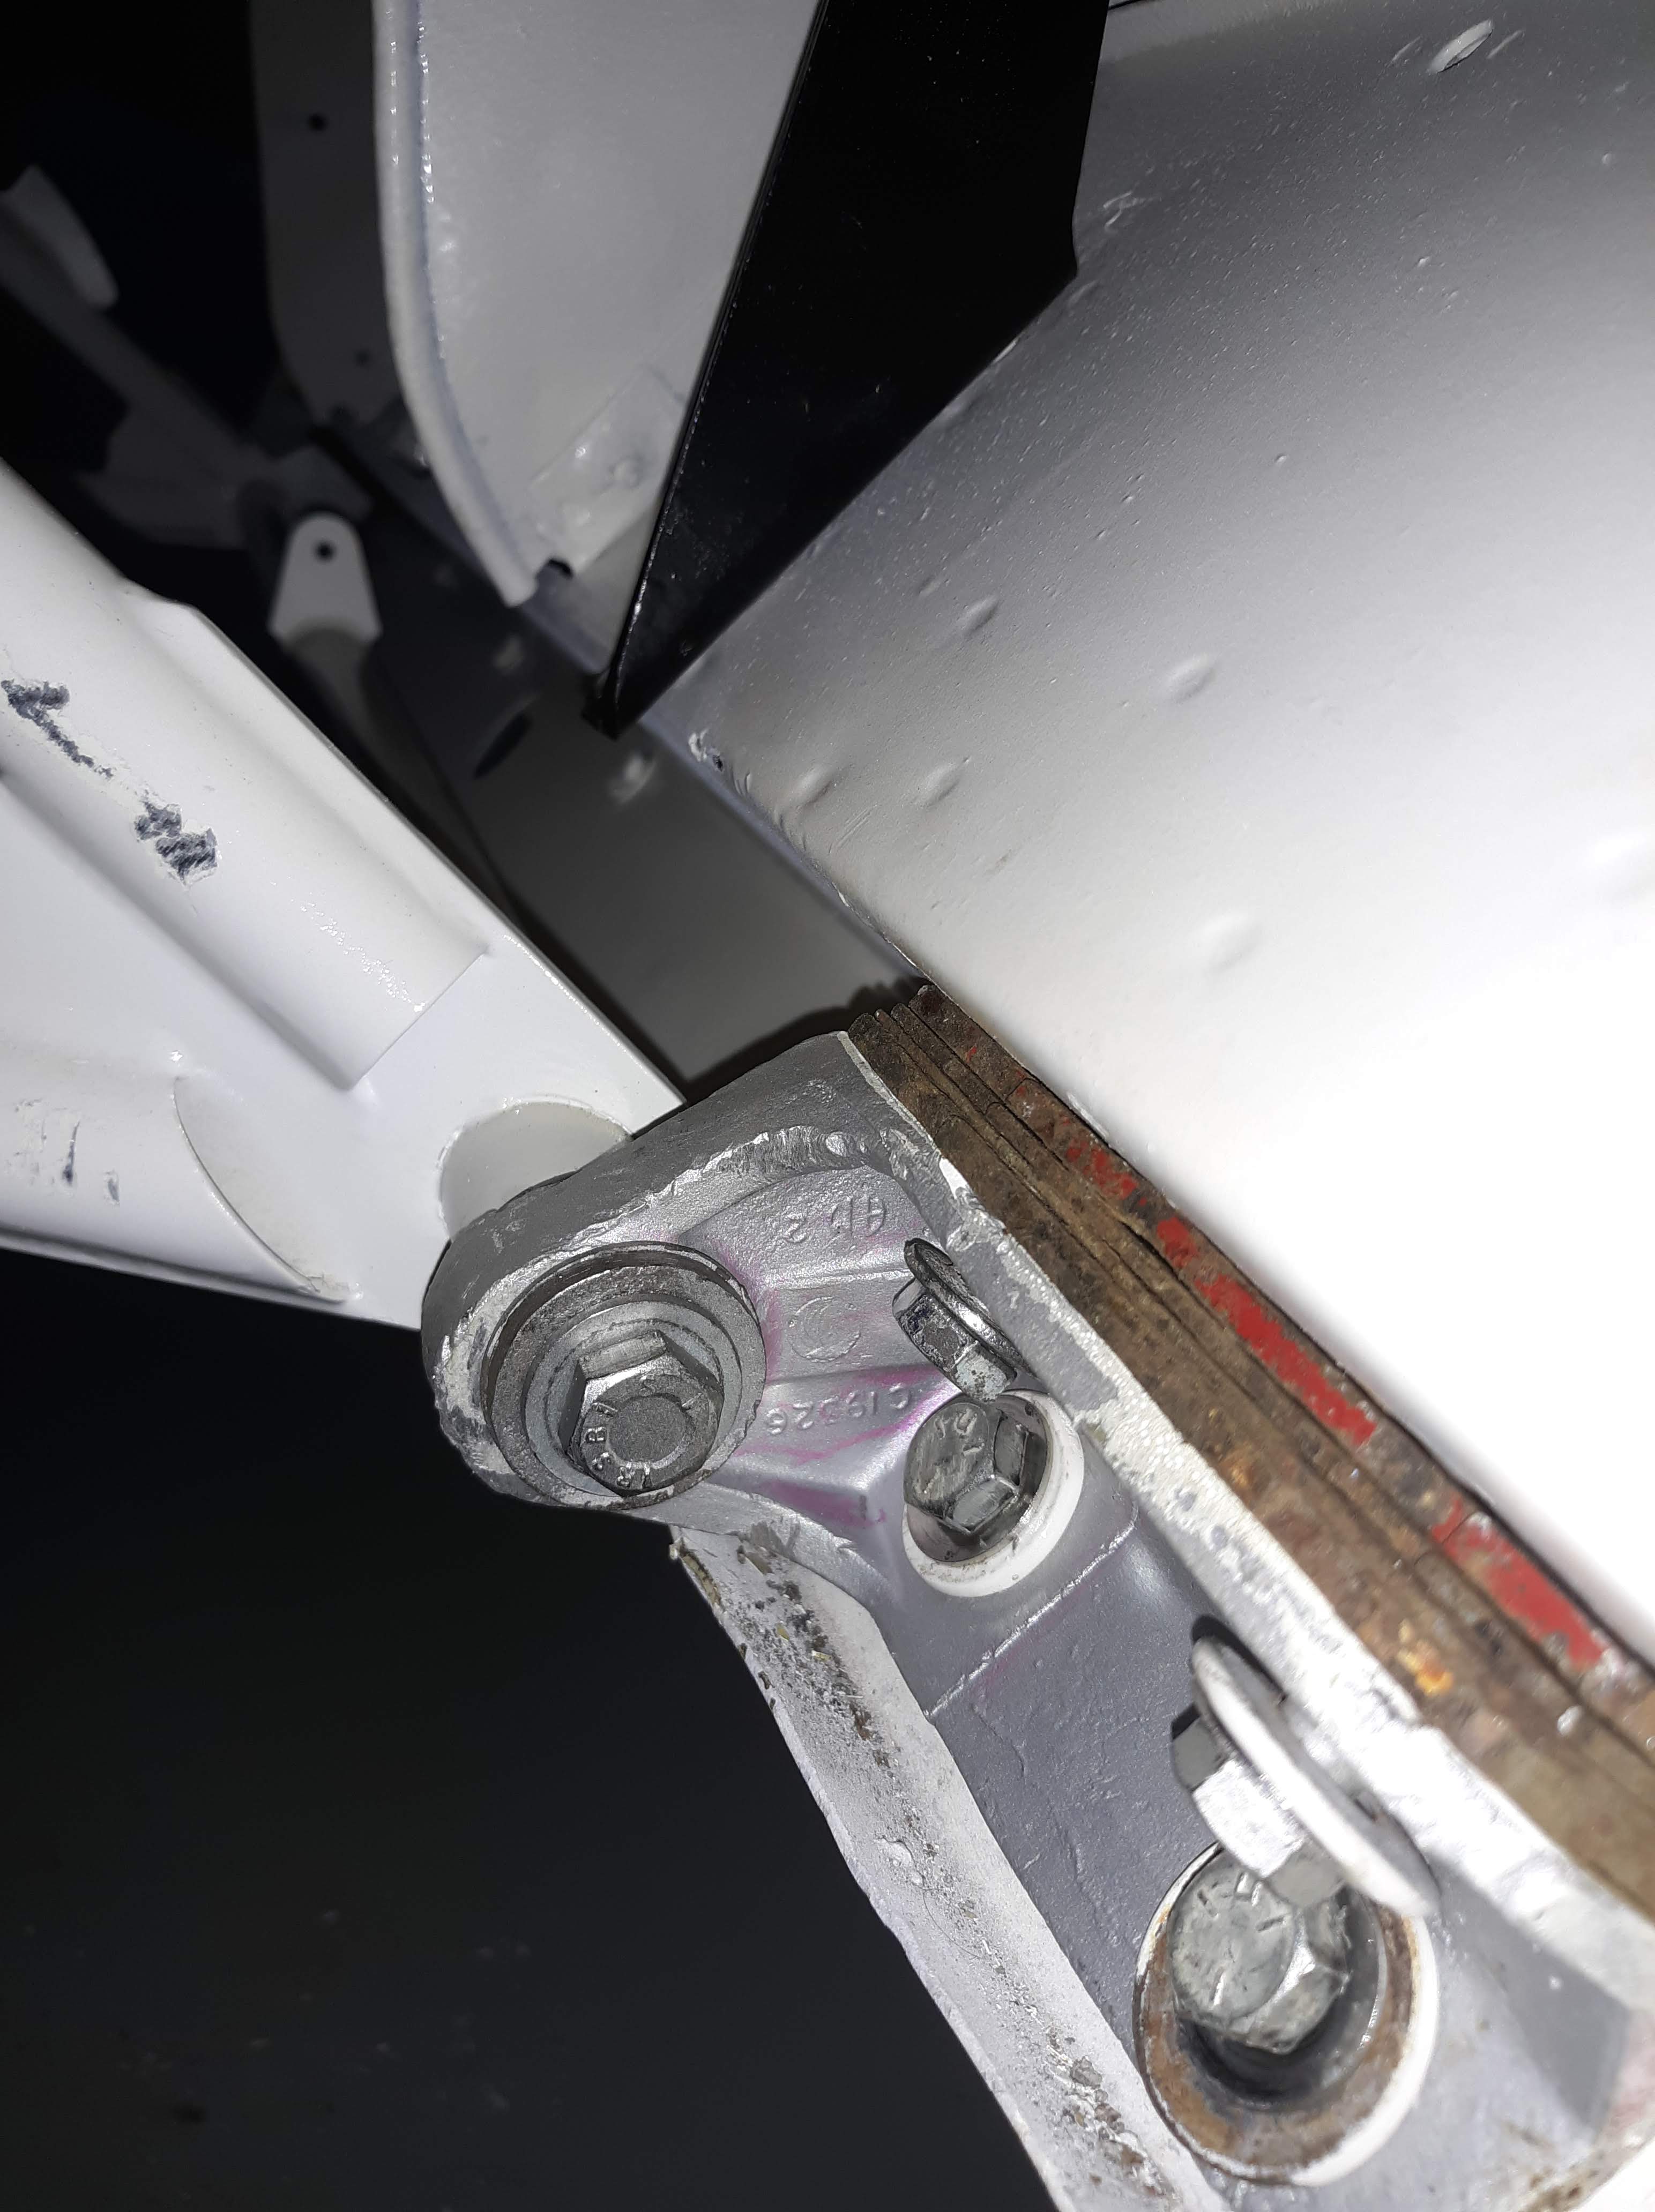
Shims on top of the hinge help rotate the bonnet to bring the gaps at the scuttle into position.
I would at a minimum get new plastic sleeves that allow smooth rotation of the hinge with respect to the large bolt that screws into the support frame. If your bonnet fit is already really good (but if that is the case why are you reading this article?) then you should pull the shims and mark/bundle them for exact replacement upon re-assembly. But the key thing here is that the shims allow you to move the entire bonnet front to rear and also vertically. The affect of the front to rear is fairly obvious as it can be used to open or close the panel gap at the scuttle. The vertical is maybe less obvious. As you raise the front of the bonnet with the rear setting on it’s latch mechanisms, you effectively rotate the upper back end of the bonnet and thus can cause the vertical panel gap on the side panels to become more or less parallel to the vertical fixed edge of the scuttle. And you will also be able to affect the parallelity of the horizontal gap at the bottom edge of the side panels where they match the fixed panels that extend all the way forward to your wheel wells. So these shims will be your friends during re-assembly. But keep in mind that if you have zero shims installed on the vertical face of the hinge and the panel gap is already too wide at the scuttle, you will be in an impossible situation going back together.
So worst case scenario, and better dealt with now than later, is that you need the back edge of the bonnet to be longer to close up an excessive gap that can’t be fixed with shims. The surefire fix, but painful, is to add welded material to the back edge of the bonnet and then custom shape it to fit. Probably beyond most of our capabilities but it can be done. My friend the ‘nuclear welder’ is an absolute artist with a TIG machine and could probably add an 1/8″ of material to the back edge without breaking a sweat. I’m sure Chuck at Monocouque Metalworks does this stuff all the time. I also understand that replacement bonnets came with extra material on the back edge and it was expected that the paint and body guy would trim it as required. I have not been there or done that either. As an acceptable cheat, modern materials such as 2 part epoxy putty or even standard body filler could be adhered to the back edge and carefully sanded. Obviously, all of this requires subsequent painting. I have one trick, which I will discuss later, which involves modifying the hinge, which will pick up maybe an 1/8″. Again, better to cross this bridge now than be cast on the shores of poor panel fit later.
Remember, at this point, we still have a basically fully assembled car. If you can’t get the bonnet to close and fit to your satisfaction, pull the front tires and carefully inspect to make sure that the bonnet is not hanging up due to contact between it and any part of the engine, engine frame, etc. On my car for instance, one of the air ducts was hard against the engine frame and kept the bonnet from fitting correctly. Some gentle ‘correction’ of the offending duct with pliers removed the interference issue. The rubber edged panels to the rear of the wheel wheels may also be a problem. I would probably just temporarily remove them if there is any question. They can be modified when you go back together. Also, you may want to loosen the screws that hold the bonnet spring fixtures in place to see if that helps. You may want to disengage the bonnet springs all together (although the bonnet gets really heavy without the springs) to see if that helps. You may want to loosen or remove the latch mechanisms, just to confirm they are not the problem.
So there is one final point I should have made much earlier in our conversation. Before you attempt to correct your bonnet fit, you really need to loosen every fastener in the whole assembly to allow everything to move around as you adjust. That means all the bolts between the center section and the wings. And every bolt between the lower nose piece and the various joints to the center section and the wings.


For me, I removed most of the fasteners but left a few very loosely in place. I shimmed open the gaps between the pieces and painted it like that. My paint job was a ‘second restoration’ so I didn’t have any rust issues to deal with in the spaces where the parts are bolted together. On a restoration of an original car, most likely you will need to take everything apart are required to do rust repair and prevention.
BTW I have not talked about the step of gluing the curved pieces on the underside of the bonnet. This is of course a necessary step in a full restoration. It is a little bit of a chicken and the egg proposition. What I did on my original restoration was strip all the parts to bare metal and painted them with epoxy primer. I then loosely fit the bonnet into position and trial fit the pieces ultimately due to be adhesive bonded. At some point you have to raise the bonnet to get at the subject pieces. I guess I wouldn’t stress out about these so much. The bonnet center section and wings have their shape and you’re not going to change it much with these glued stiffeners. I glued mine in and then painted everything with my color and clearcoat.
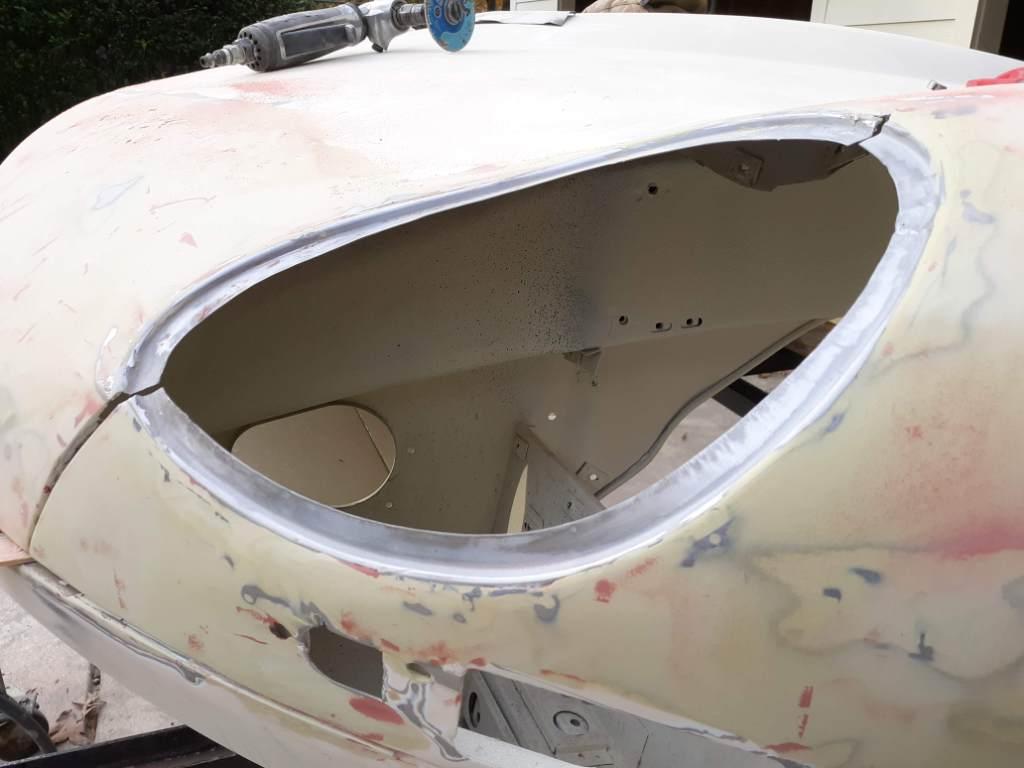
On my car, after doing most of the above, I achieved a very good fit. At this point, I prepped the bonnet for painting. I also proceeded to convert my open headlight bonnet to closed headlights, using the kit from Monocoque Metalworks but that will be another article. Here is a teaser photo.
So, months go by as the painting process proceeds. Or possibly, you’ve reviewed all the above and think you have a shot at making your bonnet fitment outstanding, without any paint work being required. The first thing you want to do is apply painters tape to all edges that may be damaged as you work on the bonnet fitment. As I said earlier, it is best if the engine is installed and the operating weight of the car is supported at the 4 wheel locations. In this way, the car will be deformed, ever so slightly, to it’s correct shape. In a pinch, I have used heavy bags of blasting sand to simulate the weight of an engine, etc. 5 gallon jugs of water may also be used.
As you get started, put fasteners back into all the applicable holes but leave them loose. Note that for the fasteners that connect the center section to the wings, you will want to insert washers to hold the joint 2 surfaces apart as required to insert the thin metal strips that hold the chrome trim strip. In a big picture sense, you are going to start the process by mounting the bonnet at 4 corners. 2 corners being the hinges and 2 corners being the latches. Let’s talk about the latches. There is a piece that is bolted to the wings. It has an adjustable screw fitting with a rubber washer on it. It is the male piece, so to speak. It will engage a fitting with a hole in it that bolts to the firewall. It is the female piece. The latches that engage with the handle inside the cockpit should be fully opened until later in the process. So again, your first fitment will be with the weight of the bonnet on the 2 hinges and on the 2 female pieces.
Male latch.

Female latch recepticle on left. Rotating latch activated from inside the cockpit on the right.
The female pieces have captive nut plates and can be moved side to side but not front to rear. The male pieces have captive nut plates and can be moved vertically and front to rear but not side to side. Between the 2 components, you have 3 directions of adjustment capability. The captive plates must be free to slide around. Spoiler alert. I wound up having to hog out the slotted holes on the male pieces to get enough vertical range of motion. More on that later.
With your first fitment you can be conservative. Adjust the male pieces to create generous panel gaps. No sense in crashing painted parts together at this point, even if protected with tape. I did all my initial fitment with the bonnet springs not connected. Yes, it weighs a ton but I wanted to rule out all extra constraints towards getting a good fit. In the simplest world, you will continue to adjust the male and female latch pieces as required to draw the bonnet panel gaps into a good fitment. It sounds easy. It took me several days! So don’t get discouraged. At some point you will want to engage the latches using the inside handles.

At times I found the curved latch ‘hook’ would not engage due to faulty alignment. The hook can’t really be moved so you have to fiddle with the male and female pieces. As you get close, you can use the latch to pull the bonnet down and rearward to a good alignment. At the end of the process you want the latches to be tight enough that there is no wiggle room that will result in a rattle. See criteria 3) above. Note that during this process, the rubber gasket that lays at the front of the scuttle is installed. This gasket can be a problem. If it is holding the entire scuttle shut line out of alignment, you may need to source a different gasket from a different vendor. They are not all created the same!

As you work towards good fitment at the rear of the bonnet, you will of course be fiddling with the shims under the hinges at the front. I used a small jack, padded of course, under the bottom of the nose piece to lift and lower the front of the bonnet and observe the effect on the panel gaps. Once I established an optimum position, I raised the jack a bit and inserted shims on the top of the hinge. The vertical bolts for these shims can be left loose, as the weight of the bonnet will hold everything in place. You also may be adding shims at the front face of the hinge. To see how these shims are working, you will need to tighten the two horizontal bolts.
In my case, the gap on the passenger side at the vertical scuttle edge was just too wide. I resorted to some hinge modification. I filled the large hole in the shim with 2 part epoxy. Then I marked a location for a new hole that was roughly 3/8″ in the direction required to move the bonnet to the rear. I gradually drilled out this hole to the required size. At the end, your new hole will be partly in the epoxy and partly in the aluminum of the hinge. Fortunately, when moving in the required direction, you are moving into the “meat” of the hinge, versus toward its edge. You will need to buy a set of metal cutting bits (I recall my largest hole was 11/16″). These bits are not cheap but my set has proved to be invaluable over time. This trick solved most of my gap problem.

The (almost) final step once you get the gap right it to tighten down all the bolts that you previously loosened. You need to leave the bonnet down and latched when you do this. It’s a pain to get up under there to reach the bolts but most can be accessed from the wheelwell. A few can only be reached with the bonnet open but by then you should have enough locked down to prevent shifting of the pieces.
And maybe what I would consider the final steps would be to lock down the hinges and to install the various baffles and sheet metal pieces in the engine compartment, such as the ones with the rubber edges. As you install any pieces that remotely come close to the bonnet, make sure that nothing is hanging up that will affect the closure of the bonnet. Install the chrome trim strips into the joint between the center section and the wings and you are done! You did remember to insert washers into the gap between these sections such that the little brass strips that hold on the chrome trim strips have a space into which they can be inserted?
It all rather involved but is an important step to having an award winning car.

PS – Here is a link to a long thread posted to Jag-Lovers. As you can see, there seem to be as many ways to approaching bonnet fitment at there are people doing it. An interesting comment is that Jaguar allowed 20 hours, by experienced factory workers, to fit the bonnet.
https://forums.jag-lovers.com/t/trial-bonnet-fitting/360577/32

Discussion
Comments are closed.