Upholstery – (defn) application of a 2 dimensional material over a 3 dimensional surface.
That definition pretty well sums it up the basic challenge of any upholstery job. It certainly was the case regarding my efforts to re-upholstery the original sport seats, as part of my Porsche 944 upgrade to a street/track car! The fact that it had sport seats and Fuchs wheels was a motivation for me to originally purchase this sadly neglected car. If you have been following this series, the car has come a long ways. It was time to tackle the sports seats.
I am assuming that the Porsche Sport Seats with their Porsche script fabric were a costly upgrade to the car’s original spec when it was purchased. I know that these seats are well thought of today on forums. I believe they were designed and manufactured by Recaro of Germany. They have cloth inserts in the middle with the word Porsche embroidered on a diagonal pattern. They have generous bolsters, composed of vinyl, that serve to keep the driver well supported during spirited driving. That’s the good part. On mine, the cloth was very dirty and stained. The original black cloth had faded to a dull grey color. The vinyl on the drivers side bolster was worn in the usual places. They may have been premium seats at one time but now they were just an eyesore. So there was work to be done.

Ugh!
This was not my first sewing effort. Back when I was in high school, I sewed up a set of seat covers for my Porsche 356. And as I was raising my children, I sewed up tents and sleeping bags to allow us to go backpacking, on a budget. I also installed a pre-sewn kit on my E-Type. But it has been a while since I started from “whole cloth” and there were lessons to be learned. Following is a tutorial on my efforts. Making this effort may not be for everyone but at least you may better appreciate the “trimmers” art.
My wife suggested that I take an upholstery class. With the internet, maybe that’s not really necessary. In that vein, I’d like to give a thumbs up to “Cechaflo” on Youtube. I have watched and studied many of his excellent Youtube tutorials regarding automotive upholstery. But all the watching in the world is only preparation for doing, which is where you really learn what is required to produce a quality product.
My first effort was sourcing Porsche script cloth. I sourced the black Porsche script cloth from Werk924.com in Germany. They have number of restoration products listed on their website. If you contact them via email, you will get in a reply in English. My contact person was Andrea. She was very helpful and knowledgeable. They list prices on their website. Shipping was not cheap for such a small parcel but my order arrived without drama. Andrea did coach me that my grey seat material had at one time been black. She was right, as I discovered when I removed the old material and looked at areas that had not been exposed to the sun!

Components of the seat laid out after dis-assembly. Note the cloth was actually black where not exposed to the sun.
I had two seats to restore. I would recommend that you only work on one at at time, as you will certainly be referring back to the assembled seat for construction details as you work. The fabric and vinyl are attached to the seat frame with short barbed spikes and “hog rings”. The hog rings can be clipped with small cutting pliers, although my aging hands appreciate the mechanical advantage of a pair of small bolt cutters.

Hog rings and pliers used to collapse the rings around the upholstery material.
I initially removed the fabric sections of the passenger seats, expecting to re-use the vinyl. A “seam ripper” is required to remove the old stitching and release the fabric pieces for making patterns. At some point, I realized that the fabric pieces had been stretched and warped over time. My first efforts, using direct tracings of the old fabric pieces, looked odd when sewn up. The problem was that the pieces were not symmetrical. Your patterns should be symmetrical about a centerline. I wound up making new patterns that were symmetrical and were a “best fit” to the existing cloth.

Paper patterns. The horizontal lines are for the seams. These are the 3 fabric pieces required to cover one seat. 1.1 meters cut length by 1.5 meters roll width was just enough to cover 2 seats. Make sure you get the script lettering running the right way (lower left diagonally to the upper right) and facing up!
The Porsche script cloth is expensive and you probably don’t want to get started without sewing up some test pieces out of cheaper fabric. I bought most of my materials from our local Jo-Anne store. One item that I bought on-line was fabric backed foam. Specifically, I purchased 1/2″ thick TS backed 1-2-Sewfoam from http://www.yourautotrim.com. The fabric is laid on the foam and the horizontal seams are stitched in. My test fabric was a black and white hounds tooth fabric, similar to what Porsche used to use. It is a real PITA to keep the rows and columns of the hounds tooth in line. Any small deviation really shows in the finished product. That said, I laid this fabric face down as perfectly aligned as possible and attached the foam to it. Attached with what, you might ask? I used Quilt Basting Spray, which is basically a water soluble glue in an aerosol can. This sticks the fabric to the foam long enough to get it sewn up properly. This was recommended by my wife, who was an invaluable resource in this effort.

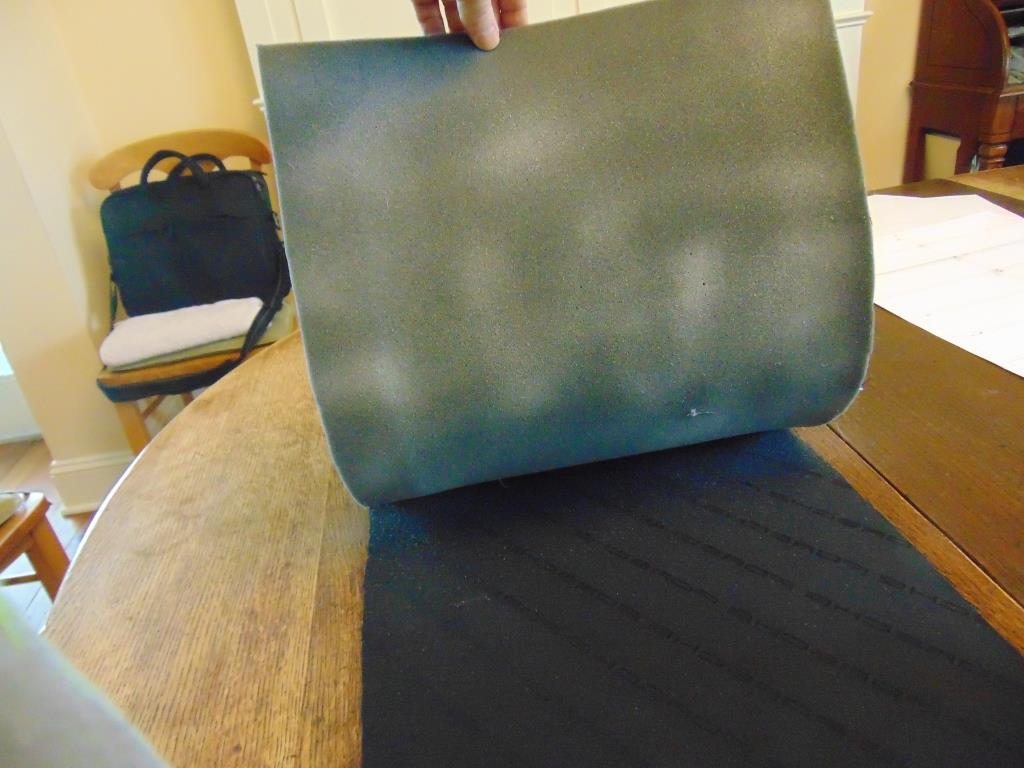
This is the special foam. The white surface has a cloth backing adhered. The fabric is glued to the opposite side. The original fabric had a 1/2″ foam backing. Later I will also discuss foam, as used for the bolsters, which an entirely different product and was clearly formed in special molds.

The foam as viewed from the side. It is 1/2″ thick.
In this picture, the fabric is laid face down and the foam is being glued to it with the basting spray, which shows as whitish streaks in this picture.

Here the fabric has been glued to the foam and the reference lines for the stitching added. Don’t add the lines until after you have glued the cloth, as it will move a little on you up to that point. The lines are done in chalk, which can be wiped away later .

Here I am getting ready to make the first of many horizontal stitches.

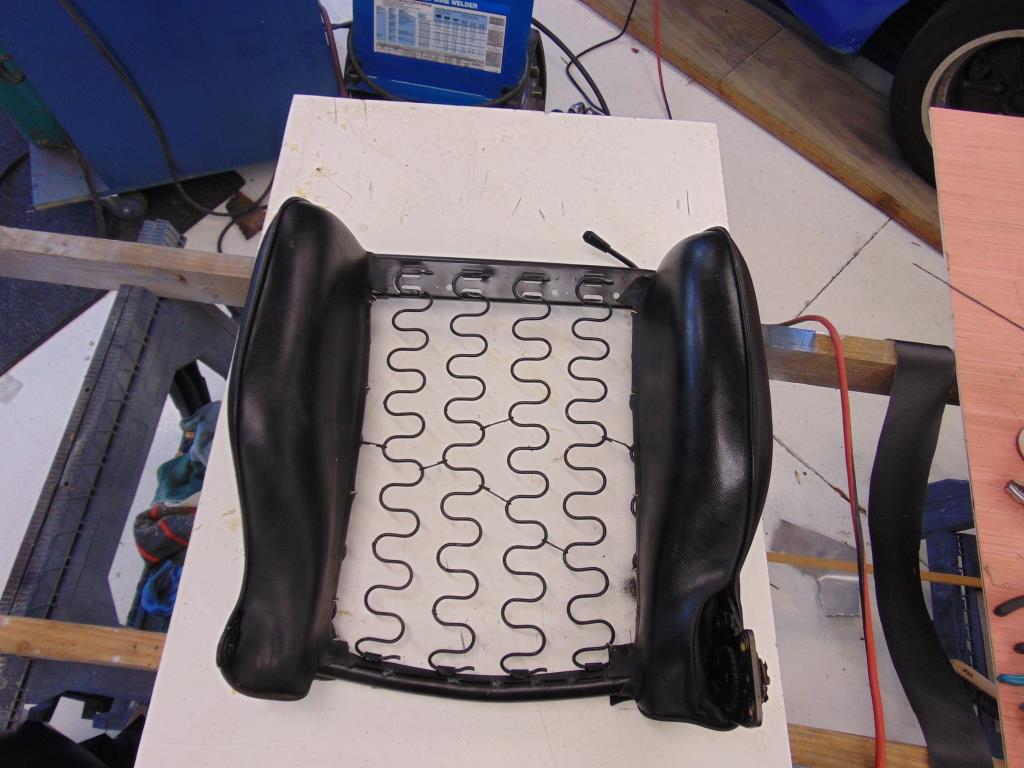
Here is the bottom seat insert with the foam double stitched across and the various vinyl pieces attached around the perimeter.
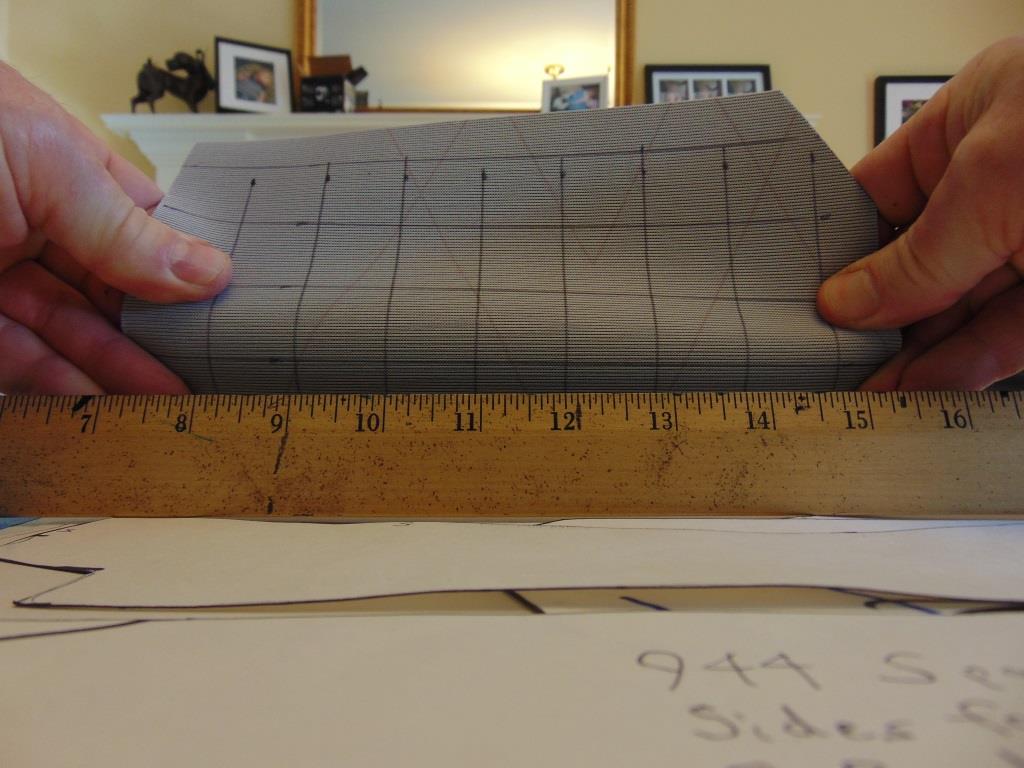
A word about the seams. I believe these are called “Tuck and Roll”. Refer to this Cechaflo video here. As you sew the fabric together with the foam, the seam will “squish”. As a result, the finished seams will be closer together than those you draw on the flat fabric. I found that if the seams where drawn flat about 1/4″ farther apart than as measured on the finished seat, the spacing will be about right. I used 2 5/8″ between the seams. The two parallel seams also measure about 1/4″ apart. For the first seam I marked it with chalk. For the second seam, I just found a reference point on the sewing machine that was 1/4″ away from the needle centerline and used that as my guide.
A word about sewing machines. My sewing machine is a “walking foot” type machine. In general that means that there is a serrated foot on the machine that marches forward in time with the sewing and positively moves the fabric forward the correct amount. It is capable of dealing with very thick layers of fabric. Beyond that, it is pretty simple. It will only do a straight stitch. No zig-zag, etc. I purchased this machine retail from an old line sewing machine supply store in NC, specifically Glenn’s Sewing in High Point. I think you can get one a little cheaper on the internet but be advised that this is a very heavy machine. It comes with a table, foot operated speed control, knee operated presser foot release, and a synchronous motor that allows slower speed operation. It is complex and bulky to the degree that I decided to purchase it from a bricks and mortar store. I do not regret the small price premium I paid in order to buy from folks with good knowledge about industrial sewing. It is a Consew P1541S. You will want to understand how to keep the machine lubricated, adjusted, and “in time”. Cechaflo has a video in this regard here. And he has several others about understanding how a sewing machine works and how to make adjustments.
I wound up making at least 2 test pieces for the cloth/foam parts before I felt that I was ready for prime time. Eventually, I worked up the courage to cut the cloth sections from my Porsche script fabric. Andrea swore 1 meter of material was enough. I ordered 1.1 meter and I am glad I did. I don’t see how I could have gotten by with much less.

My many trial pieces produced before I felt that I had the kinks worked out.
I had originally hoped to salvage some of the OEM vinyl, some of which was in good shape. But as with most cars, the area where the driver slides in was pretty ragged. Indeed, when I took this area apart, I found that it had already been replaced once. I could not find an exact match for the 30 year old OEM vinyl so I decided to replace all the vinyl on both seats, so that everything matched. 4 yards of 54″ wide vinyl should be enough for 2 seats, assuming you don’t have any do overs. Fortunately, vinyl is pretty inexpensive. Try and get marine grade vinyl, which has UV resistant chemicals include in its formulation.
The curvaceous bolsters were a special challenge. I am pretty sure that the factory used techniques to form the vinyl into a 3D shape. See the photo below.

Vinyl formed into a curved shape on the original bolster pieces.
I made some efforts to form my vinyl using a heat gun. The problem seems to be that the modern vinyl has a fabric cloth backing that is specifically designed to resist stretching, at least in the primary direction of the fabric.
Fabric backed vinyl does not like to stretch in the primary direction of the fabric backing.
Conversely, the vinyl does have some give diagonally to the direction of the fabric backing.

Vinyl will stretch diagonally.
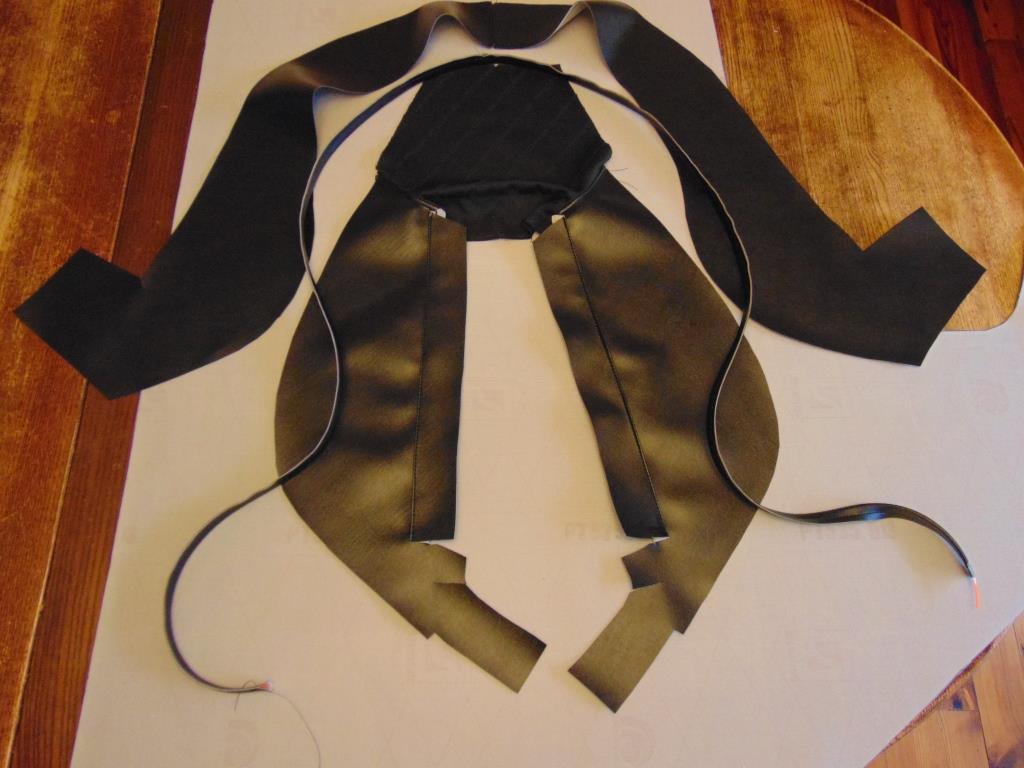
So I laid out the bolster pieces on the “bias” or diagonally to the sides of the material. Below are my patterns. As you can see, there are quite a few required. It was no small effort to come up with the patterns!

Here are all the patterns that had to be developed to do the complete job!
Following are some more photos demonstrating key steps in the process.

Seam allowance. You will cut all your pieces a set amount larger that the final desired shape. This is called a seam allowance. I used 1/2″. You can mark the seam but you can only see 1 side at a time. If you are consistent, you can line the edge of the pieces up, sew along the seam line you can see, and the bottom side piece will also be sewn along the correct line. Much of the extra material is cut away when you are done, so the seam will not be bulky.
Piping- piping is a rounded reinforced edge along a seam line. It makes the seam more durable and helps it hold a shape. Cechaflo has several good videos regarding piping. I used 0.095″ string trimmer line to make my piping. In the above picture, I am actually sewing piping, which is underneath the fabric you can see. If you look closely, the presser foot is a special one that allows you to sew up very tightly against the piping.
Vinyl parts for the seat back. In this shot, the fabric headrest piece has already been sewn to the adjacent vinyl for the bolster. You will want to plan your sewing sequence correctly or you will get in a bind. The long thin piece is the piping.

Closeup of the seam between the headrest fabric and the bolster piece. You want to sew this first so that the outer of the end of the seam can be captured within the circumferential seam for the larger piece, thus giving an attractive finished appearance.

Piping being attached. This is a 2 step process. The piping is attached to 1 side first. Then the 2nd piece is sewn over top of it. You can see the intersecting seam underneath about ready to be covered up. Retrofitting this seam is very difficult and in one reason I decided to replace all the vinyl.
Fortunately the primary foam pieces for both seats were in pretty good condition. I doubt that replacements are available but with some effort, pieces could be cut from raw blocks of foam. I’m glad I didn’t have to go there!
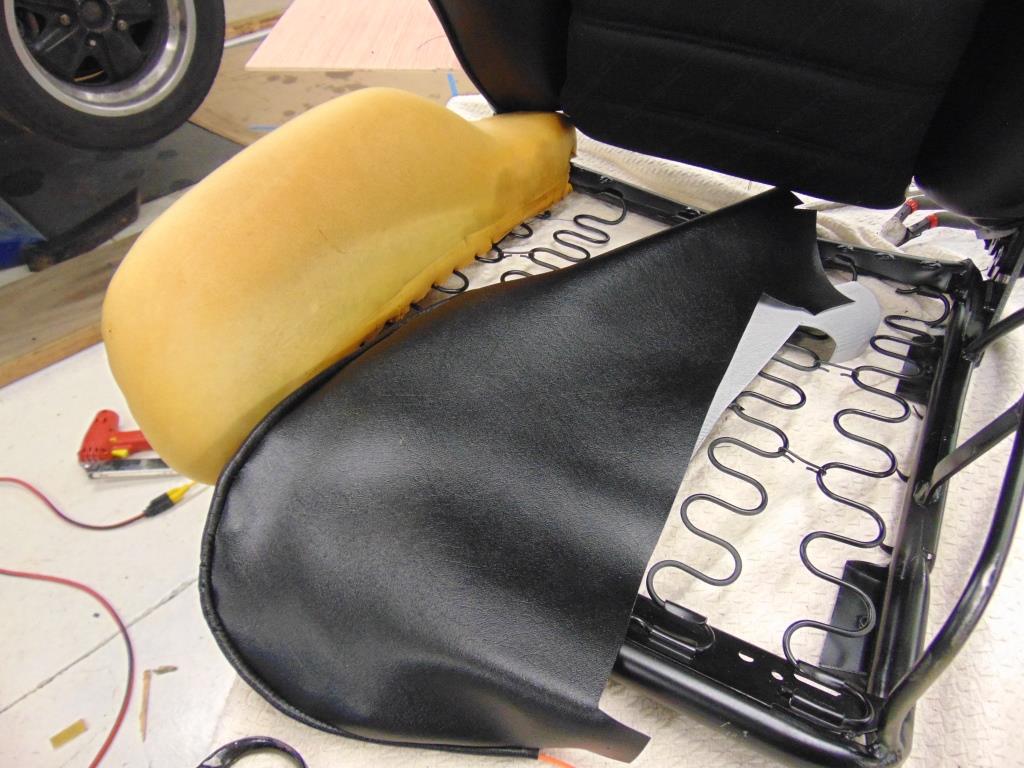
As noted above, the vinyl will stretch on its diagonal. As you put the pieces in place on the seat foams, you will wind up pulling pretty hard in certain directions to get the creases out and the profiles laying correctly. That said, I still had some areas that had minor wrinkles that would not pull out. There are wires embedded along the edge of many of the pieces which allow a solid purchase point for the hog rings as you pull. The Recaro seat frame is also very robust and helps hold everything in correct alignment.

Seat frame bead blasted.
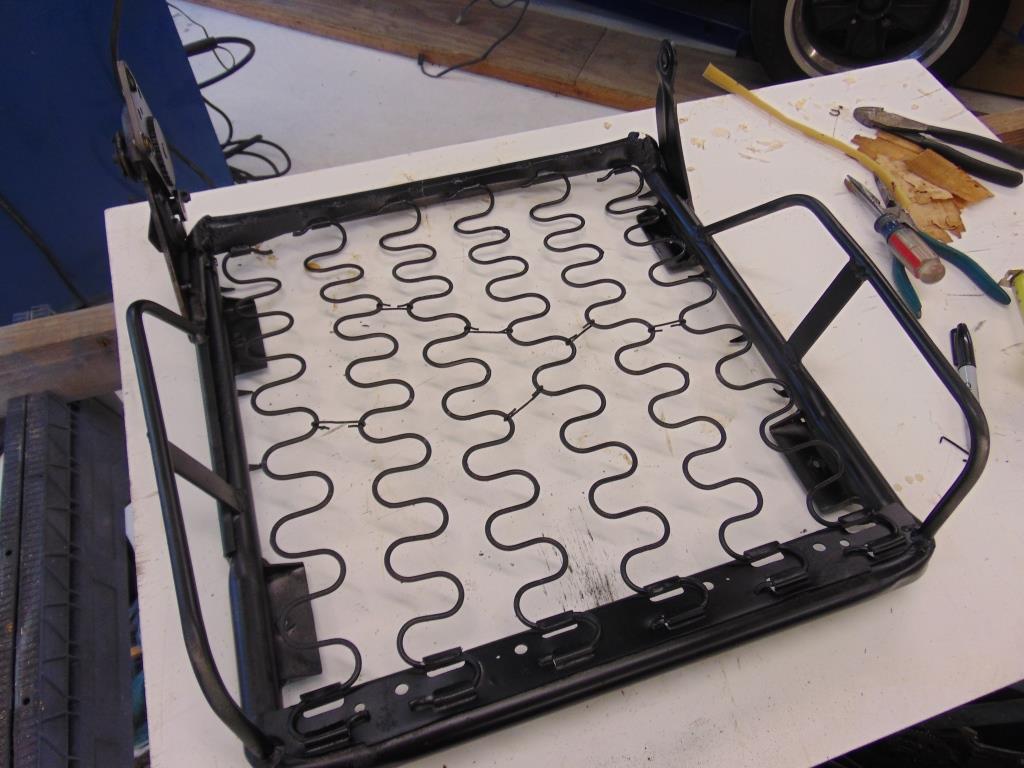
Seat frame primed and painted.
Seat frame, bolster foam, and new bolster vinyl piece.
New bolster vinyl in place.

Foam for seat back. In the background is the new vinyl ready to be fitted.

Tip- put a piece of plastic over the foam to allow the vinyl to slip smoothly into position. Pull the plastic out when you are done.

The row of black circles are where I used a one hole punch to make openings where the hog rings can go. There is a wire embedded along this edge. The hog rings will attach to the wavy seat frame wires.
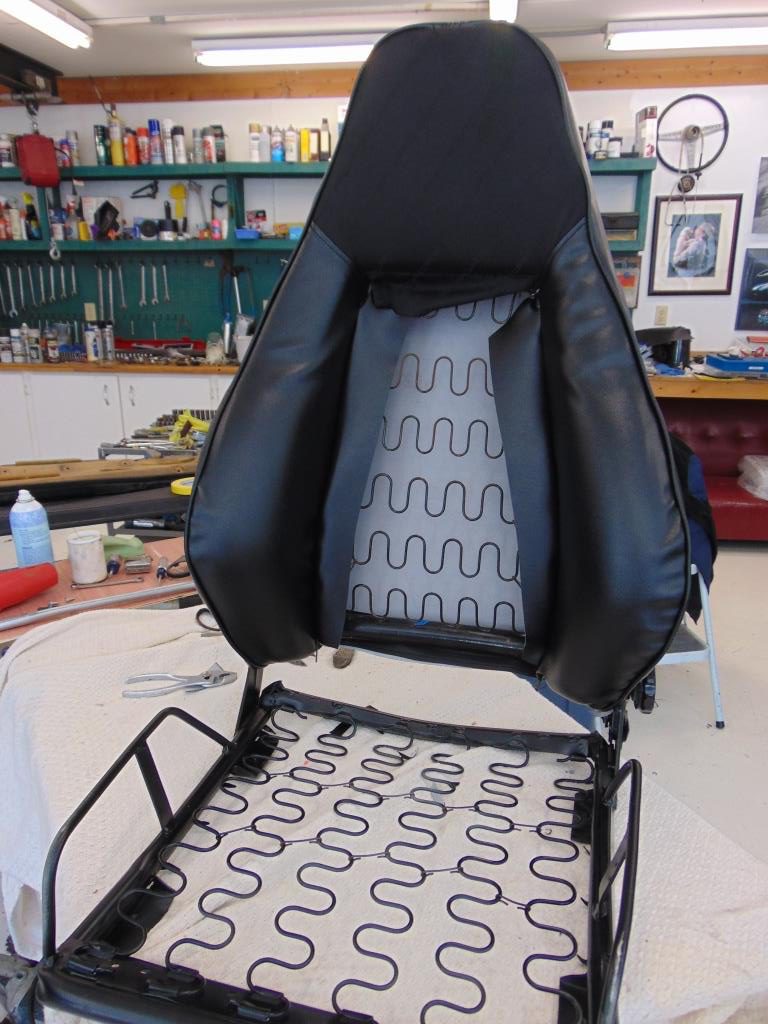
Back frame with vinyl and re-attached to the seat base frame. This turned out to be a mistake. You will want to complete the base bolsters first as they need to go over the hinge points before you attach the back.

This little guy turned out to be quite the challenge. It is the wire from the seat release lever. Getting it released from the outside is not easy. But if you remove the vinyl and pull back the foam, you can get to it from the inside much easier for detachment.

A closeup of the seat recline adjustment knob. The round center section pries out with a small screwdriver. There is a sheet metal piece underneath that must be rotated a few degrees until its release slots line up with the tabs.
The fabric sections for the back and seat base are held in place with hog rings. As I said earlier, do one seat at a time so you can refer to your original seat for placement of hog rings. Recaro also used long staples to attach the vinyl on the back side of the foam pieces. I suspect contact cement could also be used.
And, boom, all of a sudden you are done!

Done! Looking good 🙂
I’m very satisfied with the results, although it was quite the effort. Of course, now that I gone through the process, I could probably knock out additional sets in much less time. But, I’m ready to move on to more restoration challenges with this car. Next up- carpet!

Discussion
Comments are closed.