When I started the restoration of my 1963 Etype FHC “in boxes” over 4 years ago, I could only imagine conceptually the phrase “Final Assembly”. I was so far from Final Assembly that it was just a dream. Recently, after doing “Shake Down”, I had been able to list remaining items to be done, as a somewhat revolving list of about 10 items. Eventually my list would fit on the fingers of one hand. That was very exciting to tell my friends and family and, most importantly, myself!
One big final item was installation of all of the chrome. The chrome “drip rails” had been hung up at the chrome platers for many months but they eventually arrived in December. I carefully installed these, as they are quite delicate. I had actually cracked the chrome on a previous installation attempt. In retrospect, it appears that Jaguar planned for these parts to “pop over” the existing body drip rail and hold in place mainly by friction. I purchased new drip rail chromes from SNG and had them stripped and re-chromed, as is my policy to make sure all the chrome matches in its “hue”. But when the drip rails are rechromed using the show chrome process, there is added thickness. I attempted to install them using a rubber dead blow hammer but this was too much and the chrome cracked. I went back to square one. I had a set of original drip rails. They had cracked at the bend near the rear. I made a careful MIG weld repair to these to resolve the crack. I then used a mandrel (basically various sizes of sockets” drawn through the opening of the drip rail to open it up size wise. I opened them up until they basically laid into place with no force or hammering required. I had these show chromed, by S&H Chrome Plating. I was able to install these with minimal force. I used a silicone adhesive to hold them in place. After the adhesive had cured for several days, I was able to install the final chrome piece for this car, which was the cosmetic piece on the windscreen A pillar. This piece has no screws and is held in place with adhesive. I used 3M Strip Caulk, which is basically a pliable, sticky tar based strip of material. To fit and look the best, the piece had to be held proud of the underlying A-post. I actually used strategically place rubber grommets to force the piece fully outward to the best position. Then I filled in the void with the strip caulk. And just like that, all the chrome was installed on the car!

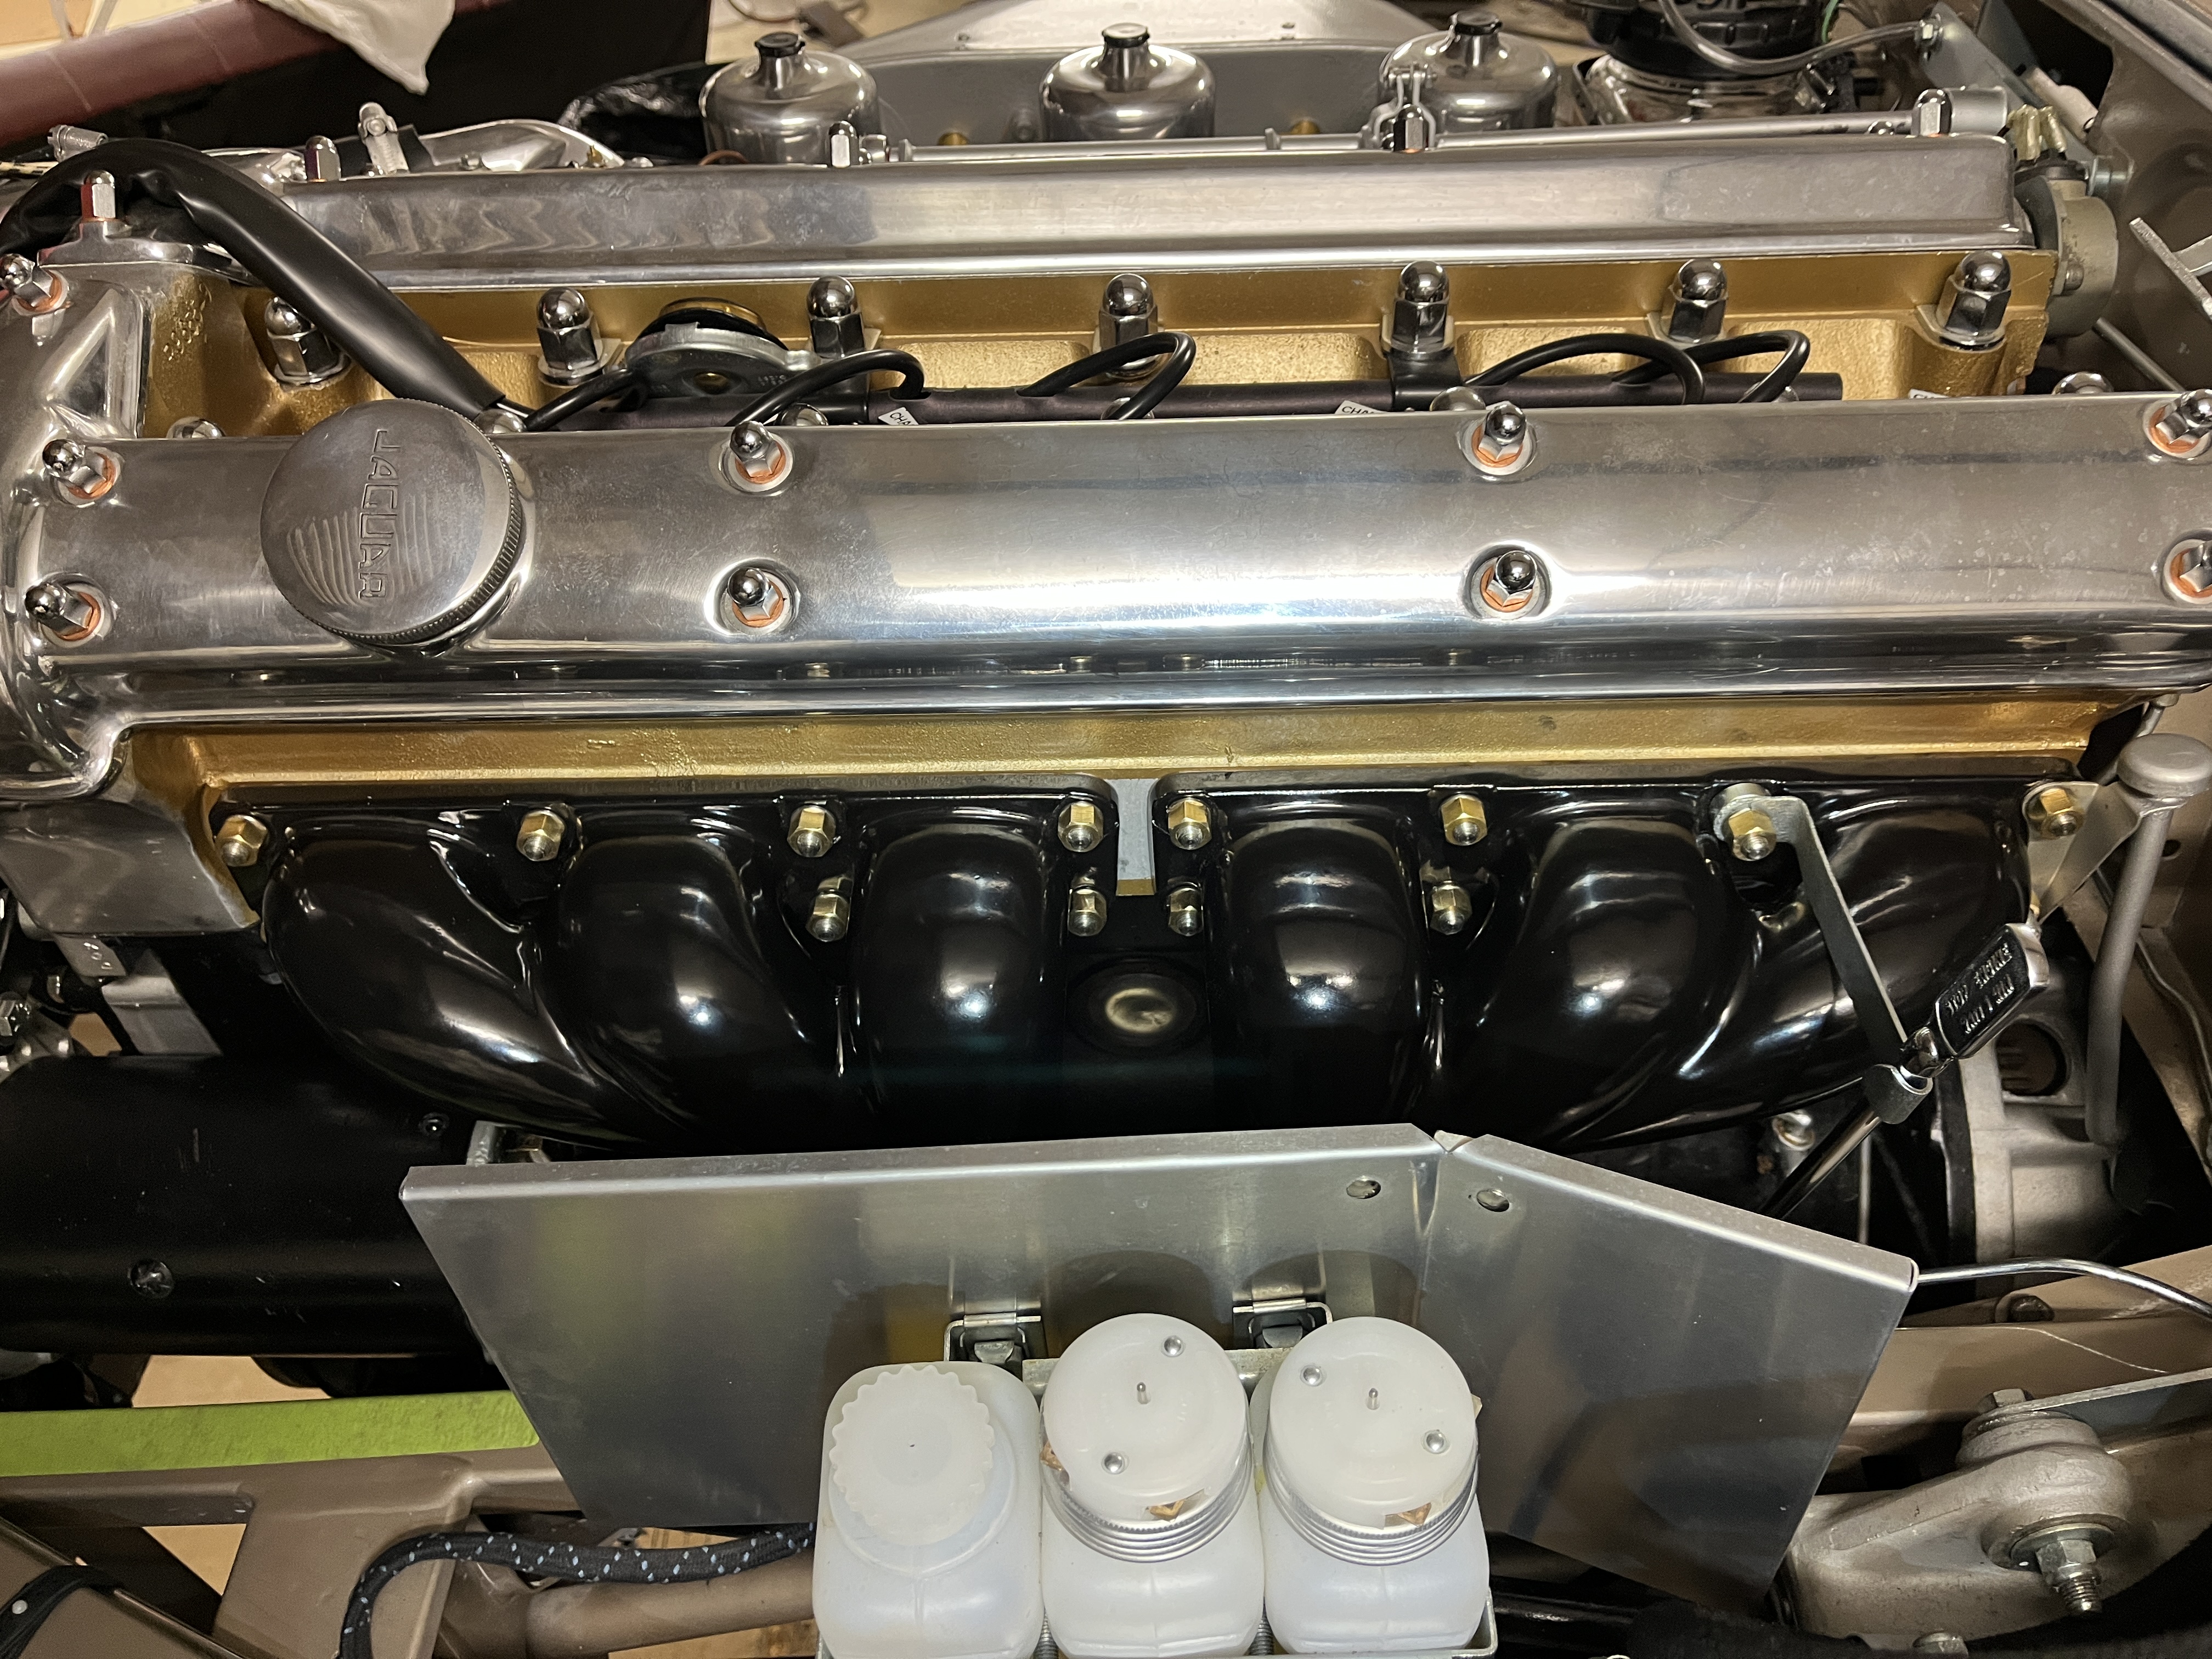
Another final item was installation of authentic porcelain coated exhaust manifolds. These are apparently delicate and sensitive to rapid temperature changes. I had initially installed a pair of very used manifolds, painted with black high heat spray paint. This allowed for me to concentrate on engine initial start and shake down without worrying about extremes of heat on the manifolds. Now that I am comfortable with the operating parameters of the engine, I have installed my beautiful porcelain manifolds with their striking brass hardware.
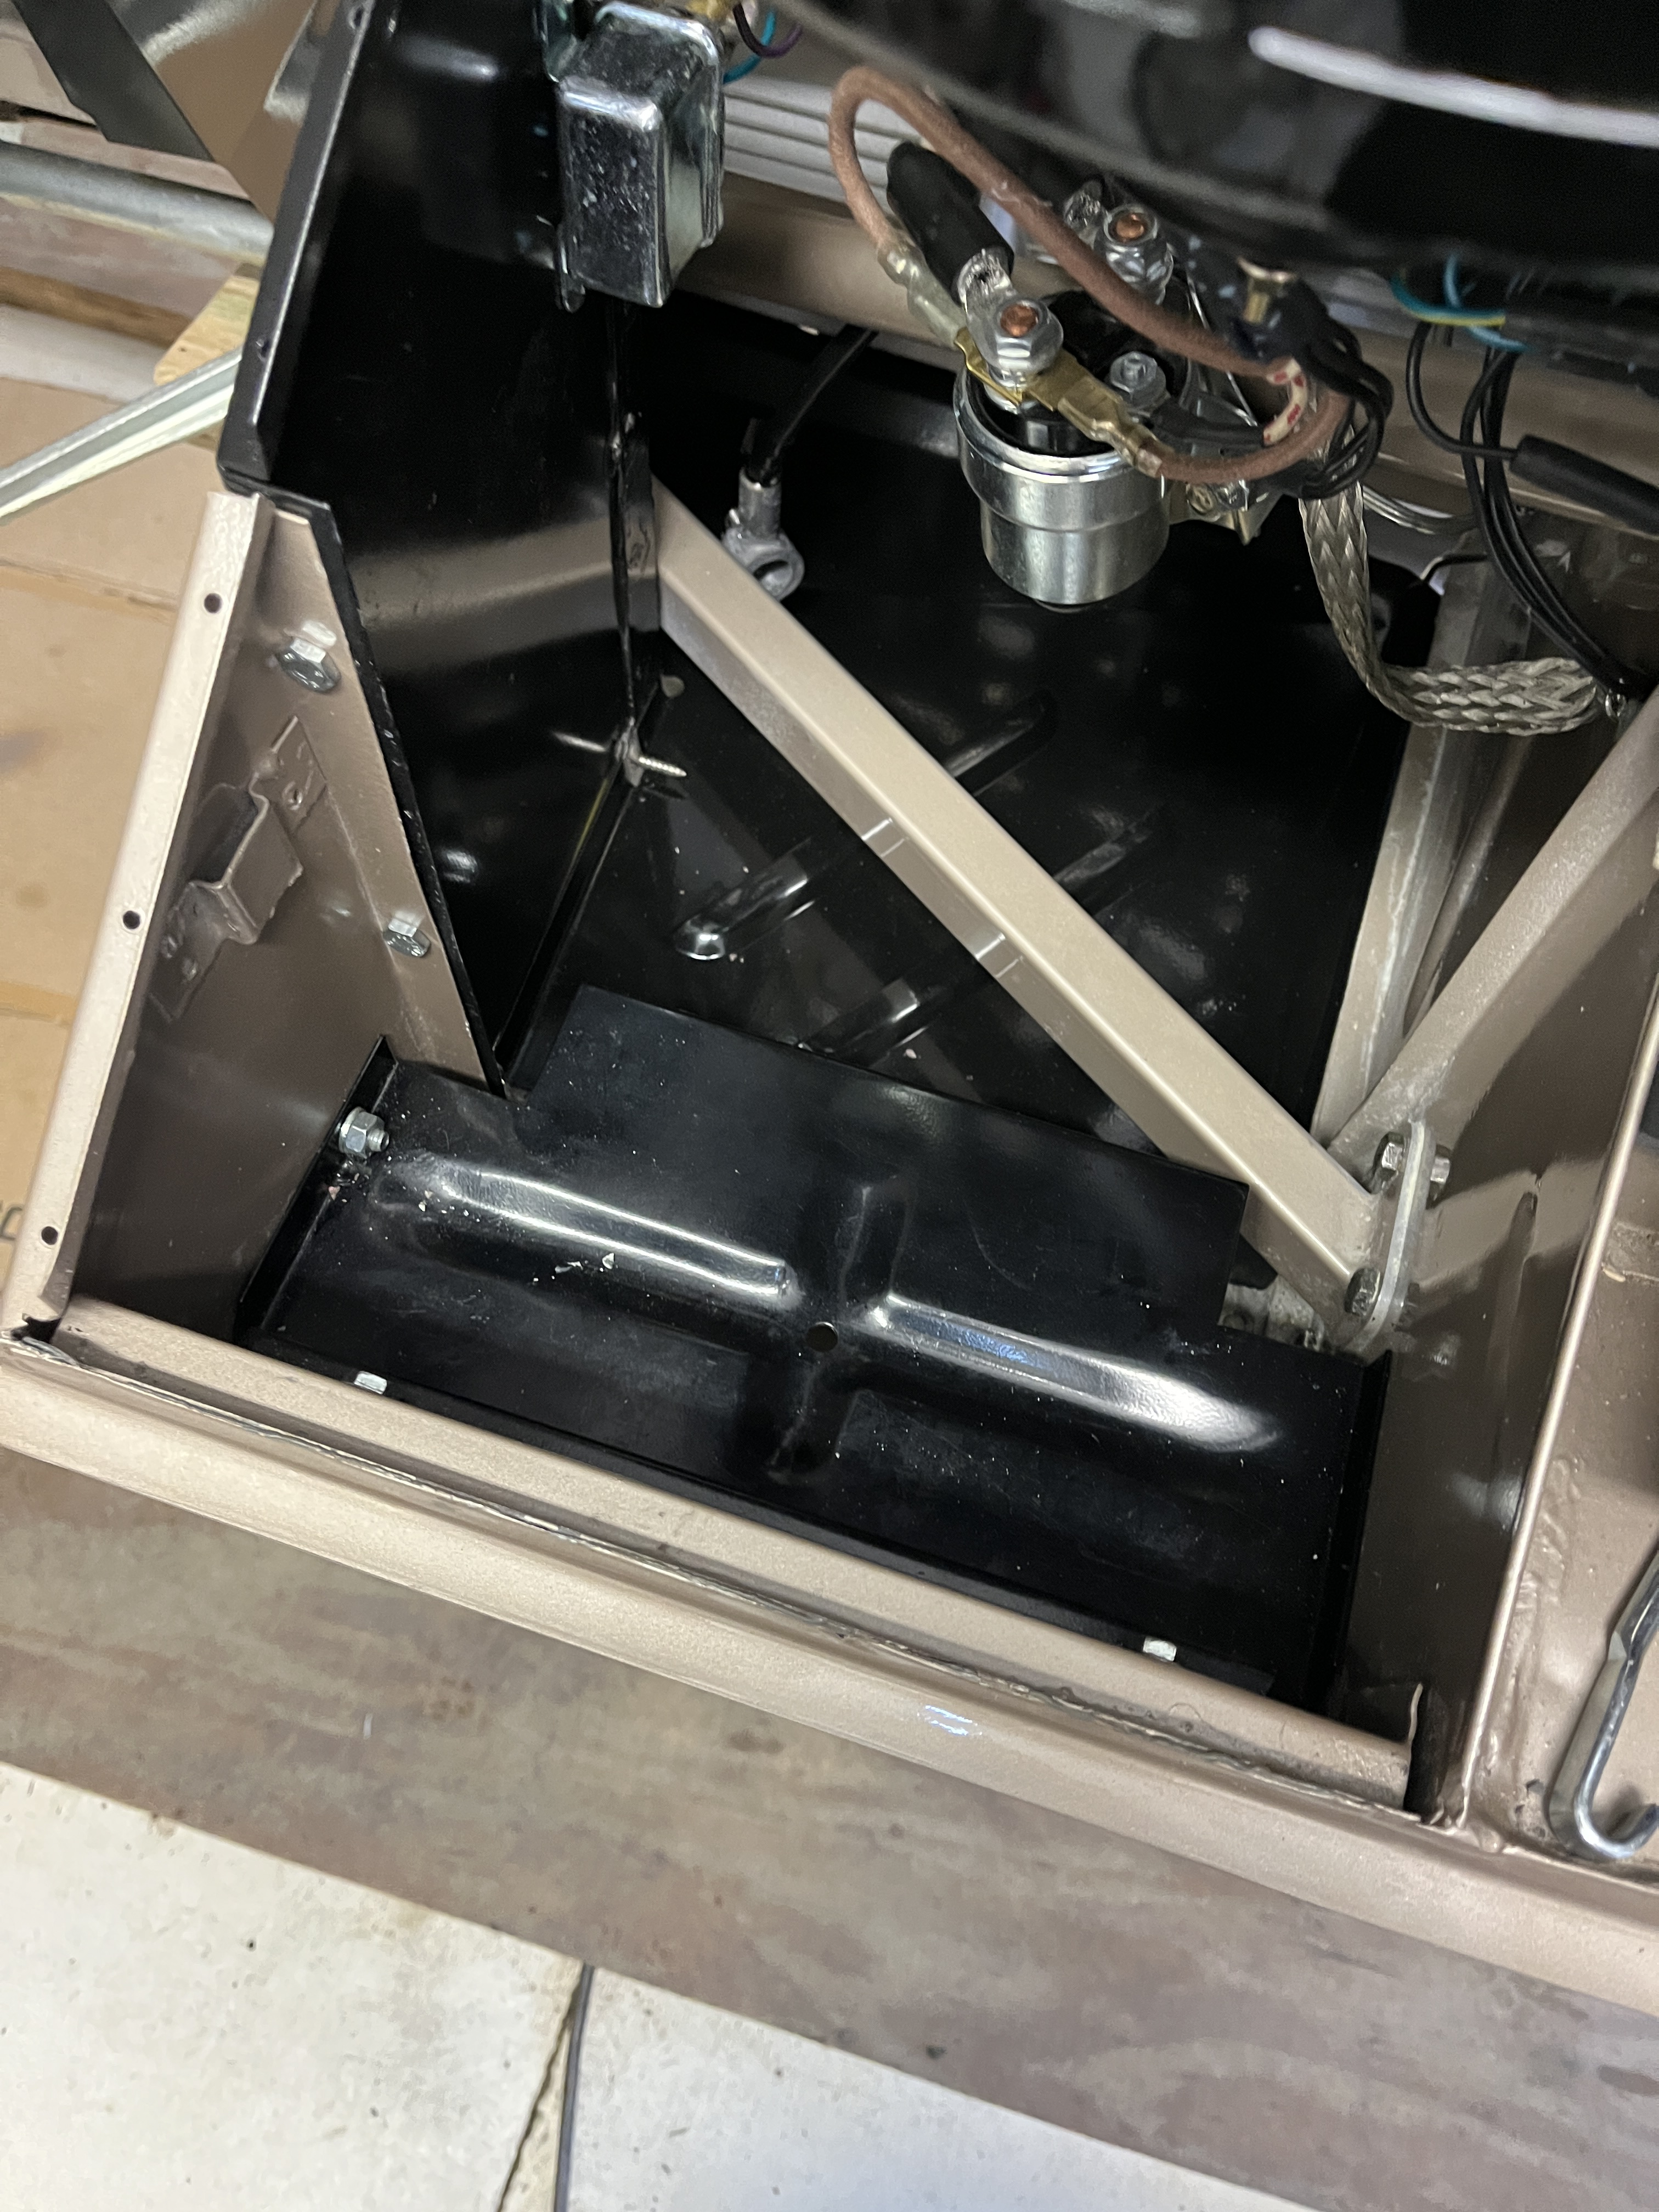
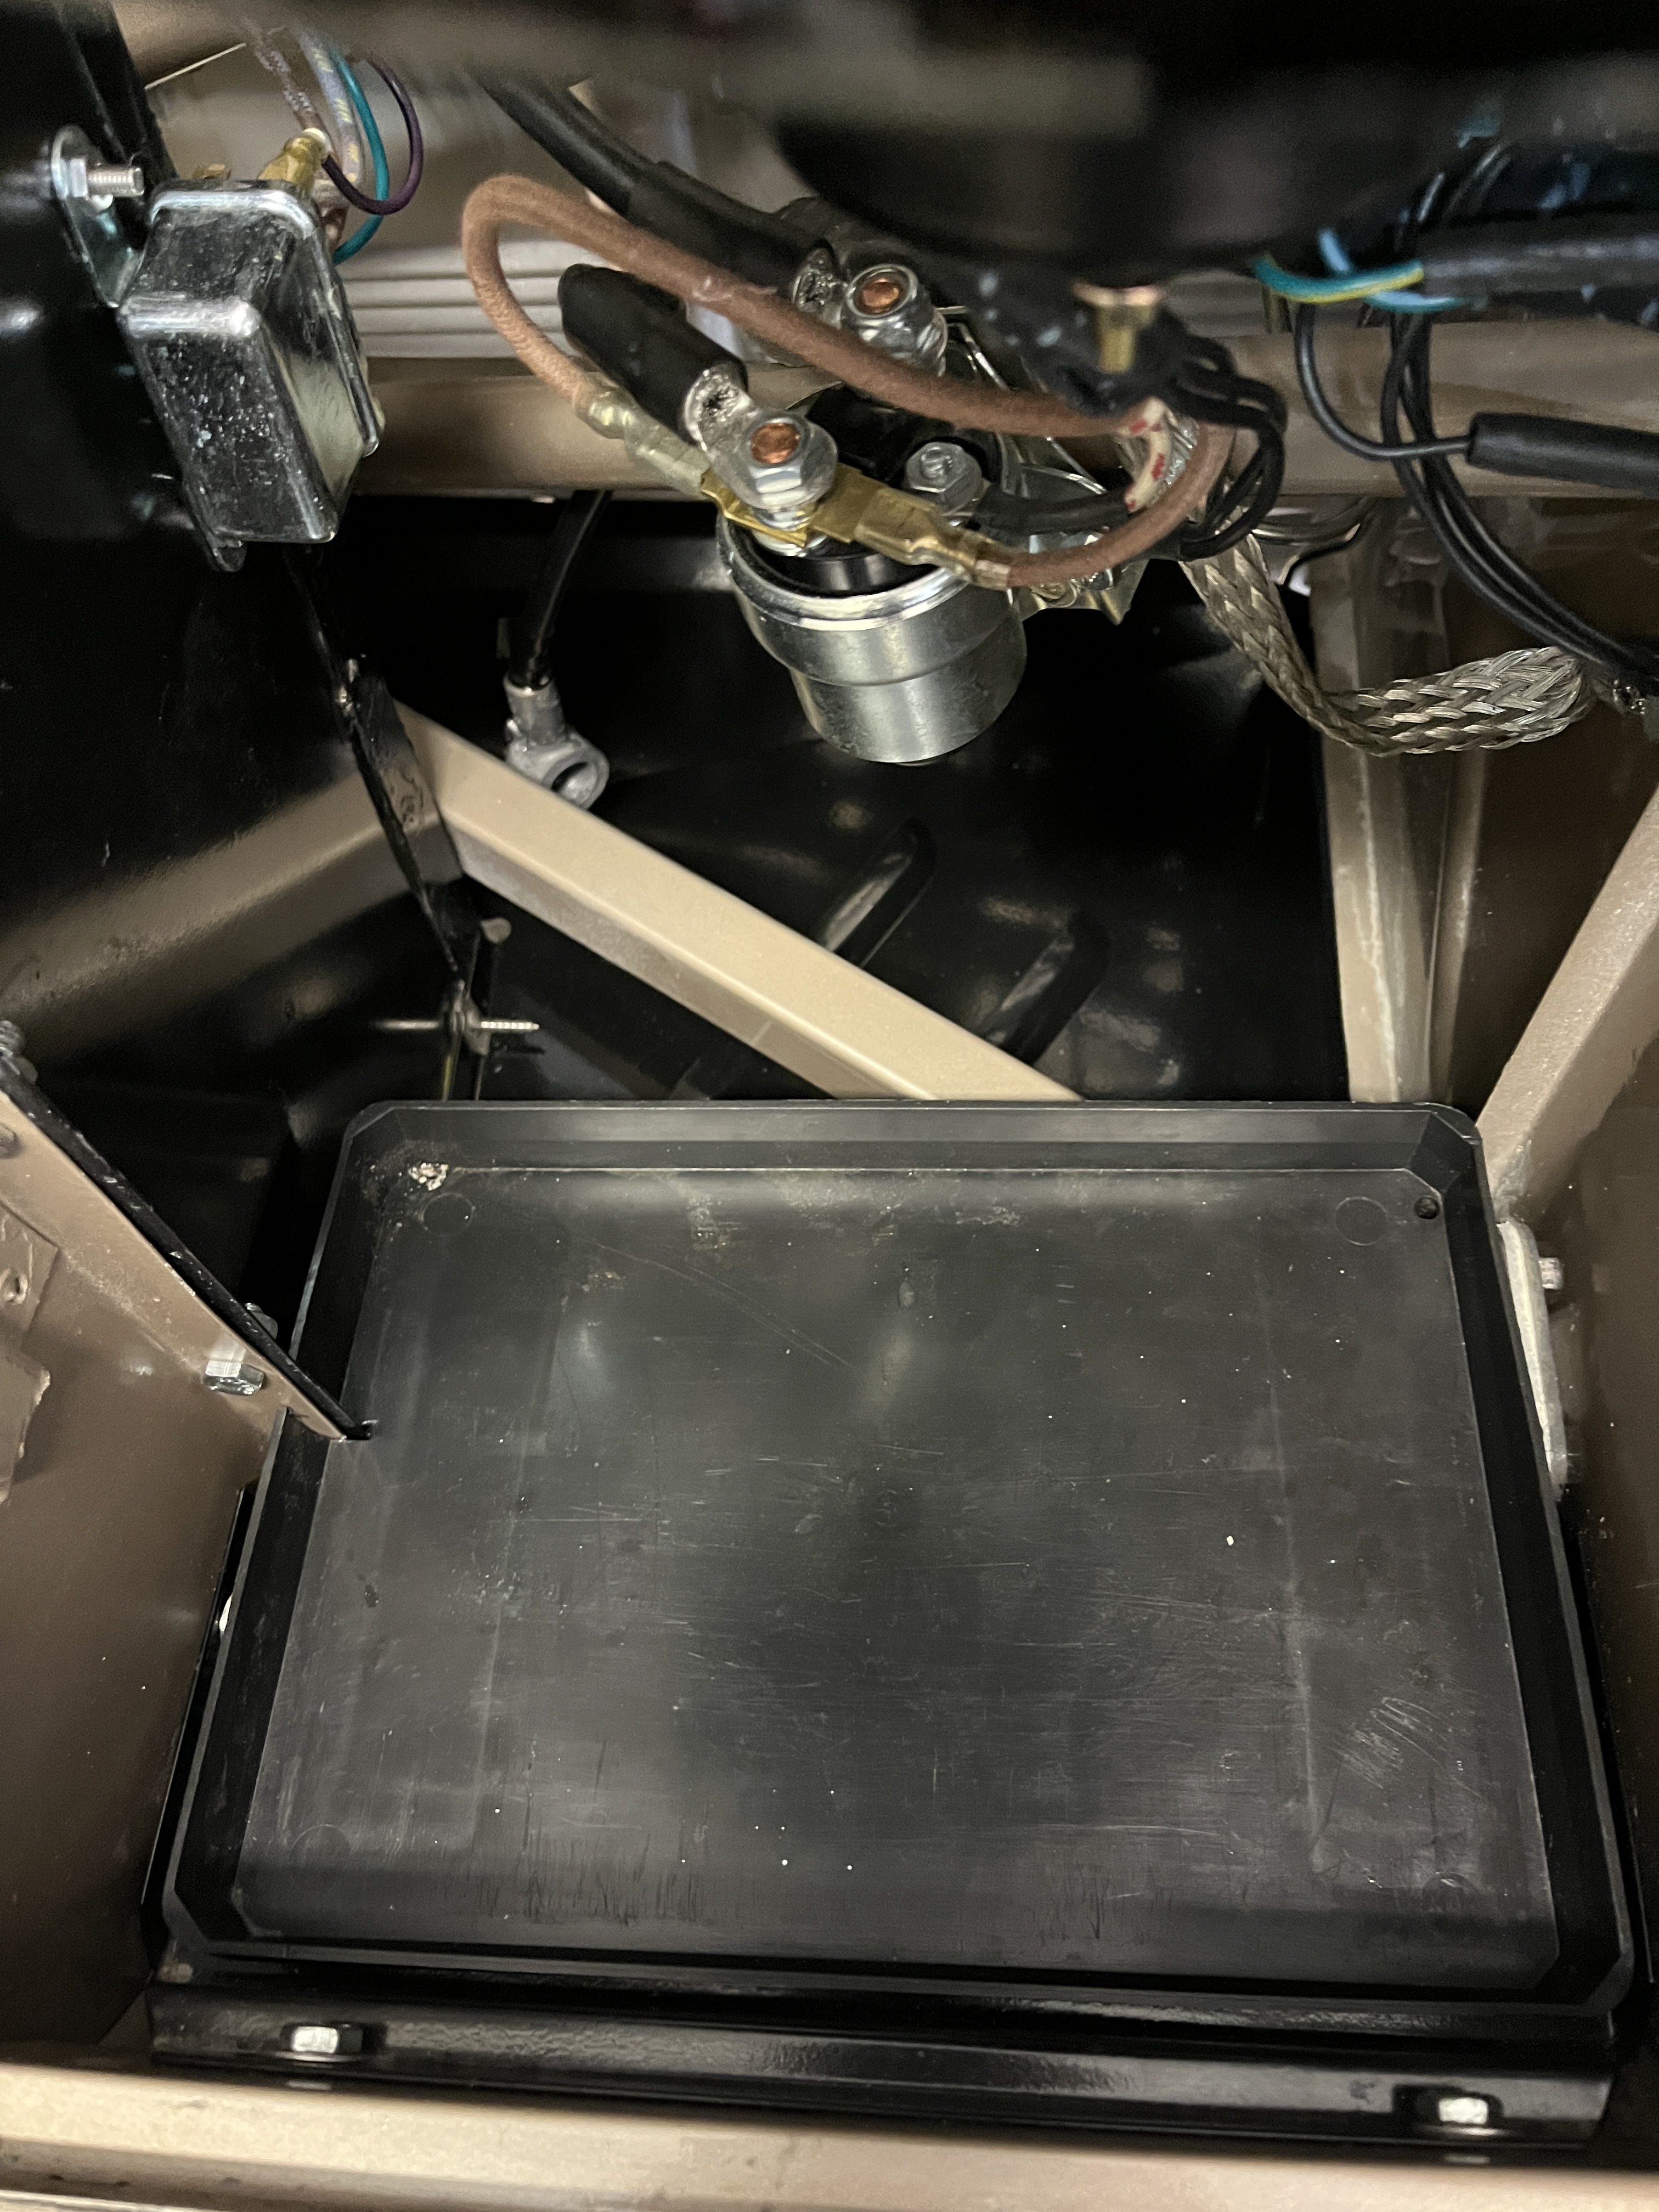
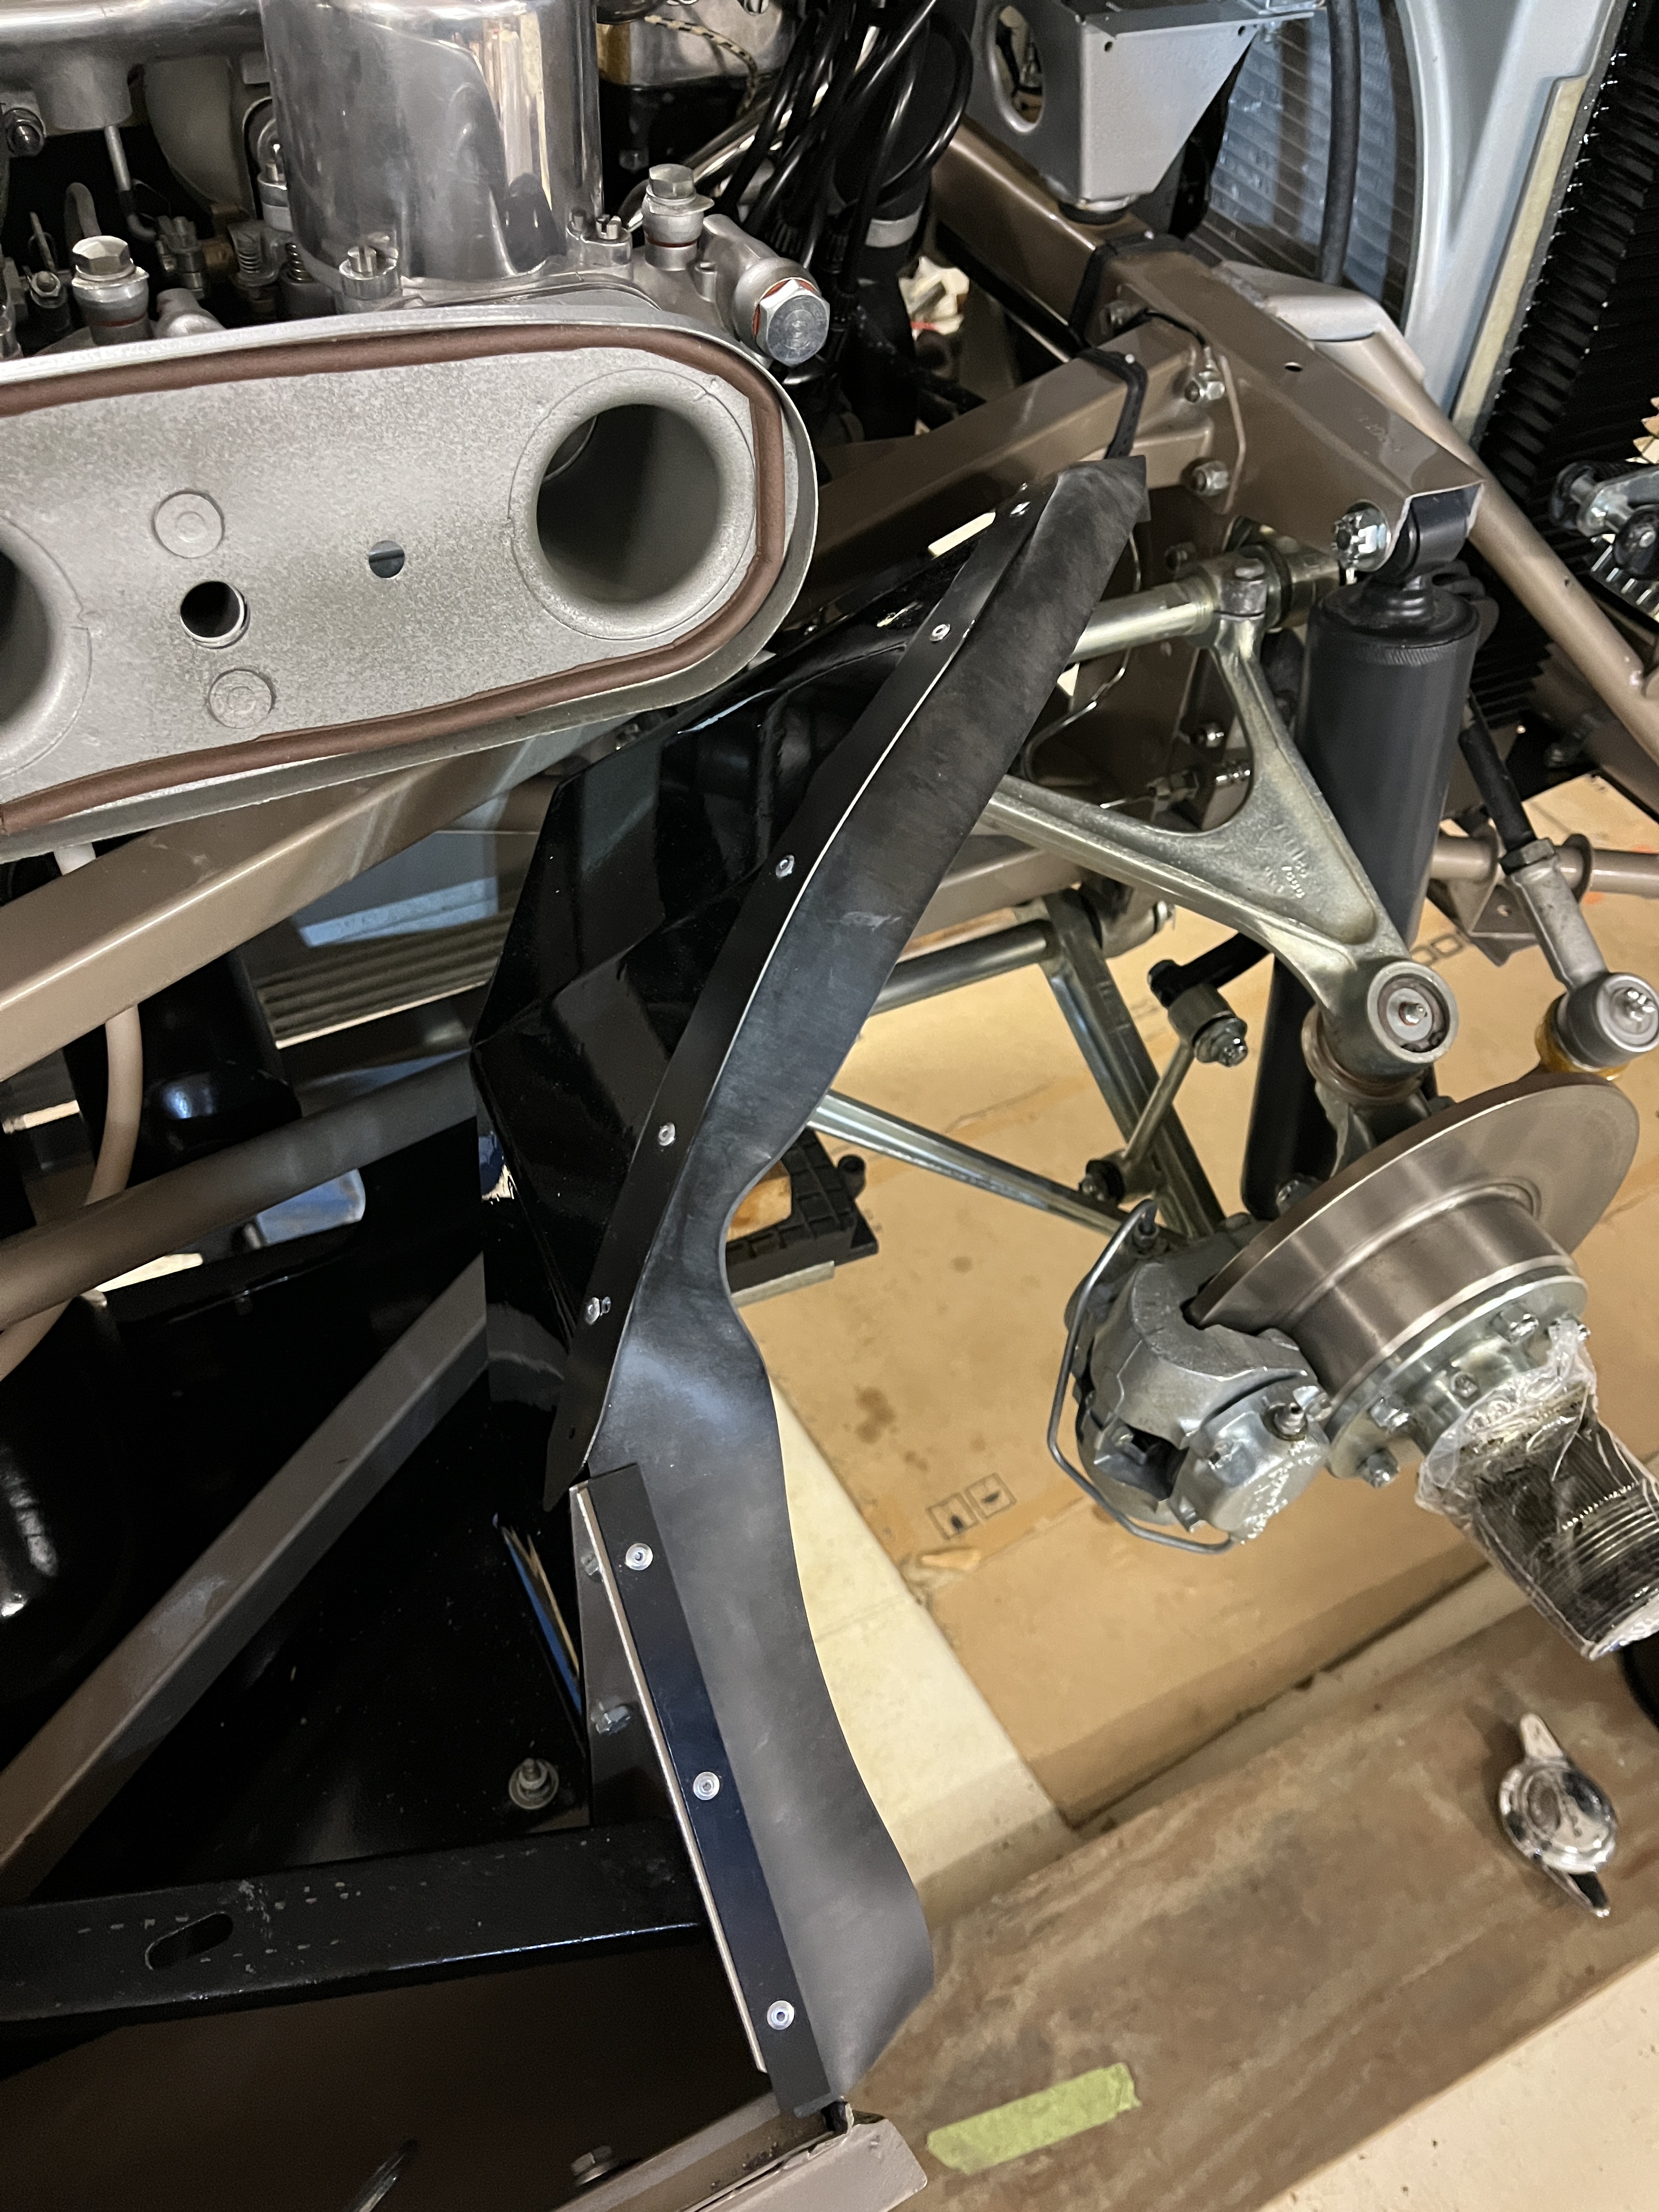
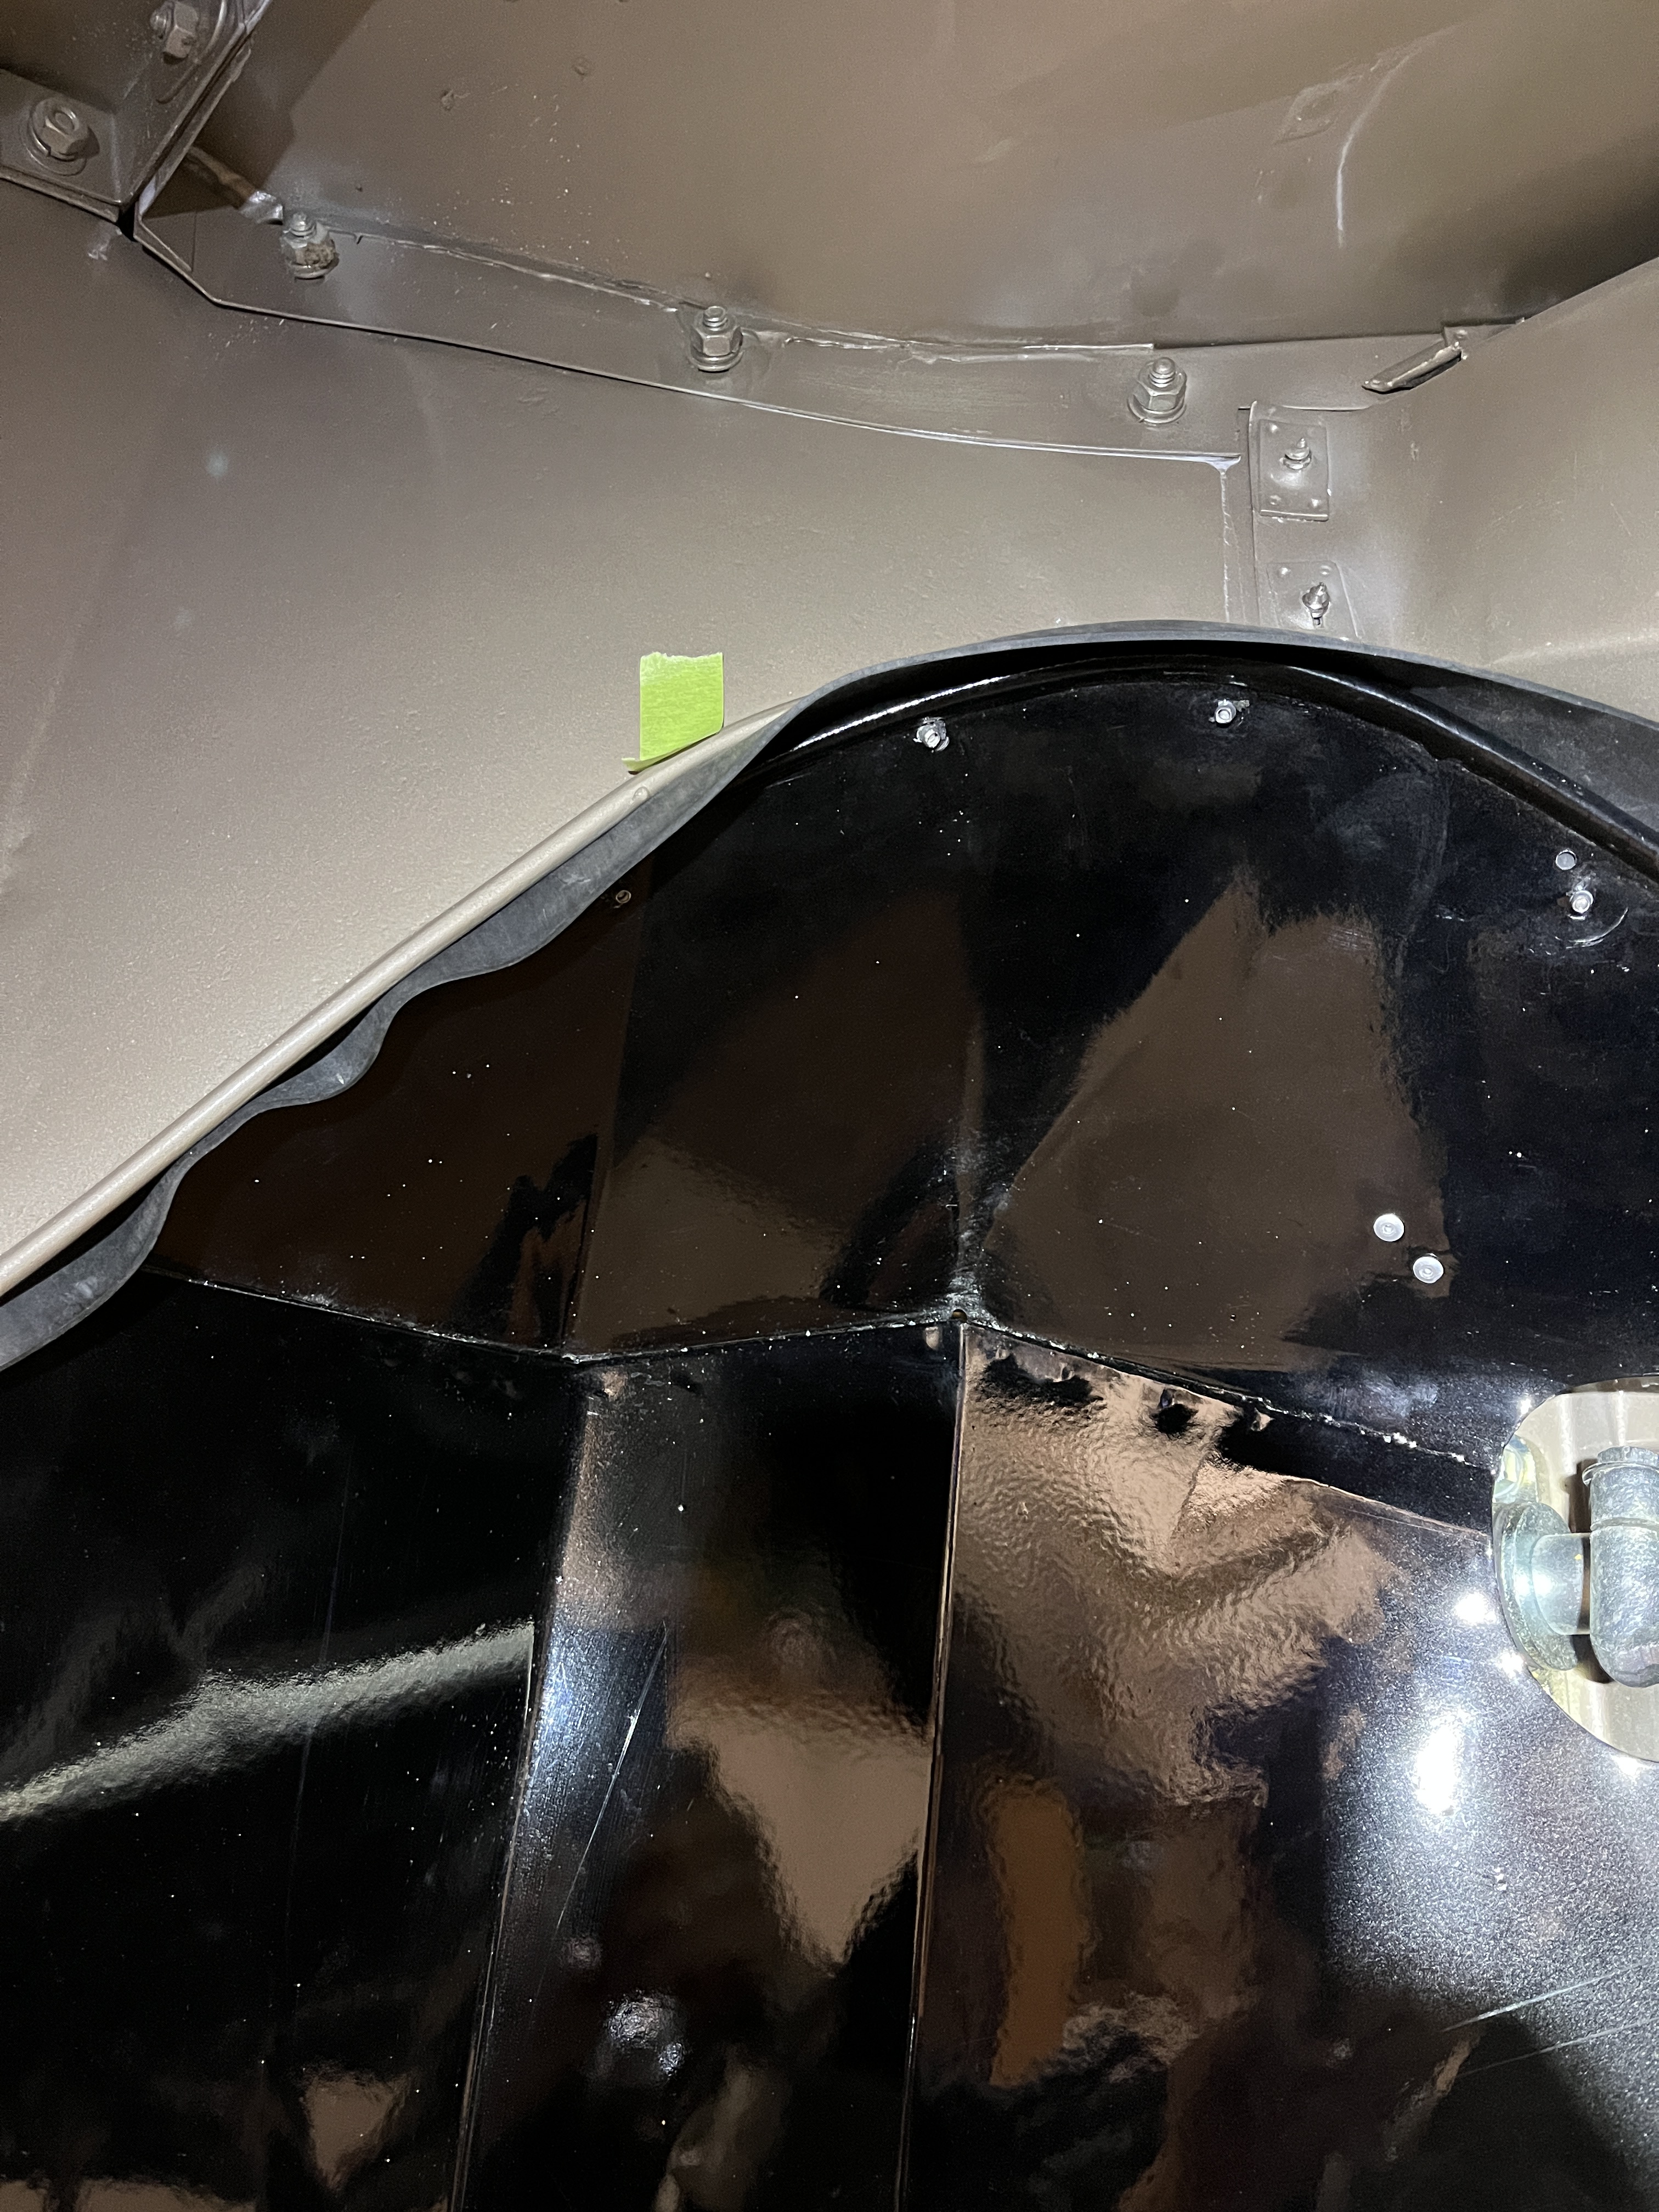
Yet another final item was the installation of the “mud shields” in the engine compartment. I had held off on these because access to work on “stuff” in the engine compartment becomes very restricted with these shields in place. As is typical with this project, the reproduction shields I had to purchase fit pretty well but required some “fettling”. Just figuring out where and how they were attached was a research project. An internet query turned up discussion on fitment on Jag-Lovers, with useful diagrams. Regardless, installation is tricky as you are boxing yourself in as you go. Removing the air filter on one side and the battery on the other side was necessary to allow access. BTW, here is a sight you will rarely see, which is a totally new, unrusted battery support tray! It gets a plastic tray placed over top of it, with a drain tube, but in general this area catches hell over the years from battery acid.
The mud shields have a rubber strip pop riveted to the top edge. The item I received from SNG for this purpose was 1/8″ thick x 2″ wide. I confirmed from someone with a similar original car that this was the OEM shape. But in my case, the clearances between the curved mud shield on the passenger side and the mating bonnet diaphragm are extremely tight. I knew without trying that the rubber would need to flex a lot in order to allow good fitment. I ordered some 1/16″ thick x 2″ wide soft neopreme strip from McMaster. This has been installed and works. Just barely. You can feel the binding as the bonnet is lowered the last little bit. As a reminder, when you are fitting your bonnet, keep in eye on the clearances from the mud shields to the bonnet. It is tight under the best of circumstances and there may be a hard interference if you aren’t careful.
I will confess that while spending a week with my daughter and grandchildren in Boston, I stole a few hours to review on-line documents, searching for Authenticity items that I might have missed. The first document I reviewed was the JCNA Series 1 E-Type Judges Guide. This is the one that you really want to pay attention to, as it is the basis for many of the Authenticity decisions that judges will make when scoring your car in a JCNA concours. I have of course been following this document all along but indeed, while reviewing it, I came up a with short list of items to double check when I got back to my car. Two examples that popped up were:
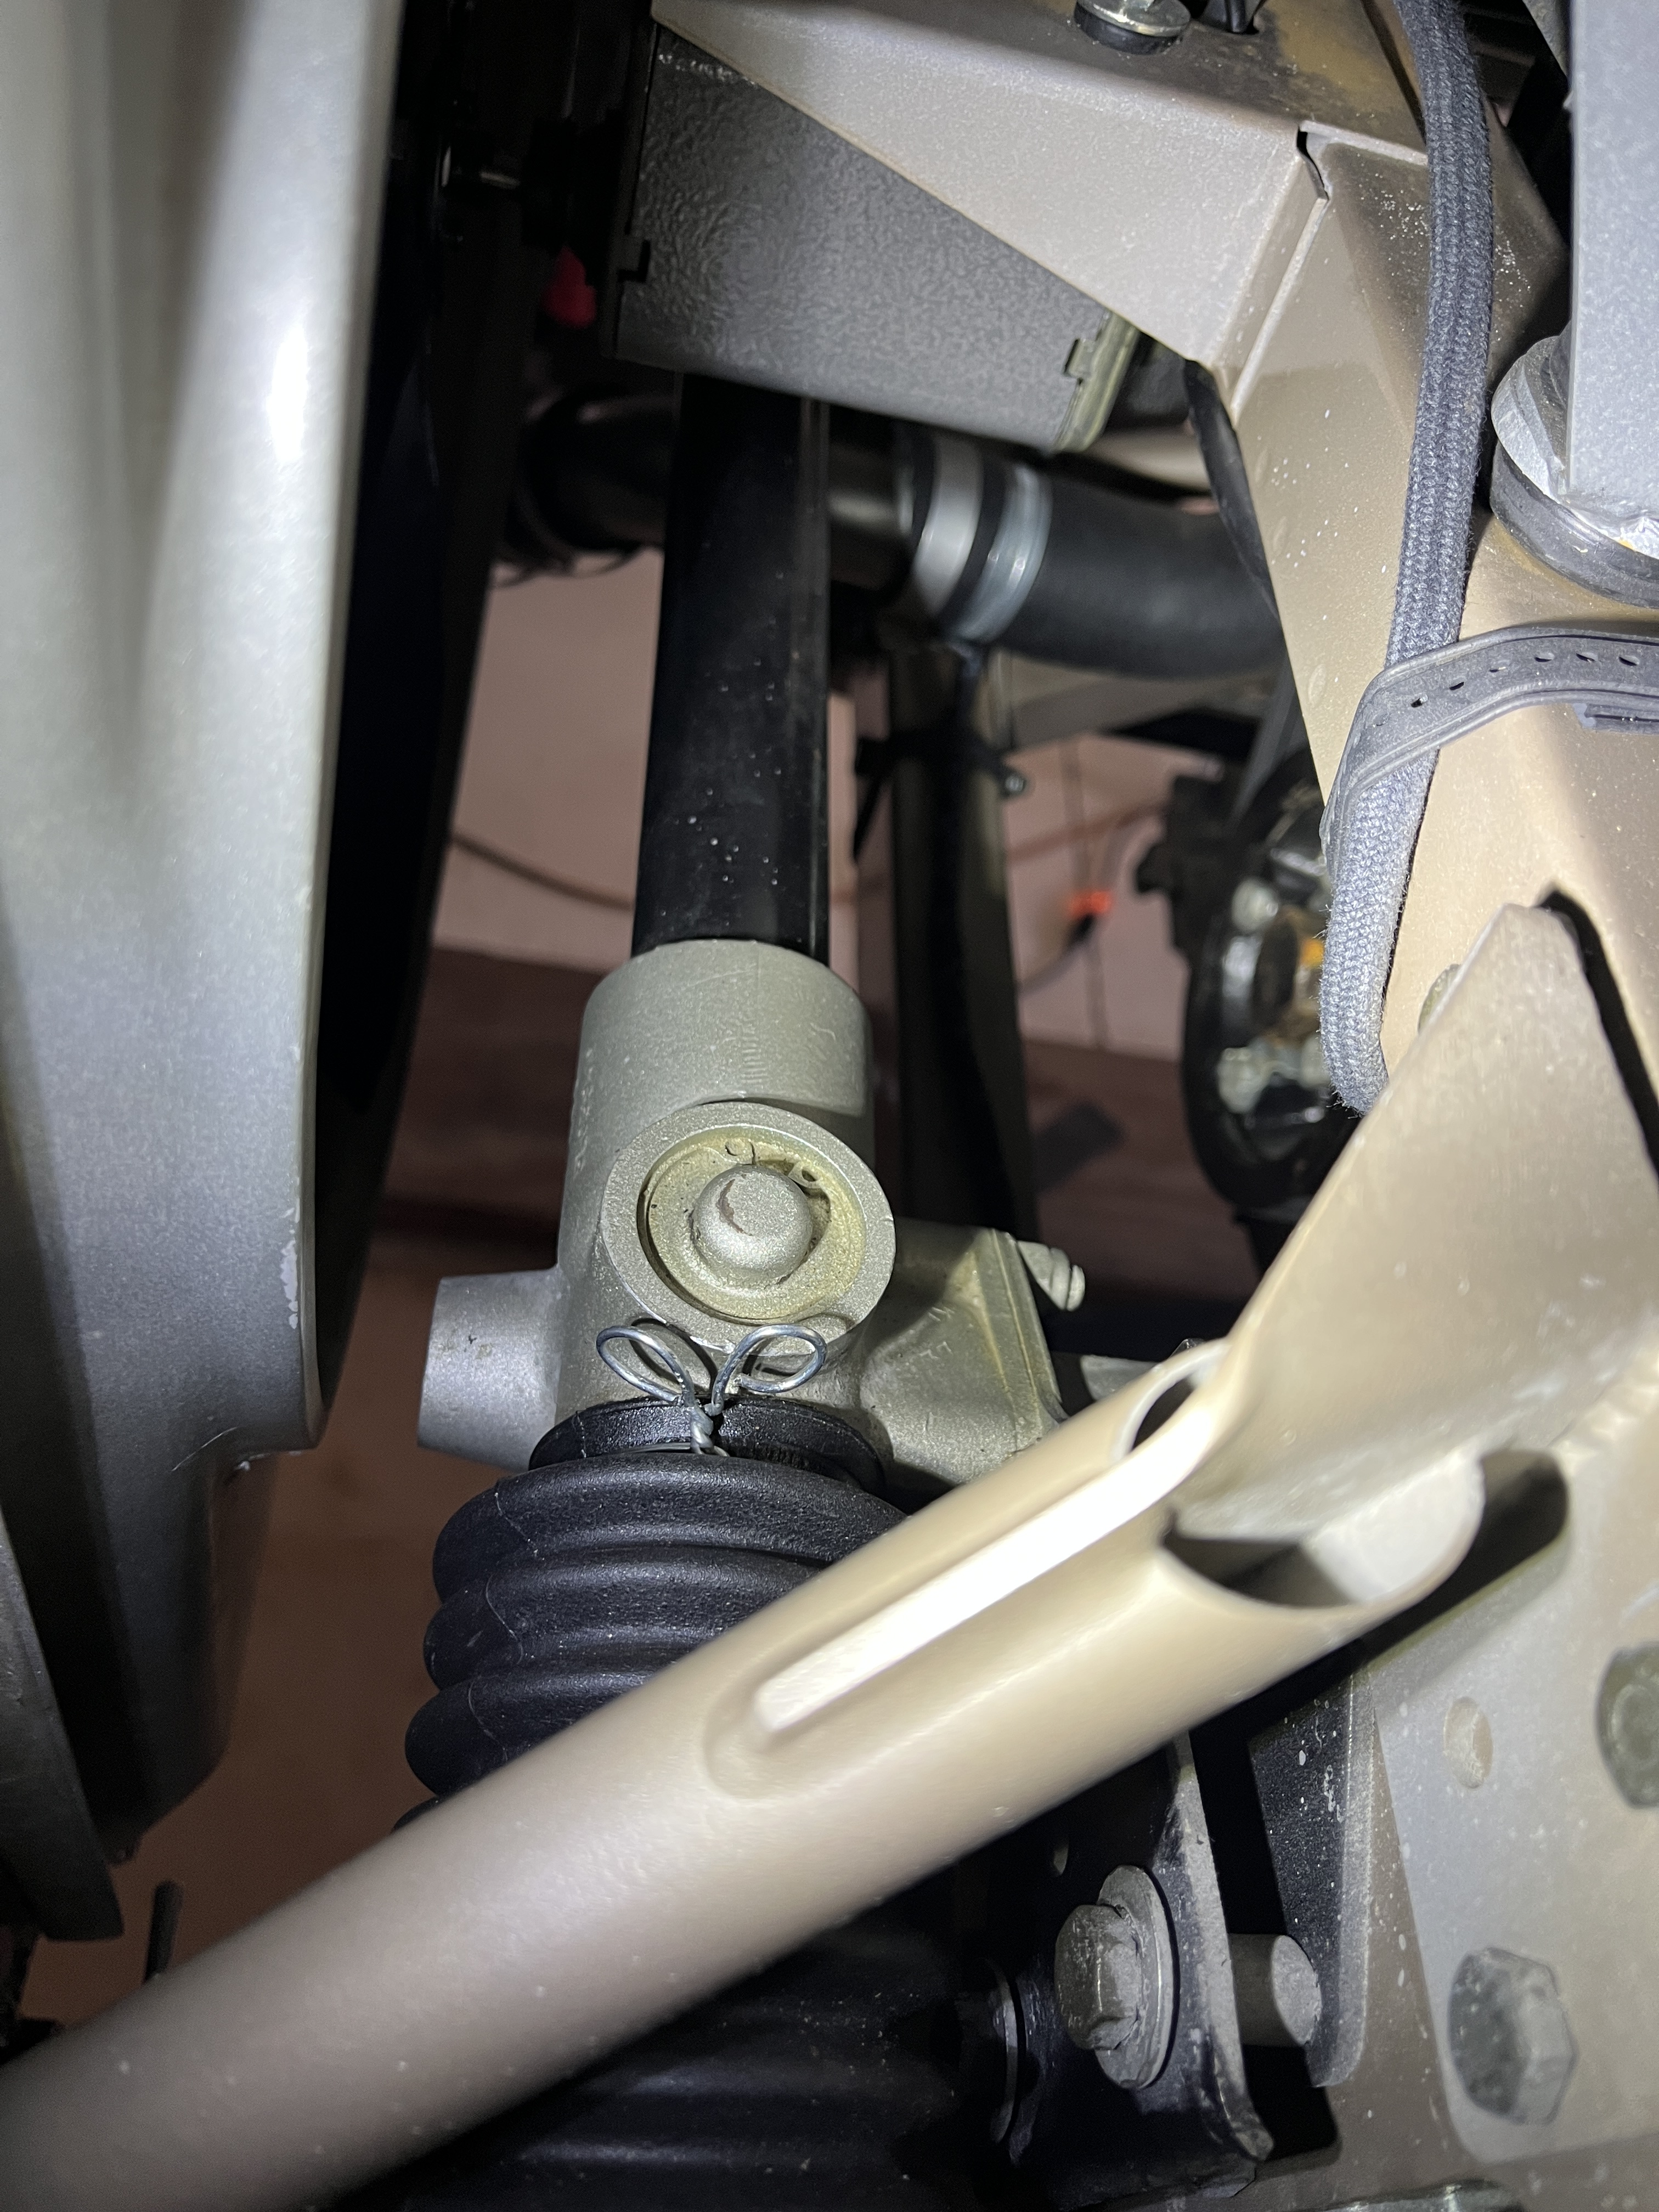
RACK BELLOWS
Retained to rack with hose clamp on right side, tie wire on left (J30 – Pg. 141 & J37 – Pg. 125)
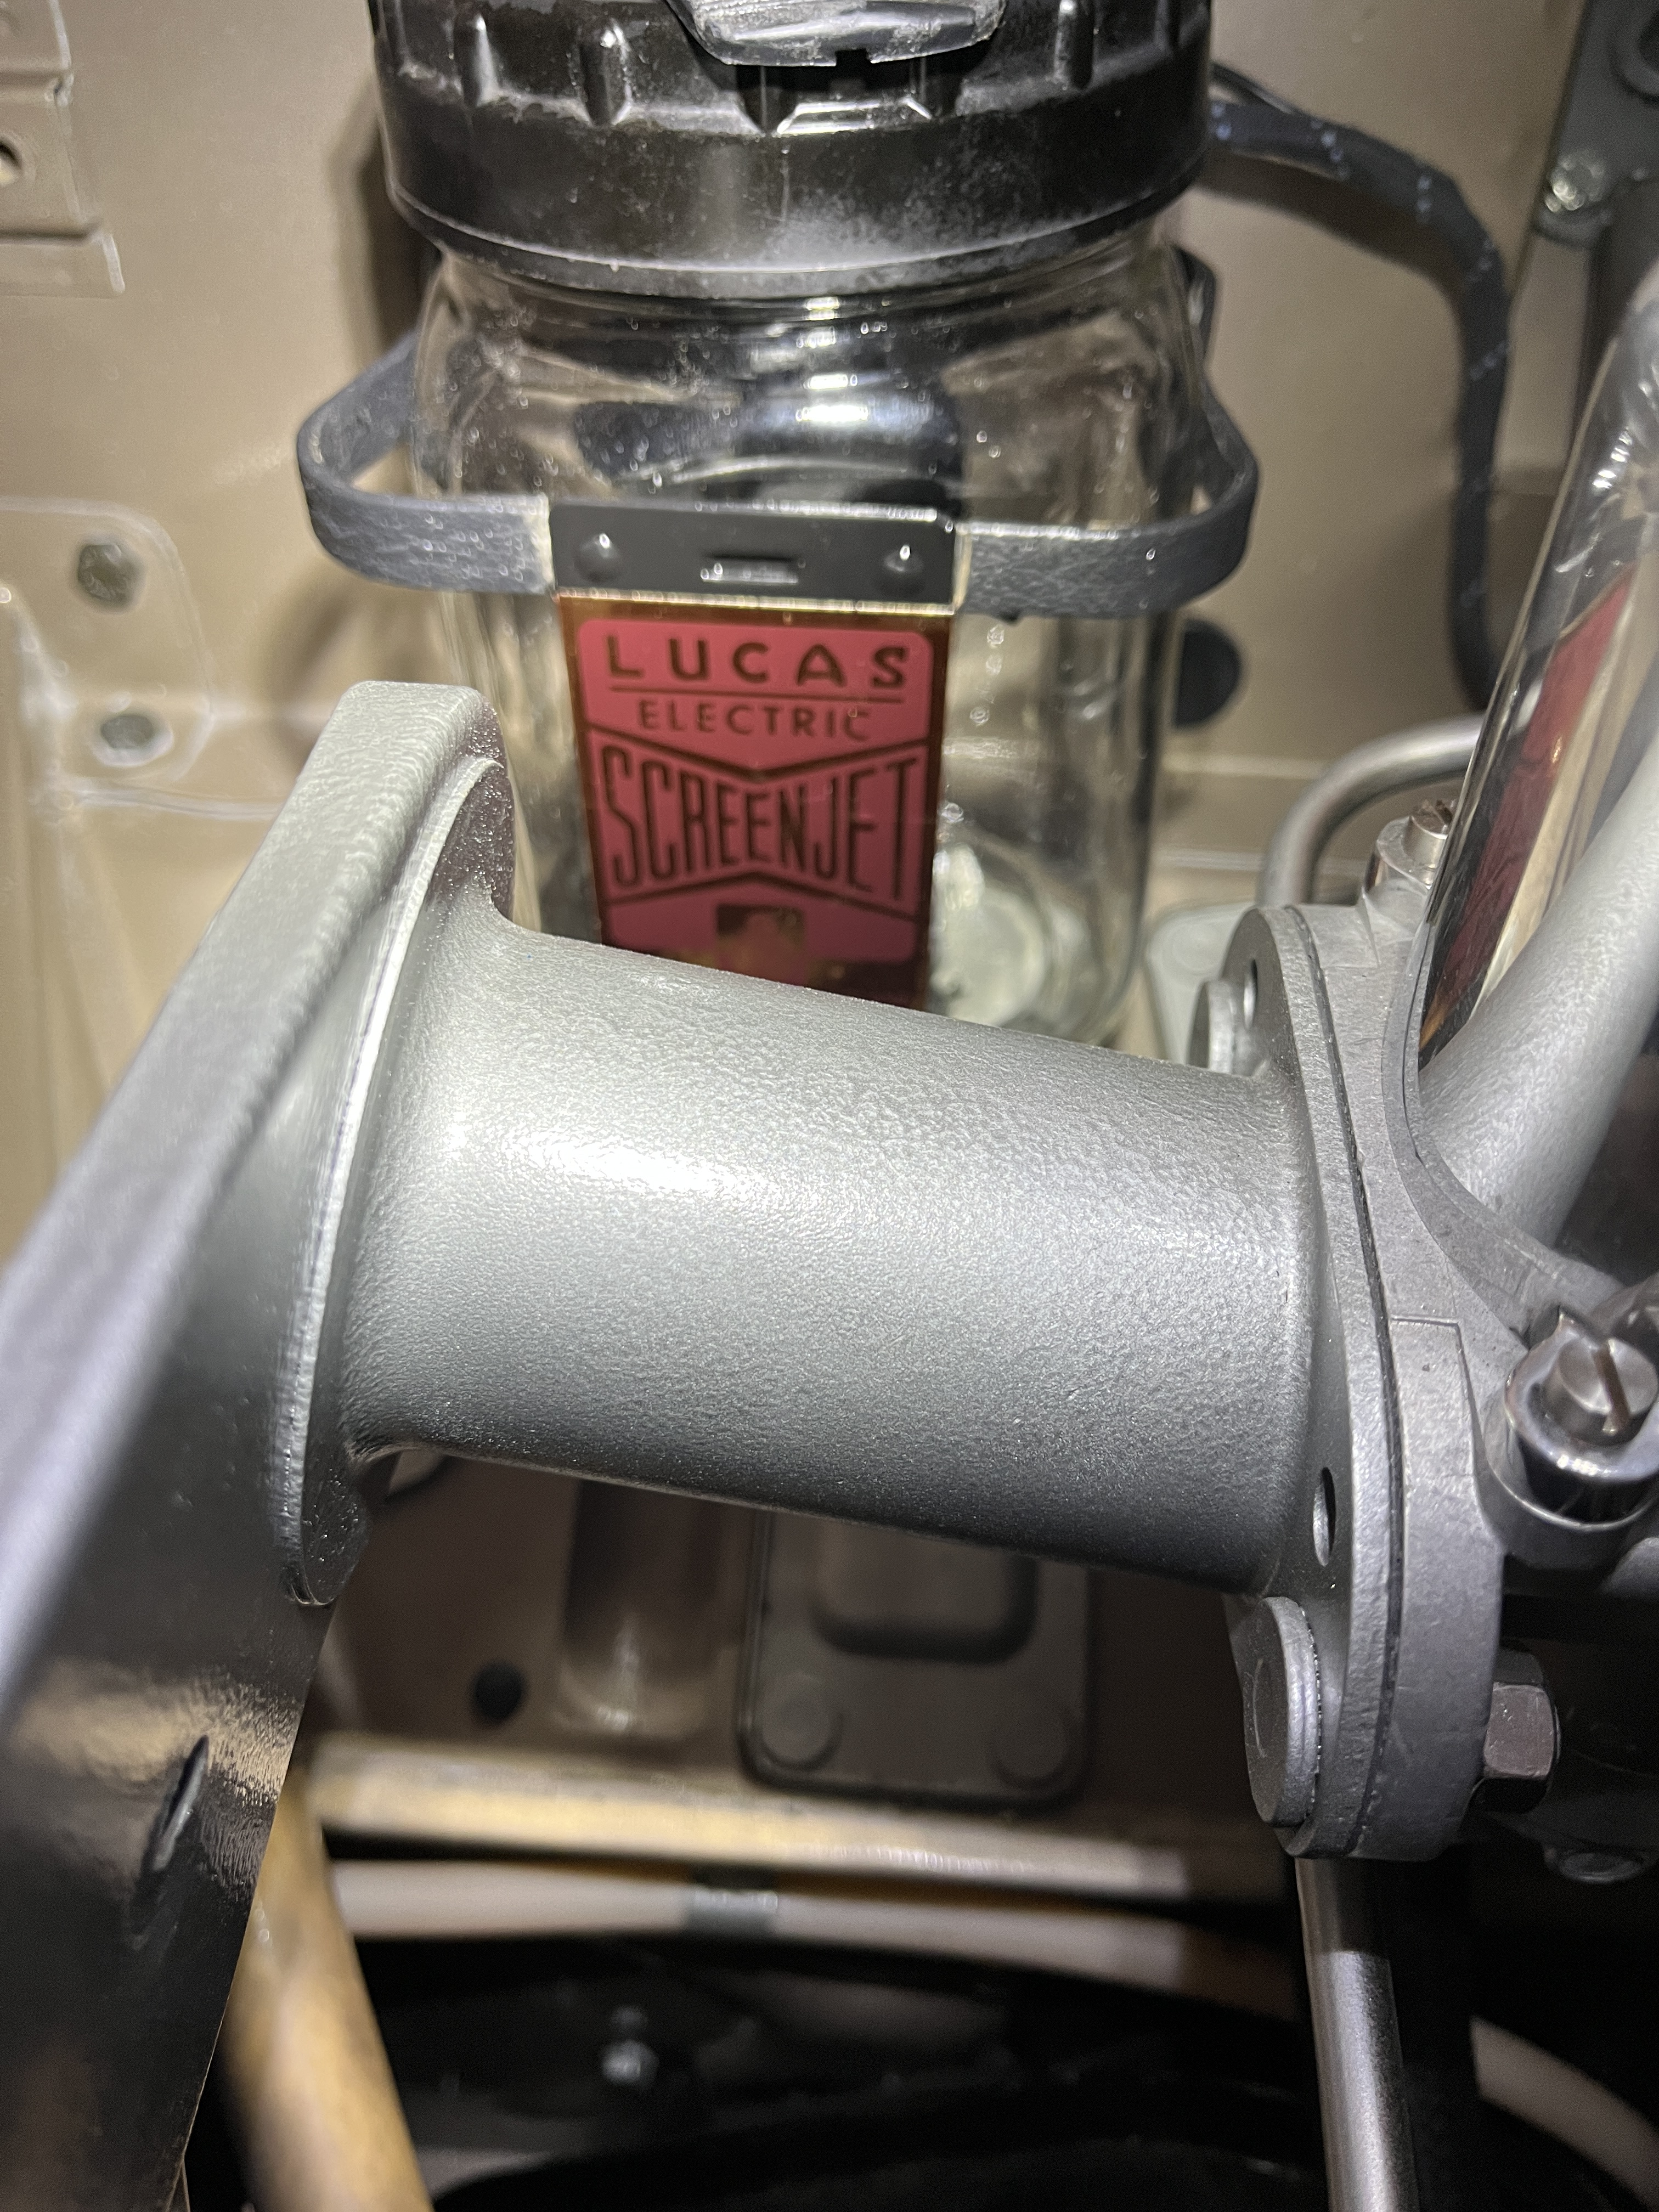
WINDSHIELD WASHER
Glass bottle, black bracket up to: 1E10753, 1E1164, 1E30824, 1E20370
“Lucas Screen Jet” sticker on bracket with 2-black rubber sleeves on bracket to protect bottle
Regarding the steering rack bellows, I had used a hose clamp on both sides. But sure enough, a look at page 141 of J30 (the Spare Parts Catalogue) showed a tire wire on the drivers side. When I got home to the car, I fabricated one from some suitable wire and made the change.
Regarding the windshield washer bottle, I was indeed missing the Lucas Screen Jet sticker. I found a fellow in Delaware who sold reproduction stickers. Once I received the sticker, it was a quick fix to apply the sticker.
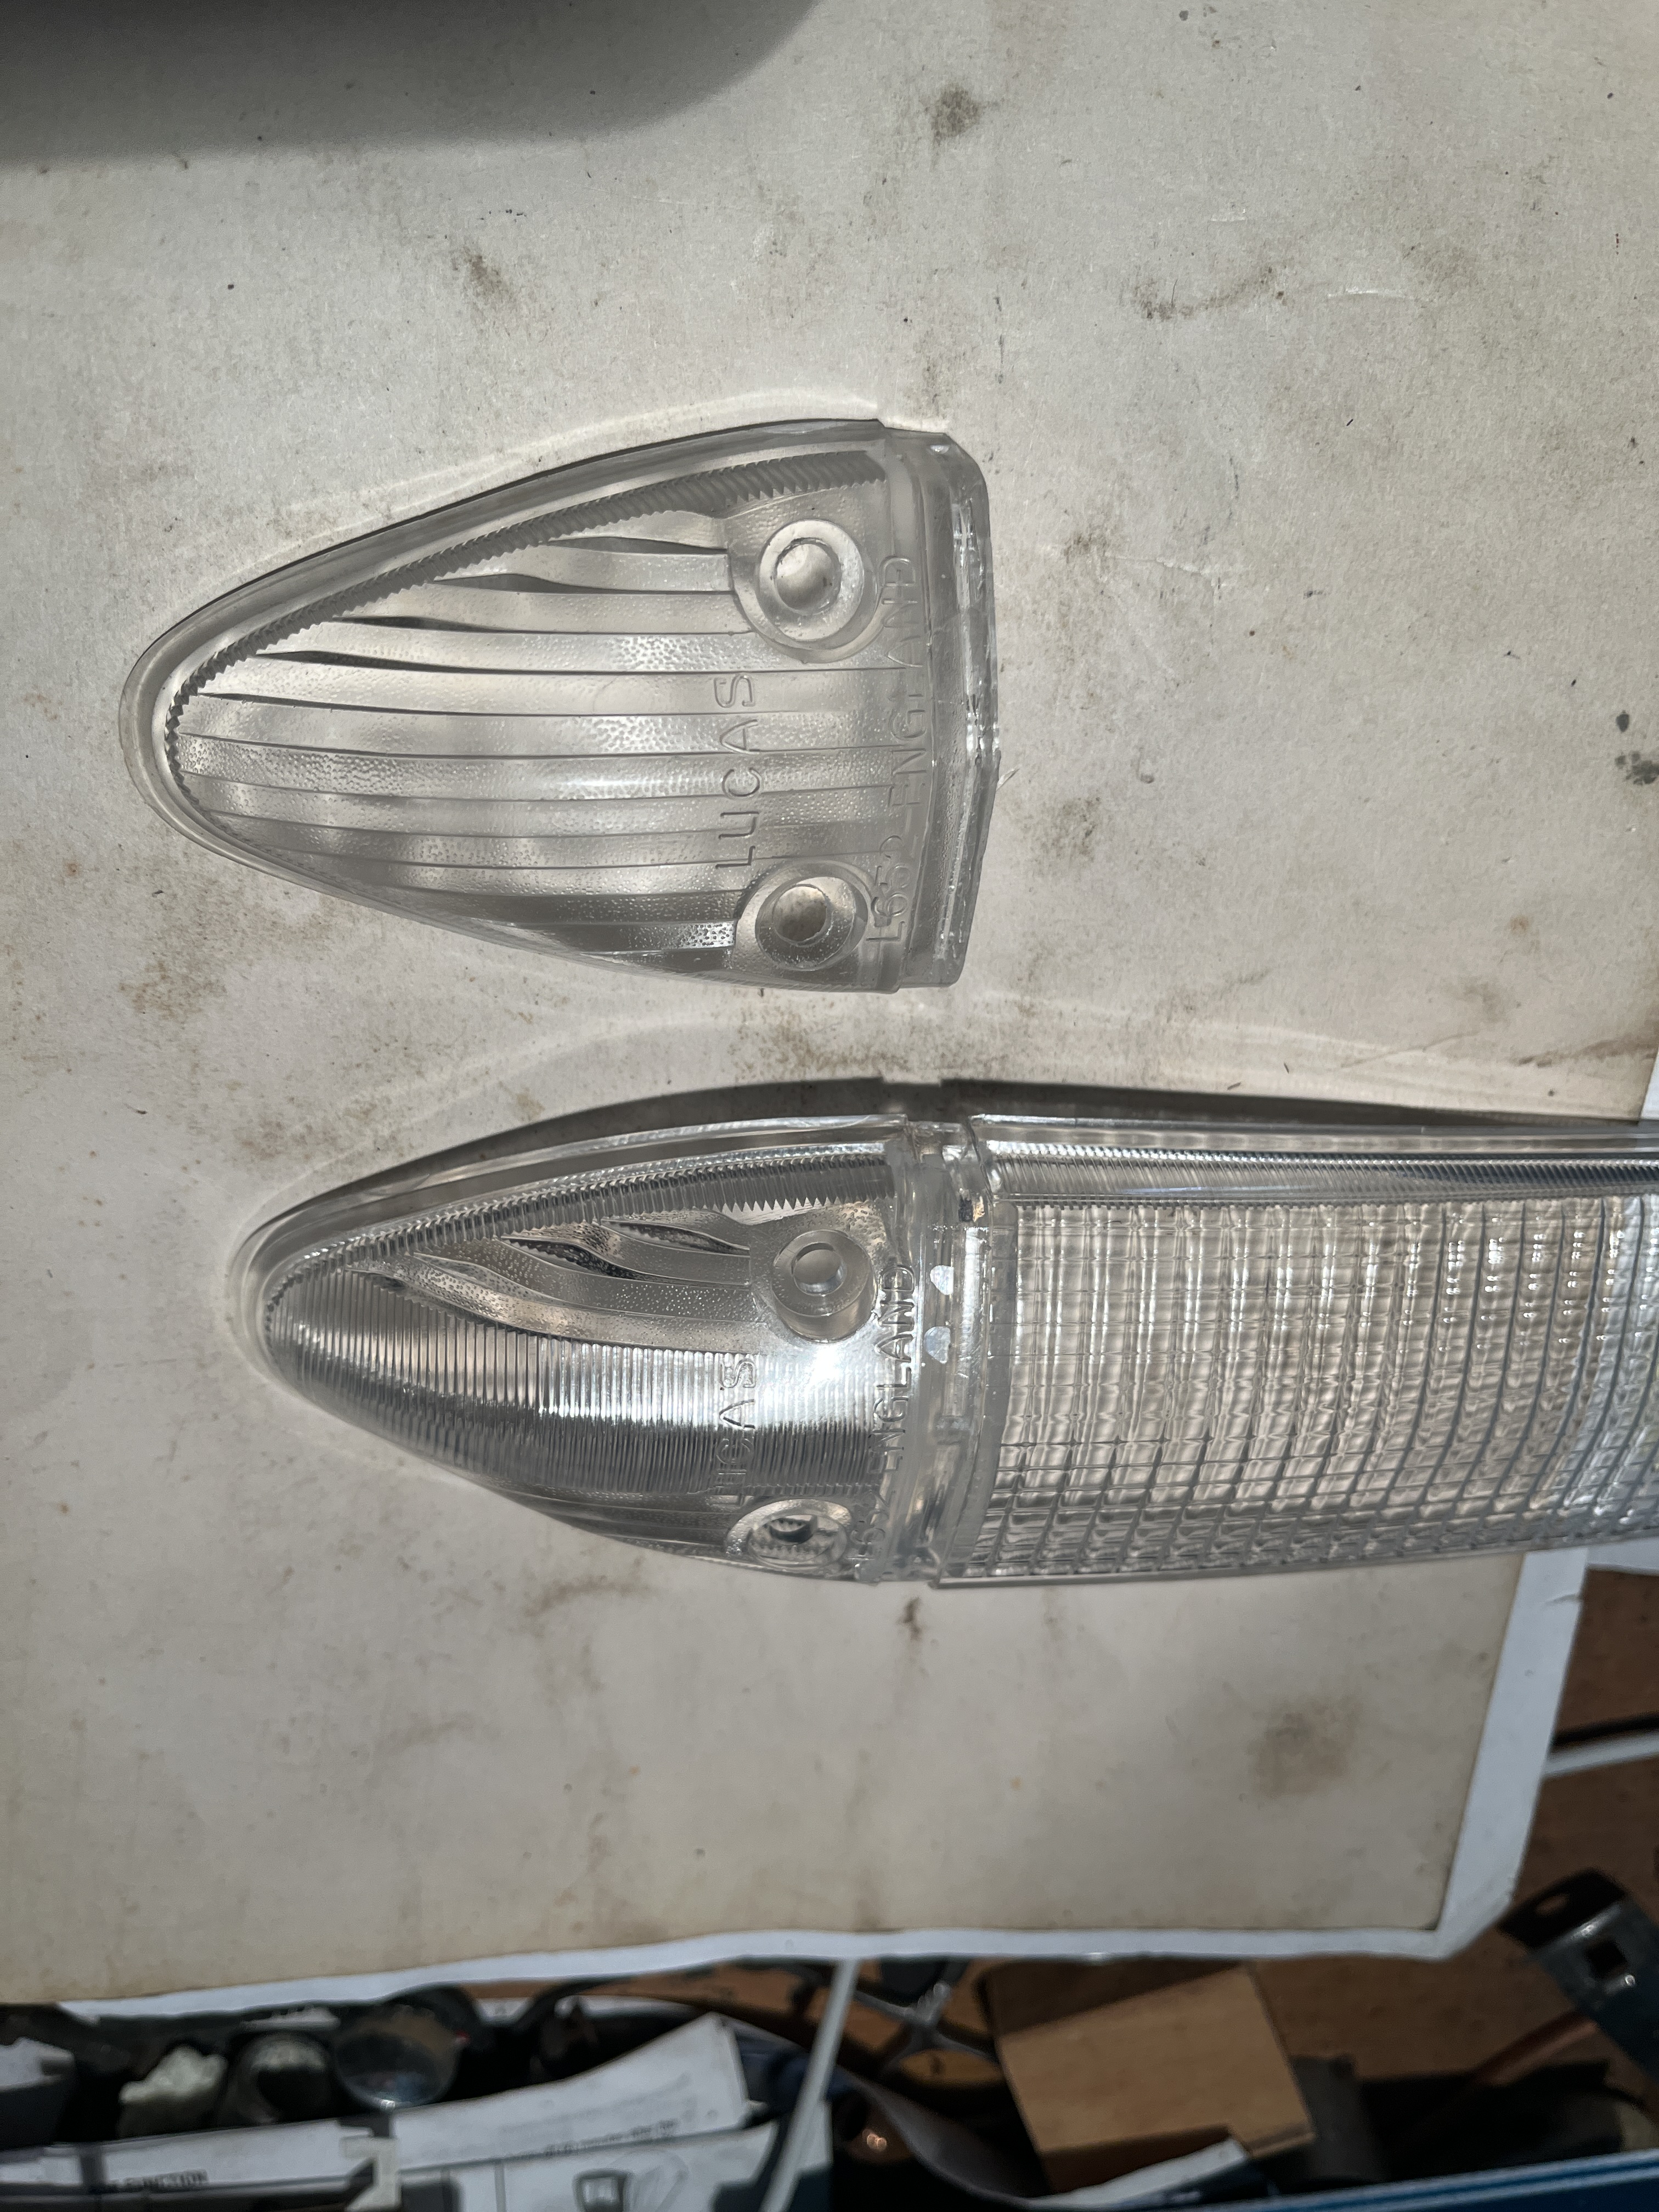
Another “document” that I reviewed was the Etype UK Forum, specifically their Factory Fit 3.8 section. This forum contains a wealth of detail regarding how these cars were built. It goes well beyond the JCNA judging guide with respect to detail and historical basis. In particular, a British gentleman, David Jones, has posted a vast treasure trove of information and historical background. It is well worth checking out, even if you are not trying to build a 100 point car. My review of the Factory Fit section revealed, for instance, that the lense/cover over my front parking lights was incorrect. It is a small detail but the “usuals” sell a version of the lense that came into use only after March of 1965. I was able to obtain the correct version from a guy in the UK, who went to a lot of trouble and expense to have exact replicas made up.
Another “find” from the UK forum was that the spark plug caps that I had installed were not correct. What I have now is the plug cap with the word Champion in a bow-tie shaped pattern, with white lettering. Apparently, what I need is the “oval” shaped plug, with Champion molded into the plastic as black, not white. I am still trying to find these for sale, although SNG has promised me that they can get them.
And so it goes. The car is about 99.9% done, in terms of all the work that has occurred to date. Yet, my list of things to do never seems to go quite to zero. But I am getting very close. I plan to take the car to its first show in March.

Discussion
Comments are closed.