I am documenting my recent efforts to remove and refresh the interior on my wife’s 2006 Cayman S. Unfortunately the reason I am refreshing the interior is due to a serious mice infestation. We had been finding mouse turds on the carpet and a gradually increasing bad odor. At some point I found a hole chewed in the cabin air filter, which I assume was their entry point to the interior of the car. I have added window screen wire over the filter and also over the drain tubes that exist in the vicinity of the cabin air filter. I hope this will shut the little buggers down, because they have caused me a ton of money and time. Anyway, if there is a silver lining to the cloud, it is that I am installing all new carpet and am painting many of the hard plastic parts in the interior. So here I will document some key DIY info such as how to obtain replacement carpet and how to remove/refresh much of the interior carpet and plastic hard parts.
There was a lot of mouse urine in the carpets. I tried a commercial pet odor remover product on the carpet, which left us with a strange mix of latent urine odor mixed with a cheap perfume smell. So that attempt was a massive failure, in my opinion. We bought the car new and decided it would be a nice thing to update the interior with new carpet. And once I had it apart, I saw that there were lots of dings on the tan colored hard parts. Oh, and we went with a new headliner as long as we were in there.
CARPET REPLACEMENT
I visited the parts counter of my local Porsche dealership, Leith Porsche, and we made up a shopping list. The good news is that almost all of the pieces are still available from Porsche. The bad news is they must be made to order, which means I had to pay in advance, non-refundable, and it took months to obtain the parts. BTW if you show up at Porsche parts with your VIN number, they can tell you what your factory color is for your carpet. That may be obvious but in our case, our version of “tan” could easily be confused with other shades. The most significant carpet piece is the one piece molded item that sits in the floor under the seats. I purchased most of the available pieces with the exceptions of a few, like the one at the oil/water filler flap, that cost a rediculous amount. It was about $3000 for the pieces I bought. Note- after installation, I found the carpets sent to me by Porsche to be a dead nuts color and configuration match to my original pieces.
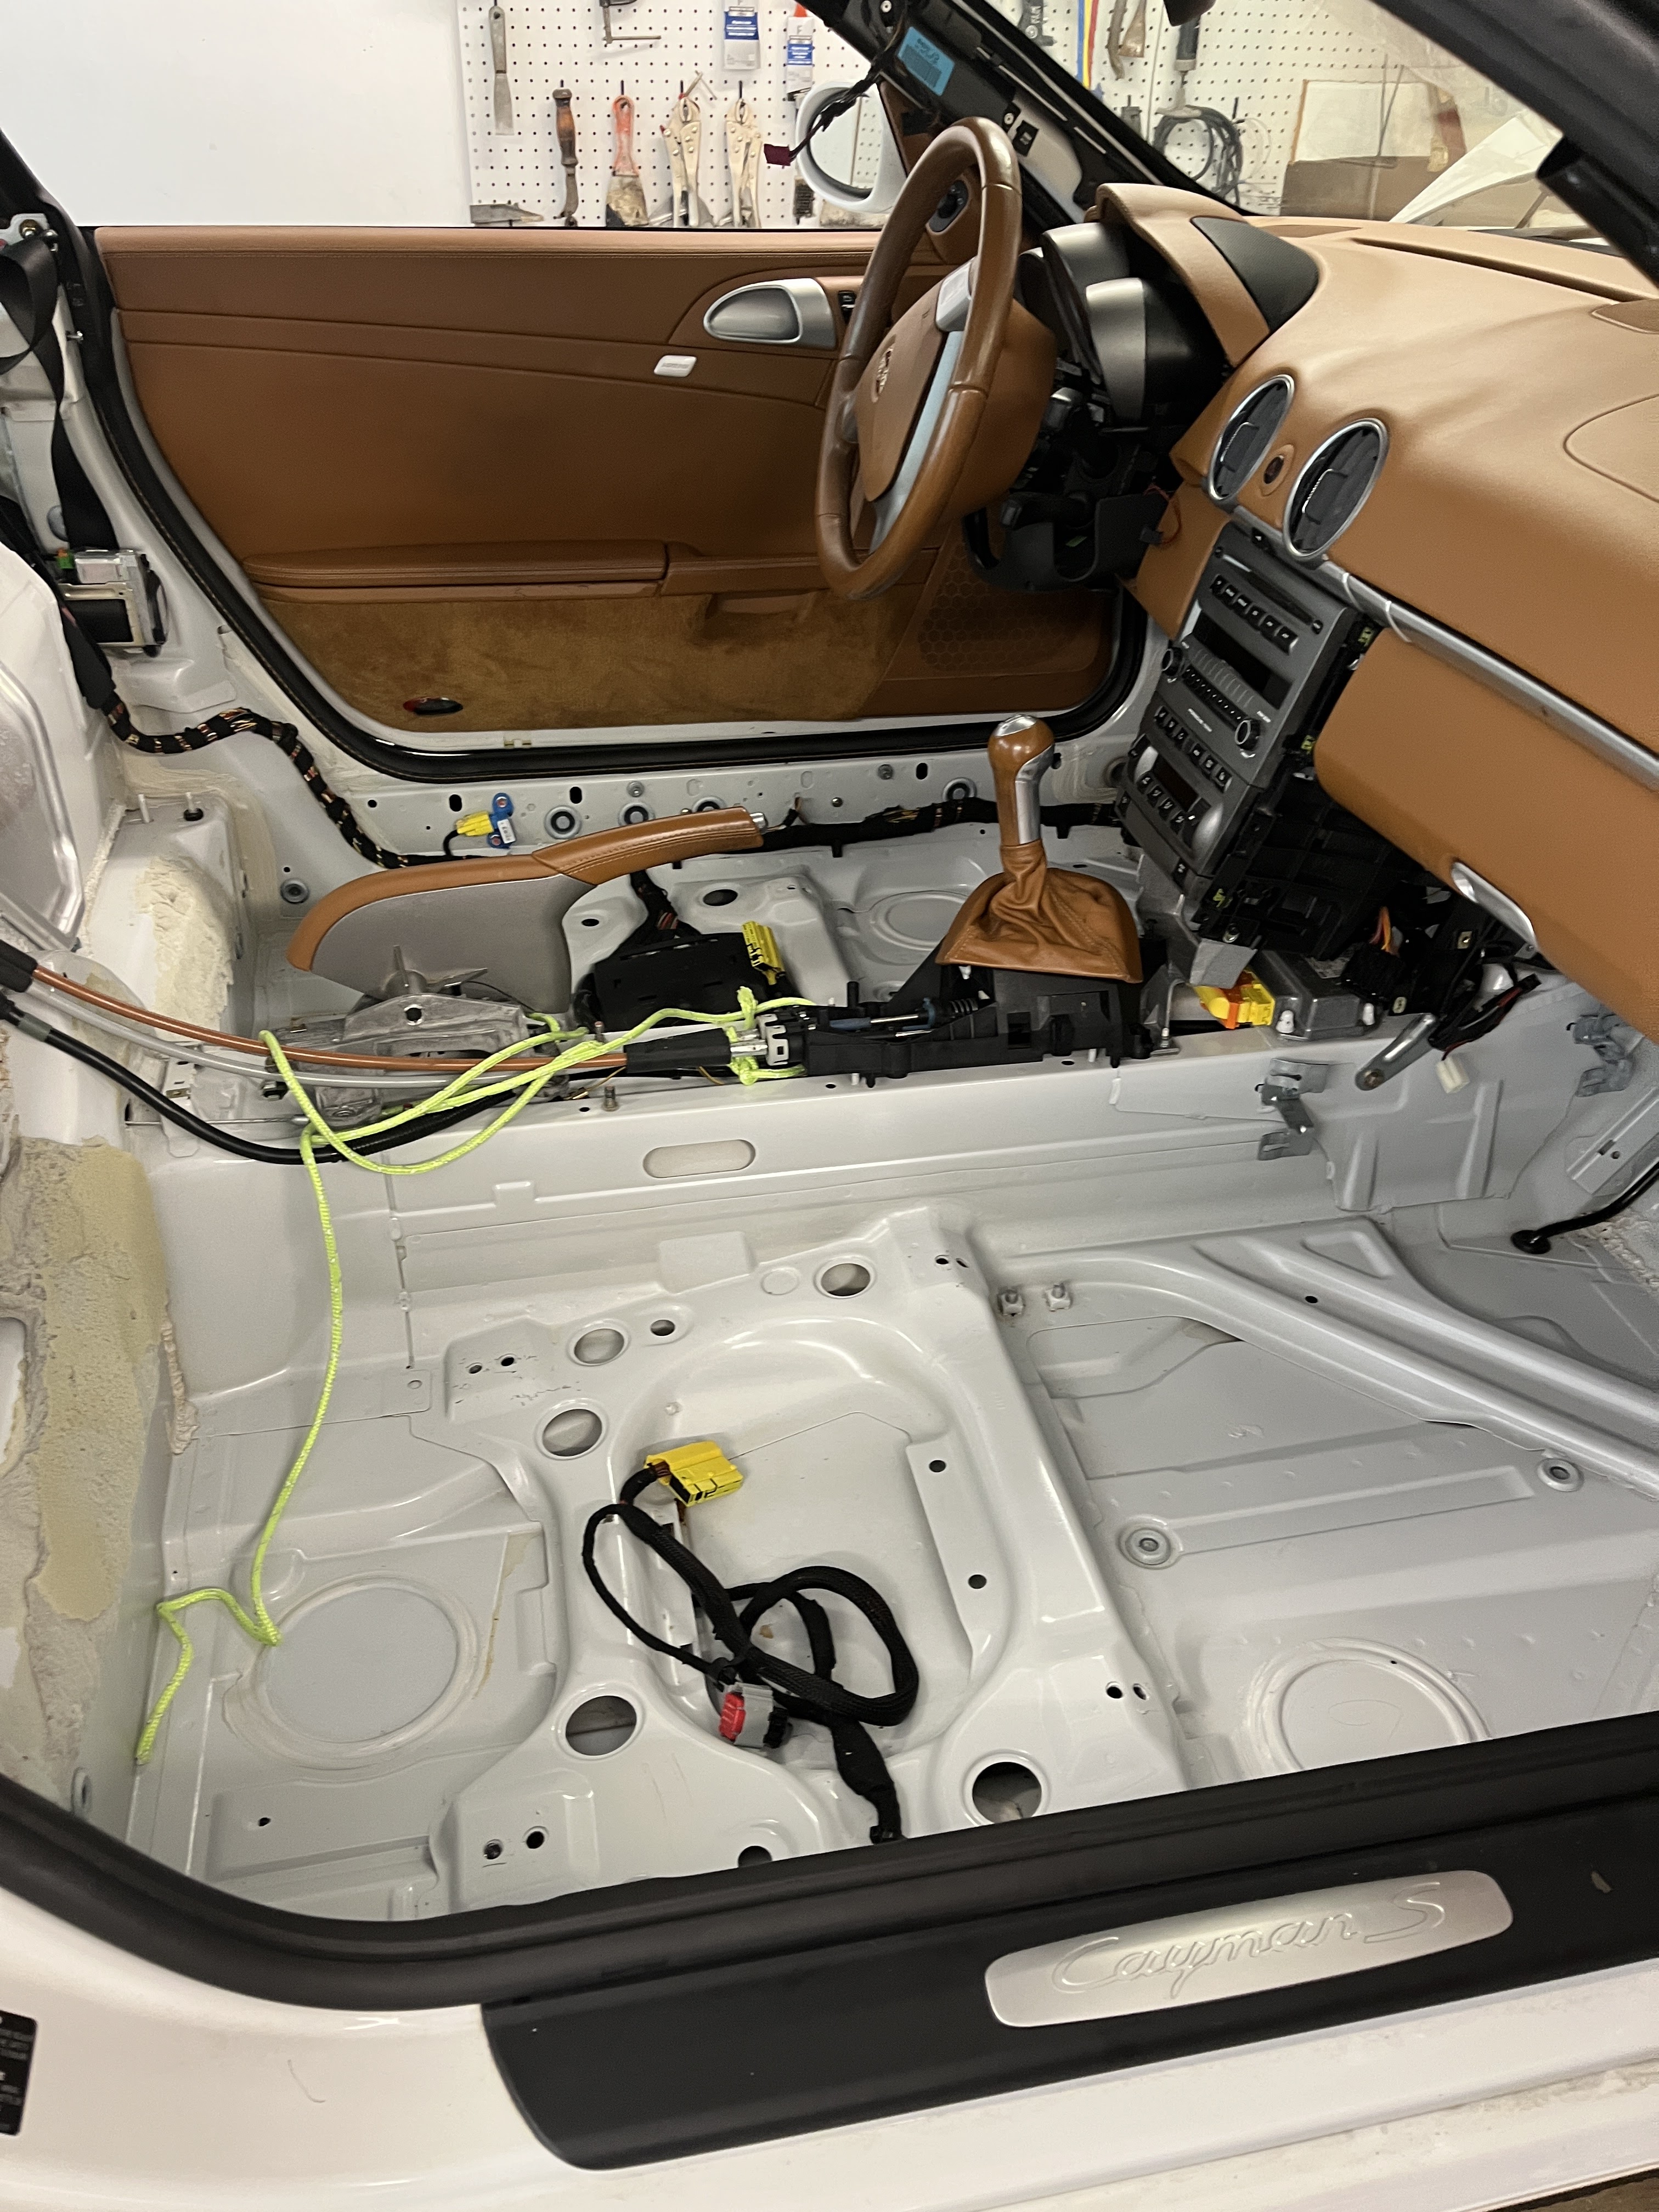
Carpet removal was fairly intuitive. It generally tucks under the various hard plastic trim pieces. I removed all the plastic pieces rearward of the dash. Of course, you will want to remove your seats early in the process. You will definately have to remove your center console and once it is out, you will want to unscrew the hardware holding down the shifter and the parking brake. Here is what the cockpit looks like stripped out. Here is a good article about removing the console.
Carpet and Seat Weight
BTW, as inquiring minds will want to know as if you are preparing a track car, how much does the carpet weigh? Well, it has a lot of sound dampening attached on the back side and it all adds up. I came up with a weight of 65 pounds!
Also, BTW, those factory seats are little boat anchors. They weigh around 55 pounds each!
INTERIOR PARTS REMOVAL
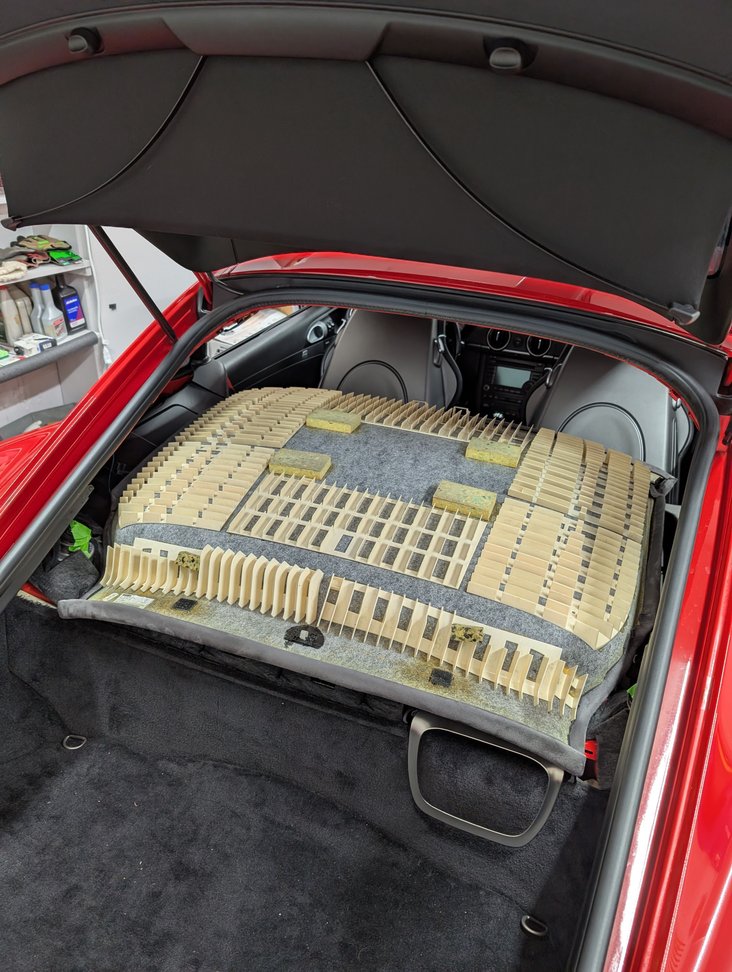
After removing the interior plastic hard parts, it is clear that you can assemble the interior of a Cayman with nothing more than a small torx driver and a rubber mallet. I guess that the price we pay for assembly line production in modern times. The vast majority of the parts have male clips that are forced into slots. As a public service, I took pictures of the back sides of all the key parts. If you know where the clips are it will give you some confidence that you are prying at the correct spot of the part. There are a few torx screws, generally T15, which I found to be pretty obvious. One exception is the heavy bar that runs across the front/top of the engine cover area. It is held in with two T40 bolts. I assume this is because it has to be designed to stop a heavy item from entering the seating area in the event of an abrupt stop.
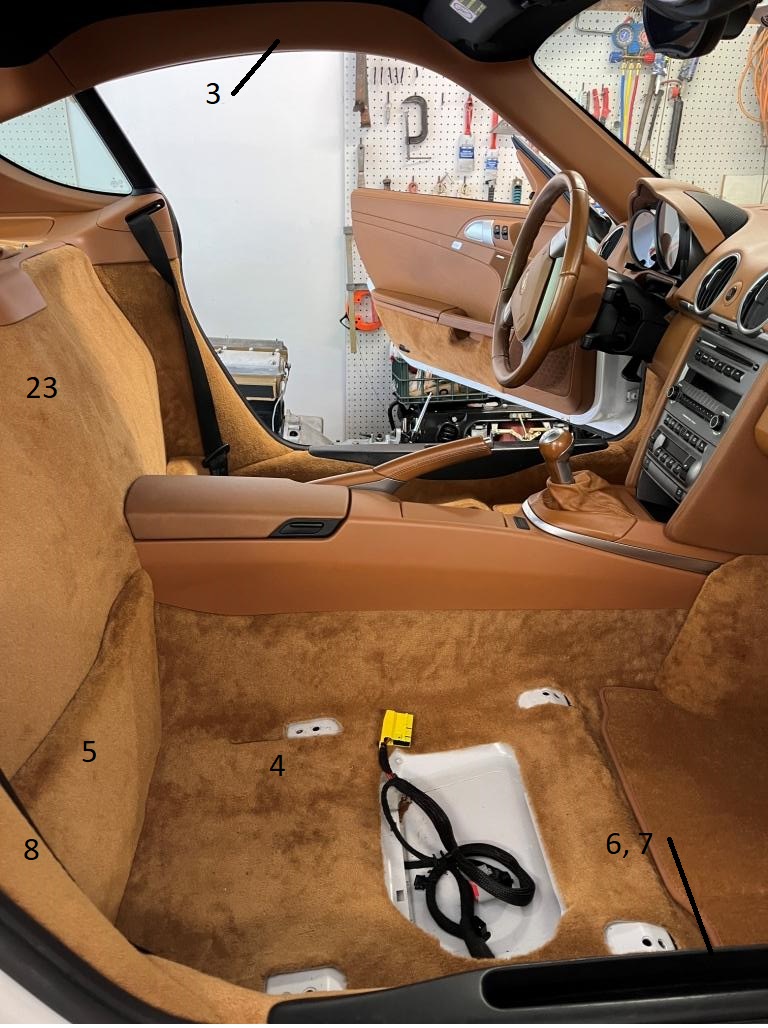
SUGGESTED ORDER OF REMOVAL
Threshold
This list is very flexible but if you are looking for some guidance, here goes.
If you are removing the carpet I would start by removing the threshold sill pieces (5 & 9). The one on the passenger side is held with clips. On the drivers side, on the inside vertiical surface, there are two plastic plugs. Remove them and there are two internal hex bolts that have to be loosened but not entirely removed.
Next I would remove the internal support sill (1). It is held in with some obvious screws. The one of the drivers side has a not so obvious black plastic nut at the rear, which holds in a brake line clip under the car body.


Shifter Console
There are multiple youtube videos and tutorials out there. Here is one that is pretty good.
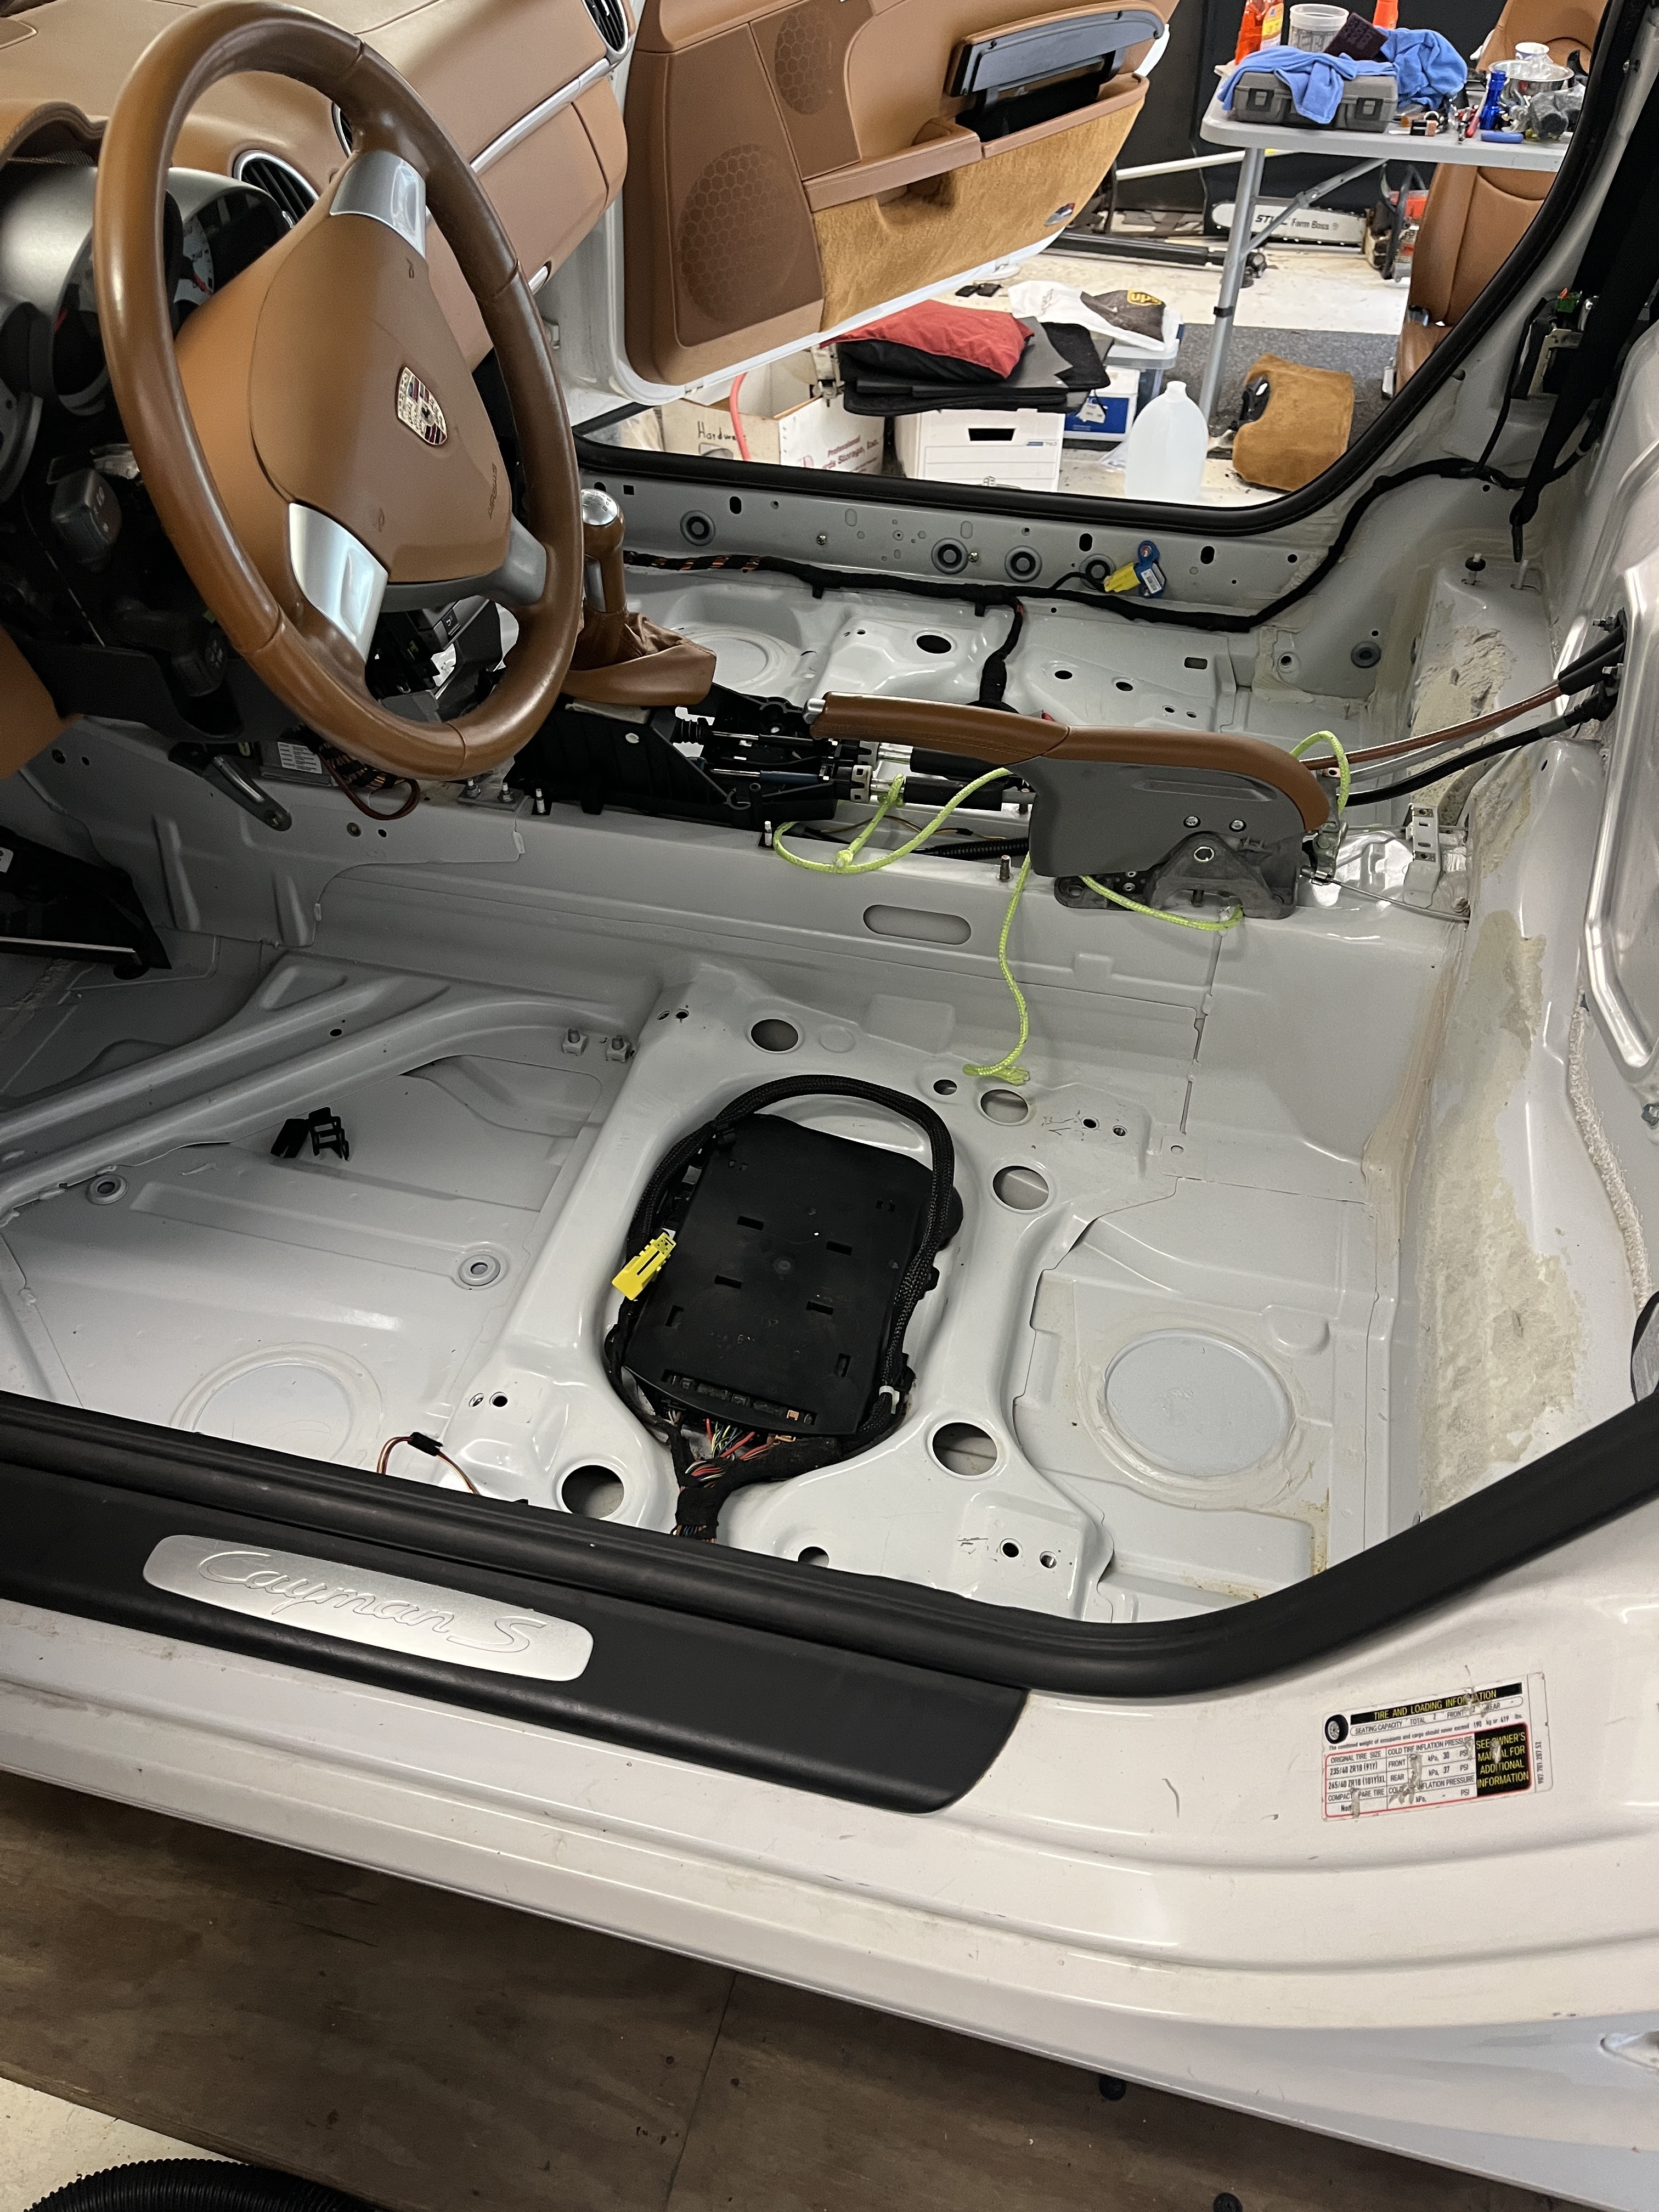
Once you expose the shifter, you will want to remove the 4 nuts that hold it is place, as well as the 4 nuts that hold the parking brake in place. You will need to tie these two items up and out of the way. For removal, you could technically cut the carpet and pull it out in two halves but I wanted to do it in one piece, so I would have that experience under my belt when installing the new piece. Note- it turned out the replacement piece came in two halves.
You will need to release the throttle pedal. There is one screw that holds it to the firewall. With that screw gone, it lifts upward. I could not for the life of me get the electrical connection to release. I was able to pass the entire throttle through the hole in the carpet.


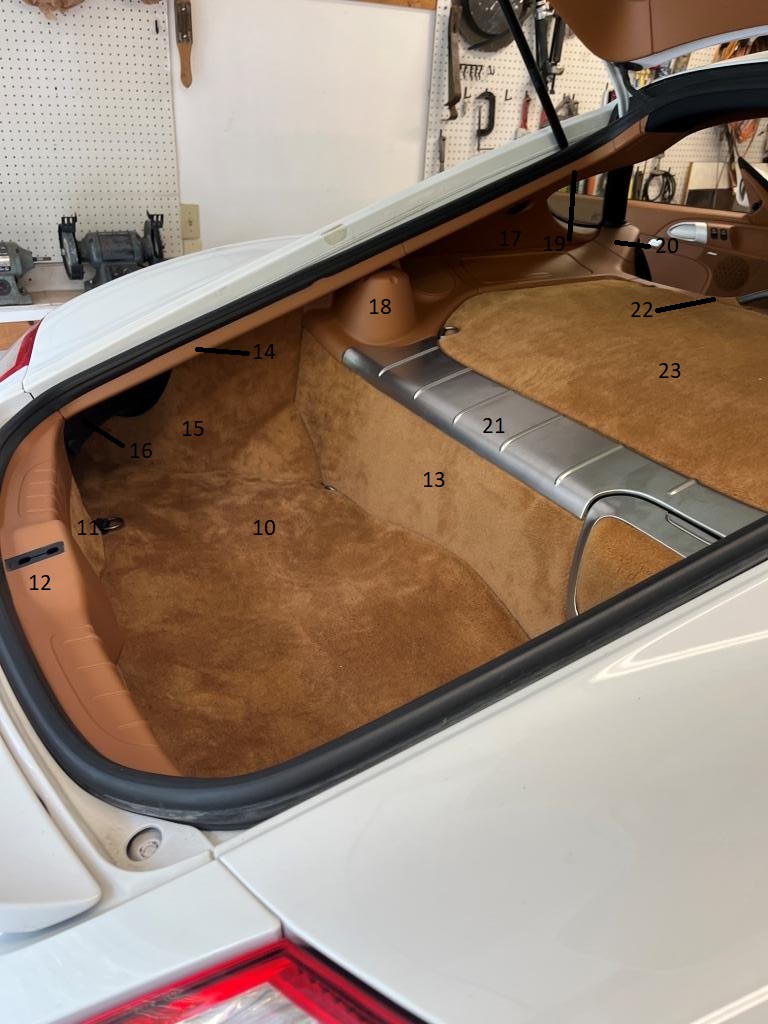
“A” Pillar & Fixed Window Surround
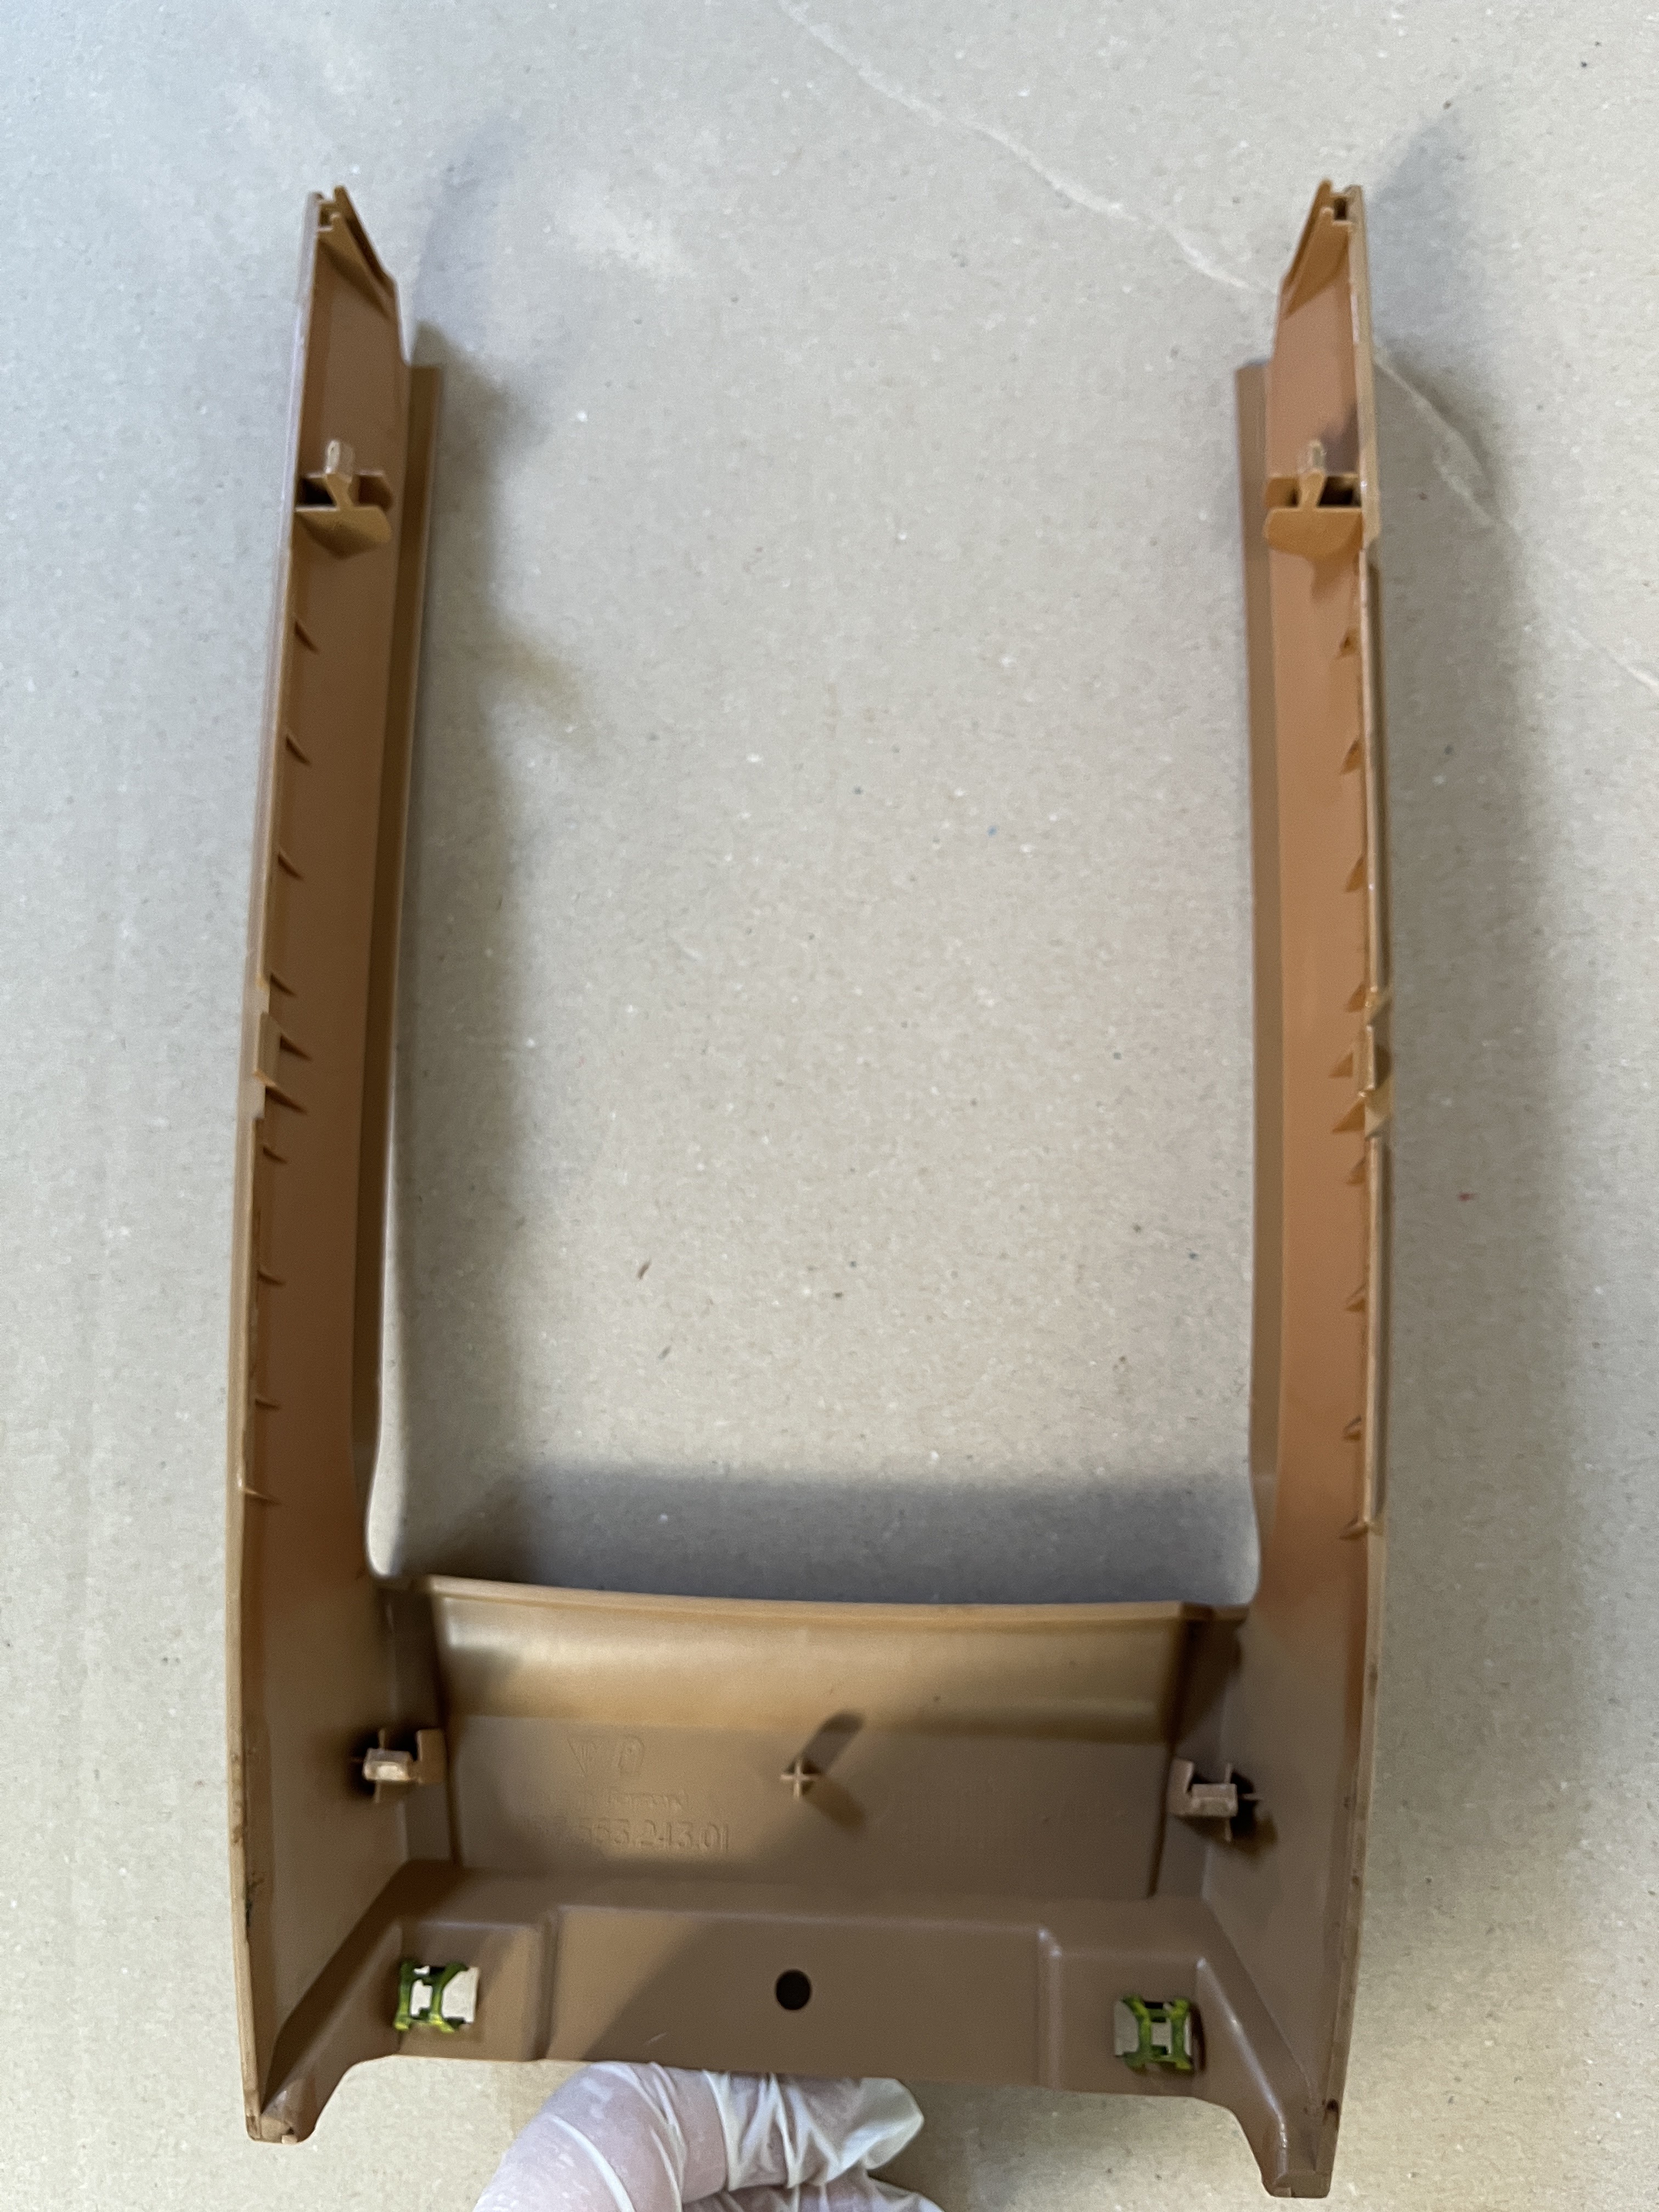
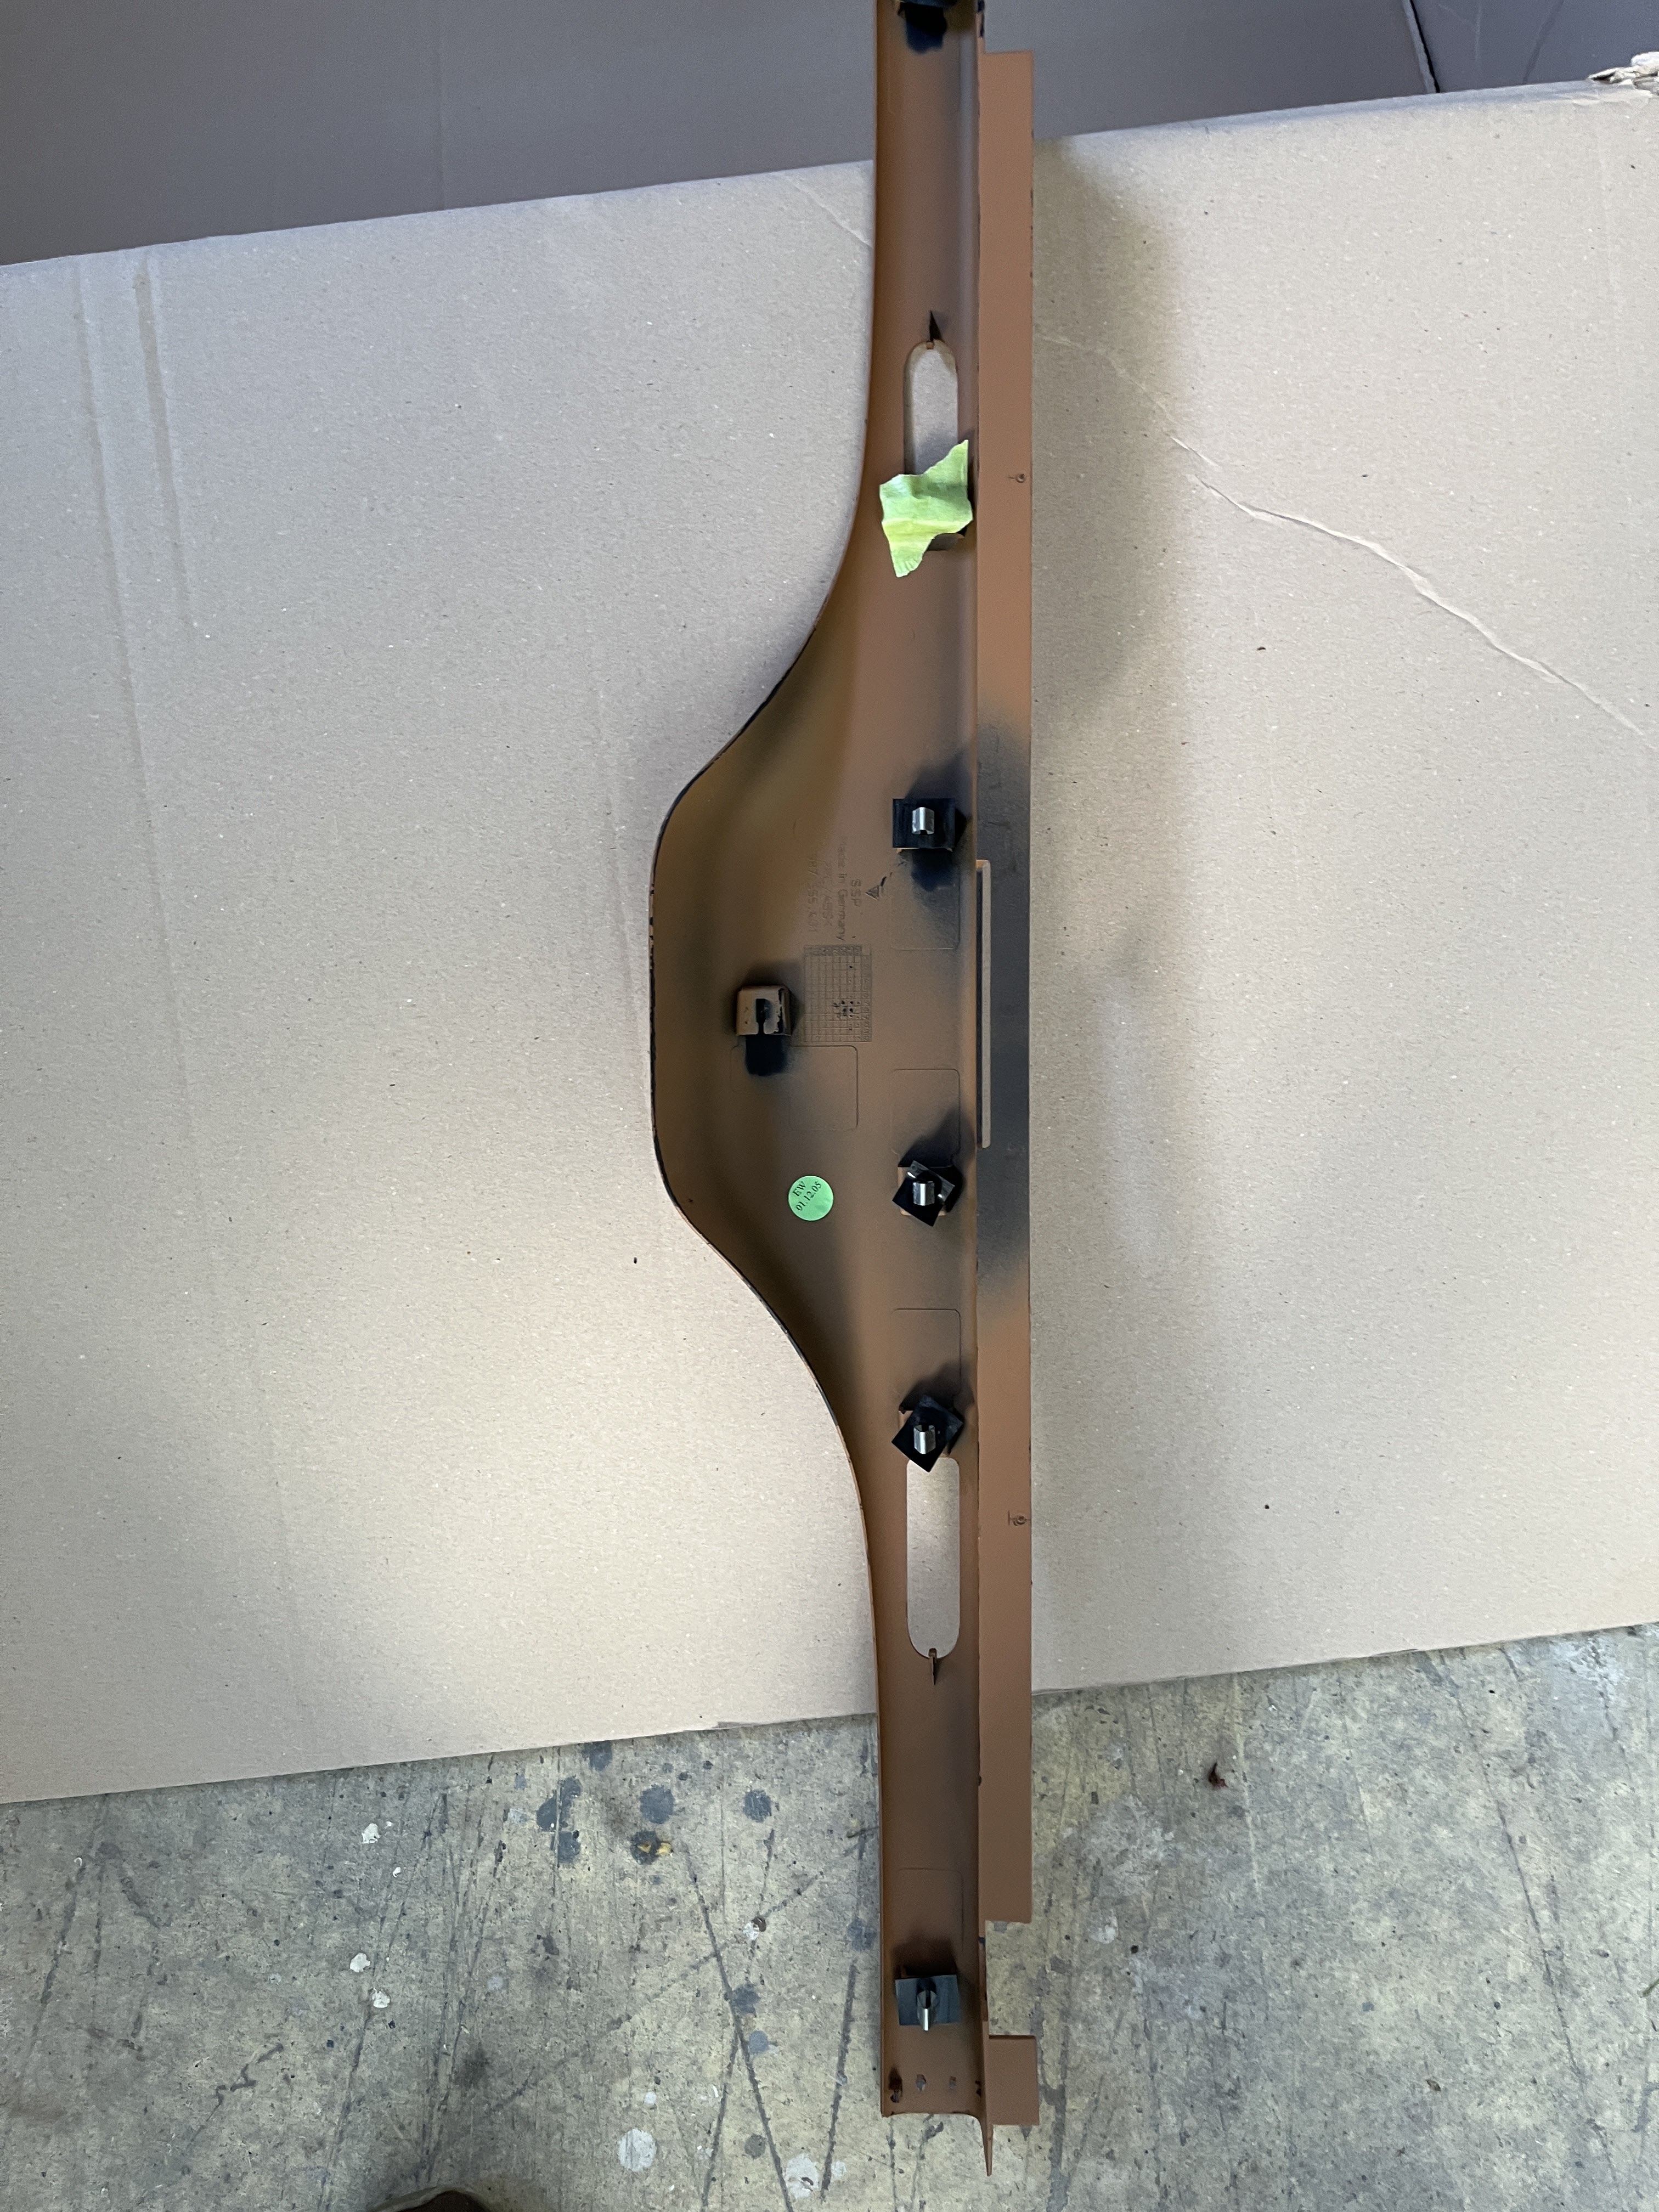
For various reasons, I have previously had the A pillars cover off (18). It is not the first piece from an “overlap” standpoint but once you get everything loosened up from a clip standpoint, you pull it upward/rearward at the base of the windscreen to release of “post in the hole” there, then it can be brought forward to clear its aft end. So you can get it out by itself, without disrupting things. The piece around the fixed window (21) has one screw at it’s bottom forward corner and two clips. Once it is out, you can disconnect the courtesy light. There are two little pieces (29) that pop out first. I can’t exactly recall but there is some reason for these pieces to be separate. Don’t lose them!


Headliner
At this point, you can remove the headliner (1). It is held at the rear with two velco tabs and a clip in the middle of the back edge. At the front, remove the visors by prying out the small cover with a slim tool, which exposes a single screw at the hinge points. The brackets to hold up the outer ends of the visors are similar. Prise out the courtesy light and the garage door opener or wait till the headliner is dropped and disconnect the wiring then. It will come out through the door or the rear hatch. Here is a picture of the back side of the headliner, curtesy of &Stimpy on Rennlist.
Engine Cover Area
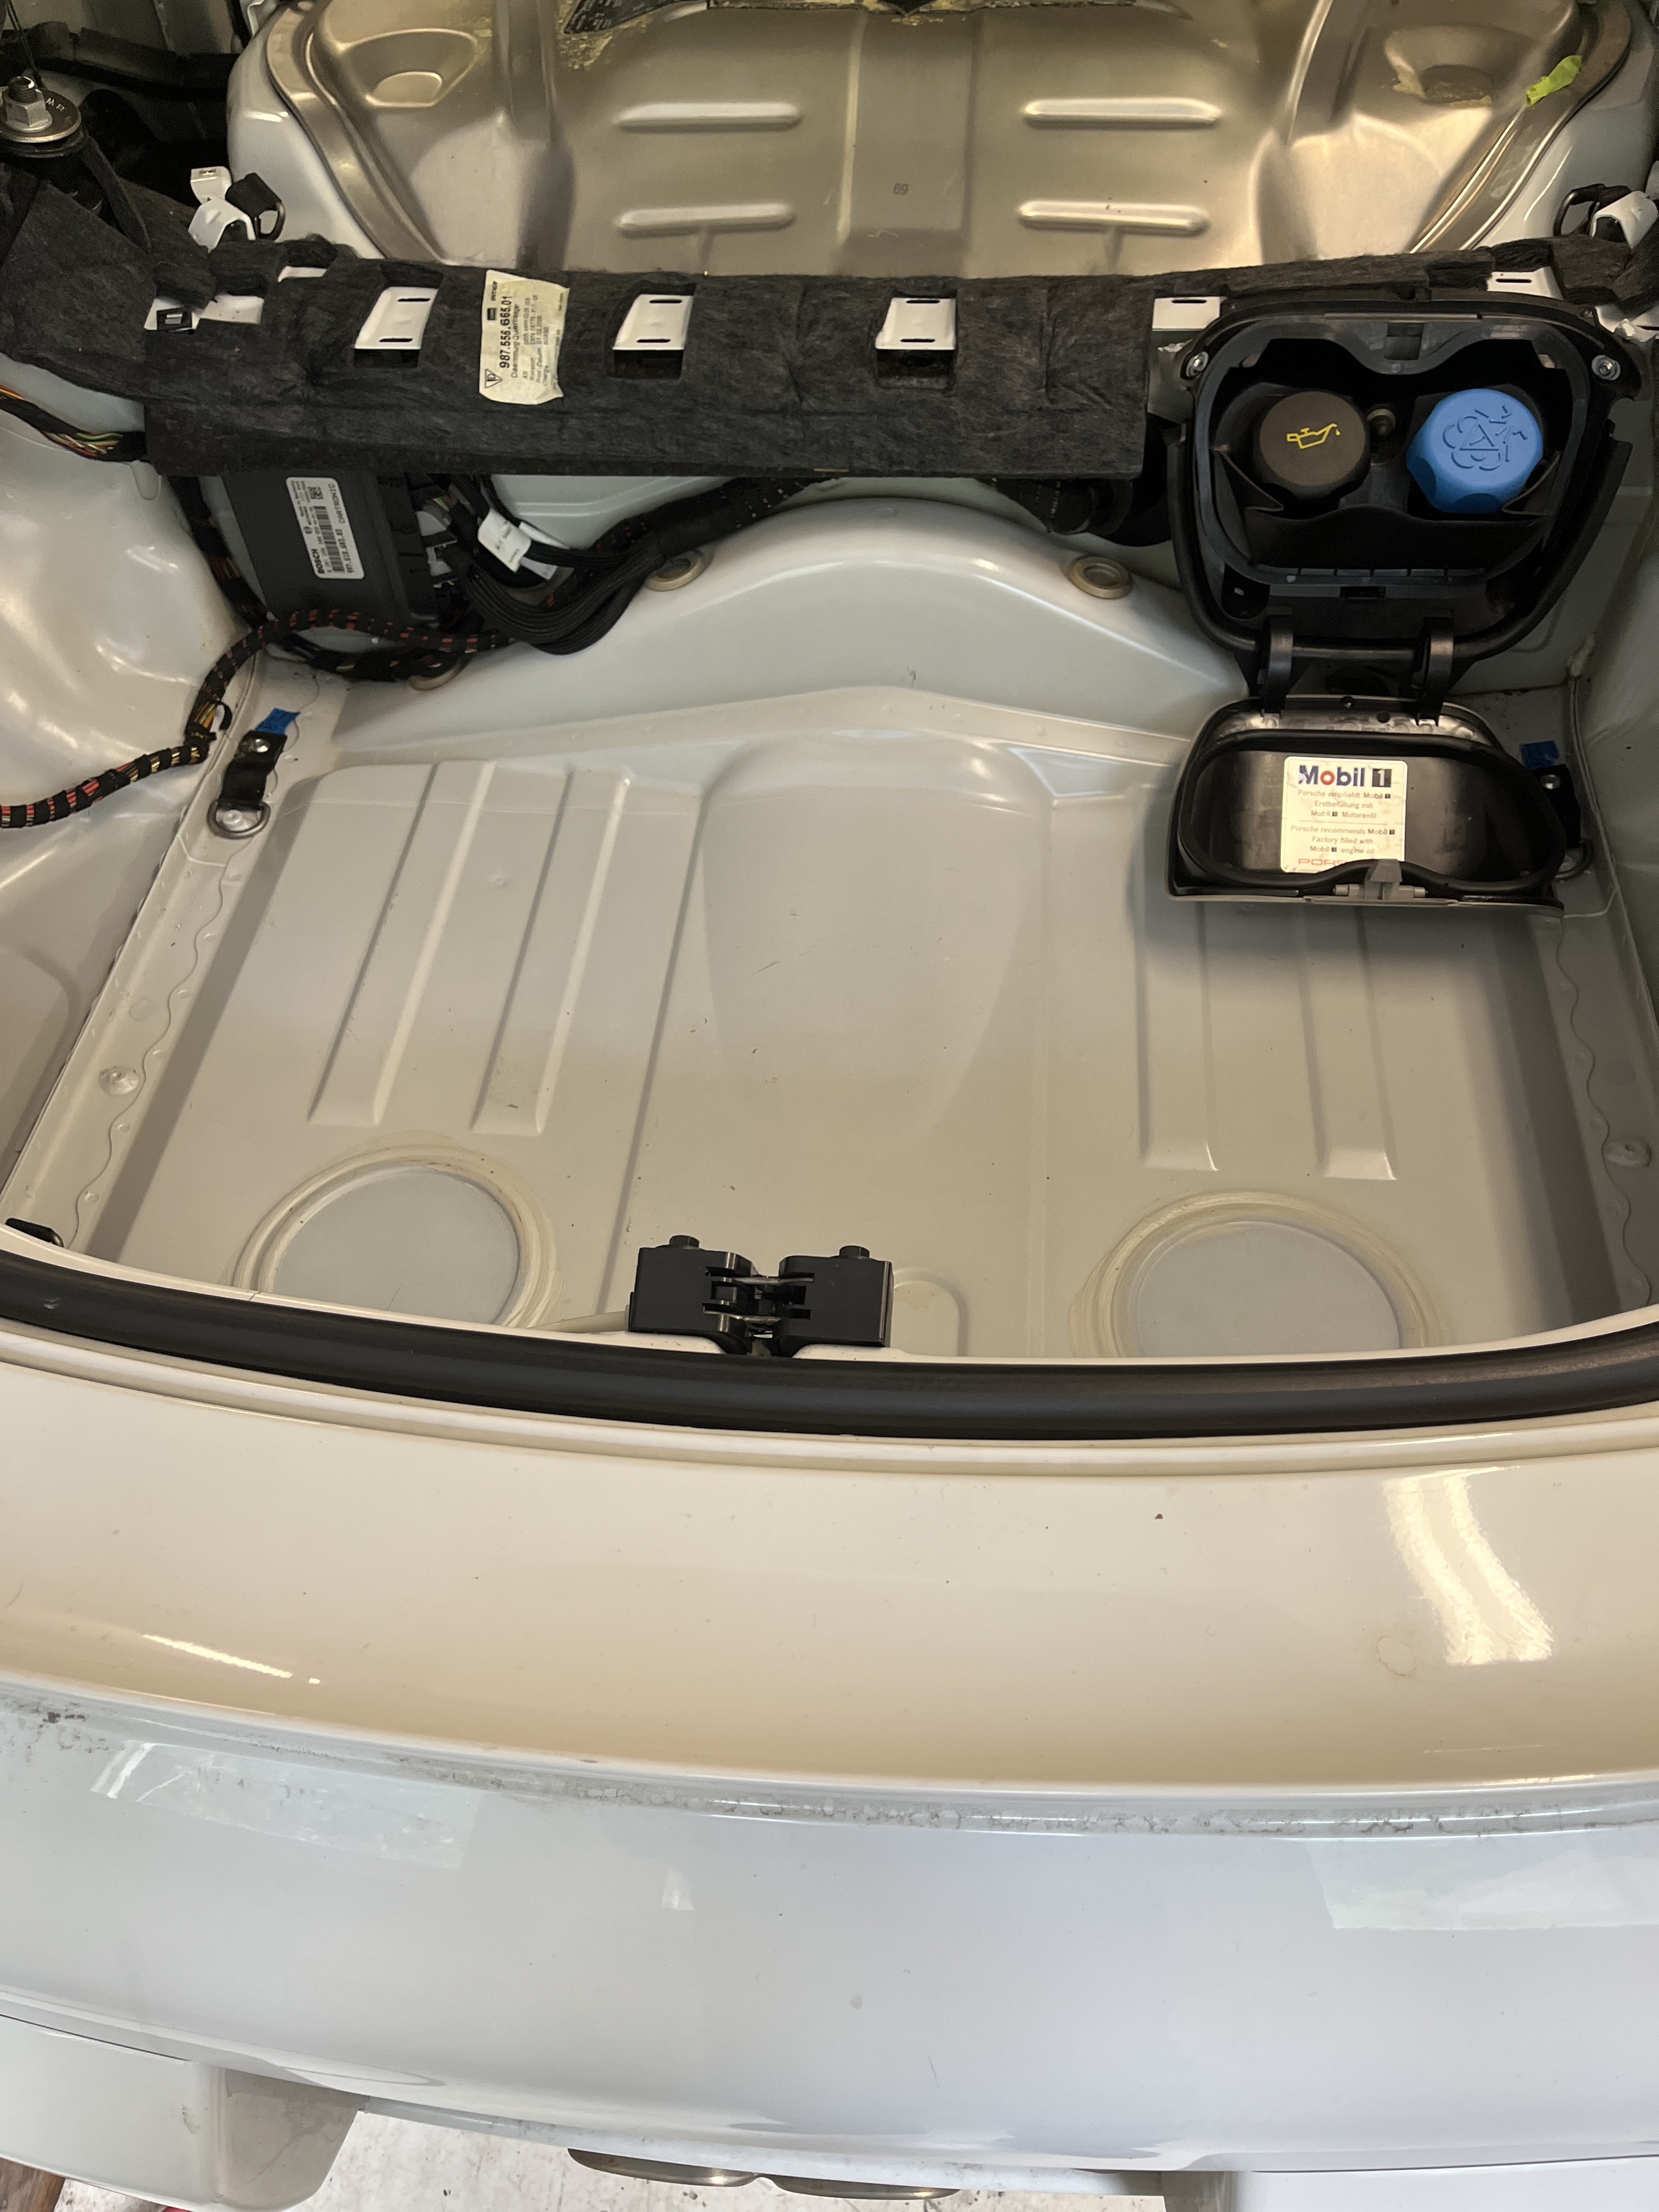
I found the 2 carpet pieces (2 & 12) were affixed with adhesive. Not impossible to prise away but there will be some collateral damage. My replacement pieces came with new foam. Items 4 and 8 are removed as a unit. Item 8 has the aforementioned T40 bolts and, strangely, one T15 on one side only. Once you get Item 8 released, Item 4 pops up with clips.

Now go ahead and tackle Item 24, the chrome piece at the rear of the engine compatment opening. It has no screws, only clips, but it gave me a mighty struggle until the first clip popped loose.

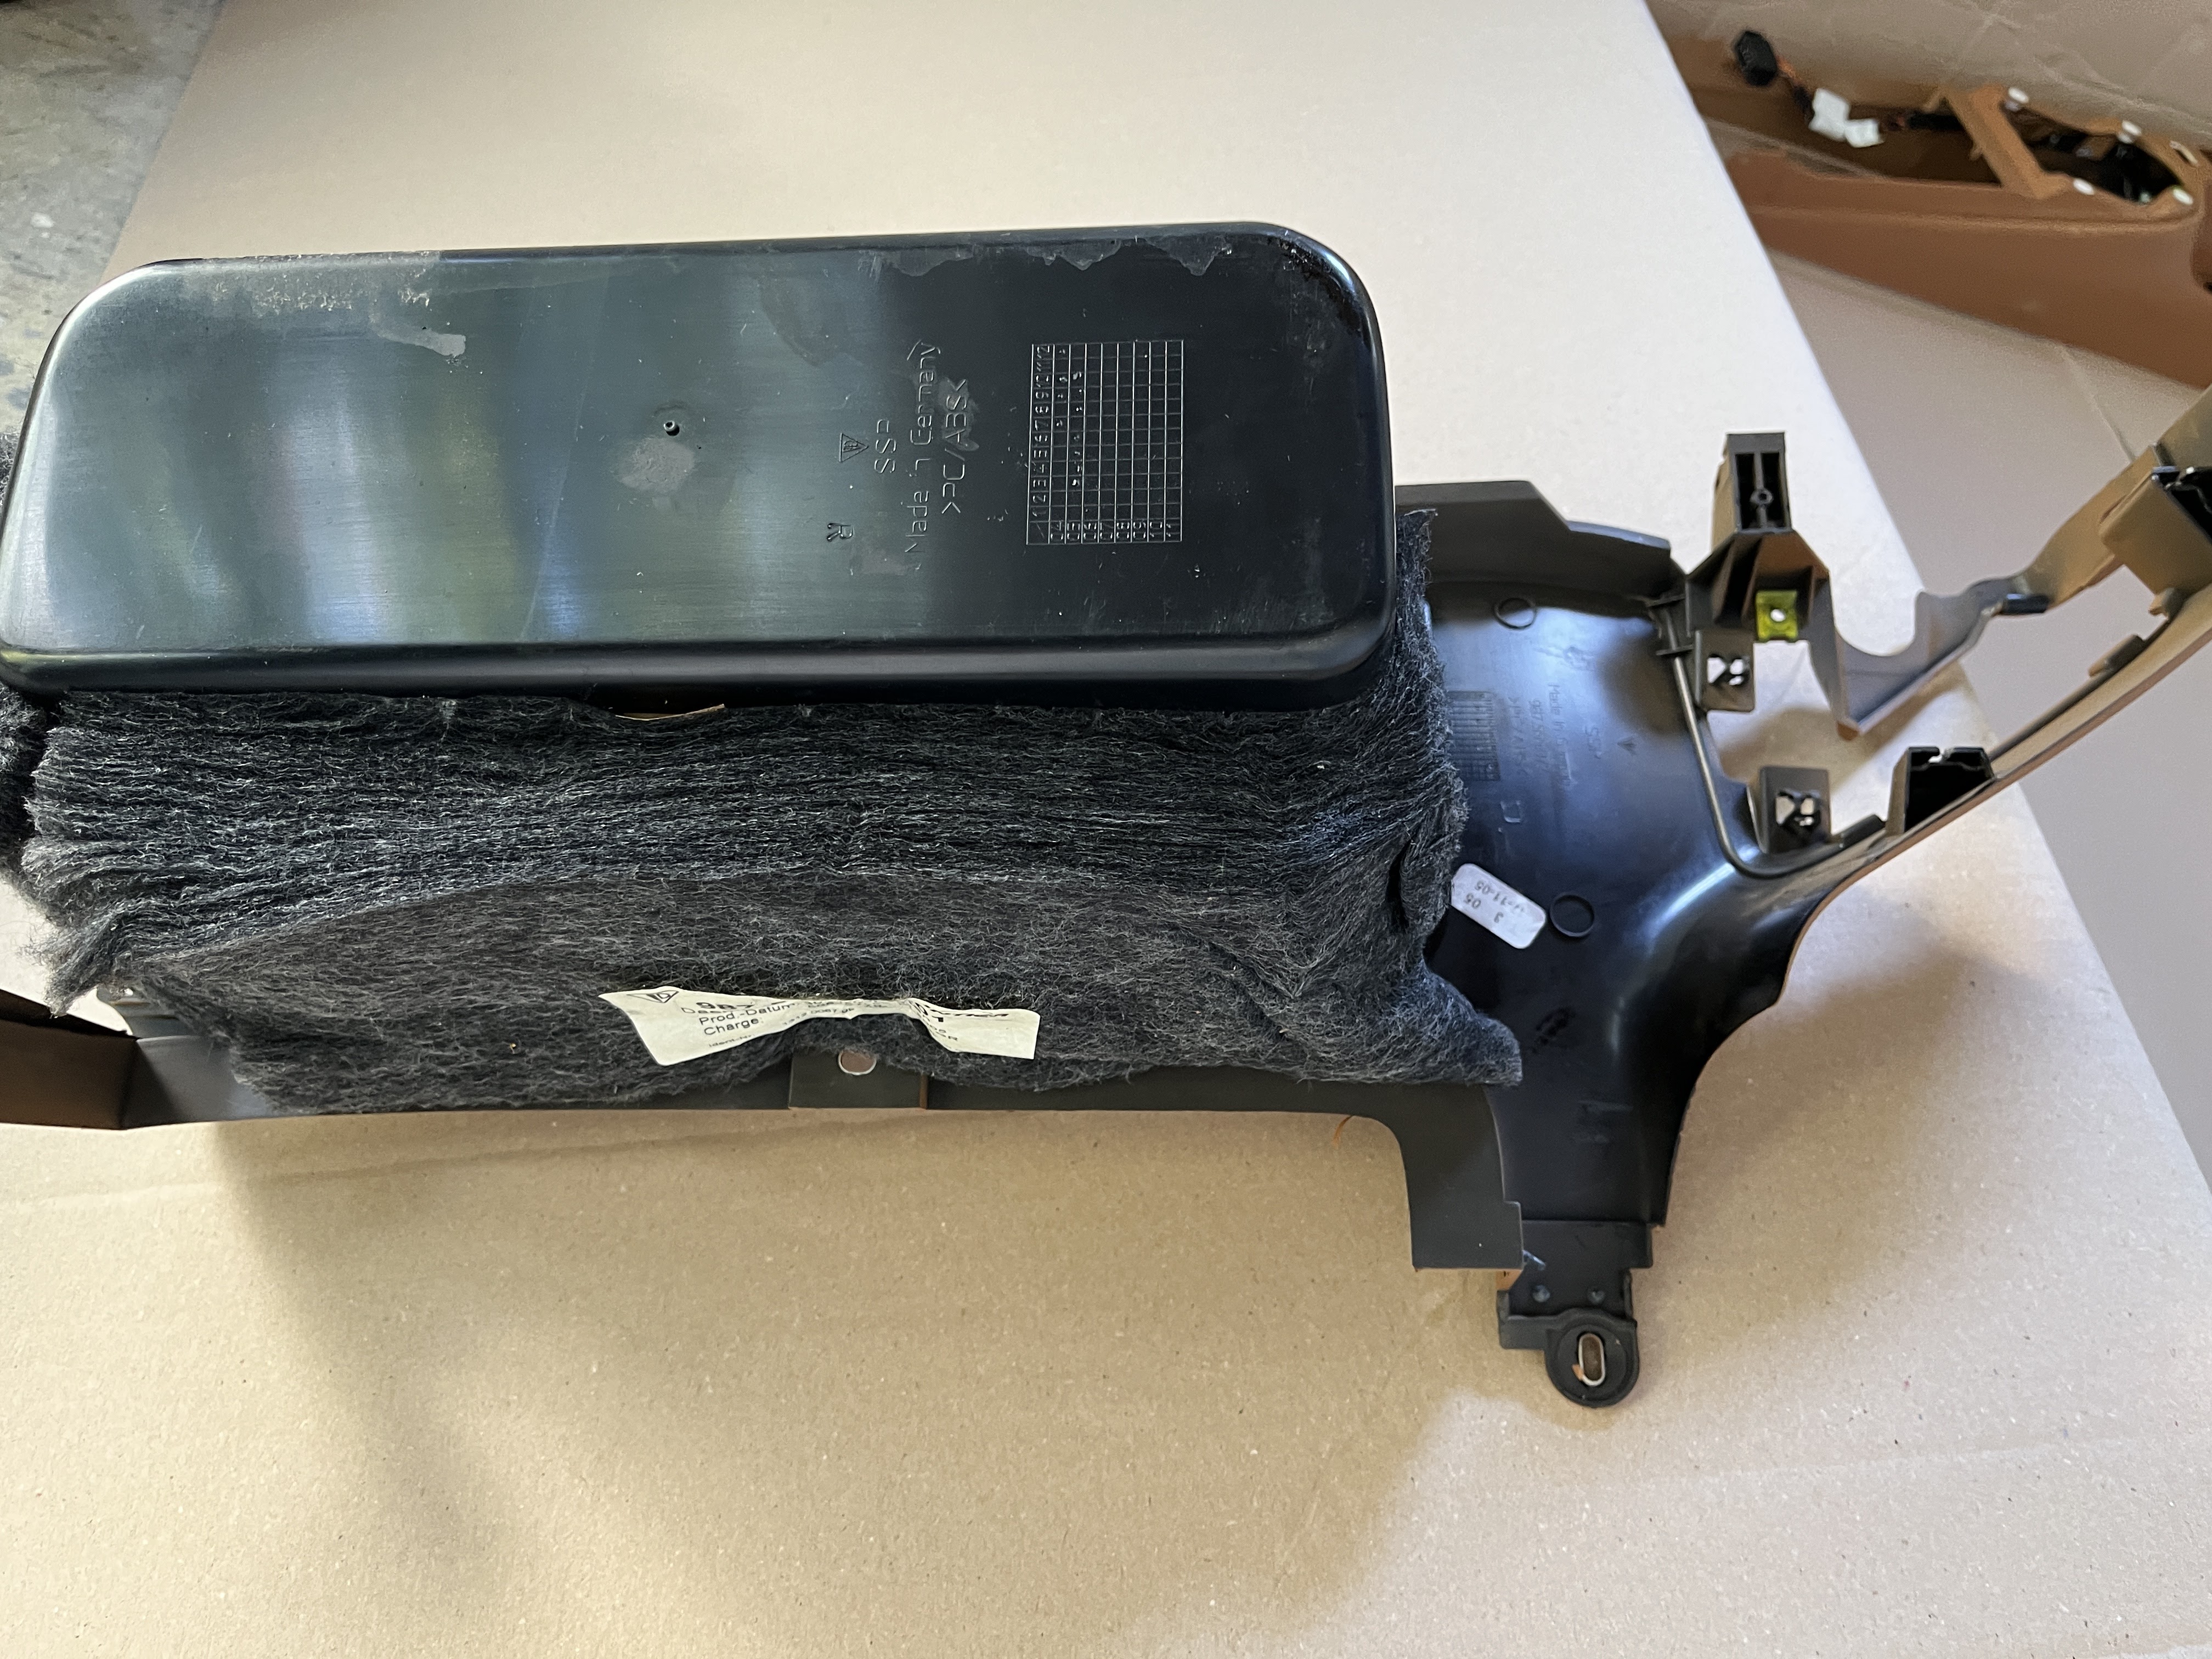
Item 16 comes next. It has the storage comparment integrated with it. Along with Item 25, they seem to have the most screws of any parts. They are very obvious.

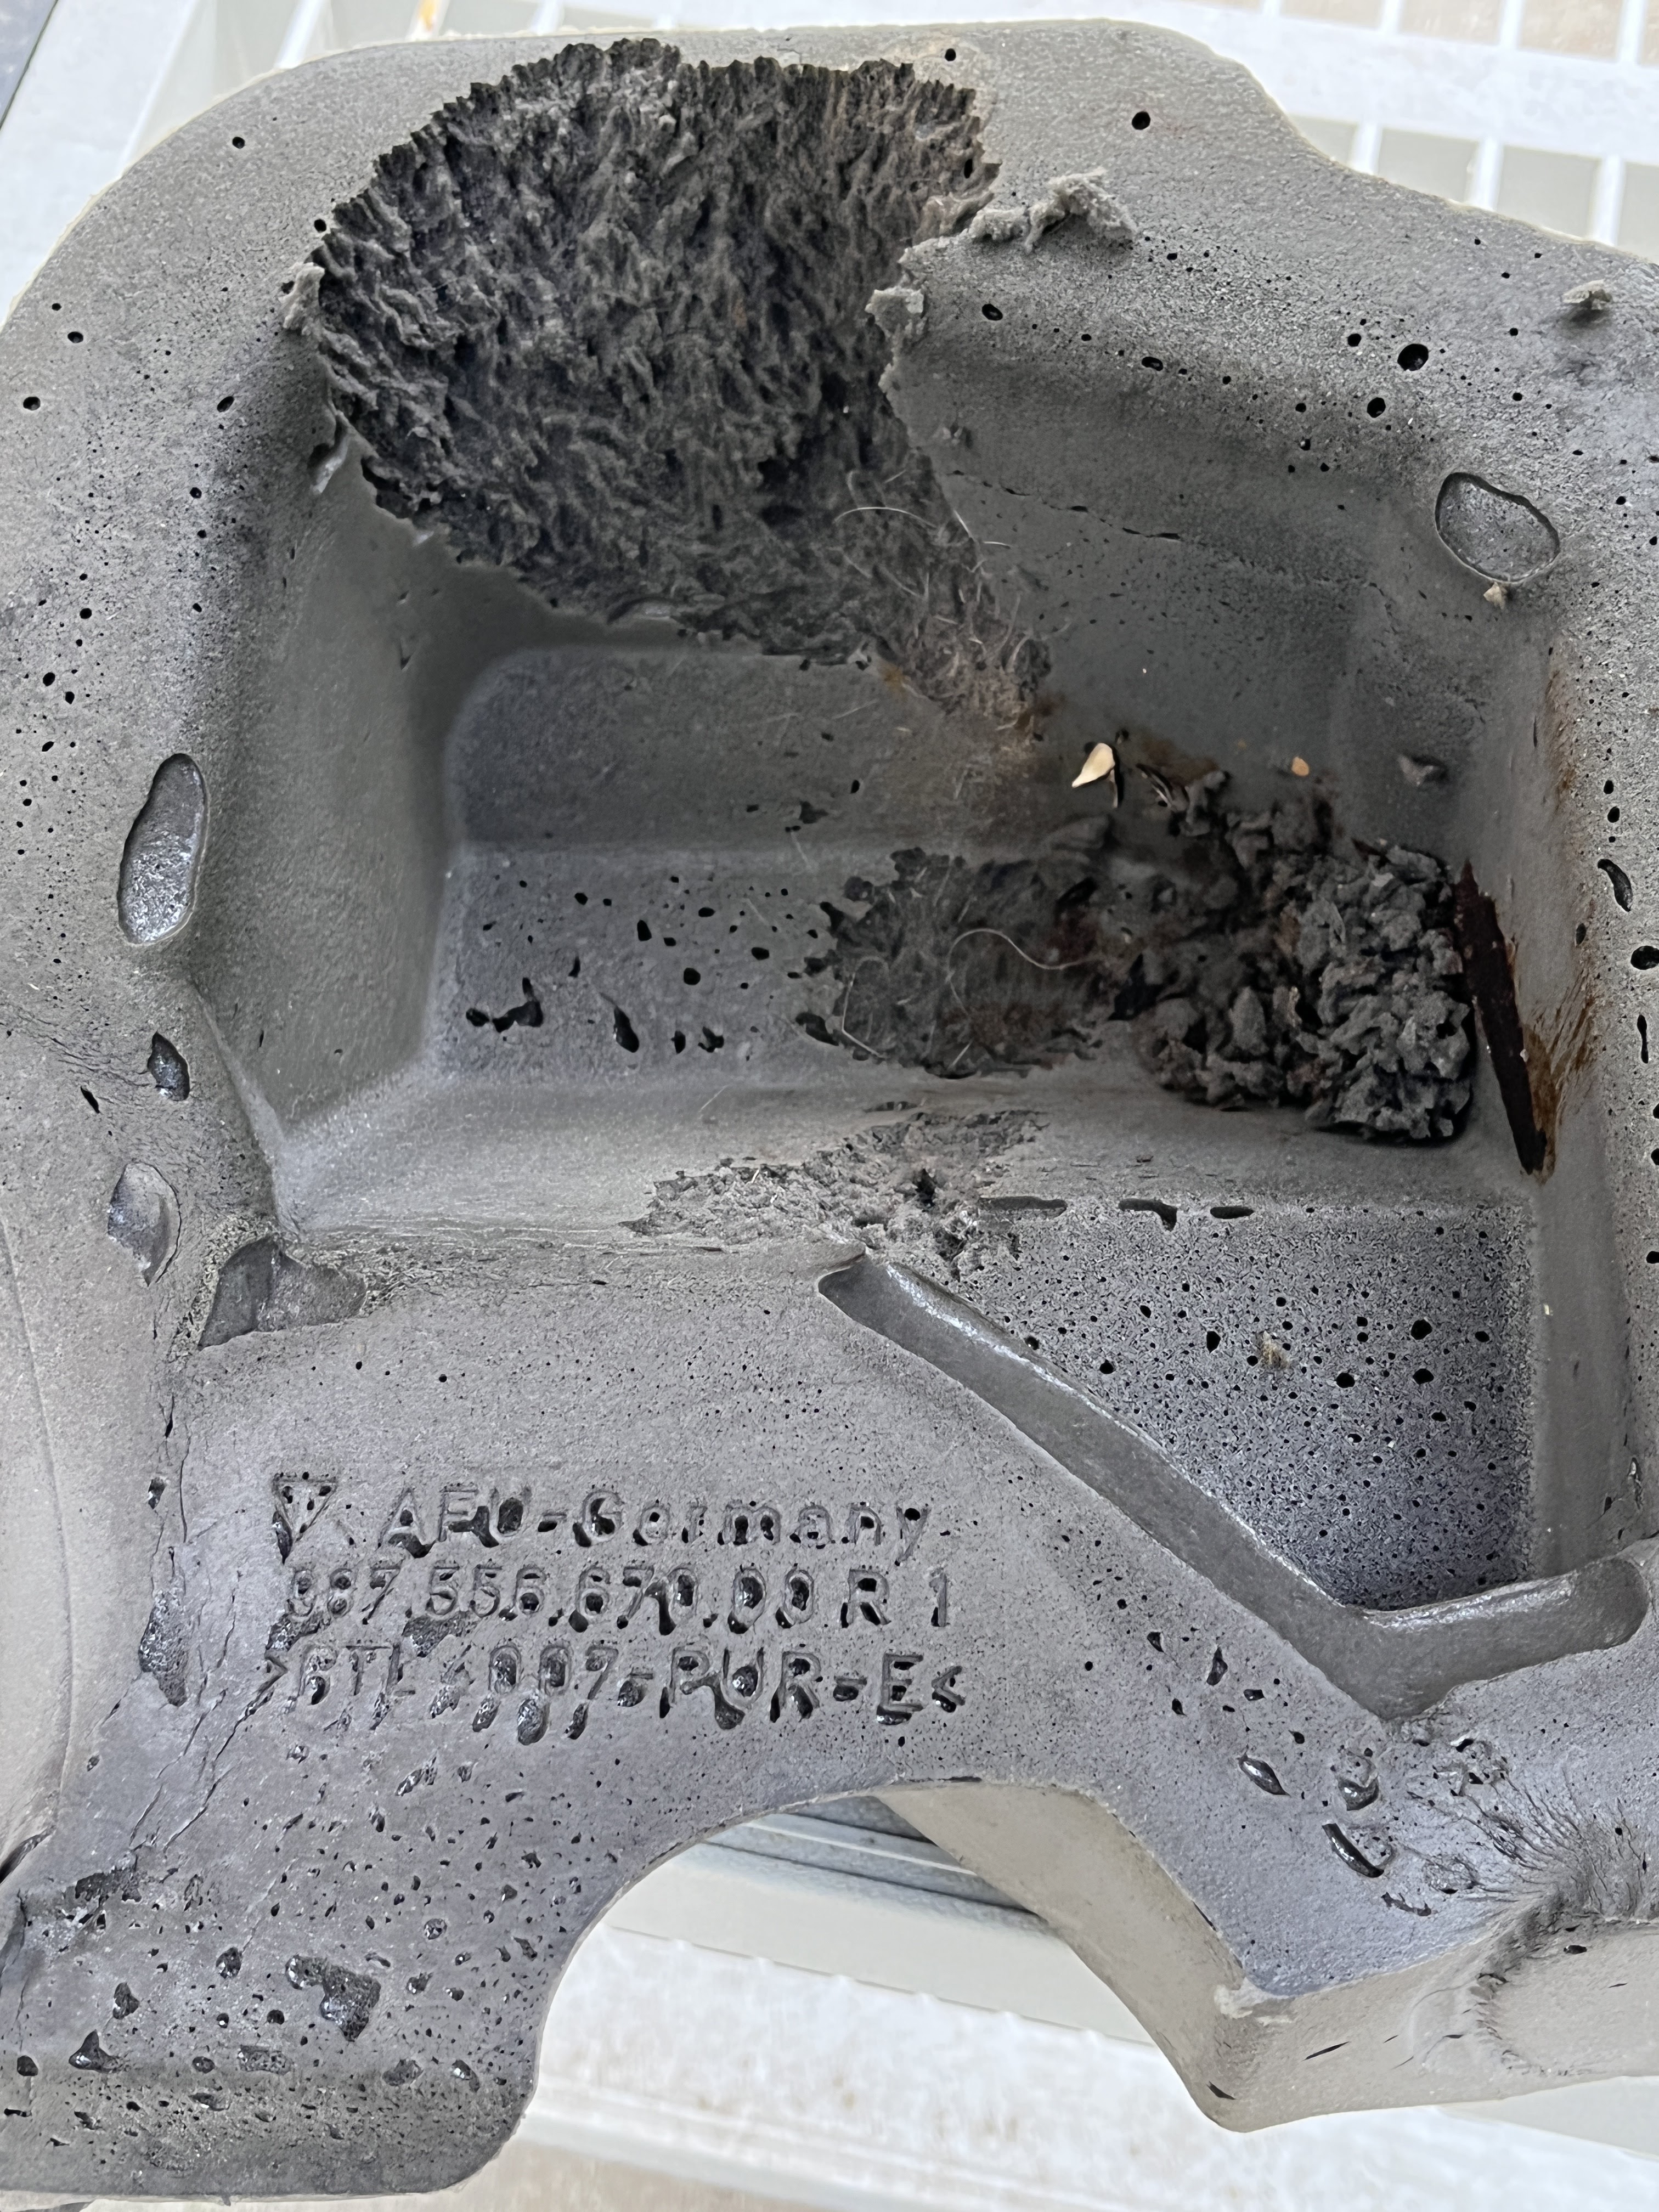
And just to gross you out, the area around and under the above piece is filled with closed cell foam insulation as well as the black fiberglass mat. This is one area where my mice had set up shop. Fortunately these pieces are available from Porsche at a reasonable price and delivery time.
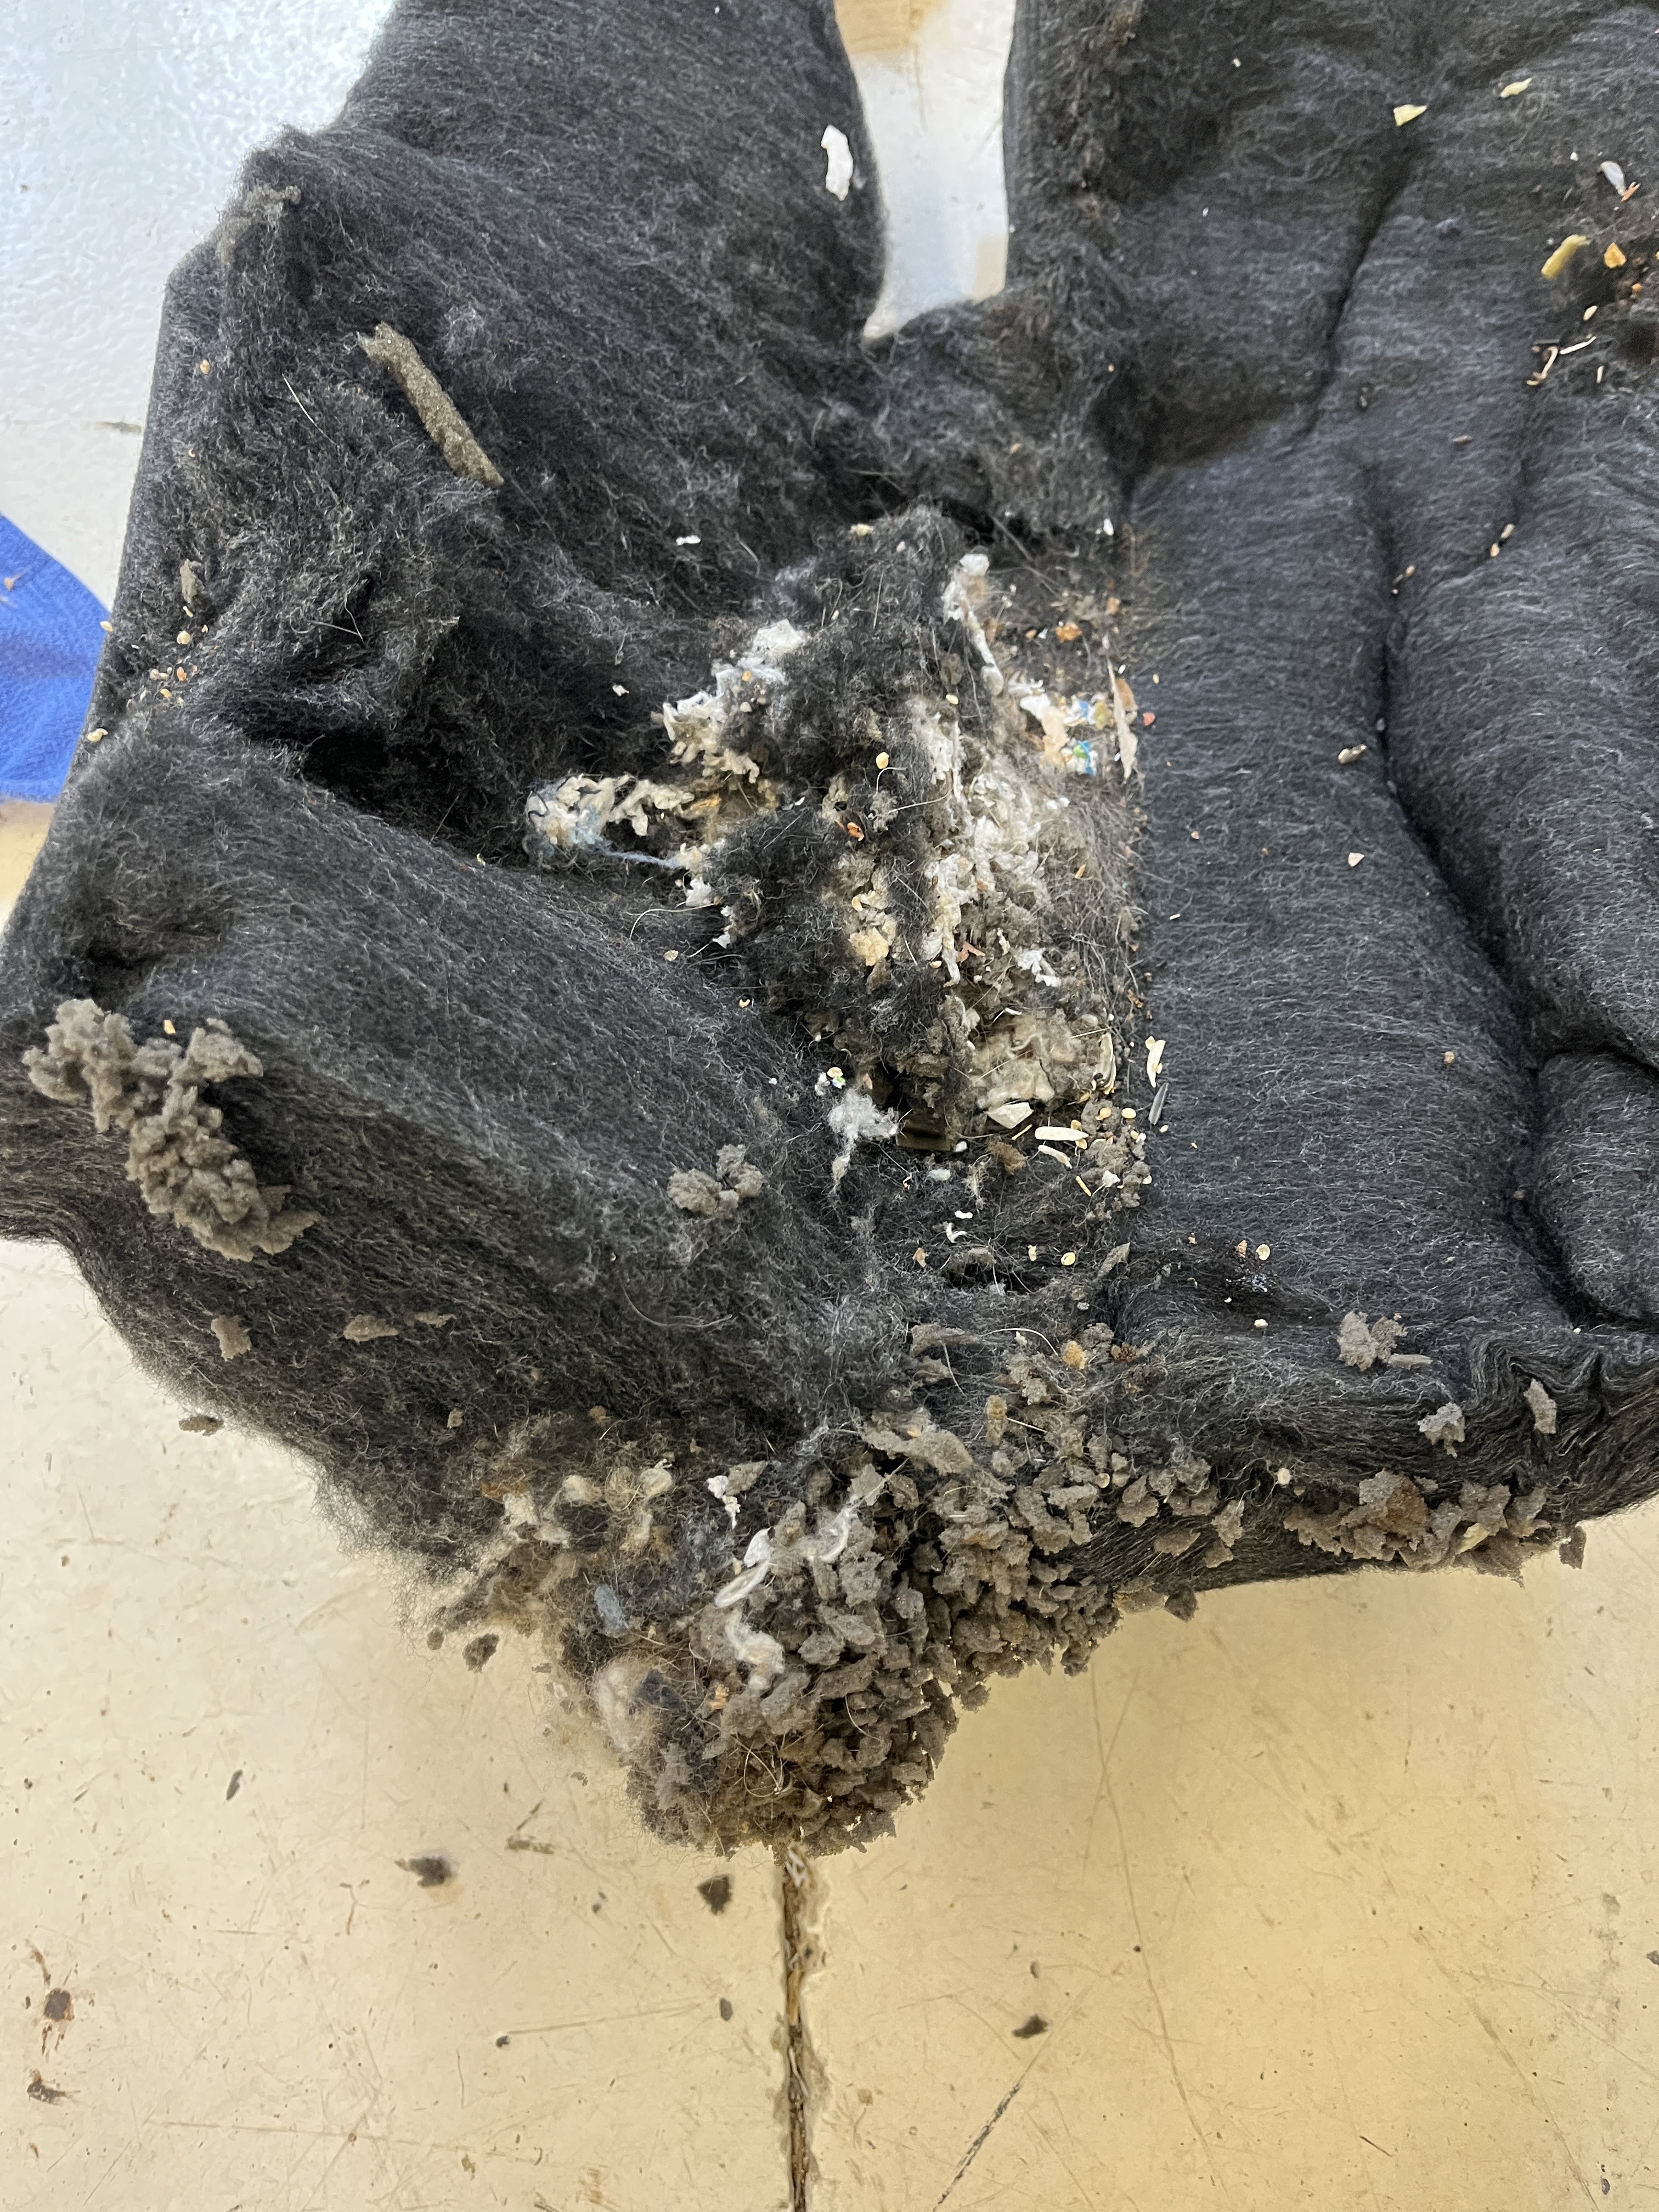
If you want to check this area on your car, you can probably get a peek in there by removing the small piece that goes around the entry point of the seat belt web into the inner body.

Next after the storage box piece are the ones with the speakers and the domes over the rear strut mounts. These have several obvious screws and some clips.


Next remove the horizontal panels with the air vents in them. Item 12.
PLASTIC PANEL REFRESH
As you can see in the above pictures, the plastic panels had a lot of spots where the color had chipped away and the black base material was exposed. I sent a representative piece to Color Plus Leather Restoration, where they mixed up an exact match paint. Their paint is meant for leather and vinyl but here is how I used it on the plastic pieces.
- Wash all pieces with Dawn soap. Rinse and dry.
- Scuff all areas to be painted with fine Scotchbrite pads. At the areas that were chipped, I spent extra time with the Scothbrite to smooth the edge between the color and the black. It ultimately took 3 applications of the paint to cover the exposed black areas.
- Mask with painters tape where necessary.
- Wear vinyl gloves from here forward to keep body oils off the surfaces to be painted.
- Wipe areas to be painted with denatured alcohol.
- Apply an adhesion promoter to all surfaces to be painted. I used SEM XXX Adhesion Promoter P/N 77723.
- Use a spray gun to apply the color. I know, we don’t all have a spray gun but from previous experience, anything less, like a brush, will leave a texture that you are not going to like. You may get lucky and find a suitable paint color in a rattle can. Check out SEM products.
REASSEMBLY
I have just spent the last two days putting the car back together. Before I forget, I am going to try and relate the order of assembly that I used. Some of this can be rearranged but I remember a few places, basically spots with overlapping plastic panels, where there seems to be a mandatory sequence. I will try and denote those steps as such. So here goes, starting with a stripped interior, no carpet or plastic panels.
PRO TIP – Identify the metal clips on the back side of the plastic pieces. Place a small piece of painters tape over the spot on the front side, which is basically where you will whack the plastic with the palm of your hand to seat the clip. Also, obvious, but make sure the clips are there and that they are in good condition. I bought a bunch of new ones from Porsche. They are cheap. You can get the part number off the PET. Also, make sure that you inspect the slots on the body where the clips will seat. I found a number of places where the clip was still attached to the body. Obviously, they need to be removed and attached to the plastic piece.
NOTE- for a lot of these pieces, the rubber trim around the doors and windows will lap over the edge of the piece. This is obvious where it occurs but in most cases you will have to use your fingers or a soft tool to help lap the rubber into position.
See photos below which refer to the step numbers.
- Headliner- note the headliner is secured at the front by the sun visors and at the rear by one metal clip and two spots of velcro.
- Sun visors.
- “A” pillar plastic pieces- these will hold your headliner up in a more secure fashion- for reference, these pieces start at the base of the windshield and run up over the door.
- Main carpet on the floor- the OEM carpet was a single piece. The replacement one is split down the center tunnel, which simplifies installation. You probably already did so but the shifter quadrant and the parking brake will have to be unattached. Snake the gas pedal through the opening in the carpet and attach it.
- Carpet on lower firewall- this is the carpet just below the removable panel where you access the front of the engine. The big trick here is that is needs to be snaked under the 3 cables that penetrate into the engine compartment. I removed the yellow cad clip that holds the 3 cables. Placement of this clip is important, to avoid interference of the cables with the parking brake cables, so document its location before you remove it. This carpet came with adhesive. Test fit the piece, then remove the plastic wrap over the adhesive. Jumping way ahead, the rear end of your center console will butt up against this piece of carpet. You have to get it installed correctly or it will hold the console too far forward. It might be worth a test fit of the console at this time.
- Black plastic piece at lower door opening, not the threshold but under the threshold- if removed, put it back now.
- Door threshold- fits over the above black plastic piece and the main carpet. It tidys things up.
- Left and right carpets on the B pillars- at their top, they are held in with 2 screws that get covered up later with plastic pieces.
- Miscl items in main cockpit- fuse panel cover. Plastic dead pedal. Black panel under the glove box.
- At this point I would move to the rear hatch area. First item is the main carpet in the hatch area. Don’t forget to fish through the 4 D rings. Now it gets a little tricky. I think the next steps have to be done in order.
- Install the piece of carpet that goes directly under the latch for the rear hatch.
- Install the plastic piece that contains the opening for the latch.
- Install the carpet on the rear firewall of the engine, the piece that wraps under the oil/water access panel, next. It really gets locked in when you install the odd shaped carpets at its left and right ends. But first you need to install the plastic panels with the air louvres in them.
- Install the horizontal, upside down plastic panels with the air louvres in them. The rear edge of these panels locks into the panel you installed in step 12.
- Install the odd shaped carpets at the left and right sides of the hatch area. These actually pop into some pre-formed grooves in the carpet pieces you have already installed and tend to push all the pieces around the perimeter of the rear compartment into final position. Don’t install the chrome piece at the rear of the engine compartment yet.
- Install the two black panels, left and right, that allow access to the tail light assembly.
- Install the plastic pieces with the storage box- several comments. These boxes are wrapped with black fiberglass matt. This mat was the favorite home of my mice. You can buy new mat from Porsche for not much money. Just forward of the boxes are some formed closed cell foam pieces. The mice also liked these. They are also available from Porsche for not much money. Anyway, because of the way the plastic pieces overlap, the one with the storage box has to go in first. I got this wrong so it is stuck in my head. It is a little bit of a PIA to lever it into position.
- Install the piece with the speakers- this one is a very tight fit at the area over the shock/strut assembly. Don’t forget to attach your speaker wires!
- Install the piece that goes around the fixed glass windows, left and right sides- this one also was a fight to install. At its upper edge, it serves to support the outer rear corners of the headliner. Check this fitment carefully. There are two small L shaped pieces that plug in last. At the front lower corner of this piece, you will overlap the B pillar carpet and the seat belts. At the upper forward corners, you will snap into the A pillar covers.
- There are two smaller pieces, left and right, that you snake the seat belt through and then clip them into position. Attach the lower end of the seat belt with the heavy bolting hardware.
- Snap the chrome piece at the rear of the engine compartment into position. This might be a good piece to replace, as it gets pretty scarred up and I found some of the fixed pegs on its back side to be broken.
- Snap the plastic piece over the top front of the engine compartment into position. You put the piece in first, then the heavy stop bar gets bolted down, then two little clips that you pre-stage on the bar are slid down to finish off the openings for the bar. Strangely enough, there is one sheet metal screw in the opening at the drivers side only.
- You are almost done! Install the sound deadening removeable pieces for the front and top engine covers. Make sure you fish the D rings through. That about does it rearward of the seats!
At this point, the main items left are the center console and the seats. As discussed above, this article on Rennlist does a pretty good shop explaining how the console if removed and thus put back.
BTW, a nice quick job is to buy the plastic piece that goes around the opening for the ignition key. It can be had from the dealer, only in black. Try your hand at painting it to match. You will learn some techniques, maybe some things that don’t work, on a piece that is relatively inexpensive and always beat to hell. To remove the piece, just gently pry around the edges.
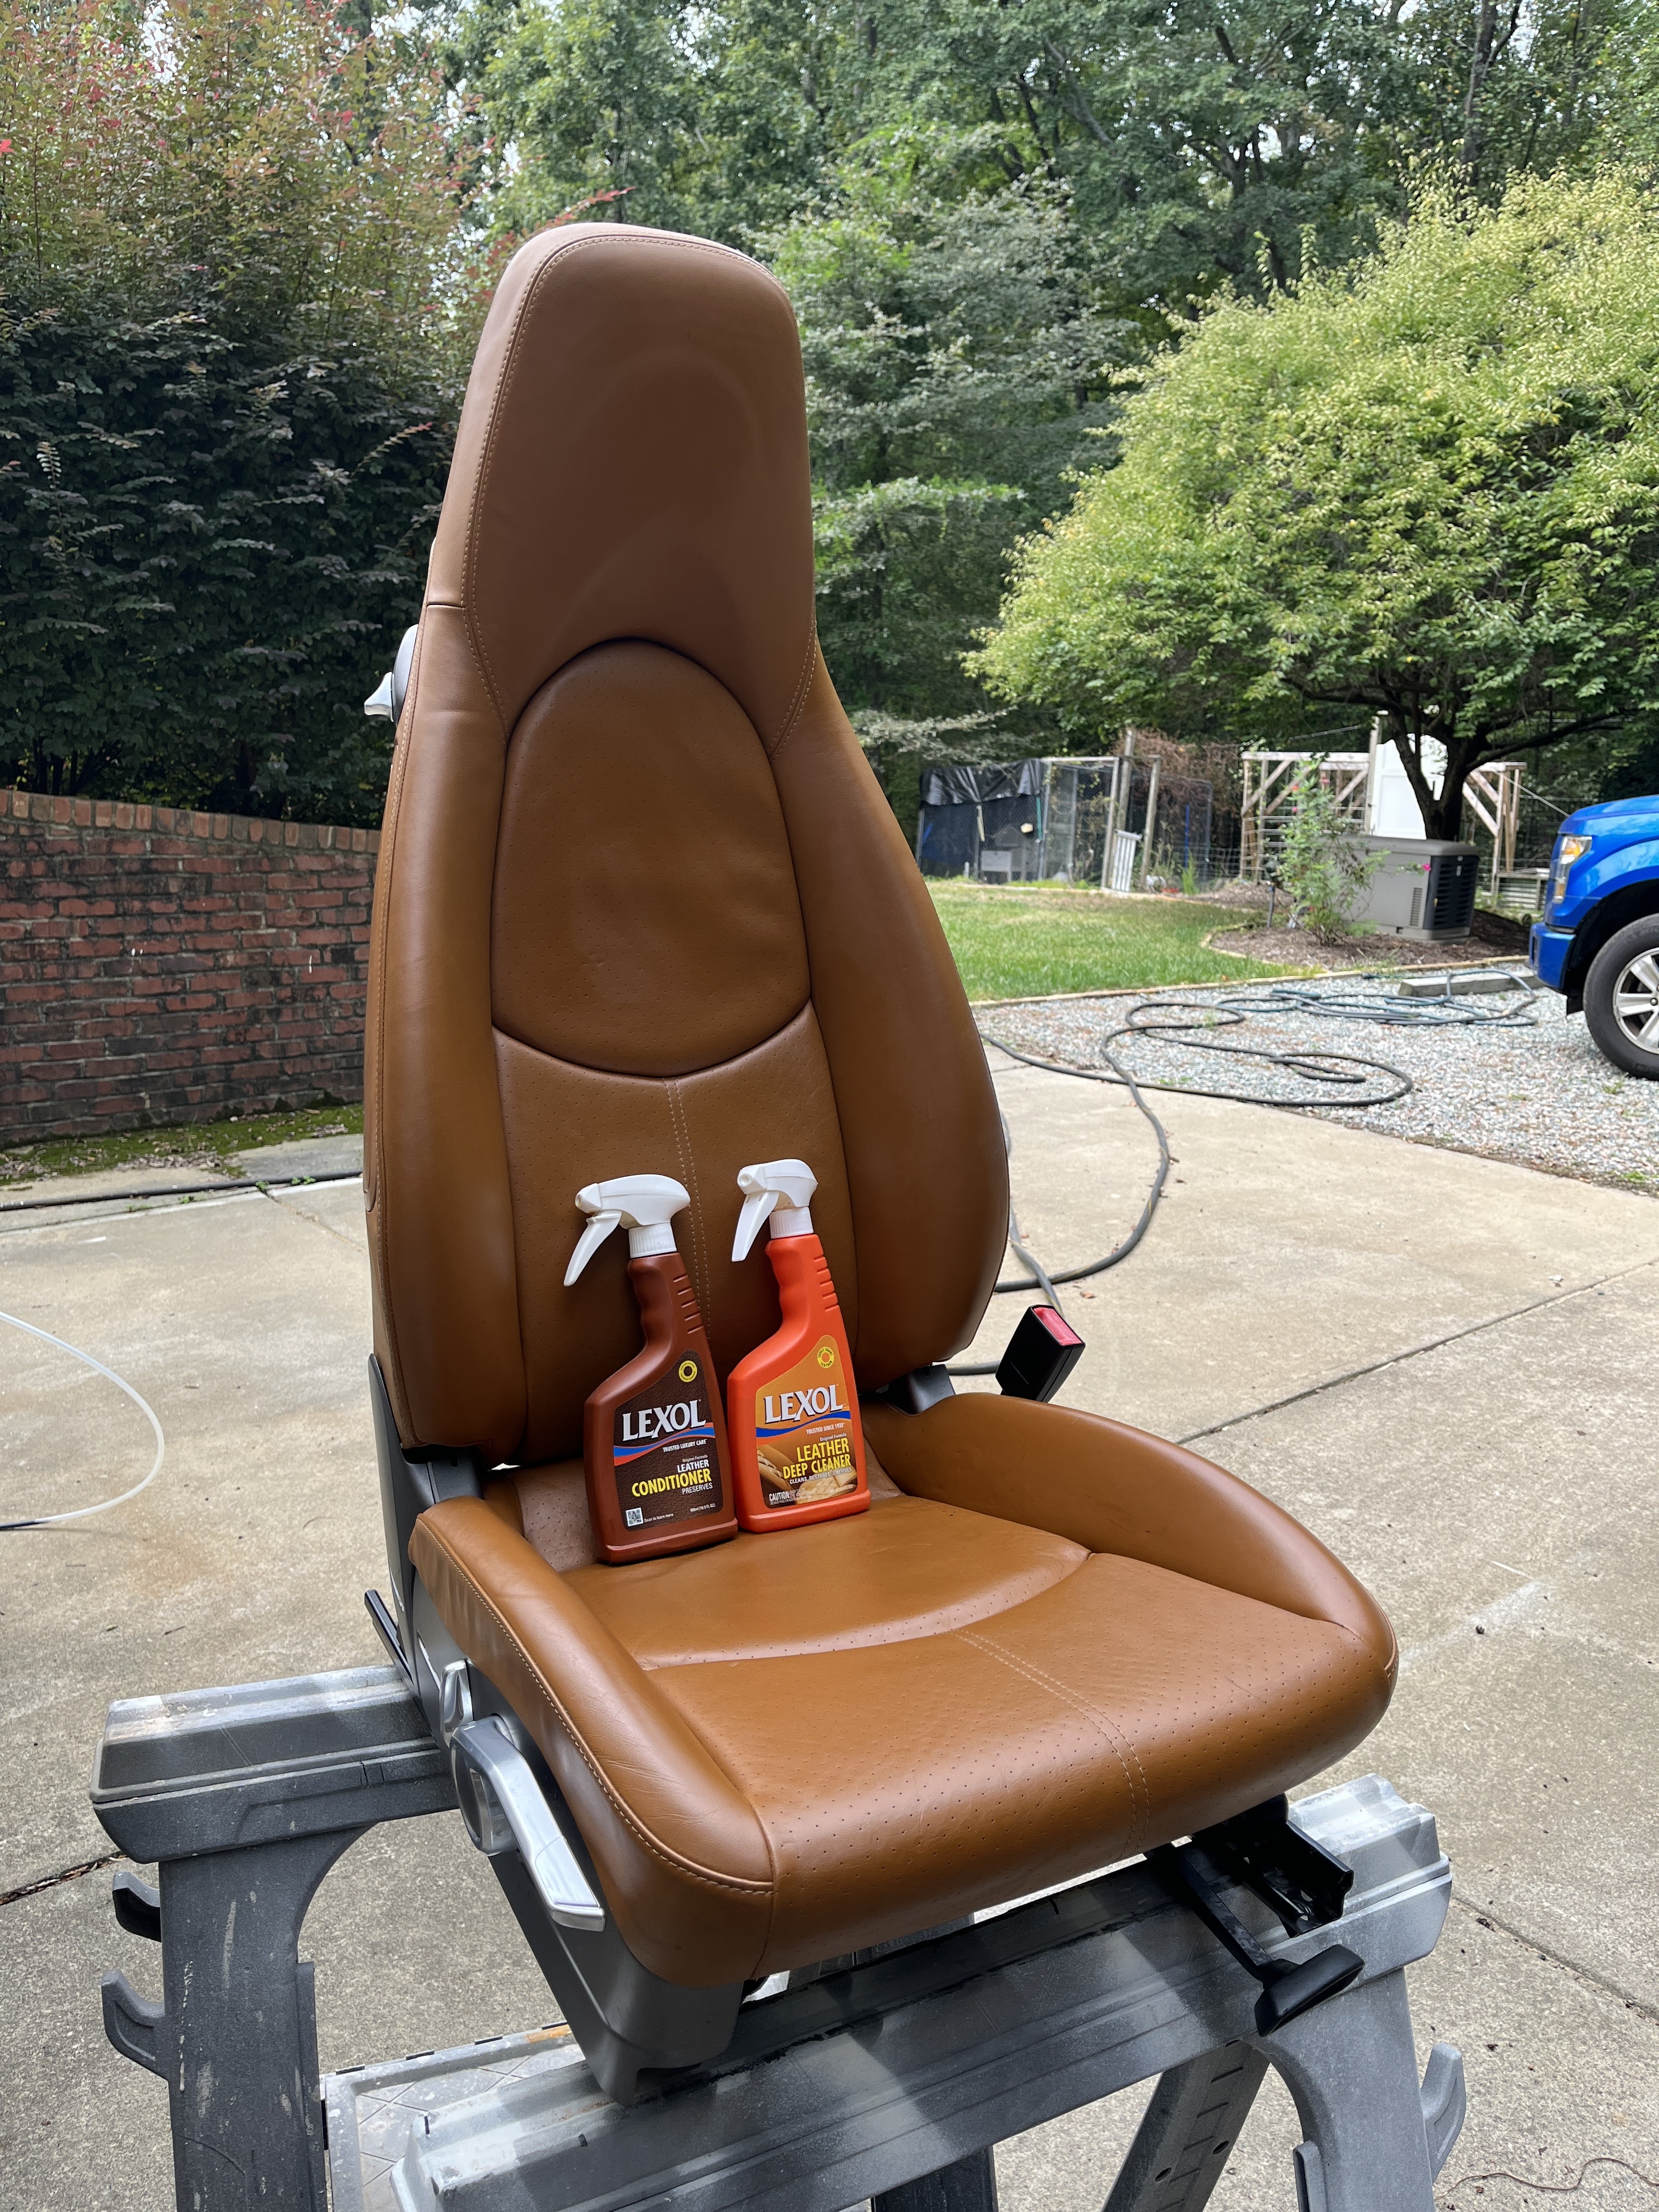
While you have them out, now is a good time to use your favorite product to clean and refresh your seats.
And that about does it. This is certainly a lot of work but whether you are dealing with mice or just want to refresh your interior, I think the results speak for themselves. You’ll fall in love with your “new car” all over again!
Don’t forget to check out my articles about fixing your gummy HVAC controls and your dash gauge face.


Discussion
Comments are closed.