A number of years ago, in 2015, I repaired the leather dash on my 928. It had developed “eyebrows” along the front edge of the defrost vents. The leather shrinks badly and pulls out from under the edge of the vents. It is not a good look. That repair is discussed here. In the last year, the leather pulled out once again from under the passenger side vent. Deep sigh!
While waiting for suspension parts to come from Germany, I decided to tackle the dash again. There is an excellent tutorial that I was able to find that discusses in great detail every nut and screw required to remove the dash. Suffice it to say that it is not the worst job in the world but you do have to do a good job of labeling parts, wires, connections, etc.
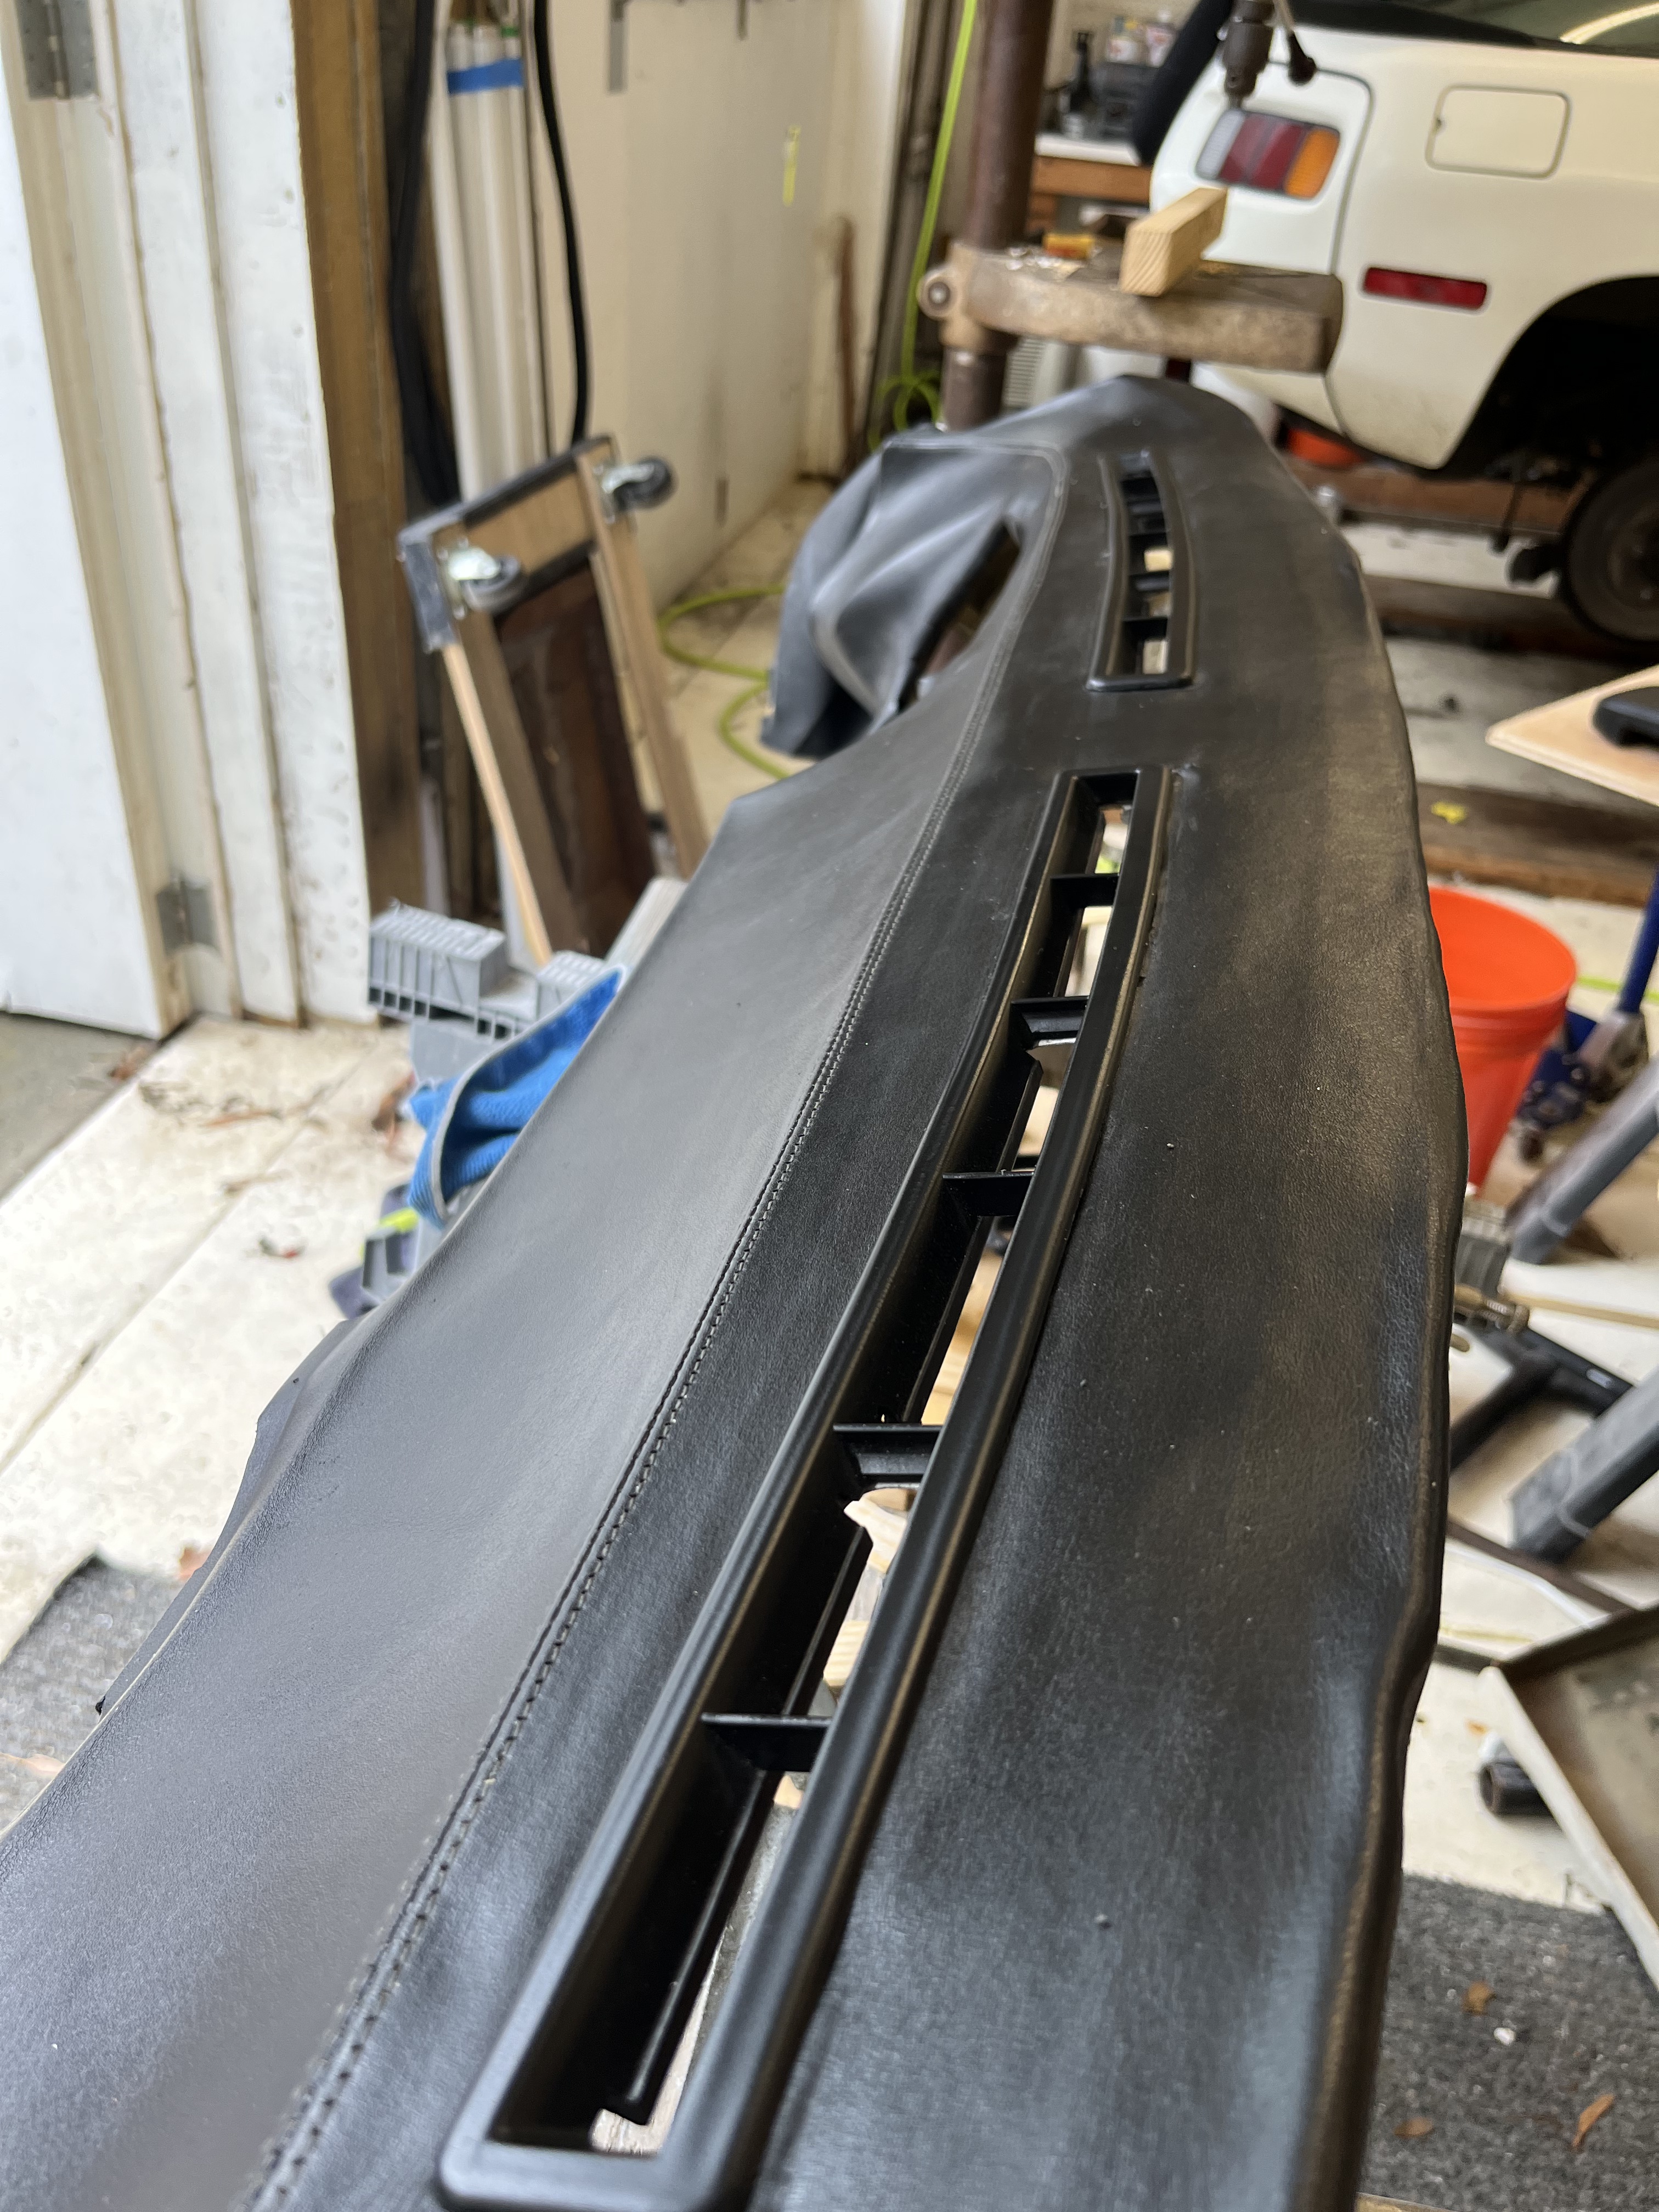
Once I had the dash out, I formulated a game plan. The dash has a metal framework that is used as the basis for a series of layers of materials that form the smooth substrate for the leather (and the vinyl if it is not a leather dash). The middle layer was probably originally injected as a hot foam material in a mold. This foam gets very hard and swells over the years. It can be seen in the edge view shot below. There is a thin top layer which is a very rigid material.

I decided to remove all of these materials and build up from scratch. I first carefully pulled away the leather. It is glued but was not hard to peel off. Then I used an abrasive disc to remove the material on the top, flattish portion of the dash. I stopped my removal roughly along the sewn seam of the leather dash. I experimented initially with spray-in expanding foam and felt it was too difficult to get a surface that would not telegraph imperfections to the leather. I then went with traditional body filler, which I am very comfortable working with. I built up the top surface to a nice smooth profile. I blended the body filler on the steeper slope of the dash back into the origional material.

It was at this point that I test fit the plastic inserts for the defrost outlets. First of all, these were very tight and I spent the entire job worrying that I would snap off the fingers that hold them. I actually filed away some metal in the openings to make them fit better. It was also at this point that I realized that the inserts were designed for a thicker stack of materials than I had with just the filler. I experimented with adding some 1/8″ closed cell foam sheet to build up the thickness of the assembly. This solved the problem.

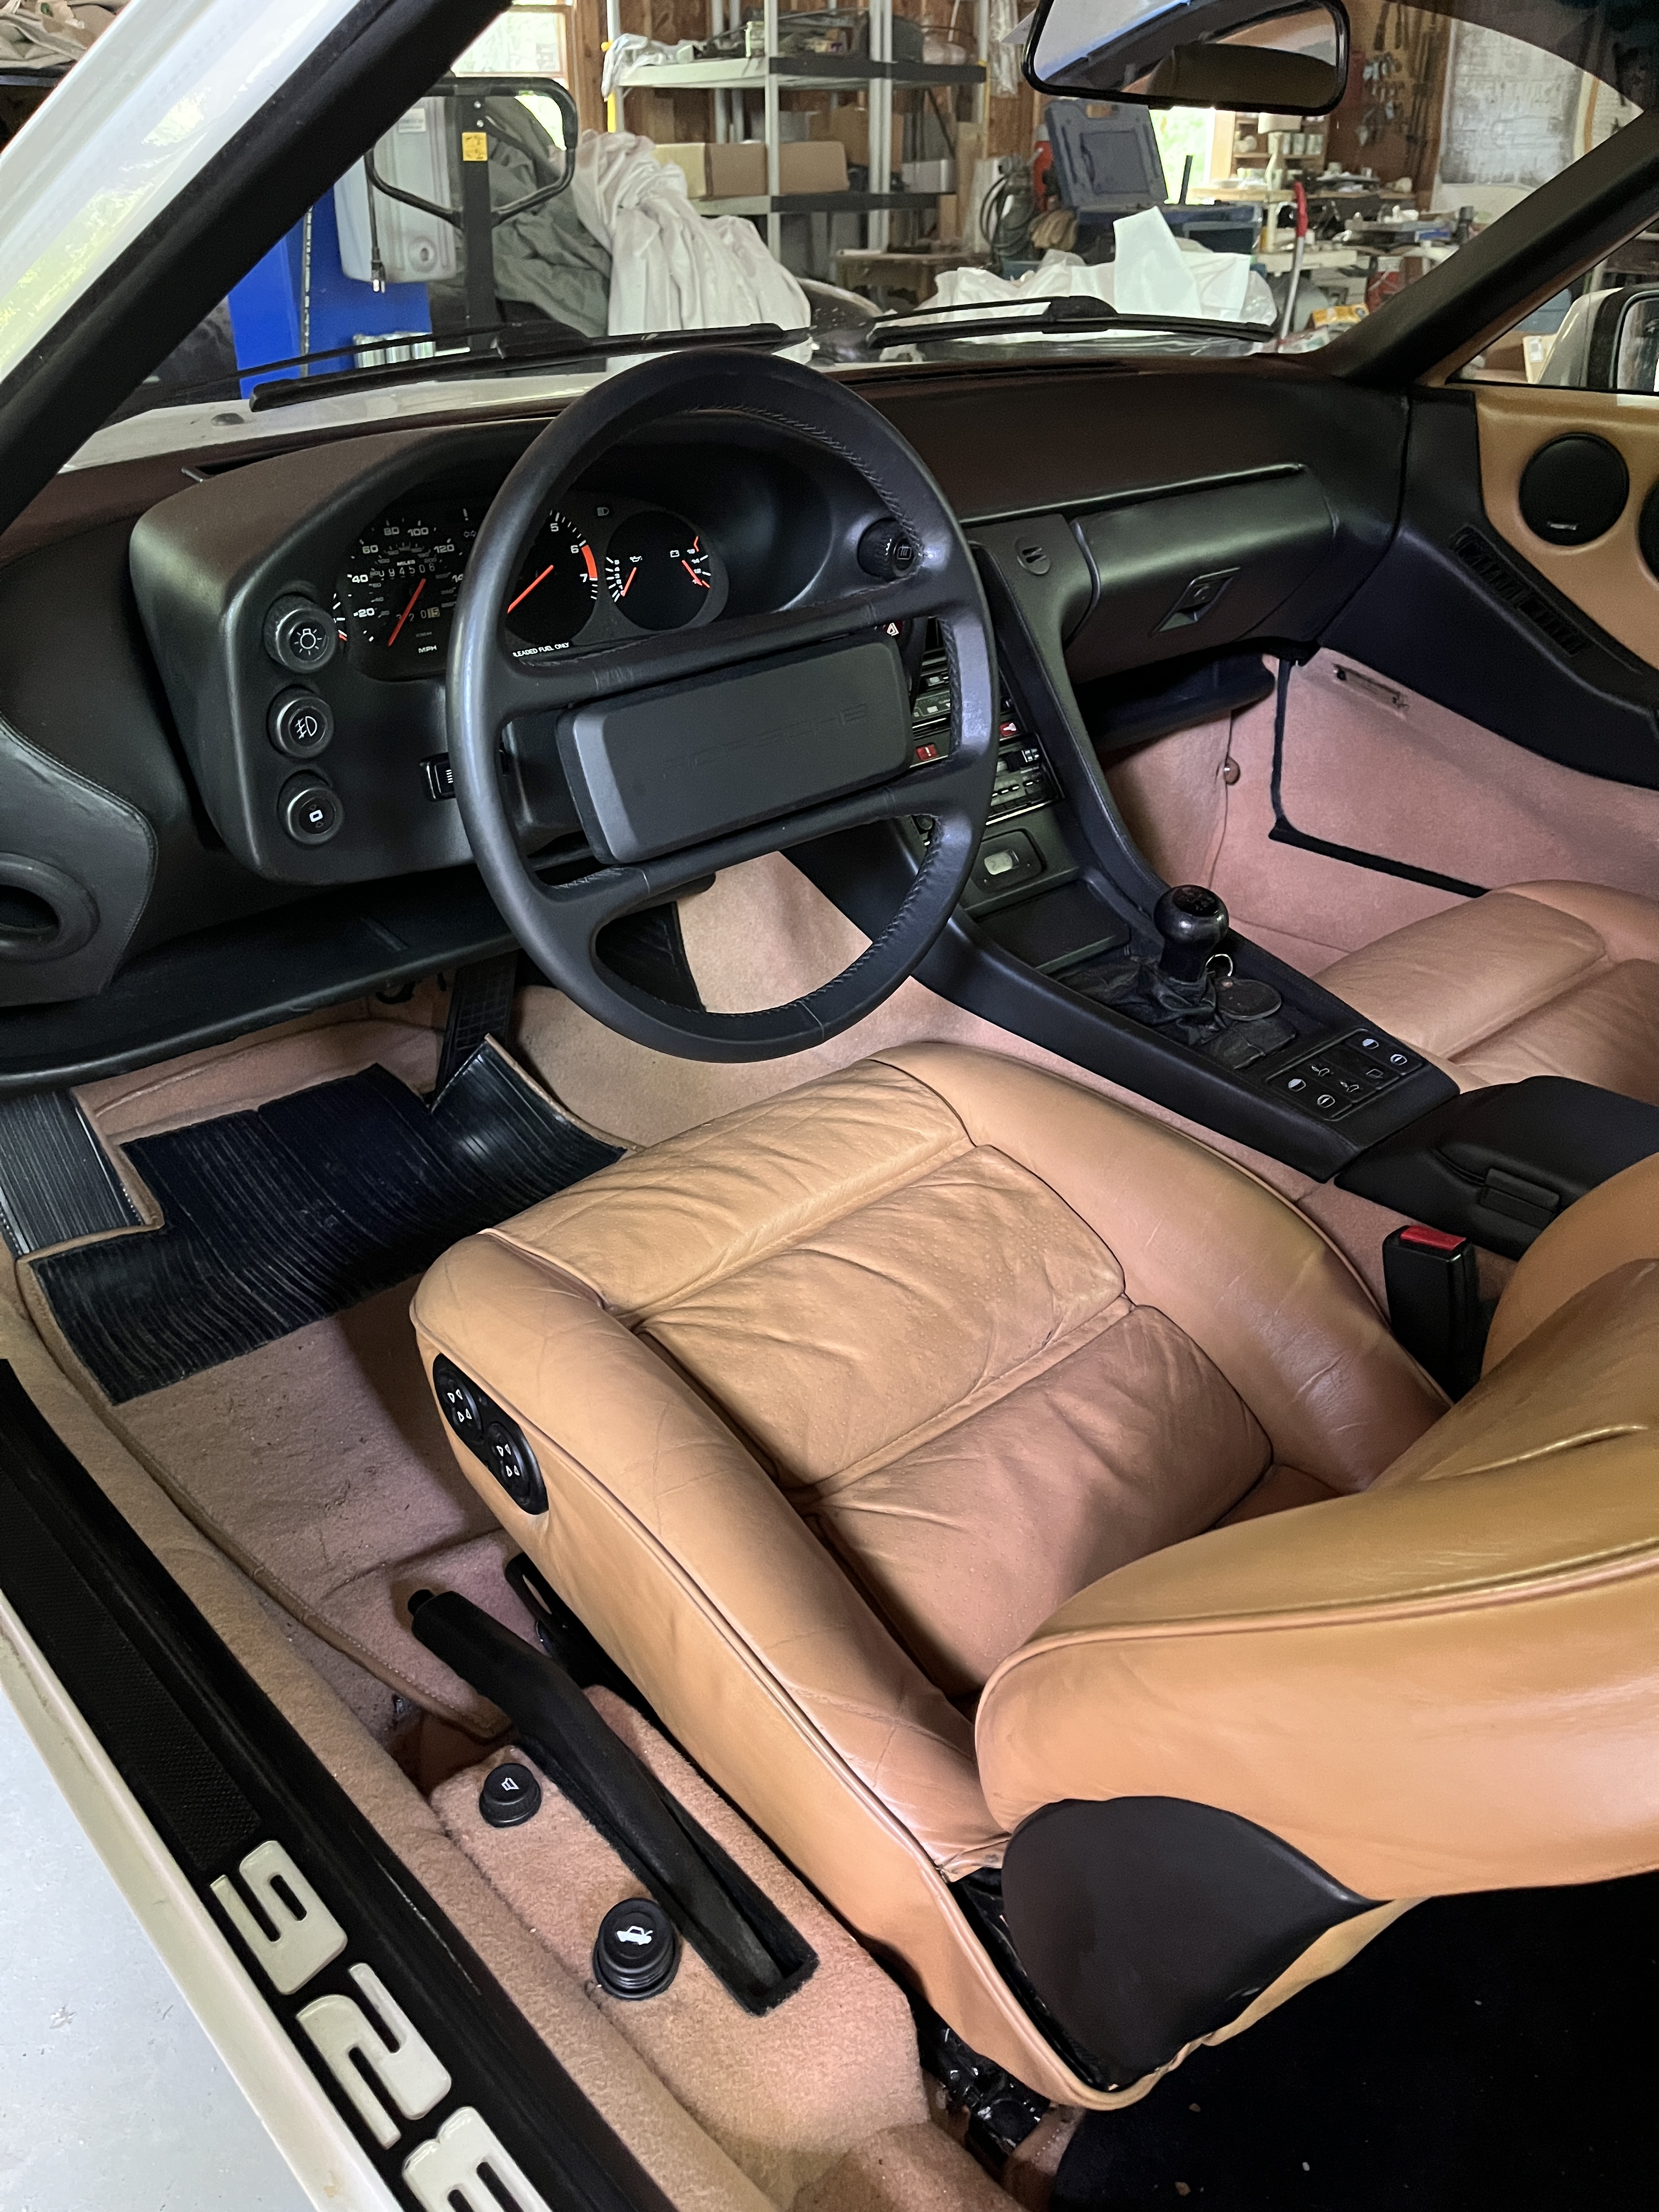
I used a combination of basting spray (shown in the photo above) and traditional contact cement to attach the foam. BTW, basting spray, which is used in sewing, is sticky but you can release and reposition the materials for a short while while it is still wet. I then laid the leather carefully into position and glued it. Besides the obvious placement of the leather over the openings for the ducts, you also have to really work to get the double stitched seam oriented in a nicely curved arc with no wiggles. Finally I pushed in the air ducts for the last time and pronounced it done.
One issue I ran into. Early in project, I treated the leather with a rejuvination product, Leder Oel. The leather was really dry and I’m sure it benefited but I also feel that it compromised the adhesion of the contact cement. We’ll see what the long term results are. I will say that as I laid in the leather over the new surface, there was no lateral “tugging” required to place the leather in the correct position for the vents so that should help.

So I got to this point and realized that almost every black surface in the cockpit had faded to a different shade. Since I had everything out I decided to dye all the surfaces back to a consistent shade of black. A company that I have used over the years for restoration is Color-Plus Leather Restorations (colorplus.com). Their product is a dye and works very well with leather but it also works on vinyl surfaces. They can do custom color matches but in this case they said they had a stock color for 80’s Porsches called 917 Black.


Although they say you can use a brush, this product looks best applied from a spray gun. I not only did the dash but the steering wheel, pod, center console, A pillars, door panels, and various trim items. Man, there are a lot of pieces. Oh, and I did the dash vents, requiring one more nervous but sucessful removal and reinstallation. I also took this opportunity to replace the rocker switches for the windows and sunroof with replacement ones from Roger. And I installed a period correct Blaupunkt radio that plays cassette tapes! I went more for the look than the functionality, as I listen mostly with my Iphone and earbuds when cruising.
I think the end results speak for themselves!


Discussion
Comments are closed.