When I left off in Part 5, we talked about having the body shell and various body panels media blasted and promptly sealed with epoxy primer. Which leaves me to the long and laborious topic of body work and paint.
First of all, my reading has established that the E-Type bodies were fabricated, mainly by Abby Panels, from untreated sheet steel straight from the steel mills. The metal was formed, shaped, and welded together in a rapid process. I read a reminiscence from a former worker that they could complete 4 body shells every hour! So obviously there was not much time spent on making them perfect. The body parts received a modicum of chemical rustproofing but nothing like what modern cars receive. They were then sprayed with a primer coat, followed by a bit of hand “flattening”, followed by a final coat of synthetic enamel. And out the door they went. It was never Jaguar’s intention for the cars to last 50 years and many didn’t. So rust repair can be a major issue and expense item for a restoration project.
If you have a car with sound, attractive paint that is a very good thing. It will allow you skip a major time and expense item. I have heard too many stories of cars being left with paint and body shops, to languish for literally years. It defies my imagination has this can happen but it does. Let’s look at a few options.
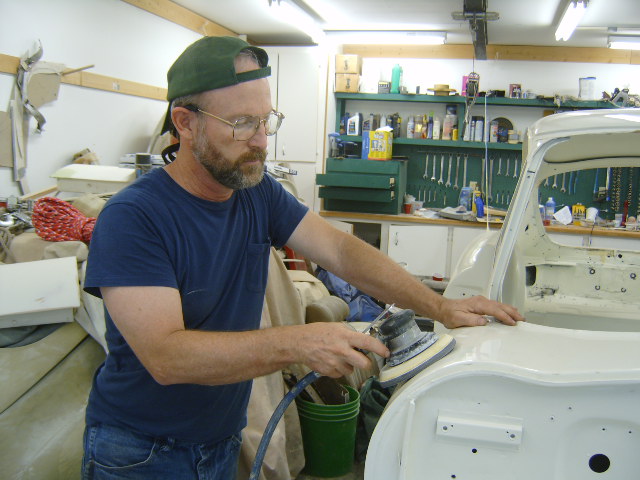
If your paint is sound but not as shiny as you would like, you may get away with a “paint correction”. The most perfectly painted surfaces will reflect the world around them like a mirror. This can only be achieved if at a microscopic level the paint surface is very flat. This allows all the light beams that hit it to reflect perfectly, like a mirror. Most as sprayed paint does not obtain this level of perfection. It is achieved by a laborious process where the paint is “sanded” down to a flat surface. I use the term “sanded” in quotes because the abrasive action is quite gradual and gentle. If you were to sand a piece of wood for craft project, you might use 100 grit paper. The sanding we are talking about starts with 1200 grit and works up to effectively 5000 grit. At that point we are really talking about polishing. This process is sometimes described as “color sanding” or “cut and buff”.
Freshly sprayed paint is not perfect in this regard and things only get worse as the surface is exposed to the elements and oxidizes. But if the car has led a sheltered life paint correction may be enough to restore a nice luster to the paint. In this process, an expert examines the paint carefully. They may use electronic gauges to establish the thickness of the paint. They will establish a game plan and sand/polish the surface of the paint. If successful, the paint will come out looking really great. The downside is that under the top paint color lies a contrasting primer coat. If you cut through the color and expose the color, you have a paint correction disaster that is not easily remedied. That is why if you go this route, you should absolutely hire an expert with a good track record. These folks don’t work cheap but it is by far the least expensive thing you can do in the restoration paint world.
By the way, I have looked at the factory paint jobs on a lot of high end cars, not limited to Jaguar. Although painted by robots in the most exactly controlled circumstances, when examined closely, all exhibit a little bit of optical ripple in their reflected images. This is sometimes described as “orange peel”. One could potentially take a brand new car and treat it to paint correction and have a paint job that absolutely pops.
The next level of difficulty and expense is a repaint with minimal body work required. To digress, all modern cars are painted with urethane (versus older products such as enamel or lacquer) based paint products. Furthermore, the color is laid on first. If left as is, it has a matte finish. Next a “clearcoat” is applied. As the name implies, it is optically clear. It may be clear but it is here that all the chemical magic occurs. The clearcoat is formulated to resist the degrading effects of sunlight, acid rain, and even a trip through the car wash once a week. As an aside, there are $100/gallon paints up to $1000/gallon paints. At some level, you get what you pay for. The more expensive paints will contain the chemical magic. The cheap ones won’t. You don’t have to look far to see cars where the clearcoat has failed. The paint is cloudy and may be peeling off in sheets.
If the clearcoat has failed or if the paint is just looking sad, the car can be economically sanded down and repainted. The assumes that the body is “straight” i.e. there are no bumps, gouges, pits, and dents for the painter to deal with. A further economy measure is to have the car repainted with “single stage” paint. This is basically a mix of color and clear that can be sprayed on, sometimes with just 2 coats. I had a 1996 XJ6 sedan with a failing clearcoat but very straight body that I had painted by a fellow in Concord, NC for less than $3000. We used a mid-range single stage paint, black, and were able to paint the car with one gallon of paint. It transformed how the car looked. This was over 10 years ago and I do not know how the paint job held up, as I sold the car. So that is an option you might want to explore.
Starting in the mid 80s, most cars were painted with urethane and the body steel received robust corrosion protection applied with an electrically charged immersion process which has shown to be very effective over the years. So if you have a car of that vintage or newer, the simple repaint may be all that is required. Correction of small dents, pits, and scratches can be accomplished with body filler products prior to the painting. It will just add to the price. You can save some money if you remove a lot of the plastic trim pieces that are part and parcel of all new cars. These can be lightly scuff sanded and refinished with “rattle can” paints especially formulated for this application. When done, your car will look amazingly better. Pro tip- have your painter insert ¼” nylon rope under all the rubber moldings for the windshield and rear glass. This will allow the paint edge to extend up under the rubber just enough so that when you remove the cord, the rubber is now laying on fresh paint.
A note- The XJ6 could just barely be covered by 1 gallon of paint applied in 2 coats. If you are thinking of having your paint job “color sanded”, you will probably want to go with basecoat followed by 4 coats of clear. The extra thickness of the clearcoat gives the person doing the cutting and buffing a margin to work with. This obviously will add to the cost of the paint job but we are still not talking about the big bucks of a full “bare metal glass out” paint job. Let’s talk about that in my next article.

Discussion
Comments are closed.