When I left off in Part 6, we talked about options for improving your cars paint without breaking the bank. Now, unfortunately, we have to talk about breaking the bank.
Probably one of the most iconic terms you will read regarding a restoration is that the car received a “bare metal” paint job. You may also read about “glass out”. And as discussed in a previous article, you may read about a “rotisserie restoration”. All of these terms are indicative of the most complete, thorough, and expensive form of paint restoration to a car. Buckle up, here we go.
First, why would you go to the trouble and effort to take the car back to bare metal. There are really two reasons. The first is, once the car has been media blasted back to bare metal, all the metal flaws are laid bare. As I did once, you may find the argyle sock that was stuffed into a rusty hole to provide backing for copious injections of body filler.
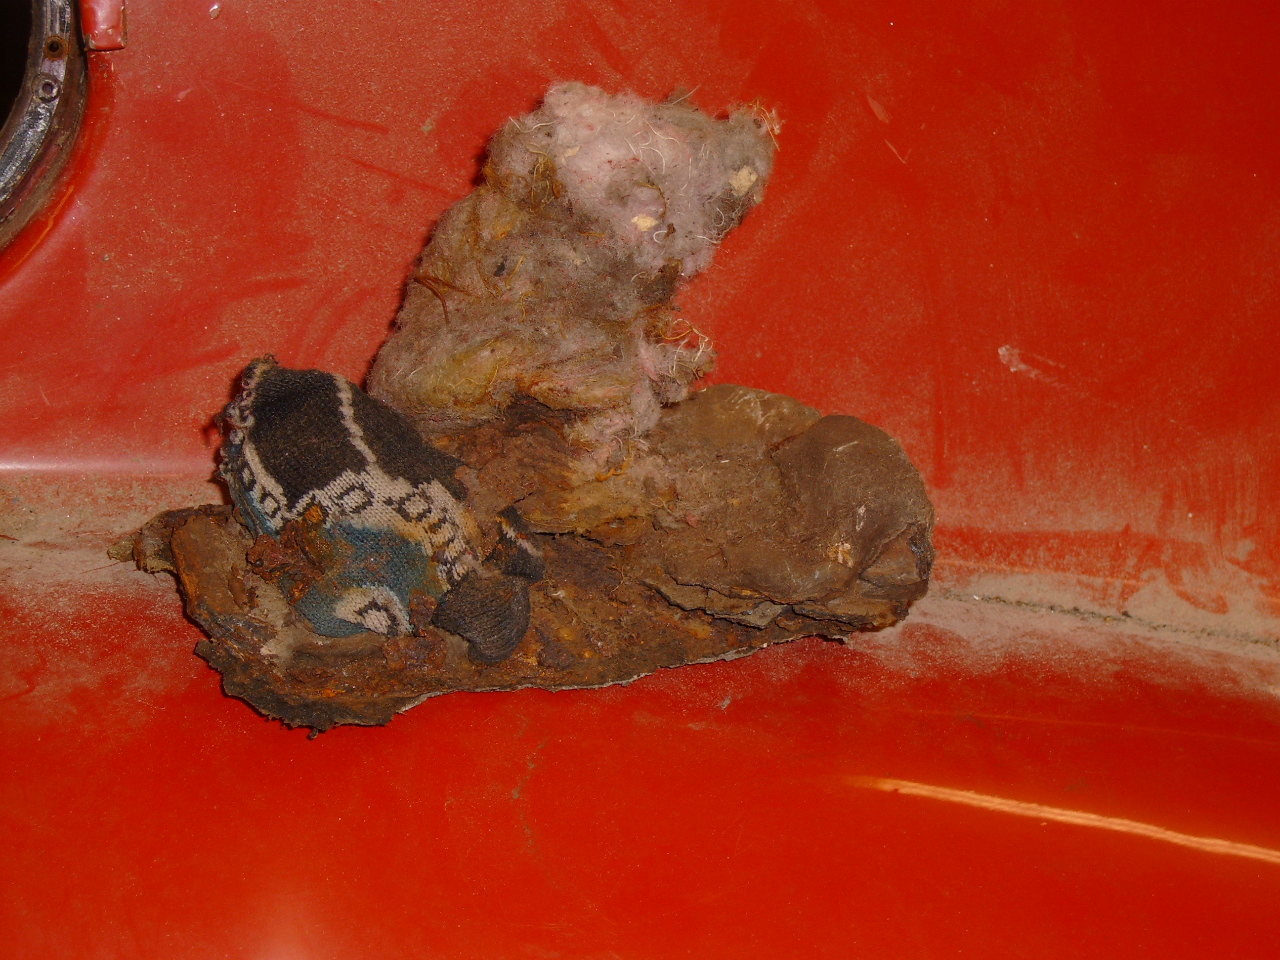
You may not like what you find but you will know that every problem has been exposed and you can proceed to deal with them. The other reason is that you never really know the “paint history” of the car. It could be original paint. It could be a poor quality repaint. It could be a mix. Modern paint products are applied as a system. To some degree this locks you into using all the products from the same paint manufacturer but this is the only way to know the various products are compatible. In my previous article, I described doing a repaint. This is not a terribly risky gamble on a newer car with a known history. And it preserves the original factory corrosion protection, which is hard to reproduce. But as you get into pre 80s cars, there was no corrosion protection and you had best start from scratch.
The process generally works like this.
-Media blast
-Apply epoxy primer
-Perform metal repair
-Produce a perfect surface profile with polyester filler. This will be multiple steps and includes much hand sanding.
-Seal the entire surface of the car with urethane high build primer. This will be multiple steps and includes much hand sanding. At the completion of this process, the surface is perfect and really for color and clear.
-Apply color coat.
-Apply clear coat.
-Optionally cut and buff clear coat.
So there are the basic steps. As of this writing, I have been at it, on and off, for over 9 months. I have totally painted the interior surfaces, bottom of the car, and the engine compartment. I am close to the step where I will apply the color and clear coat to the exterior of the car. You may correctly ask, why does it take so long? Of course there are several answers. I’m retired. I don’t put in a 40 hour week on my car, although I do something to it 6 days a week if possible. Especially during the coldest months of winter, I have retreated to other tasks that can be performed in my heated garage, versus the unheated one where the car resides. And it just takes time to get a very perfect surface to paint upon.
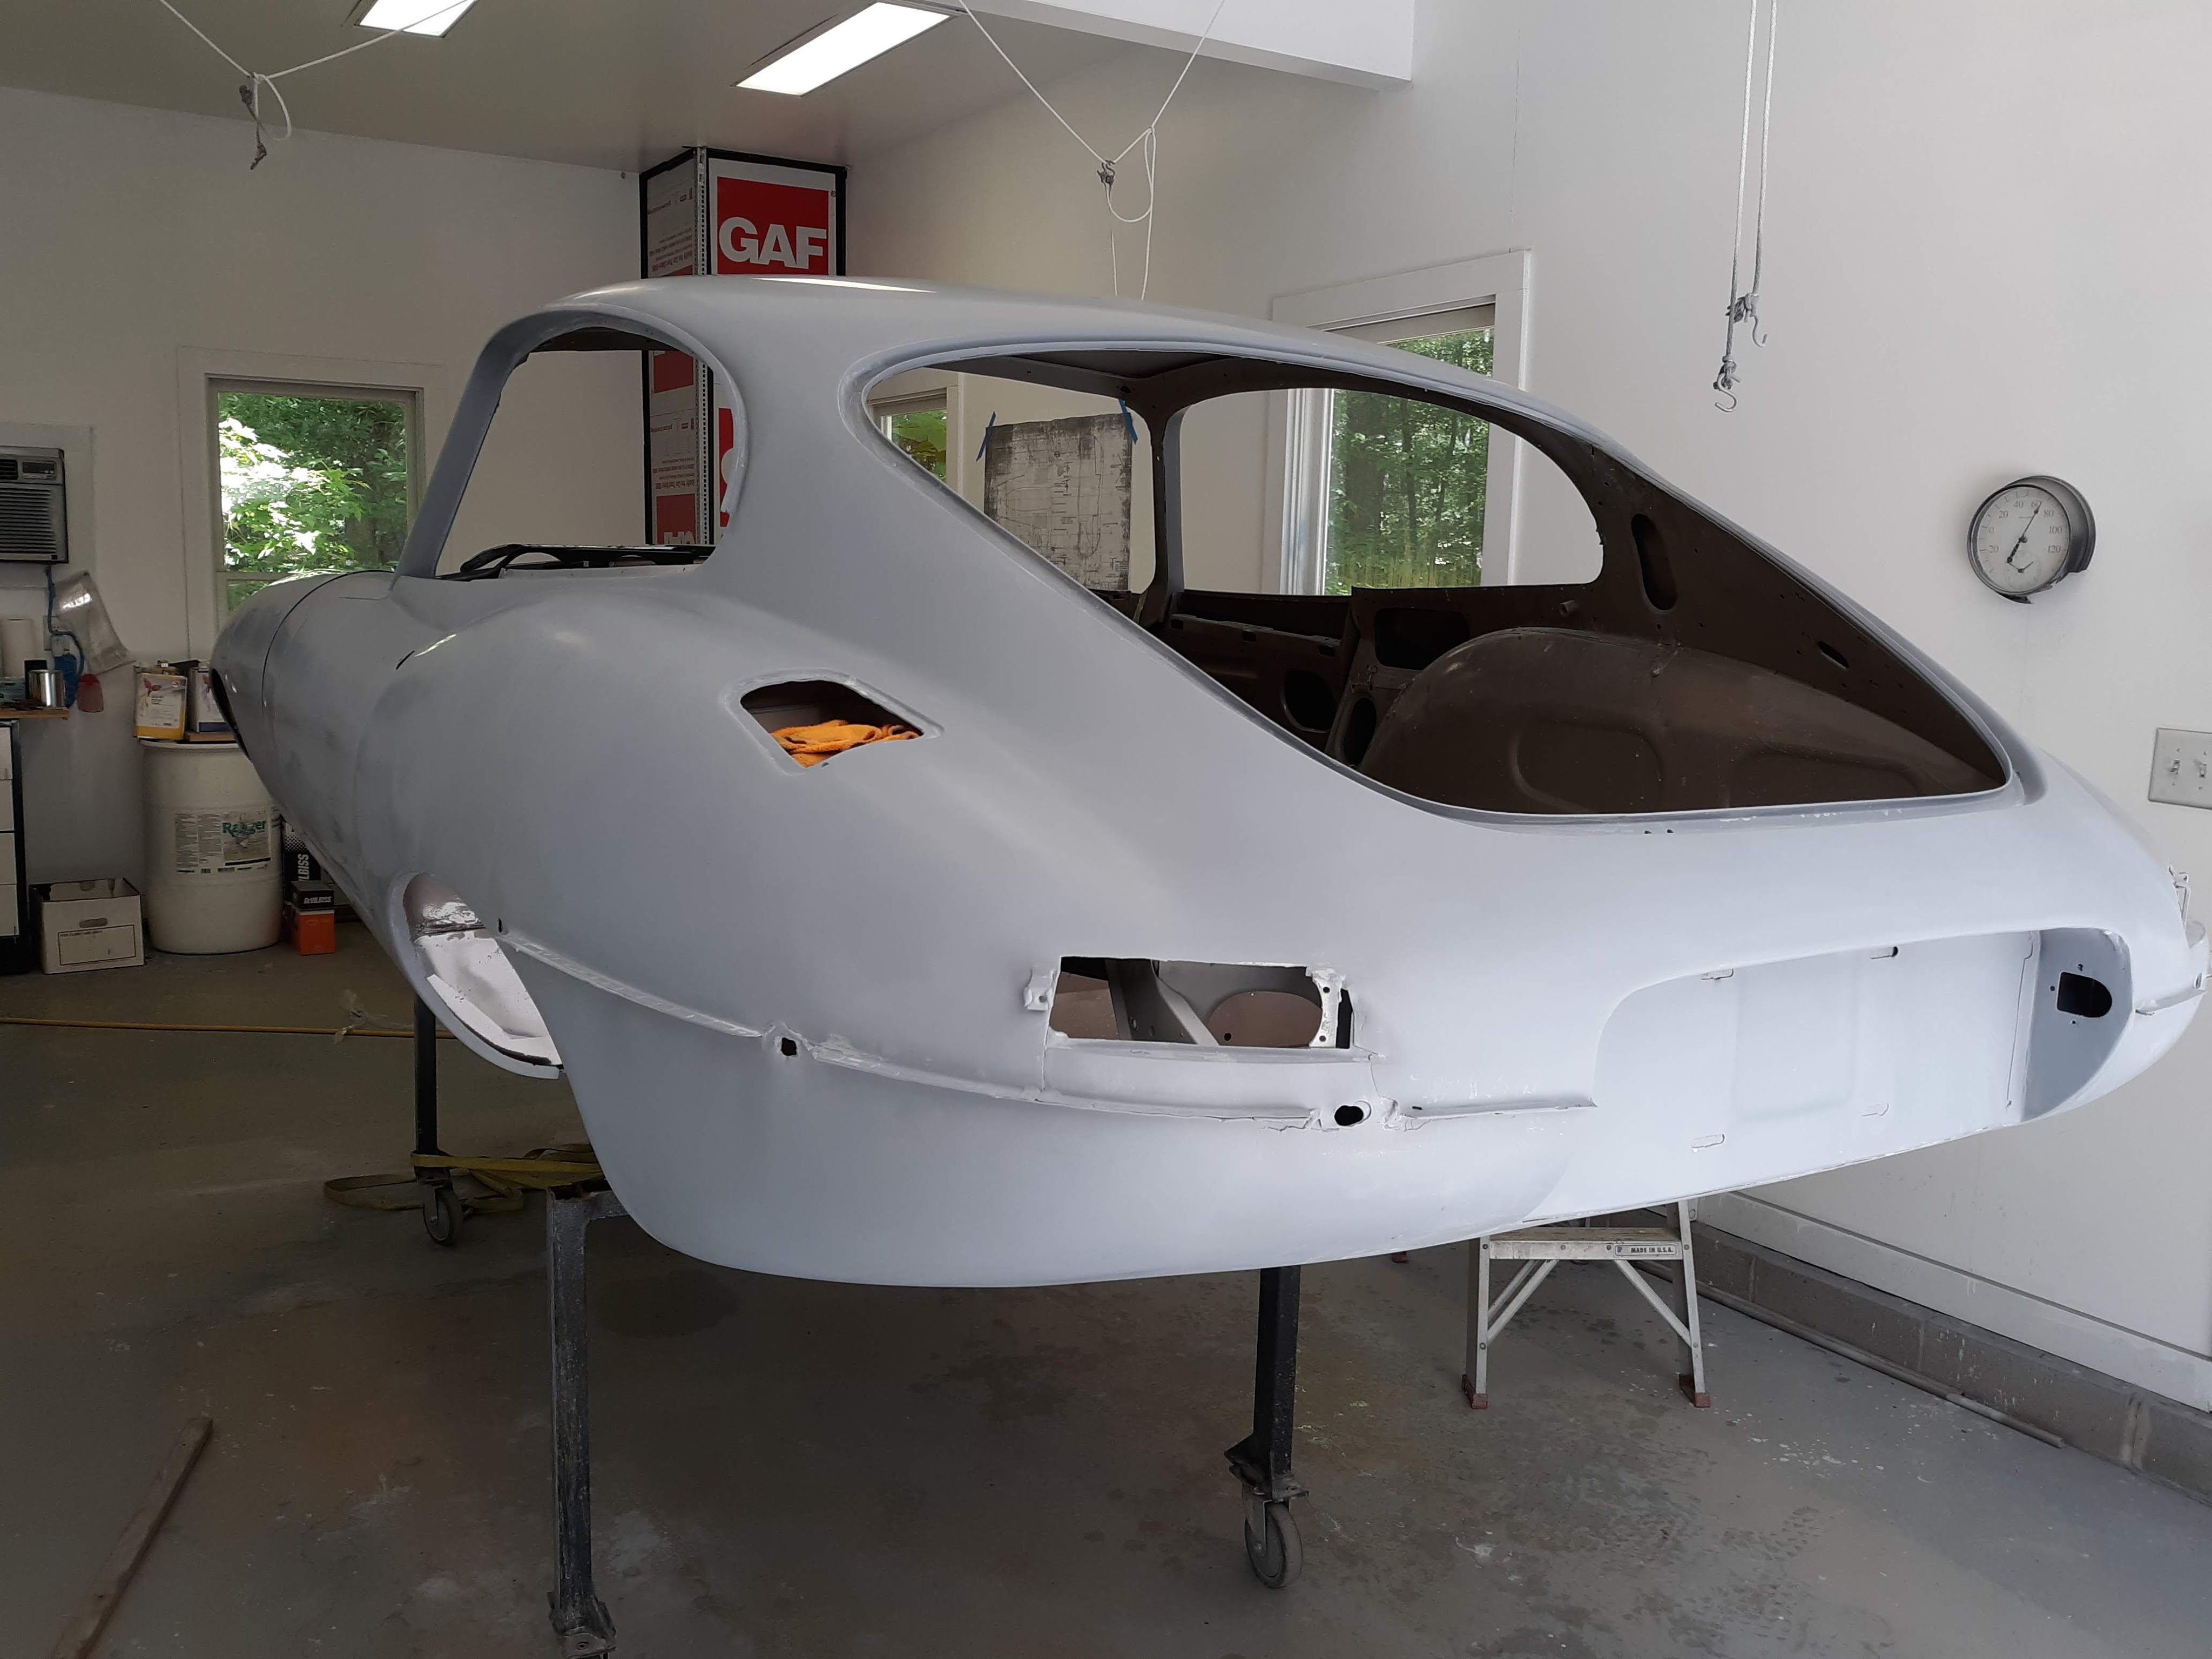
Media blasting is the best task from a time standpoint. It happened in one day. To be honest, I did it twice. The first time we exposed potential rust issues, of which there were virtually none. But as described in previous articles, there were still panel replacements required in the floorboards/footwells in order to obtain the correct factory pieces. Upon the advice of my painting consultant, I used a torch to melt out all the lead that was originally used by Jaguar as body filler. I did not epoxy prime the car after the first blasting effort and at this point, the car had sat long enough that I decided to get the mobile blasters back out for a final touch up. This time the car went straight into my paint booth and every surface received 2 coats of epoxy primer. As noted, I had retained the consulting services of a semi-retired professional painter. We went over the car and he showed me that, although the car looked to be straight, almost every panel had some minor defects or undulations that needed to be corrected. He said that high end paint shops just bite the bullet and plan on applying polyester filler to every surface of the car. This is not to say that that car would become a “bondo nightmare”. It is often referred to as a “skim coat”. I used various sheet metal techniques to bring the profile of the car very close to perfect. But at the end of the day, a thin layer of filler was applied to all areas of the car.
BTW there are artisans out there that can finish bare metal to such a high standard that no paint is required. Here are links to a couple that have produced some interesting projects. www.rungecars.com and www.randygrubb.com
On the subject of rust repair whole volumes could be written. I will not try to tackle that subject. A good resource to educate yourself on the E-Type in particular is http://www.Monocouque-Metalworks.com. The proprietor Chuck has lots of blog posts and a Youtube channel with some very good tutorials. Chuck is unfortunately an example of the shrinking universe of shops with the expertise to perform factory correct bodywork repairs to an E-Type. These E-Type knowledgeable shops are out there. Unfortunately he and the other good ones stay booked, sometimes years in advance. An alternative that many prefer is to find someone local. The advantages are you can keep an eye on your project and shipping is simplified. The disadvantage is that you may be dealing with someone that doesn’t do work on older Jaguars every day and thus has a “learning curve” at your expense. The repair may be functional but not authentic to the way the car was originally built. If that aspect doesn’t bother you, this can be a good way to go. For instance, the repair done to the footwells on my car was very functional. It just wasn’t authentic to the original configuration. Again, for many folks, this is not a negative when faced with the price and hassle of sending your car off to one of the big name restoration shops.
Back to my car. As I have discussed, I purchased the correct sheet metal stampings for the footwells and the associated pieces, which I installed. This was not a trivial effort as it took me several weeks all said and done. The other major issue was the condition of the bonnet center section at the nose above the opening for the radiator. When I mocked everything up, the profile of the radiator opening did not look right. After doing some research, including a trip to the Coventry Foundation in Columbia, SC I found that indeed my bonnet had been scrunched in one or more front end collisions. My painting consultant said he could probably “pull it out”. Chuck at Monocouque Metalworks said it looked too far gone to salvage. This might illustrate the difference between using a local guy, who will make a good faith effort to work with the materials and skills he has versus a specialist like Chuck, who knows when to move on to replacement sheet metal. As a reproduction bonnet center section could be purchased from SNG at a reasonable cost (approximately $1500), I decided to go that route. As we will see in my next article, getting a bonnet right can really take a lot of time and effort. But it will be illustrative how even a car that superficially looks “straight” is really not.
In my next article, I will continue to discuss the process used to create a beautiful paint job.


Discussion
Comments are closed.