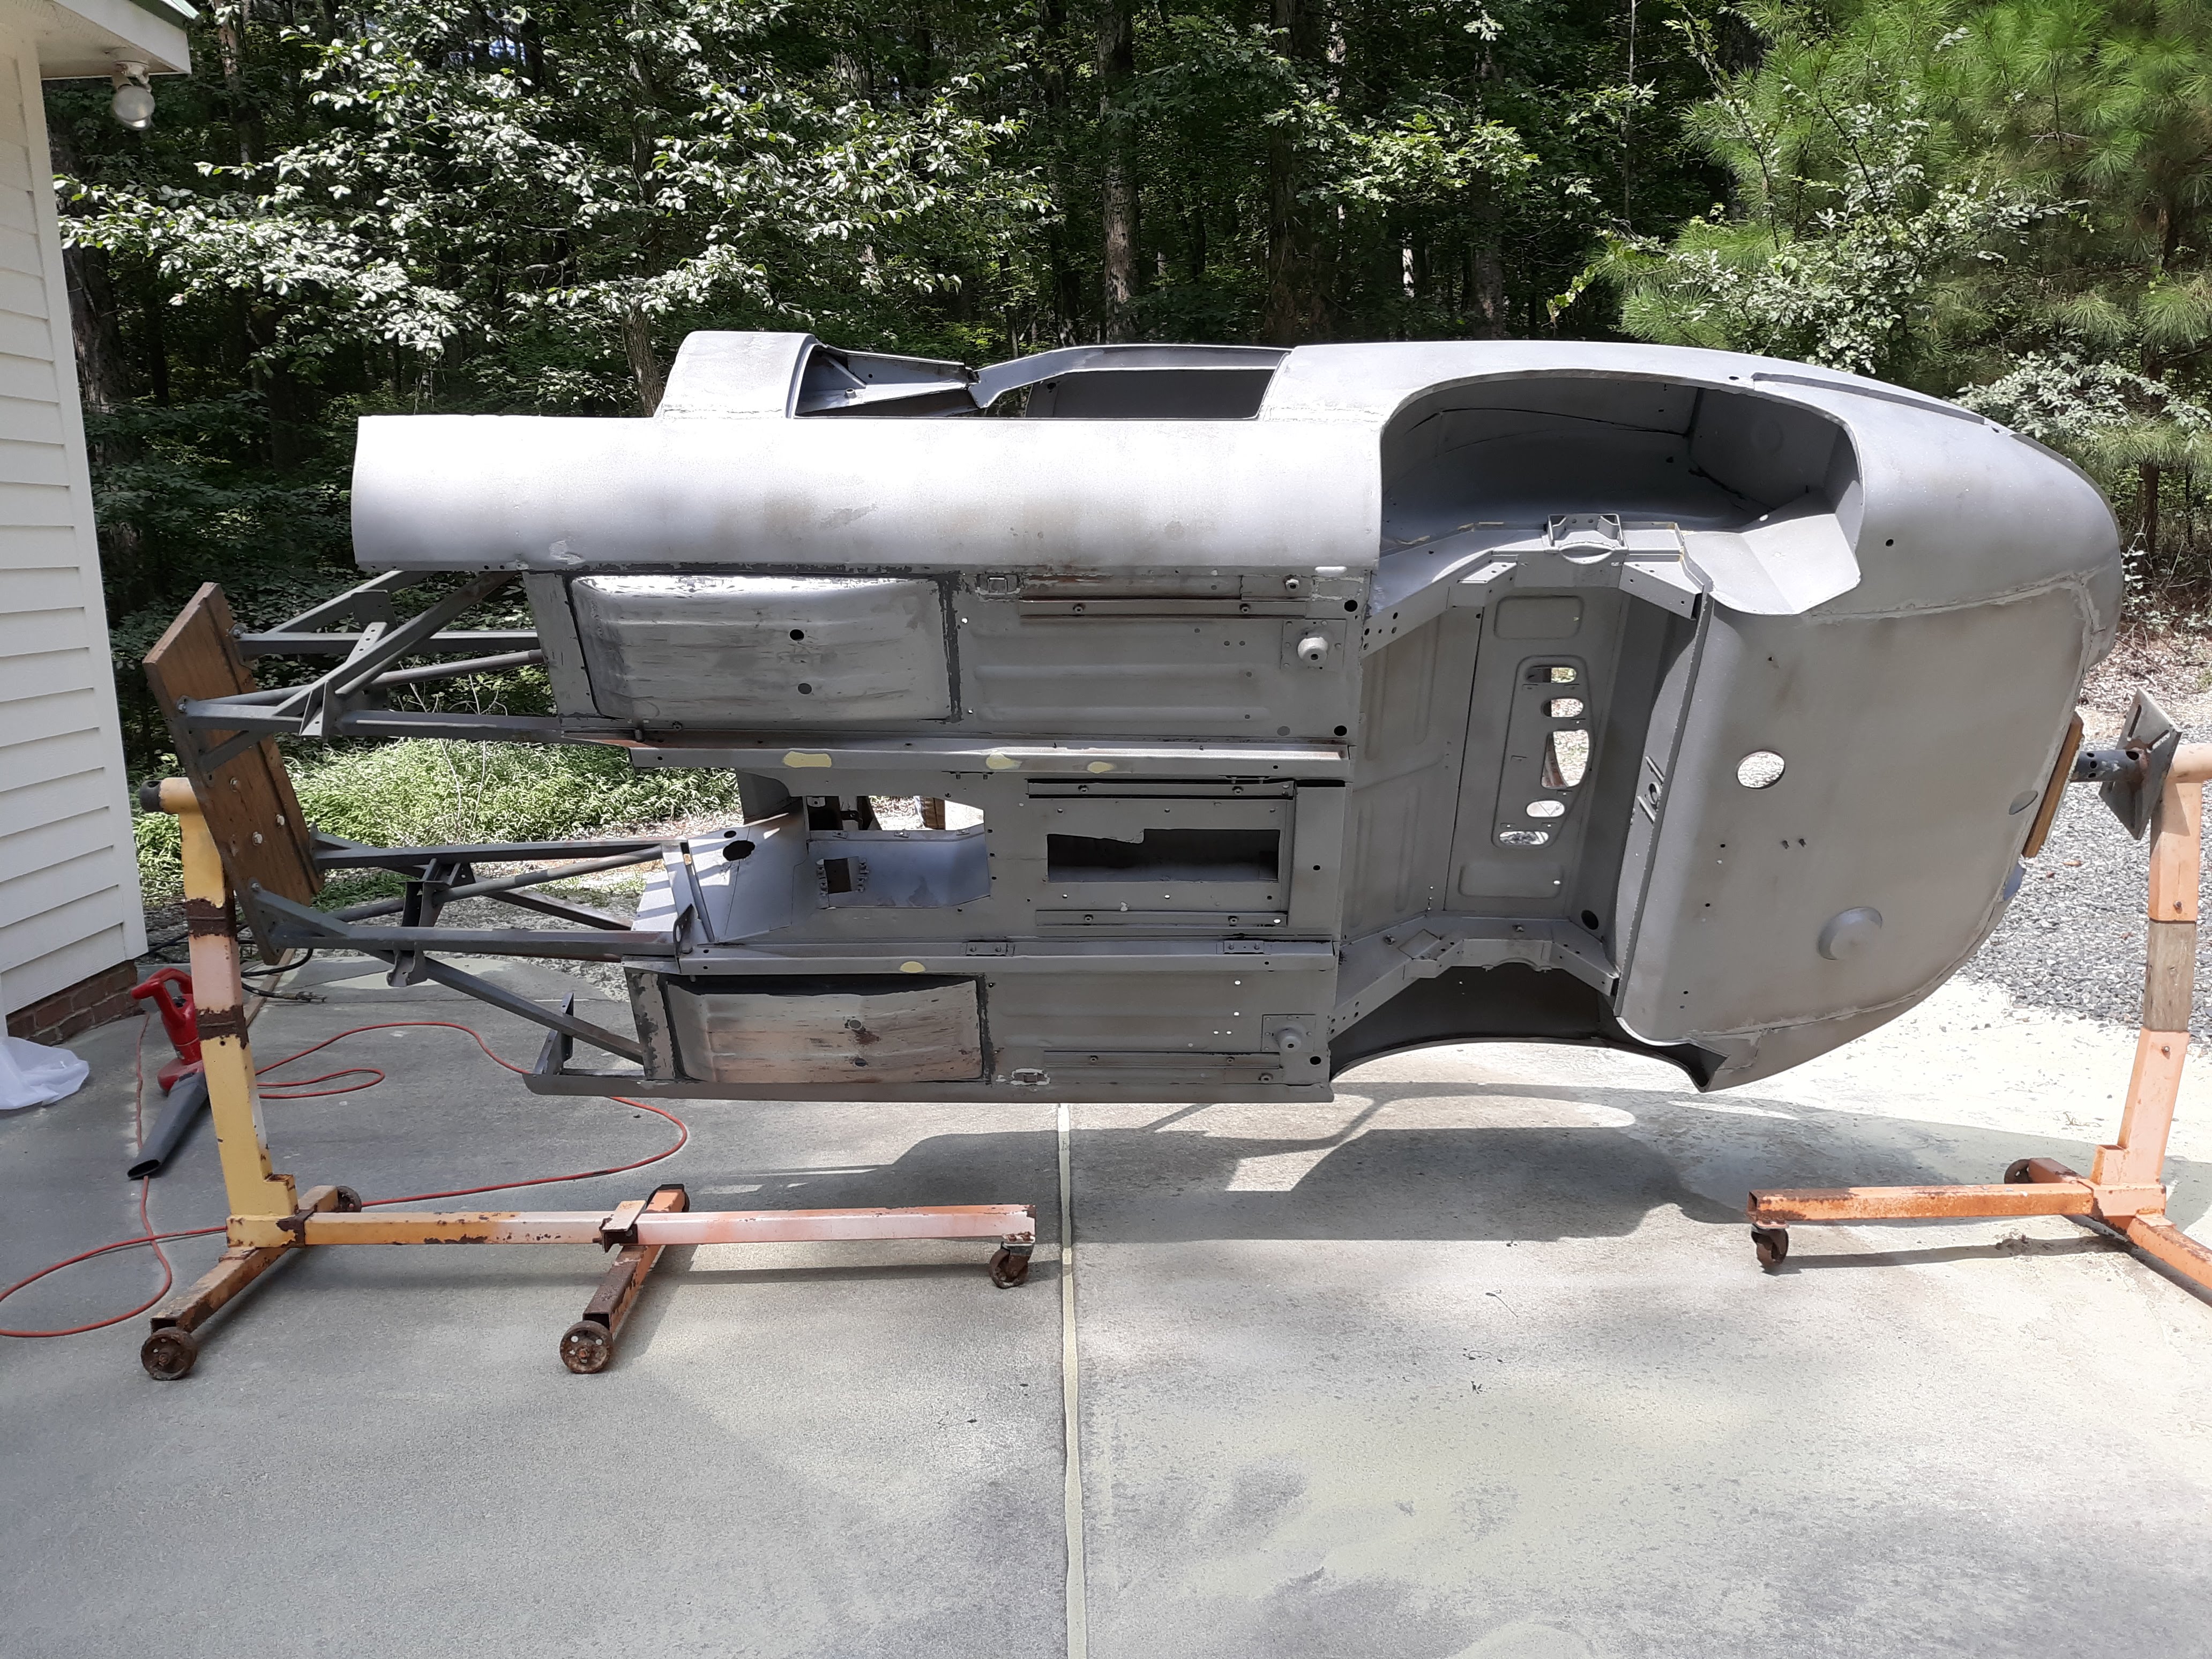
When I left off in Part 4, we talked about replacing the footwells on my 1963 E-Type Fixed Head Coupe (FHC) project. And although I felt the car was rust free, I still couldn’t be sure until the various body parts were stripped down to bare metal. Cue the sand blasting music!
Sand blasting is actually an old fashioned term. It is now called media blasting. The use of actual “beach sand” for blasting painted metal back to bare metal has fallen out of favor, as the dust from this operation has caused lung disease in workers who do it day in day out. But safer “blast media” are available and can be fine tuned for the operational requirements of the job at hand. Glass beads for instance are a media that I use in my self-contained blast cabinet. With the blast cabinet the media falls to the bottom of the cabinet and is thus continuously reused, at least until the media breaks down and has to be replaced. I have a pretty large cabinet. It is about 2’x2’x4’. I use it a lot. But is certainly too small for bodywork panels.
There is another type of blaster that is basically a once through device. The media is mixed into a stream of compressed air which shoots out of a nozzle and removes the paint and corrosion. The used sand falls to the ground. The most common device of this kind is called a pressure pot blaster. Years ago when I restored my 1967 E-Type 2+2, I bought a pressure pot and did all my blasting. It is not much fun and makes a big mess. Especially since I used a black media.

This time around I went with a mobile media blasting service. They come to your place with a trailer mounted with a very large air compressor and the media mixing chambers. They can drag a hose quite a distance to your project, if need be. I definitely recommend that you do this in a place where a layer of leftover blasting media won’t be a problem for you. Or lay down large tarps to collect the media for disposal. Because of the more industrial nature of their equipment, they can do in a few hours what took me several days with my pressure pot blaster. They did the entire body shell, inside and out. I left it mounted on the rotisserie so they could get good access. They also did all the bonnet pieces, the doors, the hatches, and various small items I laid out for them. The price was around $1800. Money well spent in my estimation.

After the blasters had left, I made yet another inspection of the body parts looking for rust. Of course, the blasting removed all the exterior paint, primer, and body filler. By the way, it did not remove the lead originally used at the factory to prepare the body for paint. In this inspection, I was looking for rust or collision damage that had been covered up by body filler and paint. I found nothing. Outstanding!
I can and will write about the painting process. But the first thing to recognize is that once you blast the car back to bare metal, the clock is ticking, as rust can begin to reform almost immediately. I was prepared and spent the next 2 days spraying on 2 coats of epoxy primer on all the parts. Although primer is not a long term solution to corrosion, it serves to stabilize the metal and is the recommended base paint material for modern automotive paint products.
To back up a step, I did find one set of rusty components. That was the frames I mentioned that attach to the firewall and serve to support the engine. There are 4 frames involved in the engine compartment. They are the left and right hand engine support frames, the “picture” frame, and the bonnet support frame. The engine support frames are a known problem area, as their construction traps moisture and allows it to cause rusting of the tubes from the inside out. Especially on the bottom of the lowest tube. Sure enough, upon close inspection, I found small pinholes in both engine frames. They may look innocuous but they only portend worse problems down the road. The only real solution is to purchase new frames. Fortunately, as with most parts on an E-Type that tend to be replaced, there were several aftermarket solutions. I bought my frames from Etypefabs.com, in the UK. I had used their frames on my 2+2 and found the fit and finish to be outstanding. The fit part can only be appreciated when you are assembling the four frames, which involve the precise alignment of several dozen bolts. Poorly manufactured frames will absolutely drive you crazy. As we will see, mine fit perfectly. Also, the original picture frame was in good condition, which is good in that it contains an imprint of the car’s body number, which is an important part of establishing the documentation of the car. I was to find much later that the original bonnet support frame was slightly bent or warped. I ultimately used a replacement Etypefabs bonnet support frame too. For now, the corroded engine frames were left in place, as they represented the attachment point for the rotisserie.
One nice thing about Jaguar is that they kept fairly good records of the cars they built and sold. Each car receives an overall car number, as well as a number for the engine, the transmission, and the body shell. These numbers can be found on the Data Plate, which on my car is mounted on the right hand side of the engine compartment.
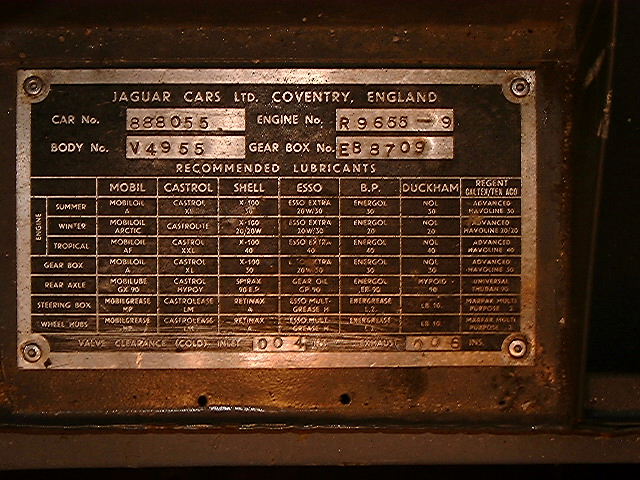
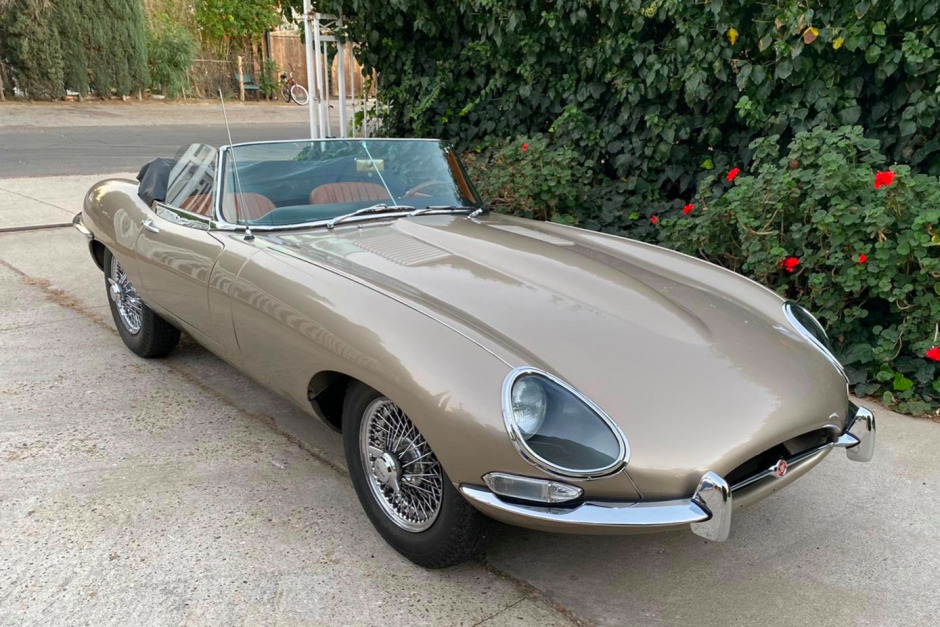
It provides the four key numbers that describe the car. The car number is commonly used on vehicle titles and registrations as a Vehicle Identification Number (VIN). As I mentioned in Part 1, you can obtain the records for your car from the Jaguar-Daimler Heritage Trust in the UK. For a modest fee, they will prepare a Heritage Certificate for your car, which includes the original exterior and interior colors for the car. There is much discussion on car forums about the merits of originality versus doing what you prefer. I will not wade into any of that except to say that in my case, I decided to make originality of primary importance. Among other decisions, that meant using the original paint color. The Heritage Certificate said the original color was Sand. Well, Sand in my opinion is not a very special color for an E-Type. But during the period when my car was produced, they also used a color called Opalescent Golden Sand (OSG). To my eyes, a much more interesting color and plausible. I made some inquiries and found that the modern company BASF and their Glasurit division had acquired R-M, one of the paint companies that originally supplied paint to Jaguar in the 60s. They had on file a paint code for OSG. I purchased a small amount and sprayed it out on a test panel. You really don’t want to rely on small paint chips for such an important decision. Also, with a test panel, you can look at the paint in bright sunlight, shade, and artificial light. What you see under the different lighting conditions may sway your decision. Regardless, the OSG sample looked great to me. So Opalescent Golden Sand it is! Next article, we will look at paint and body work.

Discussion
Comments are closed.