I haven’t posted about the 63 FHC restoration in a while. That is mainly because I am in the middle of the “bodywork slog”. This is the painful part of the process where you are getting the body ready for paint. Although from 10 feet away, my body shell looked to be very nice, when my painting consultant and I checked it over closely, we found a number of small dings, dents, etc. that needed to be corrected. I also precisely hung the doors and rear hatch, which revealed more work that needed to be done.
My paint consultant, Richard, showed me how to evaluate a panel for dings. This can be as simple as running your hand over the panel and feeling the problem areas. A more sophisticated approach is to spray some cheap rattle can paint on the metal as a “guide coat”. As you sand the paint back off, the low and high spots will be revealed. There were very few areas of the car that didn’t need some work. Where accessible, I tapped out low spots from behind to get reasonably close to the correct contour. Conversely, high spots got tapped down. The goal was to get the sheet metal very close and then make it perfect using polyester body filler. Upon Richard’s advice, I used a torch to melt out all of the original lead used to contour the body at the factory. He said he had run into problems with old lead reacting badly under modern urethane paints. For these areas that needed deep filling, he suggested a product called AllMetal. It is a 2 part catalyst based product that is basically an aluminum powder mixed with an epoxy base. Per the manufacturers literature, it dries hard enough that it can be drilled and tapped if desired. It may not be as authentic as lead but I am sure it is much stronger and also much safer. Lead is not healthy if it gets absorbed into your body.
The doors and hatch present their own set of problems. I spent many hours on them. In general, the doors can be adjusted in the opening using the hinges but at some point you have to come up with the best compromise position and then use judicious applications of filler to make the door fitment perfect. Chuck Hadley at Monocouque Metalworks has a video on his Facebook page where he discusses this in detail. The factory used lead to help make the doors fit better cosmetically. Indeed, some of the lead I removed was around the door openings. I was reasonably happy with my results.
Once I got the contours close using localized applications of AllMetal and polyester filler, I sprayed the entire bodyshell with Glasurit sprayable polyester filler. This product is basically polyester filler that is thinned out enough to spray through a paint gun with a very large tip. It went on well, although one has to move fast, as it starts to set up pretty fast once the catalyst is mixed in.
I am currently “block sanding” the sprayed on filler. Block sanding in general refers to using long strips of sandpaper mounted on long boards to sand the surfaces perfectly flat. Except an Etype doesn’t have many flat surfaces. I use a long foam sanding board that is flexible and can be bent to the contours of the car. Once I get the polyester smooth, I will be ready to apply a high solids urethane primer, that will be wet sanded to a mirror finish ready for paint. But that is a ways out, as I need to get the bonnet built up and block sanded to match the bodyshell before I go to this final primer step.
I did purchase a few major parts in the last weeks, including seat frames from Monocouque Metalworks and a special replica radiator. And I have been researching upholstery options. But that is another story.
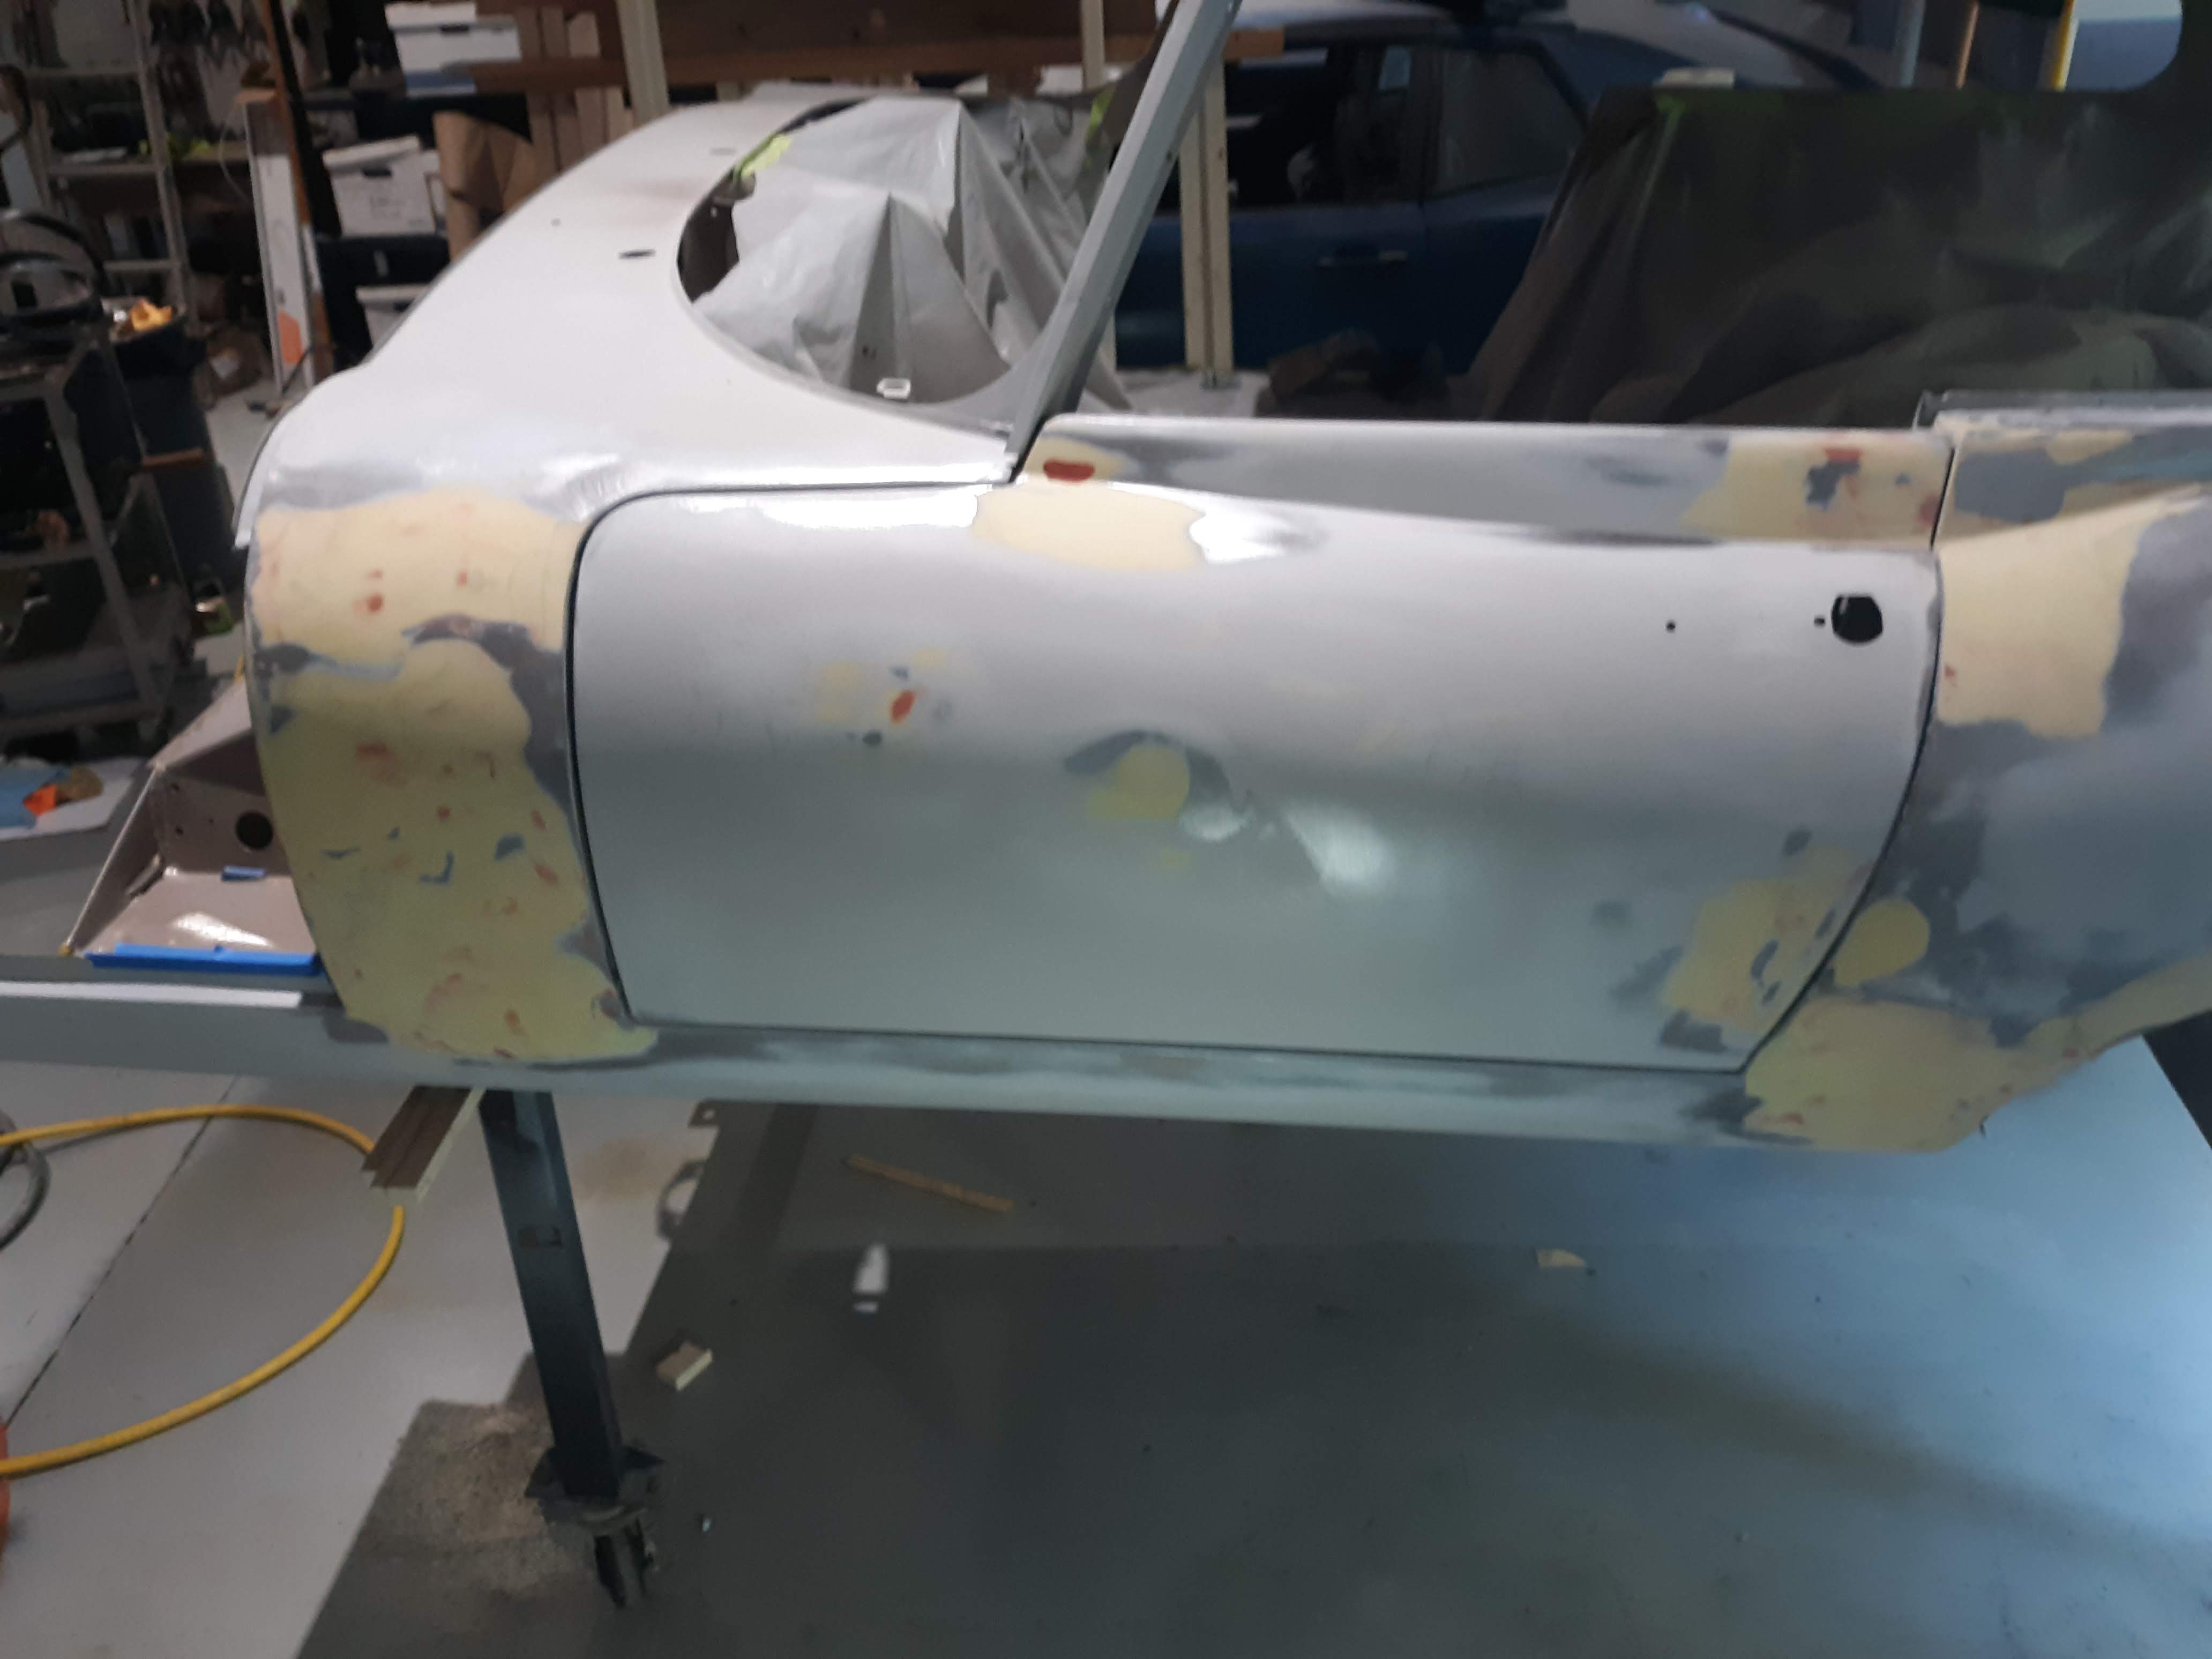
Body filler at major seams and around the doors.
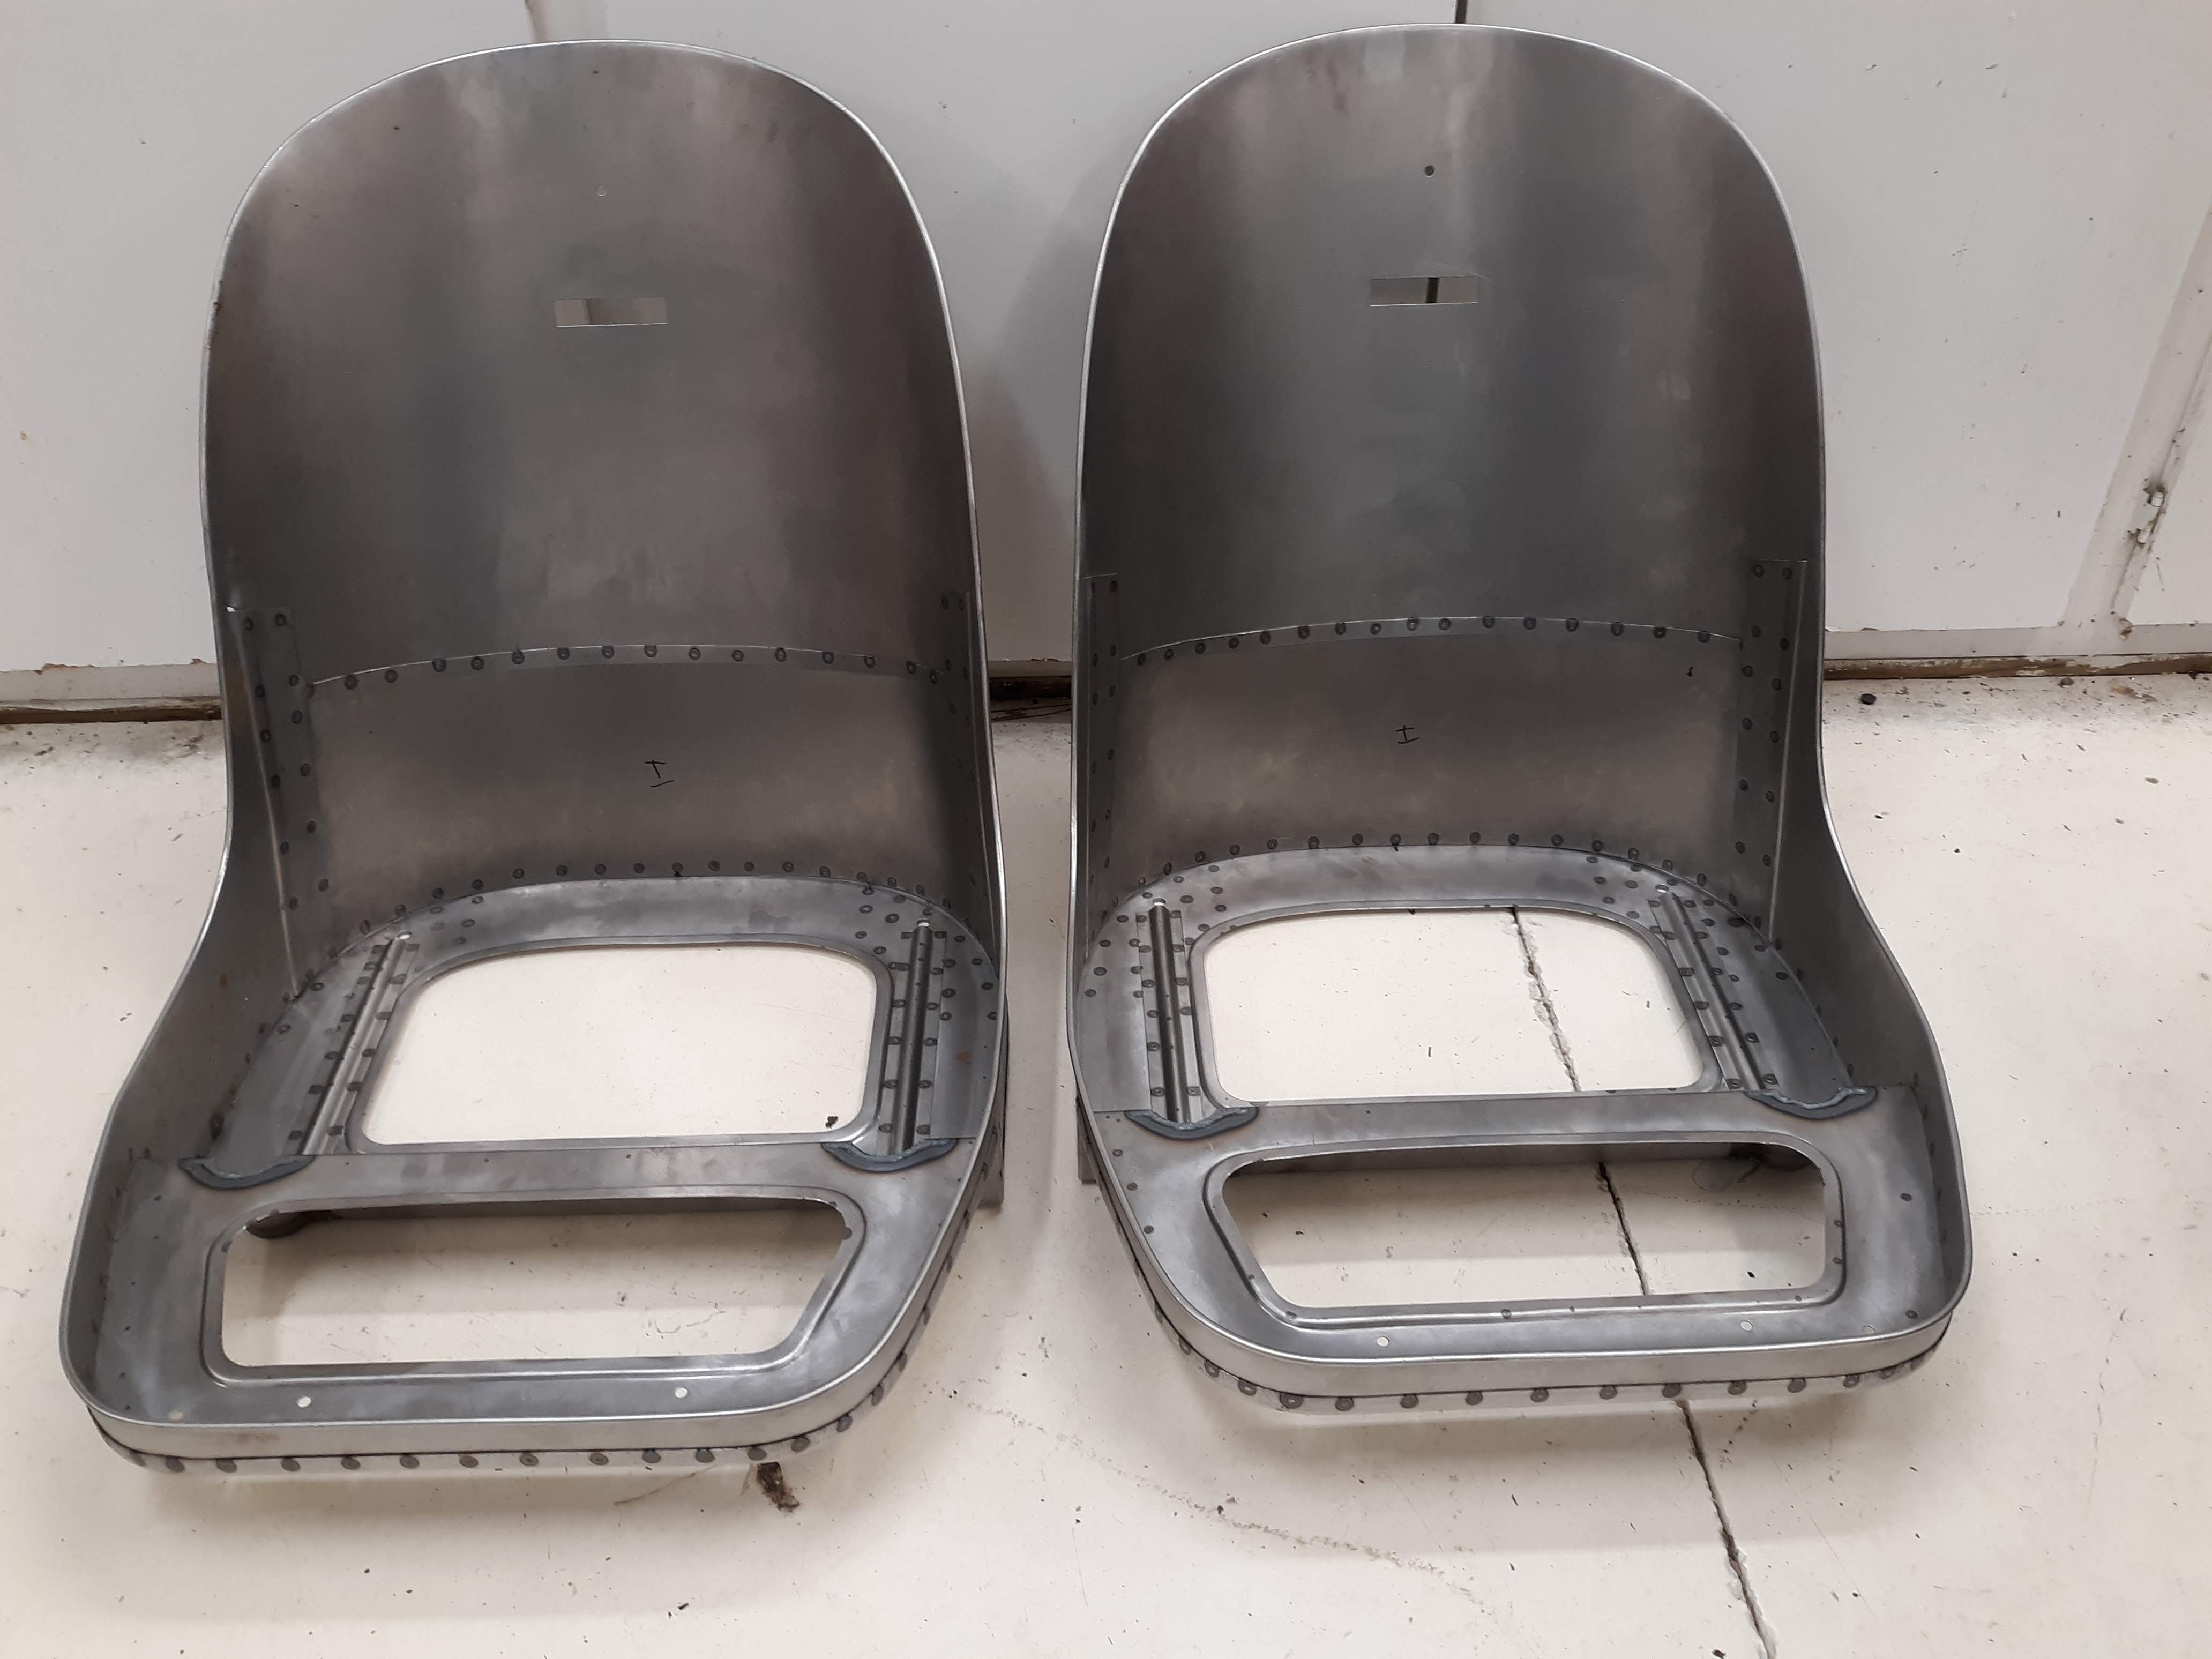
Reproduction seat frames from Monocouque Metalworks.

Reproduction radiator from CoolCat.

Discussion
Comments are closed.