The good news is that progress is being made. The bad news is that there is no way I’ll be finished in time for the Carolina Jaguar Club concours in July. Oh well, maybe next year.
The interior is basically done. All the leather and vinyl surfaces have been cleaned. I spent a fair amount of time with the center console. I had previously had modern speaker grills installed. I purchased OEM reproduction plastic “surrounds” and mesh grills from SNG Barrett (SNGB). These come only in black. I painted them tan to match the other upholstery. As I re-assembled the center console, I paid special attention to make sure the toggle switch/gauge panel would fold down properly to allow access to the fuse panels. This can take some finagling with the various pieces.

Once the interior is installed, including the cantrails that loop over the top of the door openings, the rubber molding for the door openings can be installed. This molding covers up the screws for the cantrails. On the 2+2, the molding is not glued in, rather it is confined by a C shaped metal channel. I have not found an easy way to install the molding. It gets installed an inch at a time, using a blunt tool to force the molding into the channel. My thumbs were sore by the time I was done. There is a similar rubber molding around the quarter windows. Speaking of the quarter windows, months earlier I had carefully removed the glass from it’s chrome perimeter. The glass was held in with some 50 year old gasket material, which did not want to come loose. It was nerve racking but eventually I was able to separate the glass from the metal. The metal frame was sent off to Pauls Chrome for refinishing. Re-assembly was somewhat easier and the windows look much better with their new chrome. I purchased new latches from SNGB. As I have noted previously, whether to get an item rechromed or to buy a reproduction part depends on factors like cost, availability, and your restoration philosophy.
 Next up was the rear hatch. Mounting the hatch on it’s hinges and adjusting the closure latch went pretty well. A new gasket was installed around the hatch opening. If you get an improper gasket that is too bulky, it can hold the hatch open. Fortunately the one I got from SNGB fit perfectly. The window glass also got a new gasket. Installation of the glass is the subject of much stress and discussion on Etype forums. I had done it before and it went in this time without drama. There is a rubber locking strip that holds everything secure. Be sure and buy the special tool for inserting the strip. Installation of the chrome trim pieces also causes stress and discussion. Including for me. It’s done but not without some cursing. I also spent a day or so mounting the rear bumpers. These are the original bumpers, rechromed by Pauls. The bumpers can be adjusted to some degree to obtain a uniform gap between them and the body. The gap is filled with a bumper strip. I wound up attaching the rubber strip with super glue, which worked quite well actually.

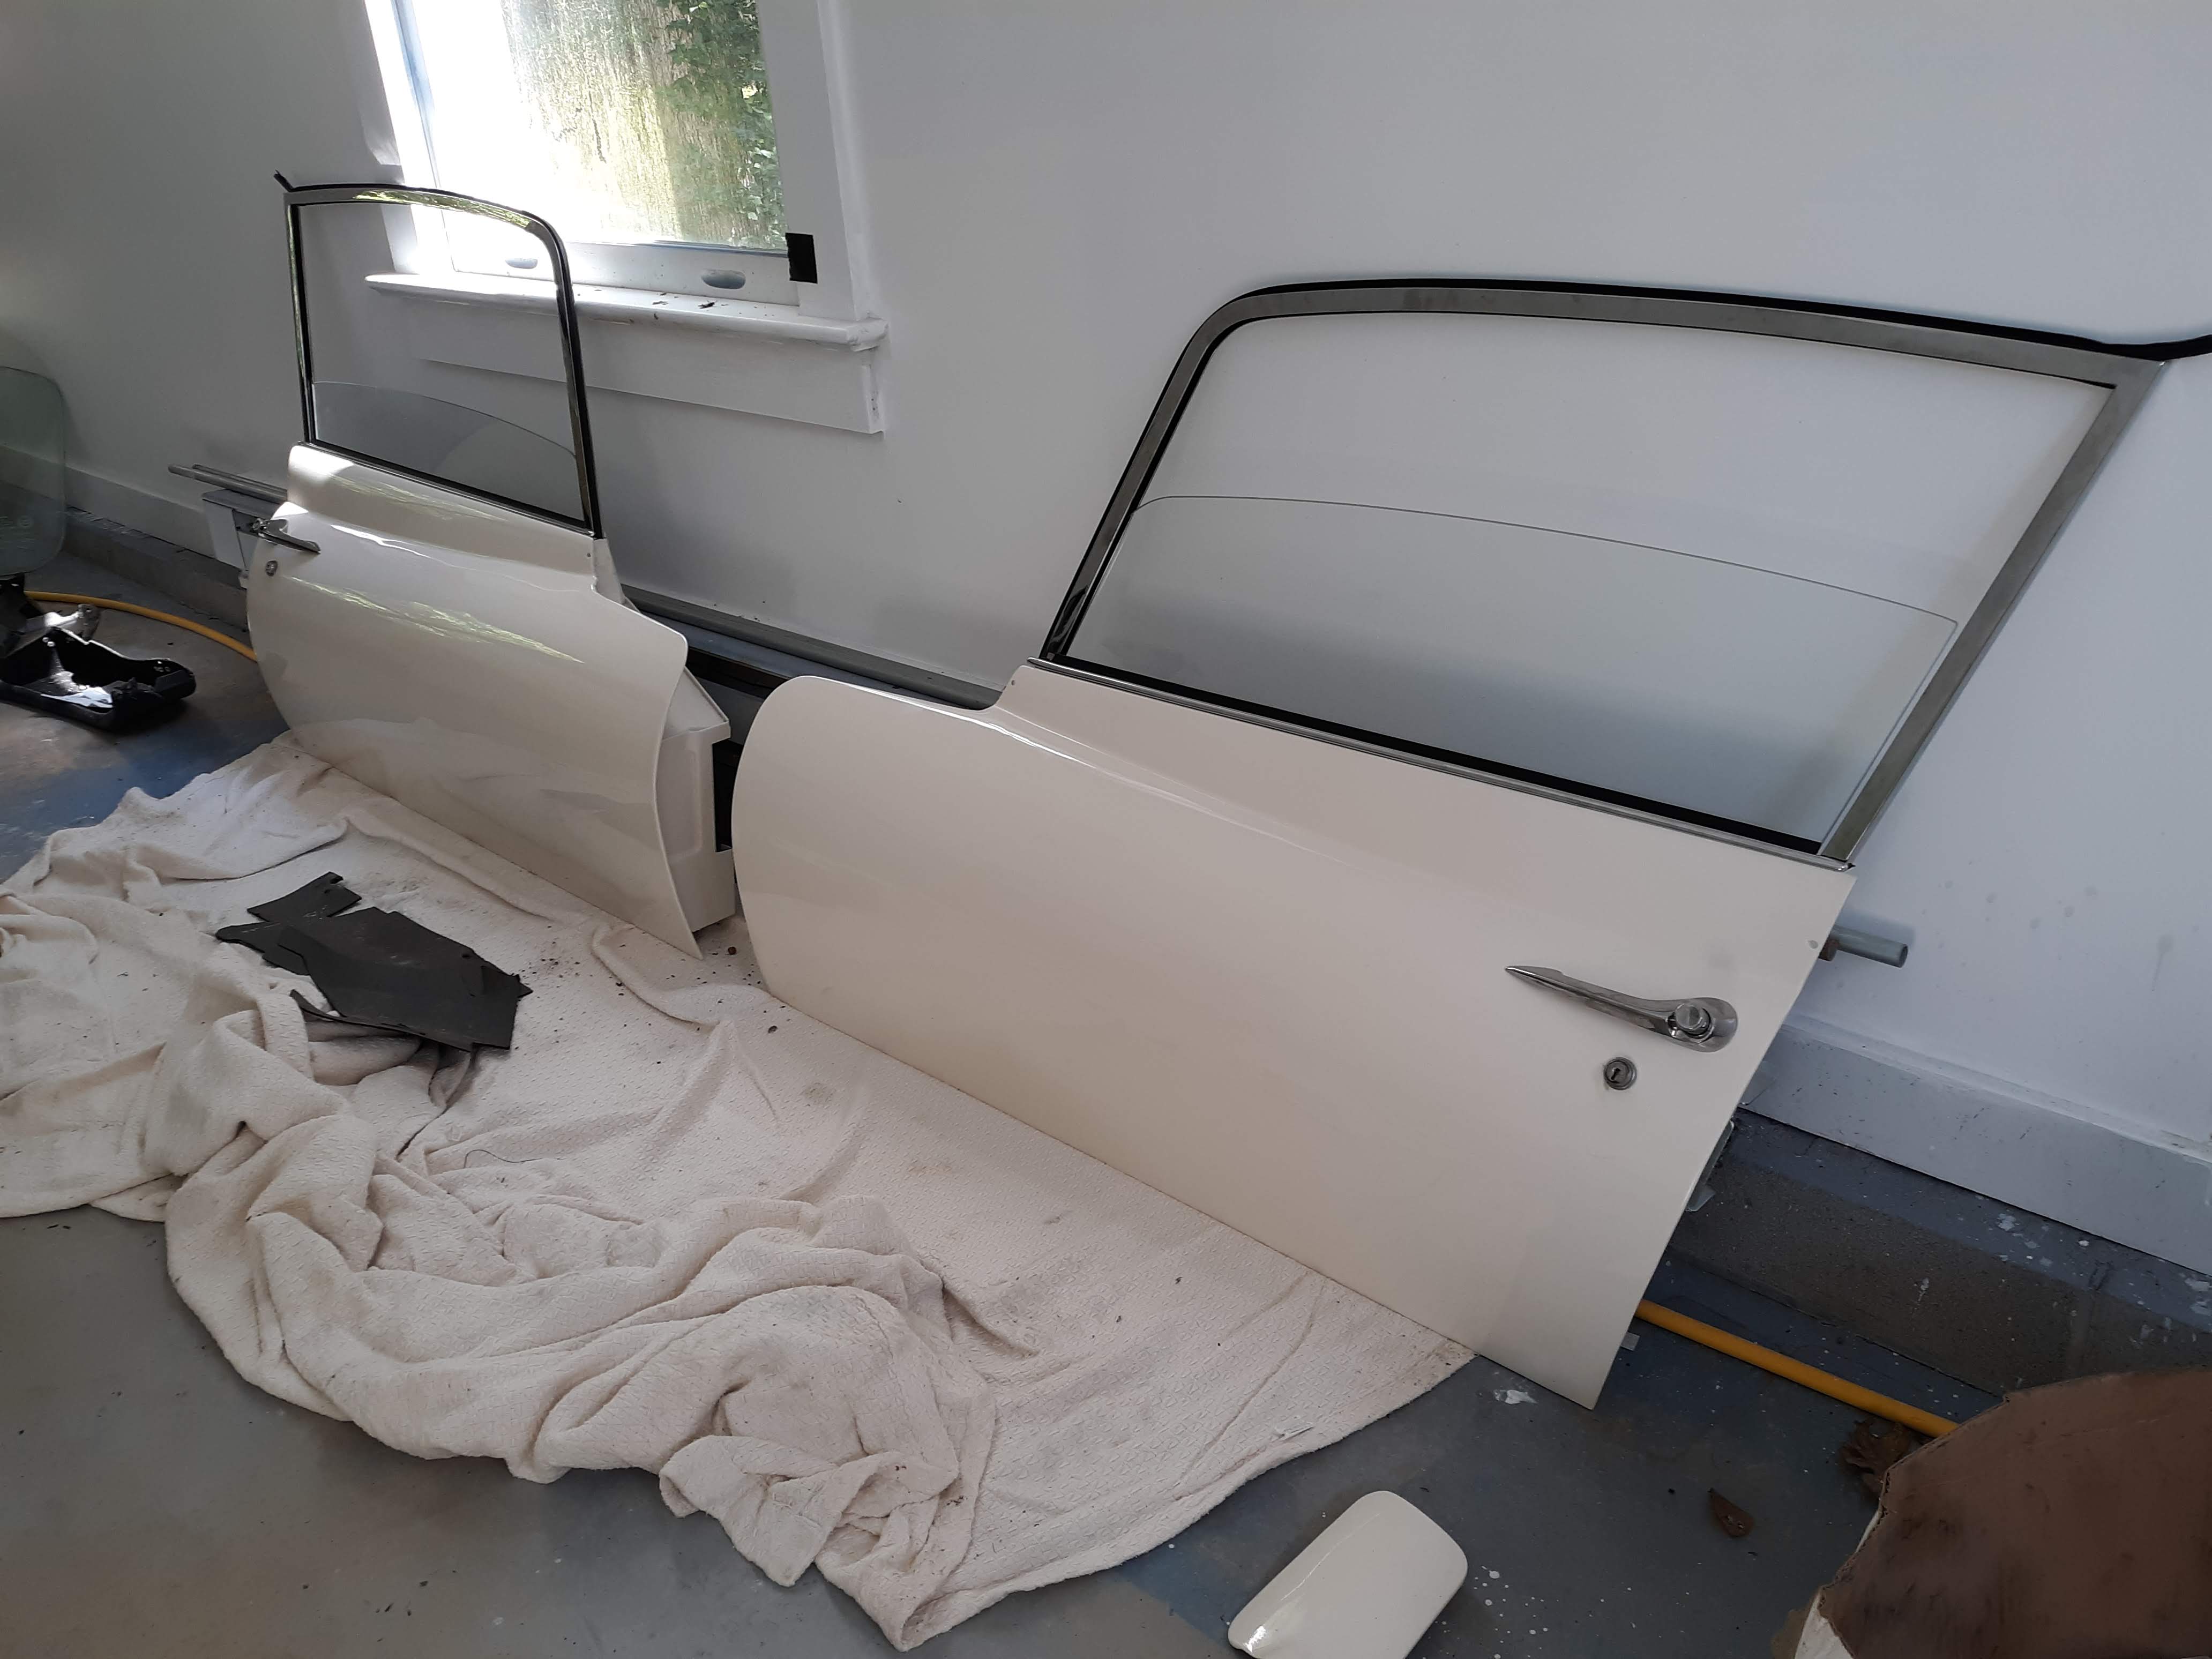
Next up was the doors. Assembly of the doors is a little bit of a jigsaw puzzle. In general, the latch hardware goes in first. Then the frame that goes around the glass. Mine were rechromed by Pauls. I also was able to purchase new glass from SNGB, as the original glass was unfortunately scratched. New felt channels and new rubber seals were installed. The hardware that raises and lowers the windows goes in next. Finally, the inside door release hardware is installed. The inside trim panels are left off for now, as they cover up access to the hinges. I’ll hang the doors at a later date.
 I had been waiting for a few key engine parts to come off backorder, which finally arrived. I proceeded to do final assembly and startup on the engine. This was not without drama. As soon as I powered up the new electronic SU fuel pump, several leaks became apparent. Most involved tightening of connections. The fuel system uses a lot of “banjo” fittings, which are fine I guess but require careful attention to detail. Next I filled the cooling system with plain water and pressurized the system using a handpump designed for this purpose. Pressurized to an operating pressure of 10 psi, more leaks were identified and dispatched. The engine was running fine when I started this restoration a year ago. Initially, I went back with the original distributor, coil, and spark plug wires, theoretically being known quantities. The engine did sputter to life but was not running at all well. I like to hook up my ignition timing light to one of the spark plug leads to assess that sparking is indeed occurring. It was but seemly on an intermittent basis. I have always been suspicious of my existing distributor, which is a Mallory Unilite. In it’s day, it was the hot setup but I was beginning to suspect it was on its last legs. After some research I purchased a “123” distributor. These are developed by a firm in the Netherlands. It is totally electronic. It contains a number of spark advance curves that are chosen with an internal switch. I bought the distributor from SNGB and installed it. My timing light showed a steady spark but still the engine would not start. Finally, I noticed that there was air in the glass bowl of the fuel filter. The car was out of gas! I’m an idiot. But a problem simply resolved. Finally the engine came to life.

Link to engine startup video- https://tinyurl.com/y4zokpzc
After I got the engine running I proceeded to change out the blue coil and blue spark plug wires with the parts with a proper OEM appearance. The meant black wires and a silver Lucas coil. Well, actually a silver Bosch coil with a Lucas sticker! The OEM sparkplug leads have a solid copper core. I got a kit from SNGB with the proper wires, the Champion “bow tie” spark plug connections, and the fibre wire collector. Each wire is individually snaked into one end of the wire collector and pops out in a small opening near each spark plug. At the distributor end of the wires, a metal sleeve is soldered on. It lends the engine a very iconic old school look.

You may notice in some of the photos that the front hubs, brakes, and wheels are not installed. I have to get all of the significant weight items installed on the car before I can make final adjustments to the torsion bars, as required to establish the proper ride height. And adjustment of the torsion bars is easier without the hubs and whatnot installed. Now that the engine compartment is complete, I will install the bonnet, doors, seats, etc. and adjust the torsion bars accordingly.


Discussion
Comments are closed.