Well, as we all know, the coming of the New Year causes us to consider weight loss. Yes, I’m all in! Let me tell you how my track car lost 225 pounds in 30 days.
It started with a review of all the heavy items on the car that could be removed or replaced. Using my corner balance scales, here are some interesting numbers (note- # equals pounds):
Starting weight – 2501#
Front bumper – 30#
Rear bumper – 24#
Sunroof – 12#
Door – 38# (Stripped) 58# (Complete, with windows)
Hood – 42#
Rear hatch – 54#
Passenger seat – 26#
Headlight assy – 6#
Update: Here is a link to an article by a fellow 944 enthusiast, Dean Erb. Dean has put together a spreadsheet regarding the known stock weight values and suggested lightened values for the 944. This article will give you an idea of where you can get the most bang for your buck, so to speak, when you decide to take some weight out of your 944. https://www.deancent.com/porsche-944-weight-reduction/
I went to local metal supply house and purchased three 4′ x 8′ sheets of 1/16″ thick aluminum. About $225. A full 4×8 sheet weighs 14#. I started with the rear bumper. I started there because my metal shaping skills are only marginal and I wanted to get up to speed on an area that was not so obvious. Here is the result. 5# installed!
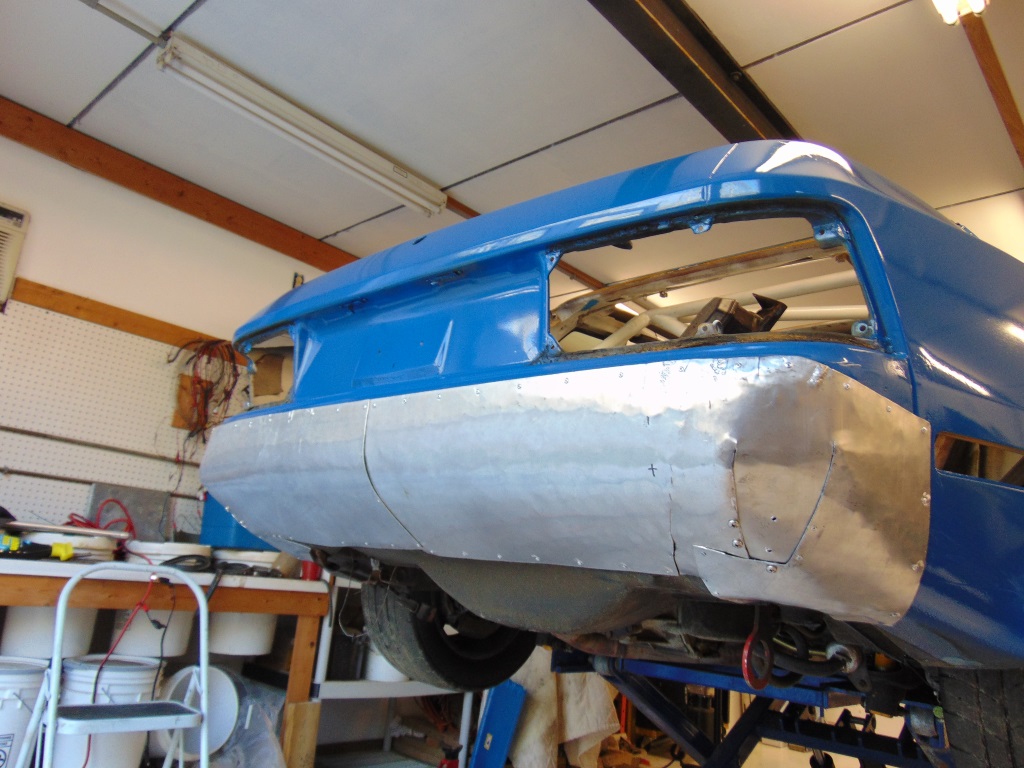
In retrospect, the back bumper was one of the most technical pieces because it had double or compound curves. I cheated to some degree and did slits to bring the metal around the corner.
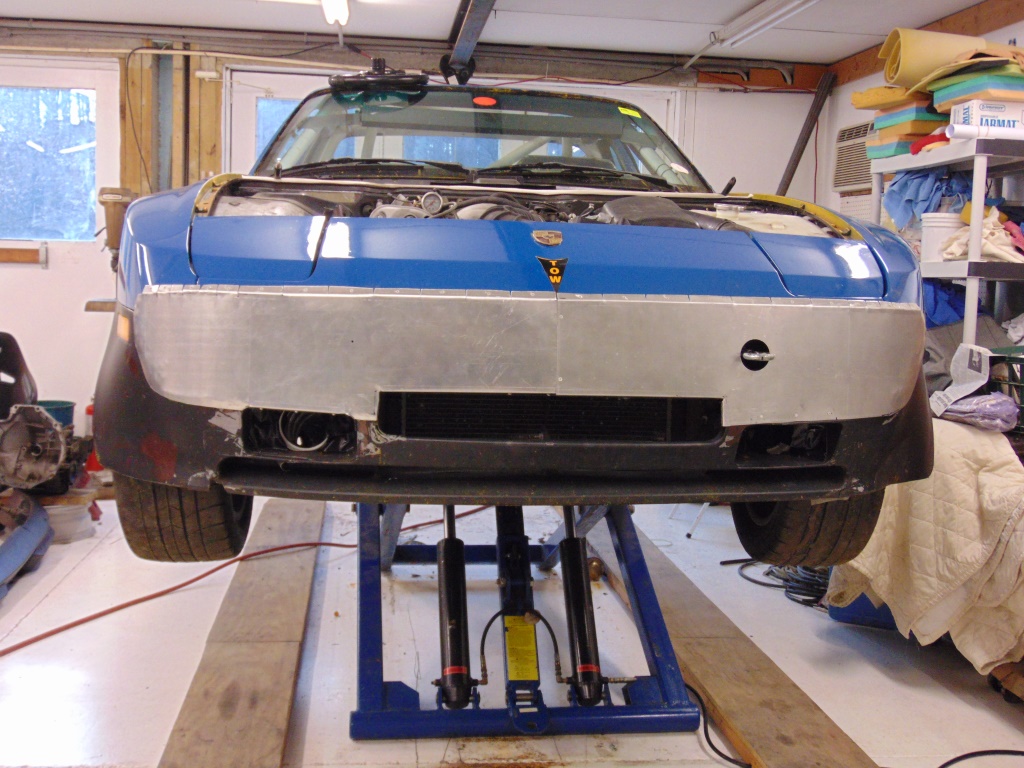
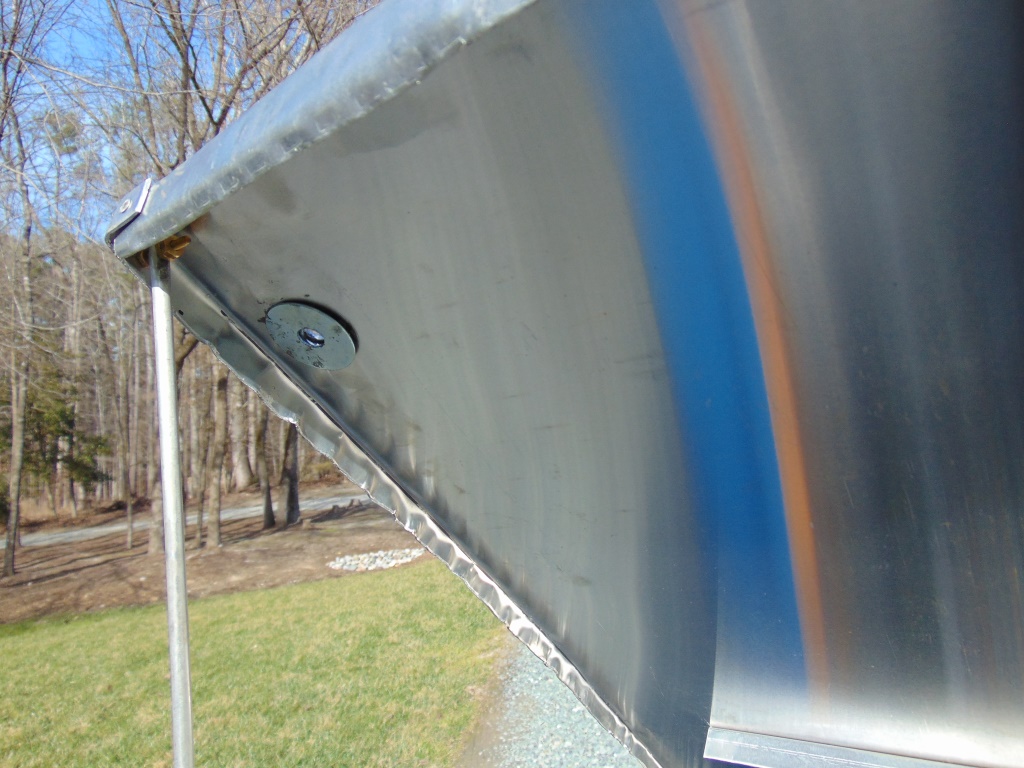
Next was the front bumper. It was actually simpler because it really only curves in one plane. On the front, I decided to use some “trick” aviation rivets. Know as Cherry Max, these rivets are countersunk and break off very flush at the surface. Although technically they are a “pop” rivet, they are much nicer. Check out the Cherry website. They are a little pricey. Aircraft Spruce and Supply sells them for $0.54 each. Plus I had to buy the installation tool. I also bought a trick little tool to drill the countersunk holes to a precise, consistent depth. About $300 spent for rivets and tools. Here is the result. 3# installed!
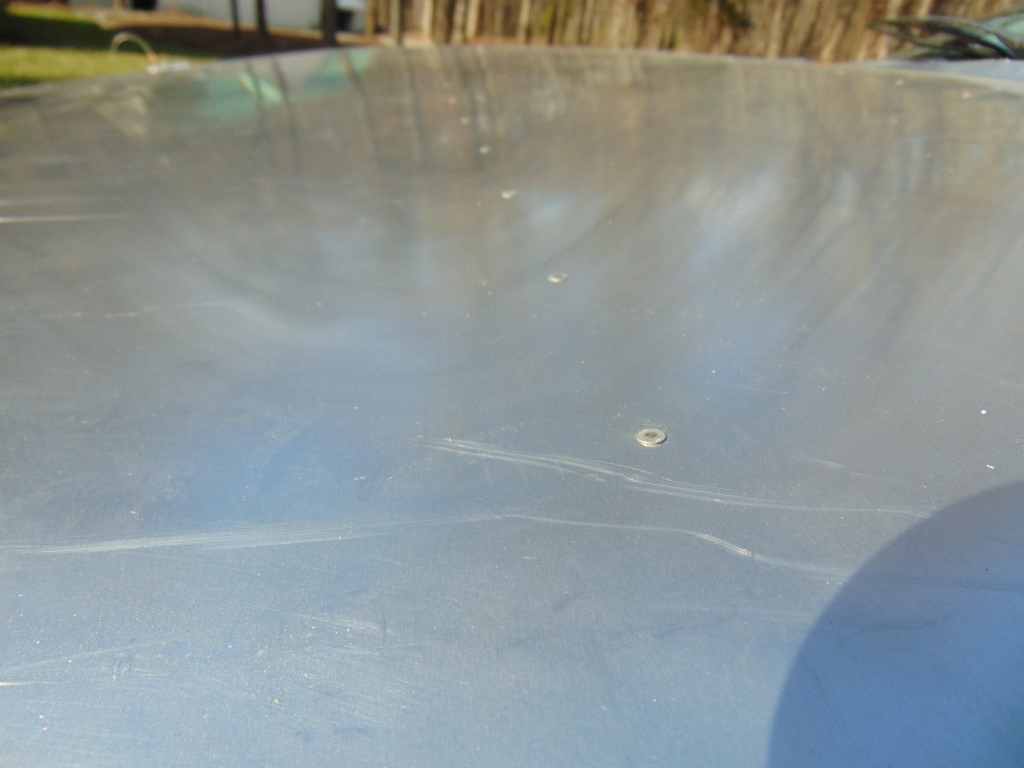
Closeup view of rivets
Next was the sunroof. There is not much weight to be saved here but it does open up a little more headroom for the old helmet. It is also a double compound curve. I was a little worried but the aluminum pulled down nicely with the rivets. Here is the result. 6 1/2#!

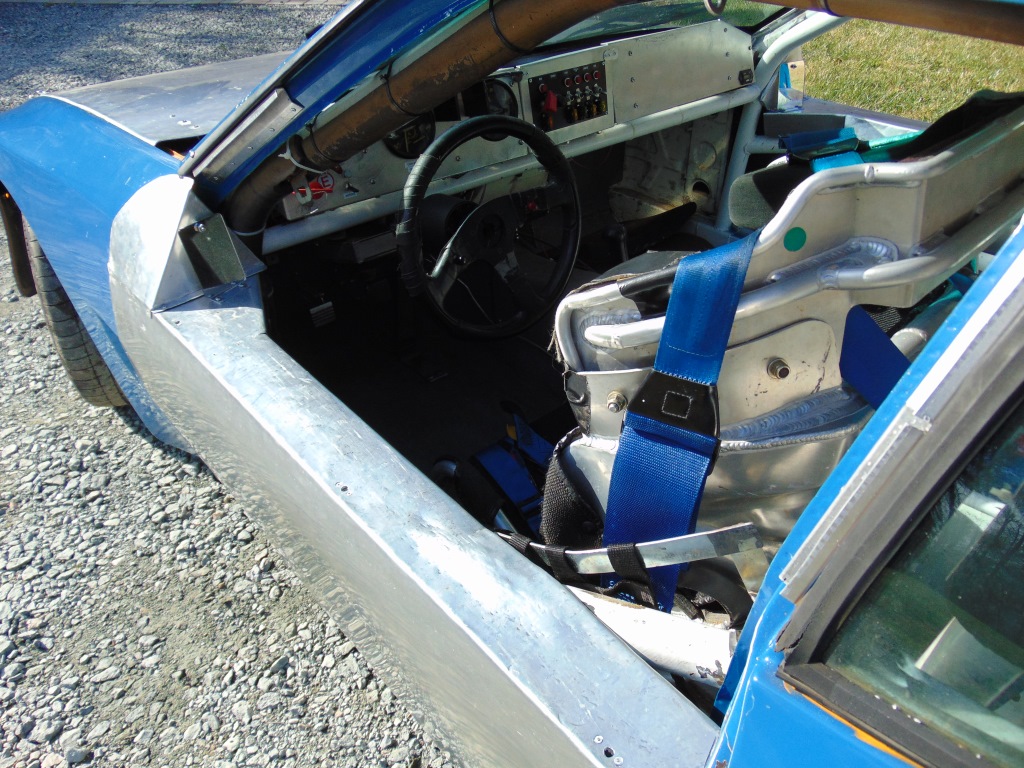
Now it was getting serious. The doors. The stock doors are heavy because they have crash bars. With my full cage, I really don’t need crash bars. Also, as discussed in my halo seat article, the seat sets very low in the car. It is hard to get my arm out for point bys with the normal door height. So I cut the door down to just the right level to get my arm out. The new sheet metal basically sits right on top of the cage door bars. There is no need for the door to open so it is riveted tight. There is a nice threshold for me to slide my butt on when I get in and out of the car. Here is the result. 6# per door!
 I would note that I have a 3 in 1 tool that will roll, bend, and shear sheet metal. That said, it is only 30″ wide and it struggles to bend a 30″ section of 1/16″ aluminum. And bigger items like the doors are too big to fit into the machine. I use alternate techniques for the bigger pieces. I have some heavy sections of steel angle and also wood planks that I can clamp the piece into and then beat it into a 90 degree corner with a hammer. This leaves a lot of scars but it gets the job done. For gradual single plane curves, the 1/16″ aluminum can be pulled into a curve by hand with the rivets. This worked well on the sunroof as it only had to pull down about an inch at the 4 corners. I also have very modest skills at forming 3D curves using a body hammer and a shot bag. This is definitely an acquired skill so my efforts were crude but again I was able to get the job done.
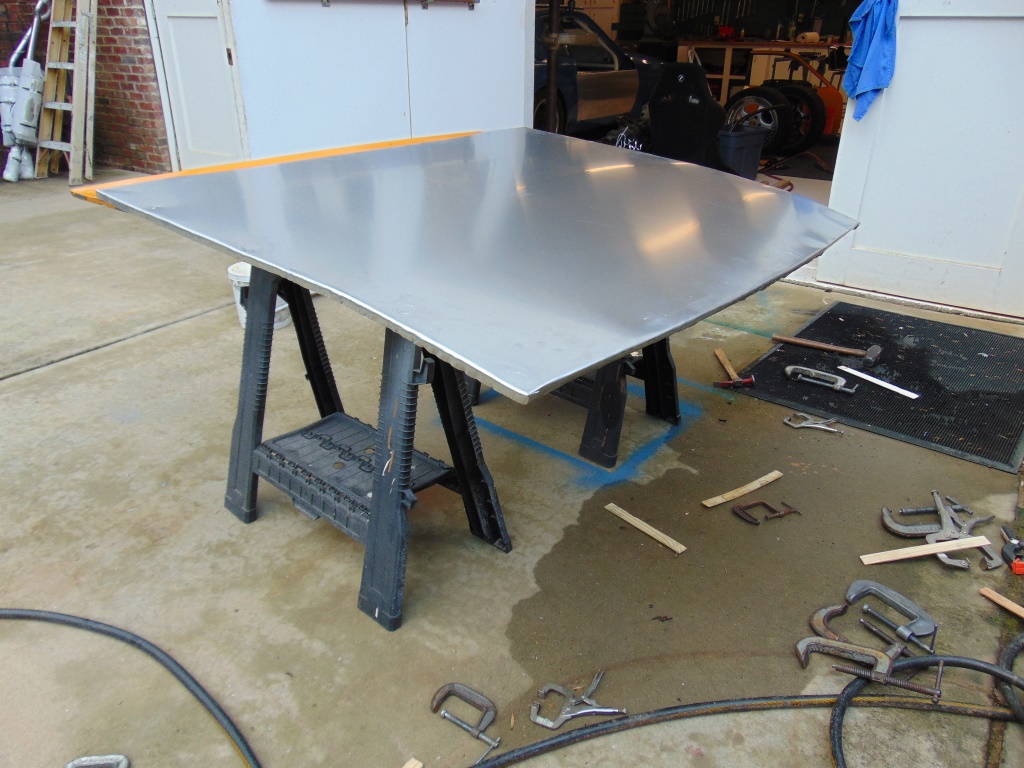
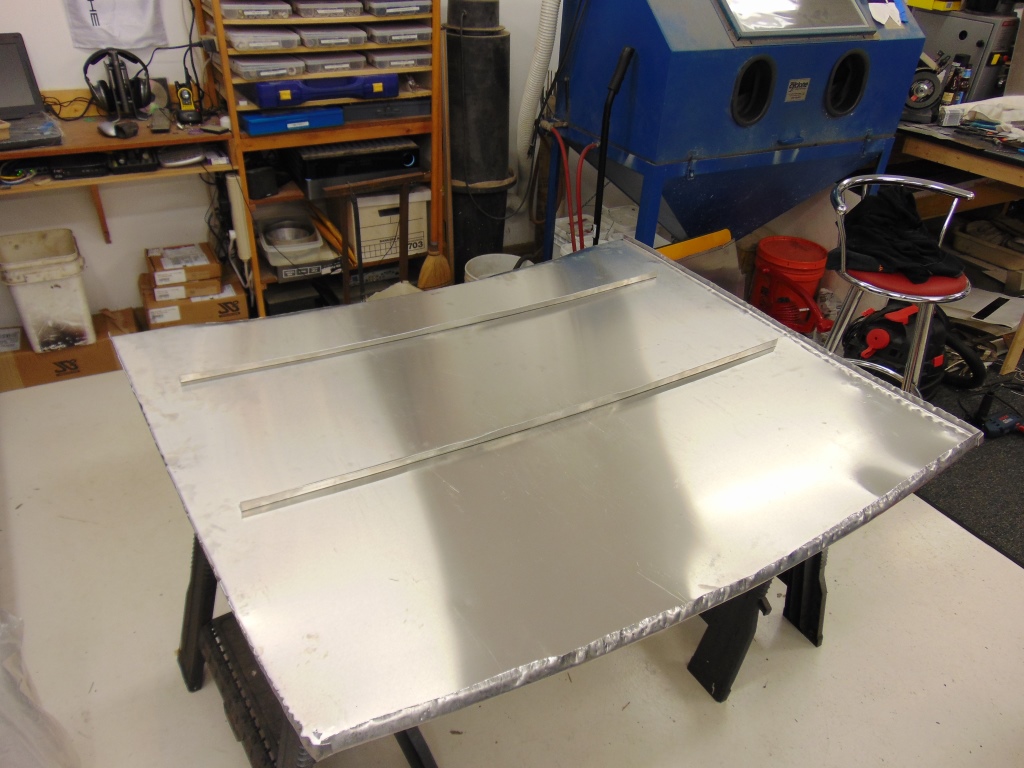
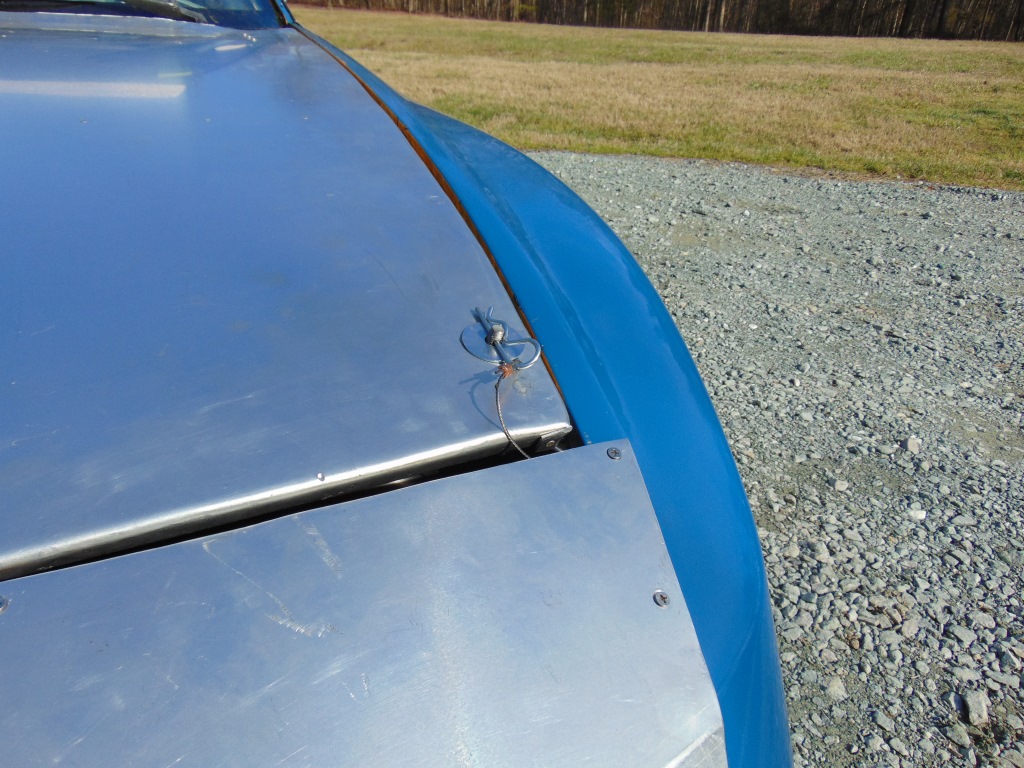
The job is also crude in the sense that I have lapped the pieces in place. I contemplated trying to obtain a flush installation. I just didn’t think my time available or my skills were up to it. As we are getting ready to see, the hood was one area where I was able to get a basically flush installation. So for the hood, I set the old hood up on sawhorses and checked it for flatness. Unfortunately the hood curves in both planes, meaning it has a 3D curvature that normally would be beyond my skills. So here is what I did. I cut out a piece of aluminum that was about an inch bigger then the hood. I placed it on the existing hood and proceeded to apply clamps around the perimeter. This was kind of like whackamole, as the material did not want to conform but trust me, if you apply enough clamps you can get the material to conform to the shape of the existing hood. Next I basically “hammer formed” the 1″ of extra material as a lip around the sides and front of the hood. Since the lip is describing a arc, you have to wrinkle the lip to get it to work. The back edge of the hood is bent upward, which can be done with pliers. After the entire perimeter was formed as a lip or the upward curve, I released the clamps. I was amazed to see that the hood held its shape! I carefully slid it off the old hood and test fit it into the car. It fit pretty well. I did have to adjust the lip at the rear as it hung up on the wipers. Being worried about “oil canning” or fluttering of the hood in the wind, I added L shaped stiffeners to the back side. I test fit the hood to the existing hinges and used JB Weld to add a triple layer of aluminum where the hinges would land. I attached the hood to the hinges with countersunk machine bolts. Finally, I made up some hood pins at the front 2 corners. It worked out pretty well, if I do say so. One minor issue is that the hood is greater than 48″ in both dimensions but I could only buy aluminum sheet in 4’x8′ sheets. If you look closely at the pictures, there are 2 small triangular sections up near the hinges that I left out. I may scab pieces in there later.
The resulting hood weighed 17#!


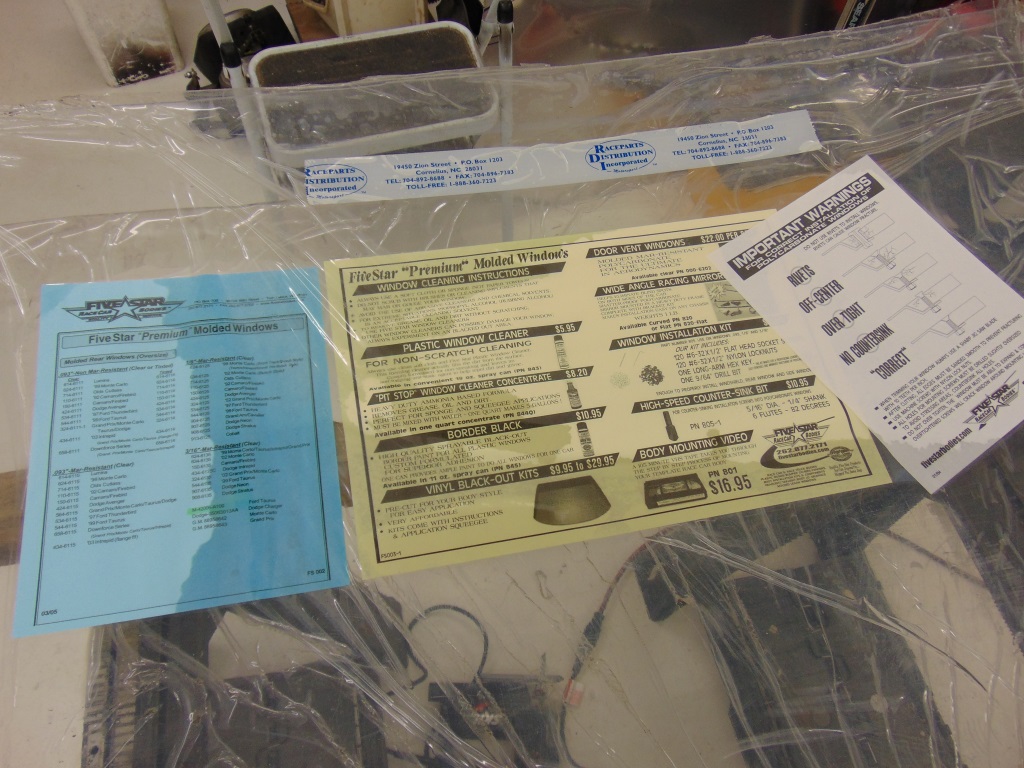
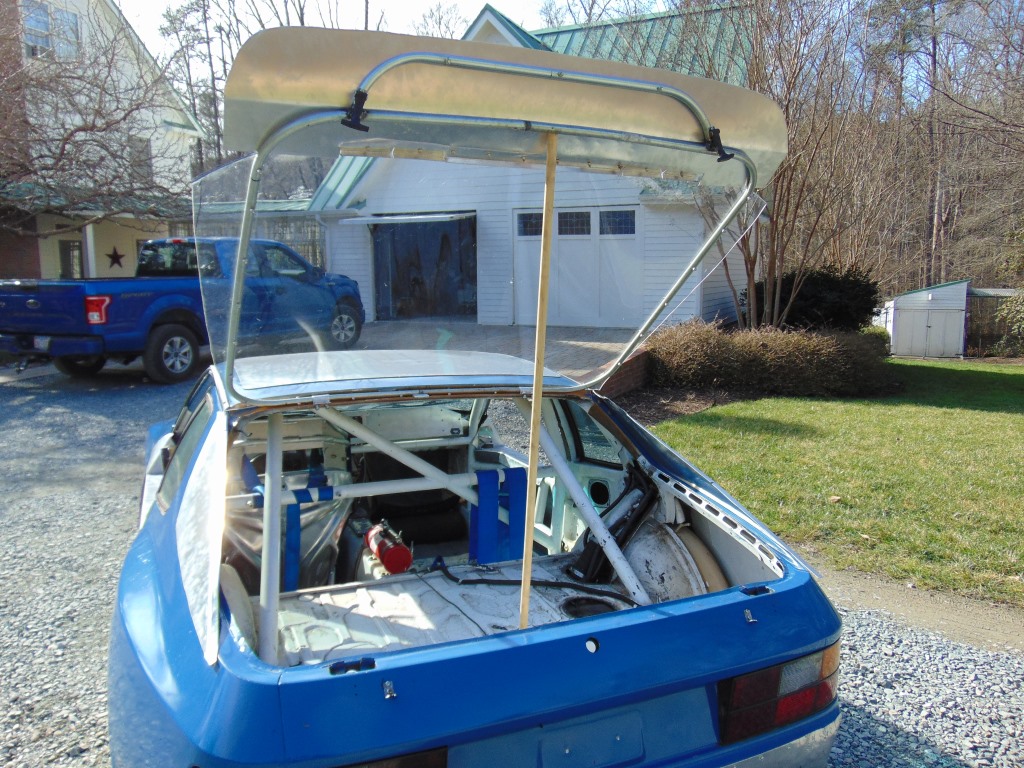
 Finally, it was time to turn to the hatch. As you can see from above, the hatch is one of the heaviest pieces. It is also a very challenging shape. Now you can buy pre-formed Lexan hatches for the 944 from vendors. They are $500 or so. I’m sure they are very nice but I went a different route. A few years ago I stopped at a NASCAR surplus warehouse in SC and picked up 3 front windshields and 2 rear windows, for about $100. Some had never been used, including the 2 rear windows. I re-purposed one of the rear windows for my hatch. I used the two front windows to make side windows for use while transporting the car on the trailer.
 I started by forming a framework out of 1/2″ EMT, which is thin wall electrical conduit available at building supply stores. I did have to buy a dedicated conduit bender. I carefully bent the conduit to form a framework. Easier said than done! I worked in 2 halves and joined the 2 pieces. As you should be able to see immediately from the pictures, I did not try and follow the path of the existing window and its rubber seal. Rather, I squared it off so that I could avoid a dramatic curve in the plastic. The Lexan can be formed if you apply heat but my efforts in this regard using a heat gun were not successful. So I decided to limit my curves to gradual ones, which the Lexan is happy to do at room temperatures. So I made a frame, cut out the Lexan, drilled oversize holes, countersunk them, and placed countersunk machine screws through the Lexan and holes in the frame. I attached the bolts with plastic locknuts so that you don’t place too much force on the bolts through the Lexan. I made some crude hinges out of aluminum scrap and mounted the piece.
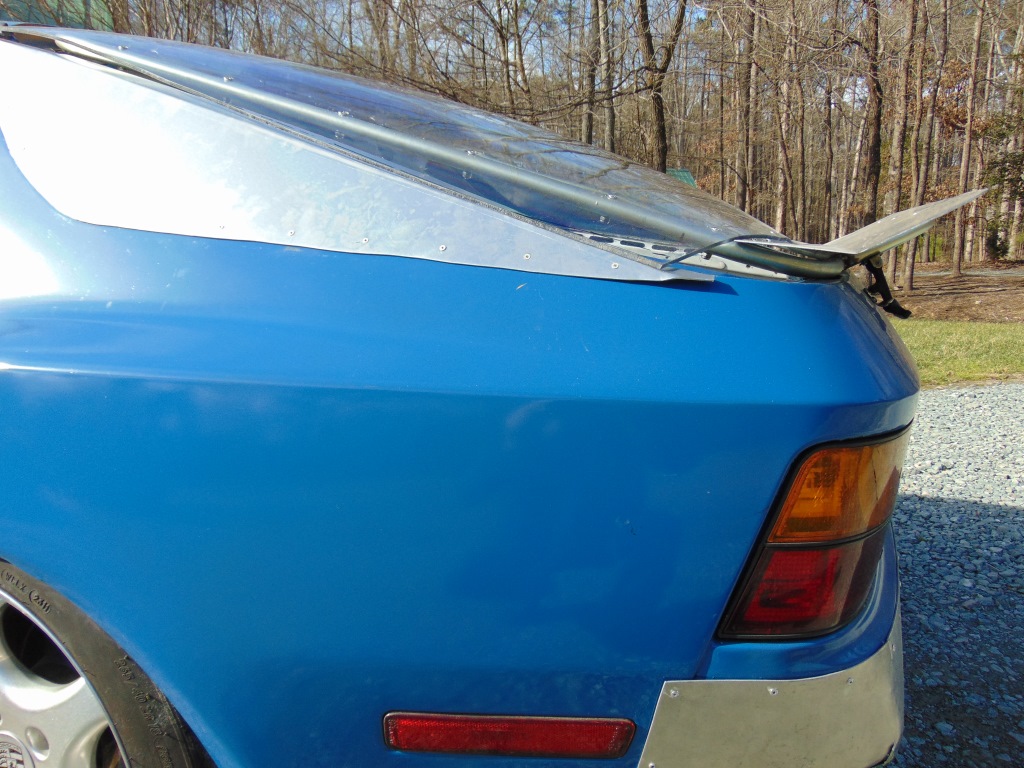
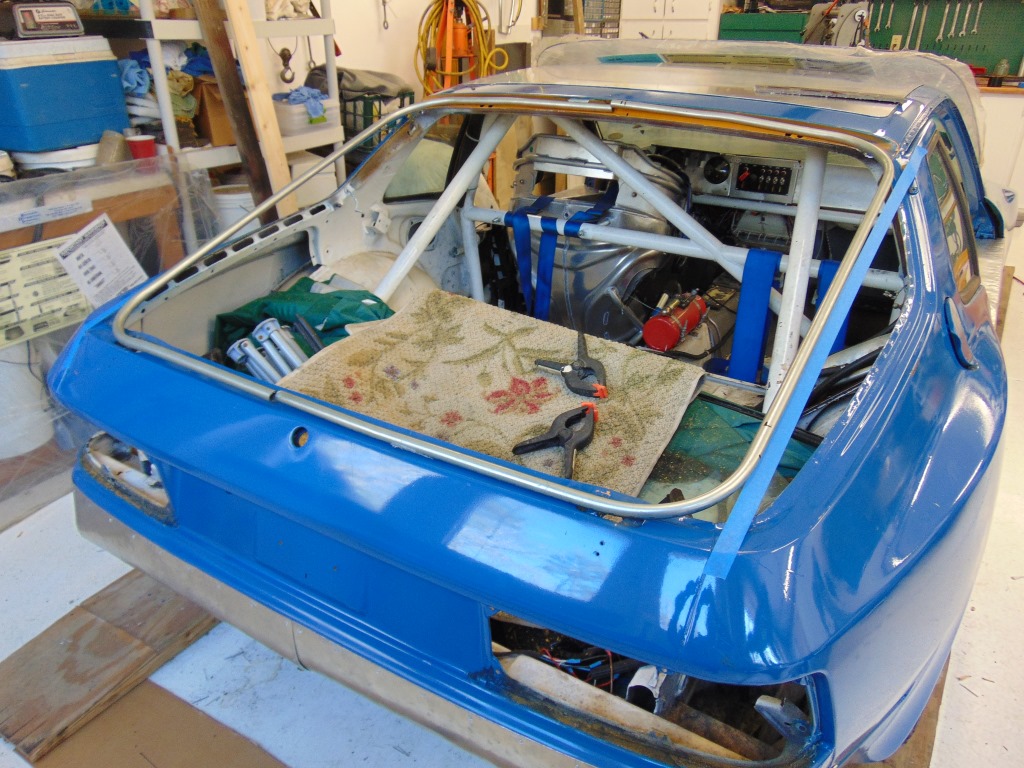 Prior to beginning, I had mounted the OEM hatch and made some measurements to establish where the rear edge of the factory spoiler resided. I used these measurements to layout conduit and a section of aluminum to mimic the spoiler configuration. Finally, I added some solid panels on both sides to fill in the area from the hatch down to the side of the car. Here is the result. The hatch weighed in at 21#. A savings of 33#!
 I also removed the passenger seat. When I put the car back on the scales, my total weight reduction was 225 pounds! At this point, the car weighed in at 2238#. That was with the fuel tank 1/3 full. I suspect it would be under 2200# with an empty tank. The front/rear weight distribution remained at approximately 50:50. Not bad!
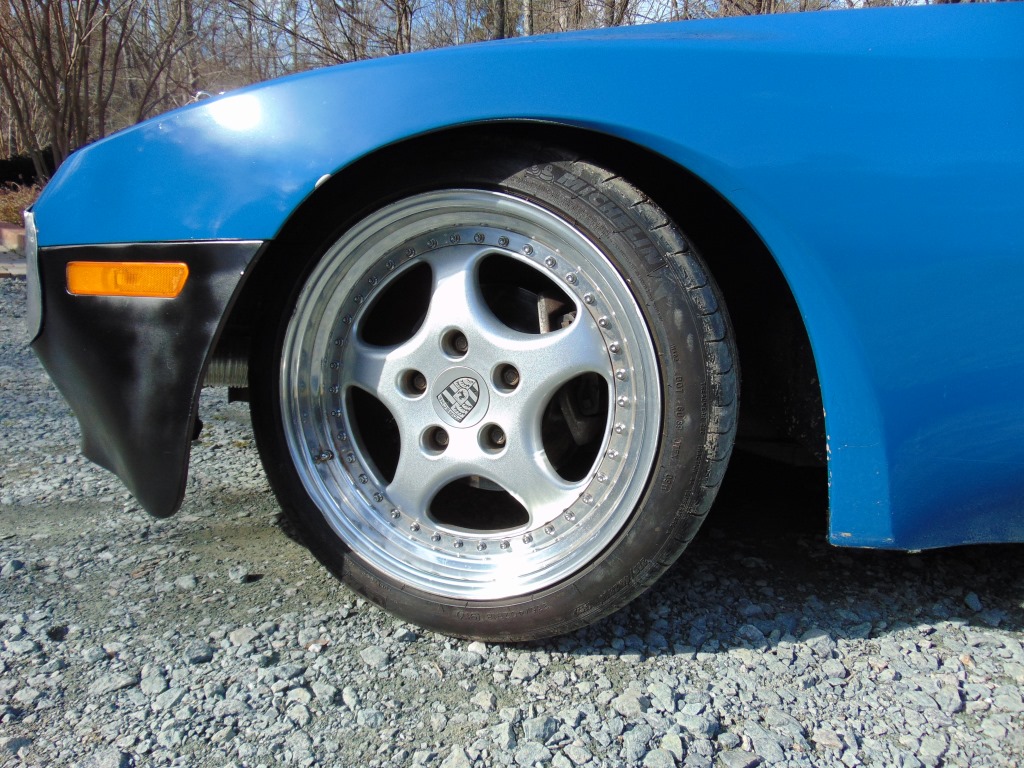
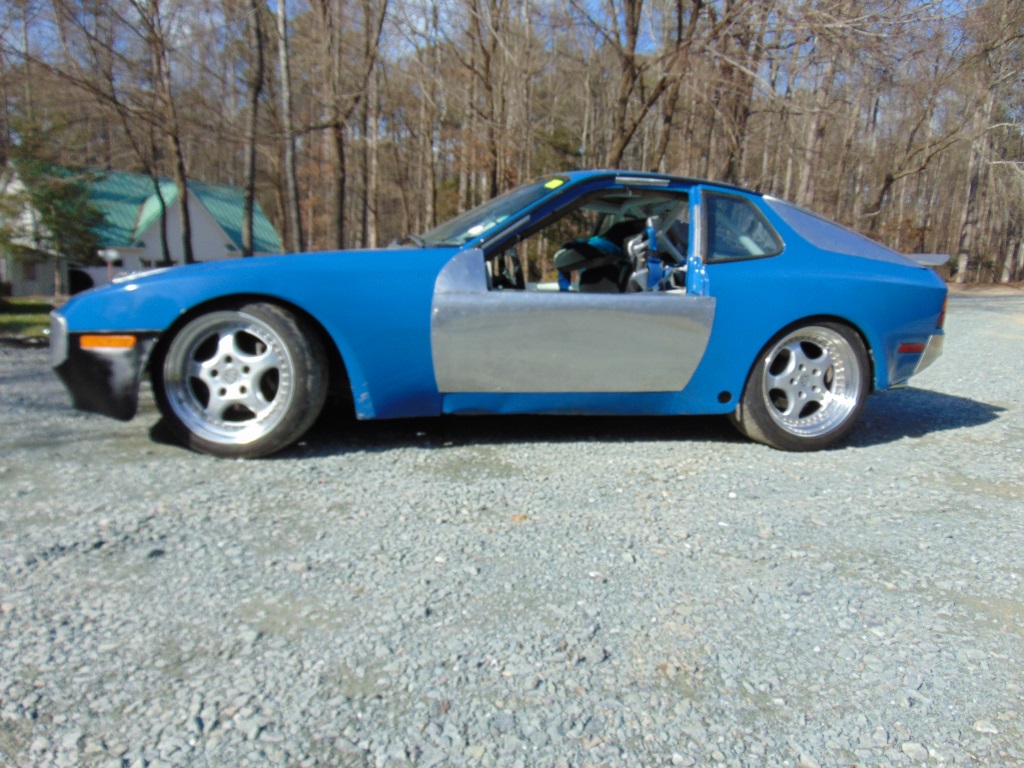
I then did a couple of things that added some weight. I replaced my exhaust system that used a Supertrapp muffler with a more stock exhaust. I also changed my wheel/tire combination. With these changes, the final weight of the car is 2310#. You will see the wheel/tire combination in the final pictures. This deserves a little explanation. First, my wife owns a Porsche Cayman. Her expensive Michelin tires got noisy with 1/2 of their tread life still to go. They really did whine, which I can’t explain but it was extremely annoying. So we got new tires and I had kept the old ones just in case. One day I was fooling around and held these tires up to the 944. It kind of looked like they might fit. I had very similar sized tires on my 928. I took the wheels/tires off my 928 and mounted them on the 944. I was surprised to see that they fit. So I mounted the tires from the Cayman on my 928 wheels and mounted these on the 944. Simple, right? The wheels are 18″ diameter. The front tires are 235mm wide and the rear tires are 265 mm wide. This is versus the 15″ x 225mm tires I had been running. This is probably not going to be the best idea from a standpoint of ultimate lap times but the look is so interesting I had to try it. You be the judge.
Update #1: I took the car to VIR in February of 2016. The first day it was very cold and I ran my Kumho Ecsta street tires, as I felt they would do a little better in the cold temperatures. Around lunch time, it had warmed up so I mounted the Michelin’s on the 3 piece rims as shown below. I was very worried about tire rub so I sort of eased into things. First a trip up the access road. Then the lunchtime parade laps. I couldn’t discern any rubbing so I took it out for the next track session. I didn’t experience any rubbing but there was a significant vibration from the rear of the car that got worse as the car went faster. This was strange as I had the tires Road Force balanced. Regardless, I came in after the session and jacked up the rear of the car to inspect. Indeed, one of the tires appeared to be out of round. At the end of the day, I took these tires back off and went with the Kumho’s for Sunday. Later at the shop, I noticed that there was the slightest bit of rubbing at the rear, as evidenced by a slight amount of undercoating removal indicative of the inside of the tire rubbing on the sheet metal. The rubbing was around the 10 o’clock position in the 2nd photo below, on the sheet metal area clockwise up from the torsion bar tube assembly. I suspect another millimeter or 2 of spacer would resolve this. Other than that, I found no evidence of rubbing, front or rear. So it likes like it is possible to stuff these massive tires into a stiffly sprung 944. Your results may differ.
Update #2: Working on my silver 944 for a glass out repaint, I removed the windshield. Curious, I threw it on the scales. 25 pounds. I went and get one of my used NASCAR plexiglass windshields. 19 pounds. Huh! So I, like many others, think of going with a plexiglass windshield to lighten the car. But I had read on Rennlist once that the weight savings were minimal. Now I understand why. I think the real advantage of a plexiglass windshield is that if involved in blunt force trama, it will not shatter so badly as glass. I don’t know for sure but certainly in all the NASCAR wrecks I’ve seen, I do not come up with any mental images of windshield parts spread all over the driver or the track. The NASCAR spec front windshield is pretty thick. Thicker than the piece I used for my rear hatch. The downside of course is they can be scratched and are expensive. So I’m sticking with my glass windshield in the track car for now.
 Here is a final photo montage.


Discussion
Comments are closed.