In my previous article, I discussed my winter project to upgrade the suspension on the Porsche 944 track car. I went over the installation of the front sway bar and coilover springs.
From my previous measurements I knew that the most negative camber that I could obtain with the stock suspension was -2 degrees. This is done by adjusting the eccentric bolts on the lower end of the strut housing. Negative camber means when you are looking at the front of the car, both tires are leaning inward at their top edge, toward the middle of the car. Most tires will provide better cornering force when they are operated at a negative camber. This is due to several effects. As the car leans into a corner the outside “loaded” tire when tend to straighten back up and thus be more firmly planted on the road. Tires also generate a “camber thrust force”. This force is described in more detail in the book “The Racing Tire and High Performance Tire” by Paul Haney. In preparation for the upcoming season, I have purchased a set of the Toyo RRR tires. According to the specs on The Tire Rack, they like 3 to 5 degrees of negative camber. Yet my “rain” tires, Kumho Ecstas probably won’t be so happy at this extreme amount of camber. A camber adjustment plate is called for.
Camber adjustment plates are available commercially. The first set I looked at cost $500. I don’t mind spending money for something I can’t build myself but I felt that camber plates were within my fabrication abilities. So here is how that effort turned out.
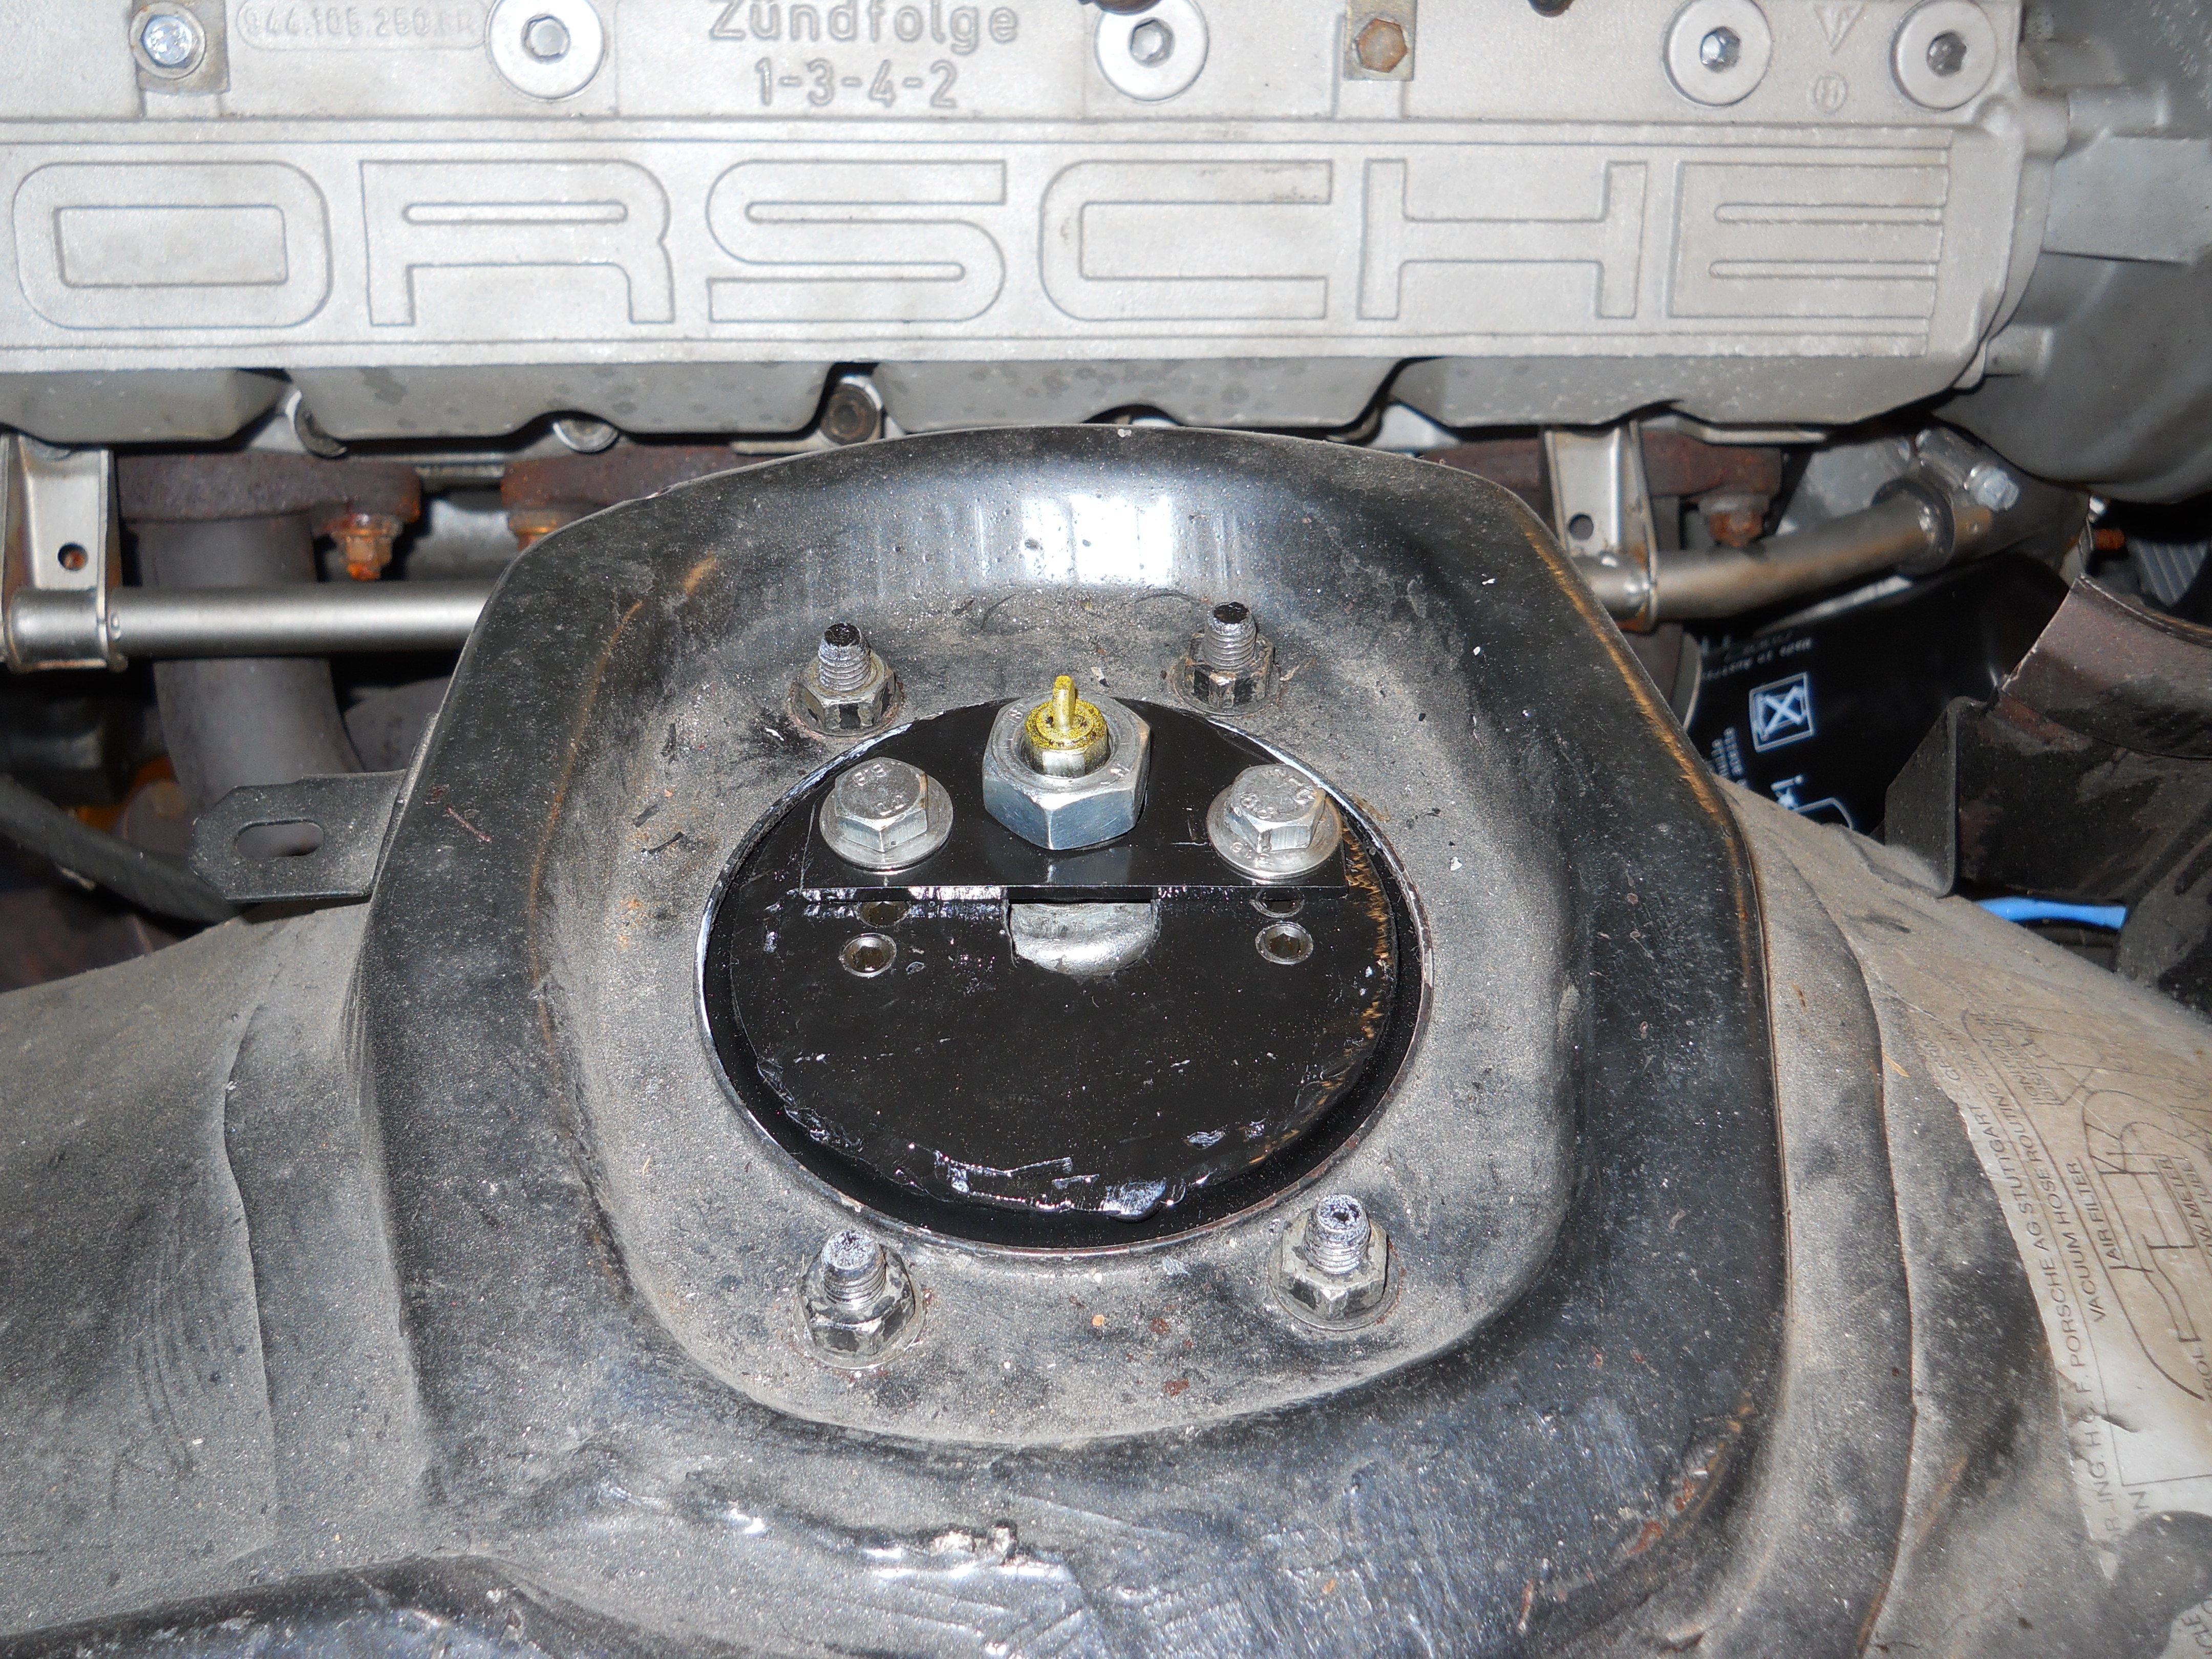
After studying the existing stock parts I found a roller thrust bearing at the top of the strut, mounted in a rubber donut, which was mounted into a plate that bolts to the underside of the strut tower with 4 bolts. I used my wire wheel to remove the rubber from the bearing. I cut off the top of the mounting plate. I cut out a round circle of 1/4″ plate that would fit into the opening of the mounting plate, eventually to be retained by welding. First I cut a slot that ran from the center of the round mounting plate out to its edge. The slot is about 1″ long, which allows about 3 degrees of additional camber. On the top of the plate I drilled and tapped 3 pairs of holes. These engage a keeper plate that sets the strut rod at the stock position, -1.5 degrees, or -3 degrees. Added to the -2 degrees that I can obtain with the stock eccentric bolt, up to -5 degrees of camber are possible. Underneath the round plate I welded 2 guide plates to capture the bearing fore and aft. Once I had the parts all laid out, the various pieces were MIG welded into position and black paint applied. I placed allen head screws in the unused holes to keep out crud and to strengthen the empty holes. Here are some pics:


Discussion
No comments yet.