It is time for an update on the progress of my upholstery on my 63 FHC. As noted in my previous article, I had received an upholstery kit from GB Classic Trim in the UK. Working on a top down approach, my first job was to install the headliner. Cantrails and the areas behind the seats were next.
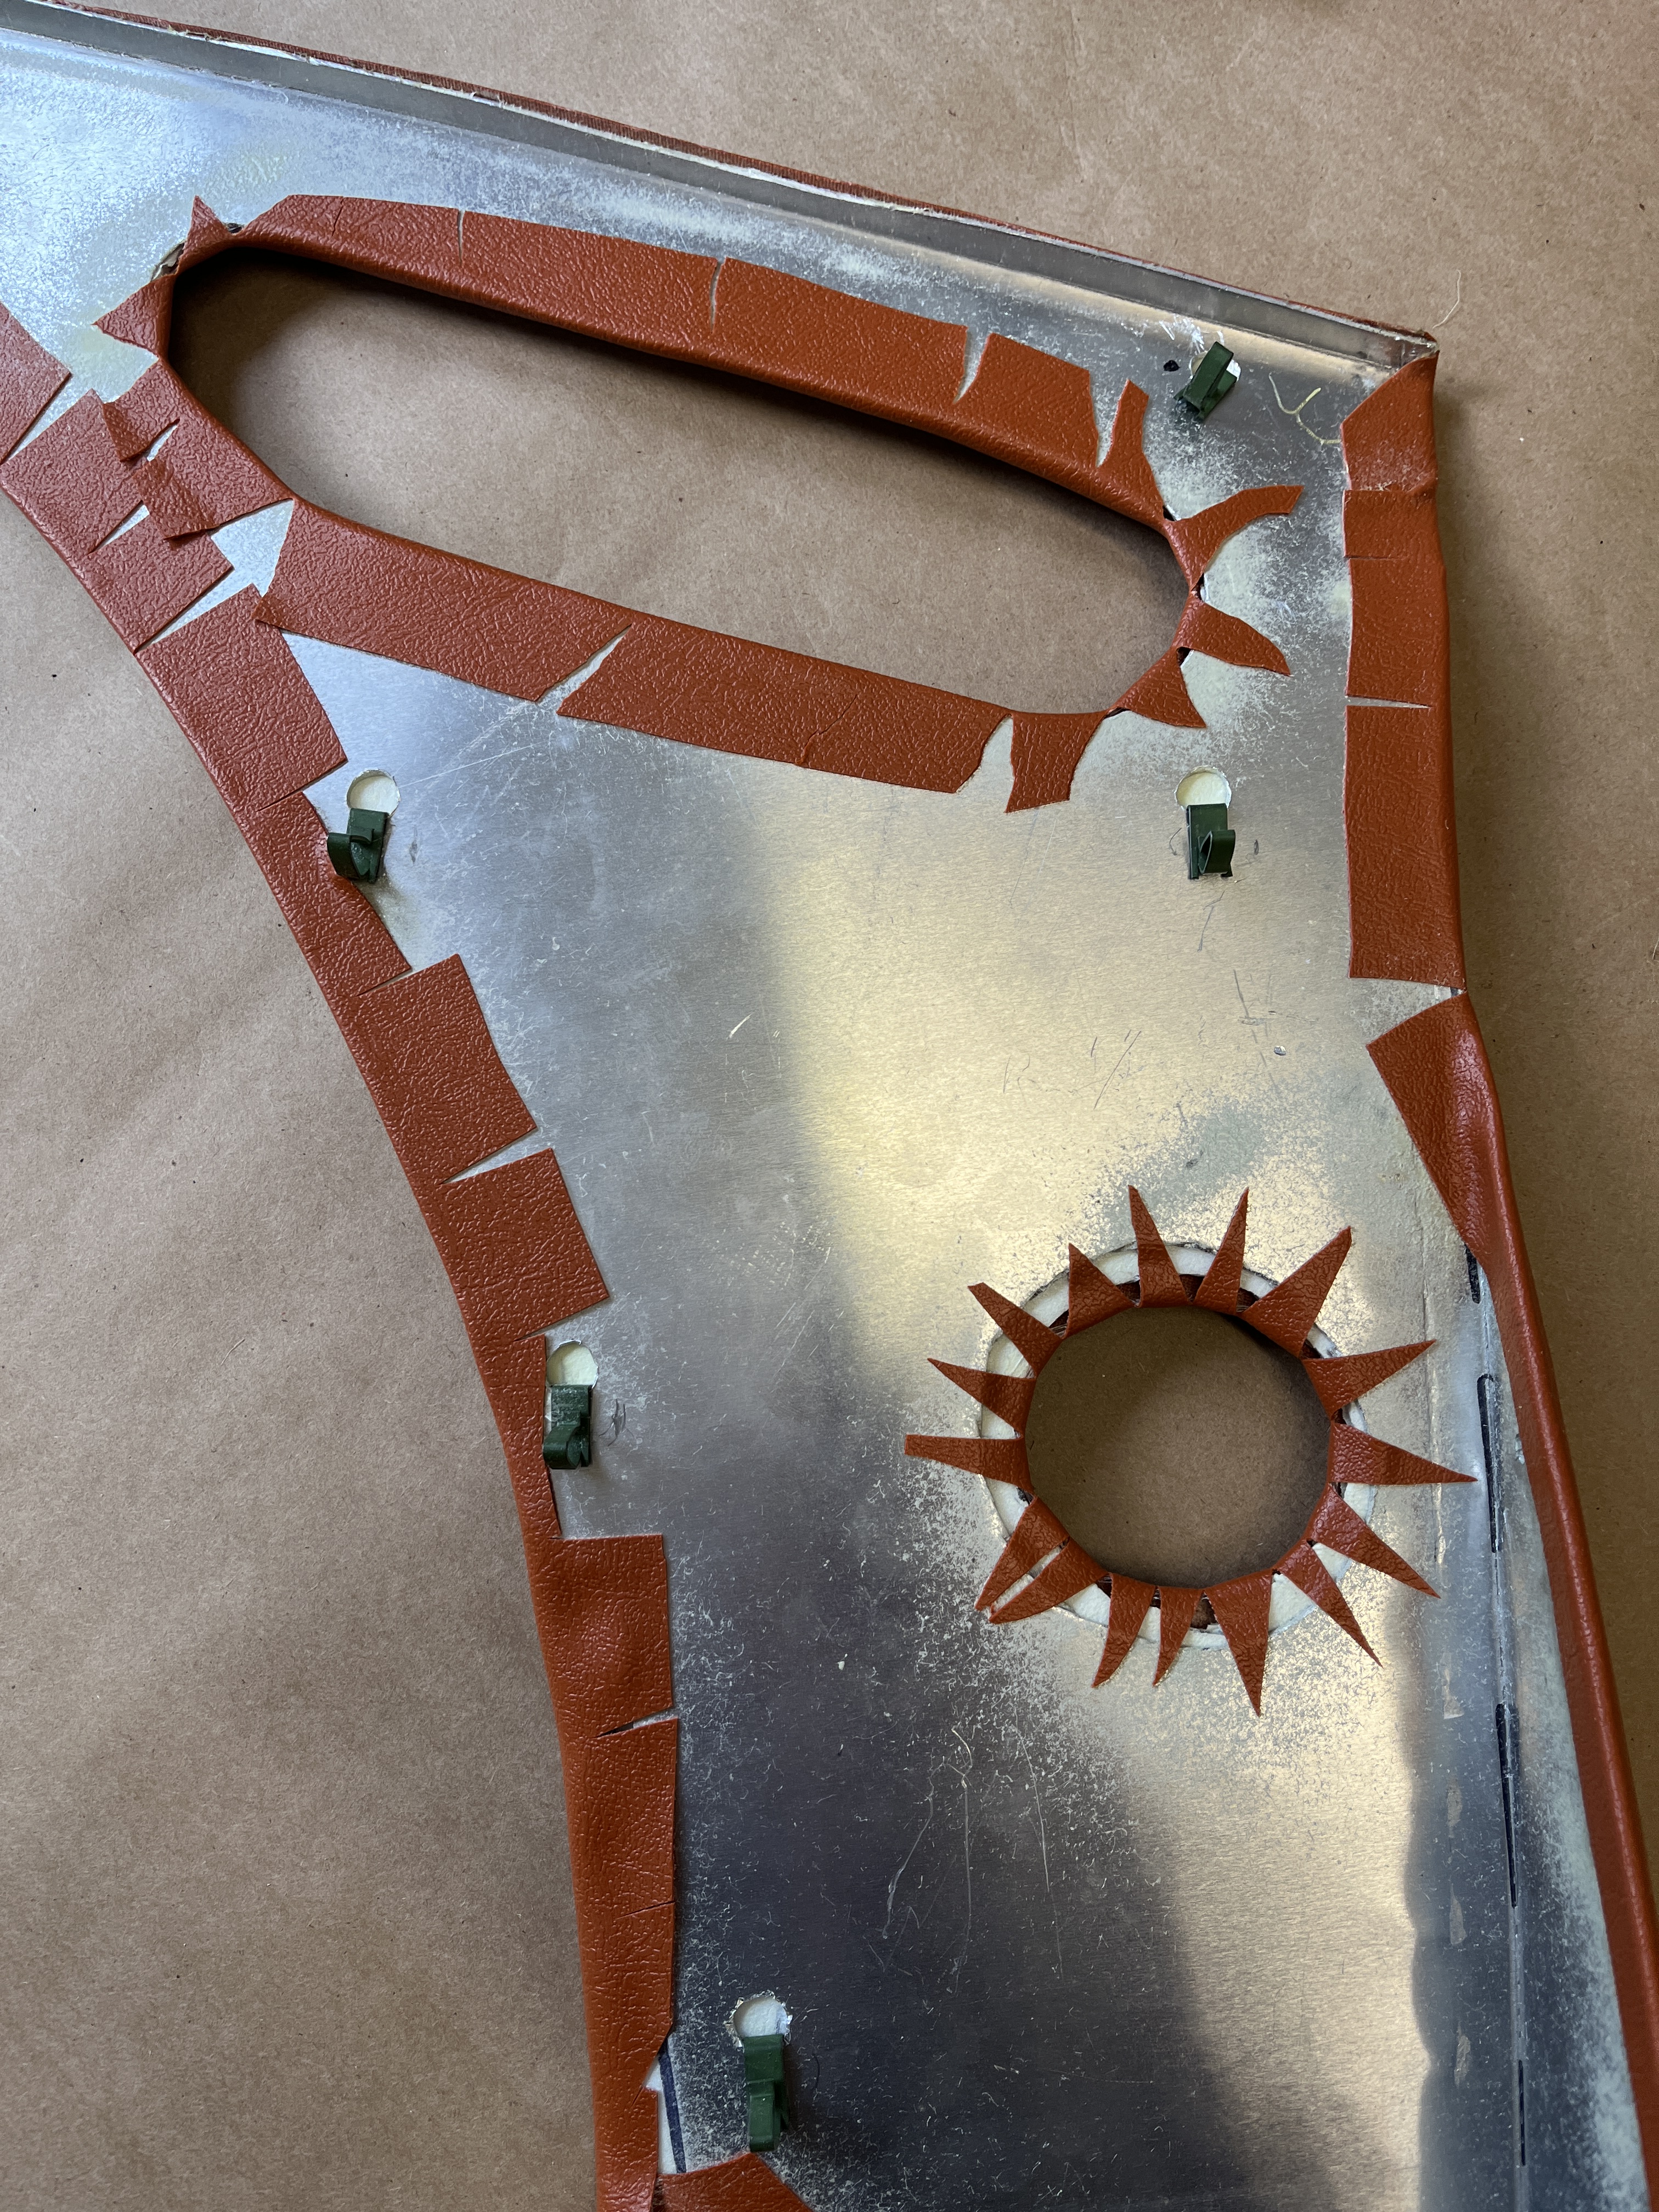
Of interest would be my approach to the areas over the wheel arches, from the B pillar back to the hatch opening. “Casings” are supplied in the kit for these areas. These are pieces of heavy fiberboard with the vinyl stretched/glued across the front face and wrapped around the edges on the back. They have metal clips on the back side that insert into holes in the sheet metal of the cockpit. If you have taken the door casings off to get at a latch or window mechanism, it is the same approach. In a perfect world, the casings are placed into position and you slap the palm of your hand over each clip location, seating it. That is in a perfect world, not my world! As discussed in the previous article, Jaguar made a major revision to this part of the car just a few months after my car was built. The casings I received did not really fit, although they were close. On the rear casing, which extends rearward from the quarter glass, I was able to modify the casings and make them work. The ones that extends rearward from the B pillar were too different to salvage. I wound up making new ones from aluminum sheet. (Surprisingly, fiberboard was hard to find for purchase and I had the aluminum sheet on hand.) I test fit the aluminum sheet and made a paper pattern where the clips needed to go. Then I drilled the holes for the clips and installed the bare aluminum with its clips. This allowed me to get the clips in the right location. Next I applied a layer of 1/8” thick closed cell foam over the aluminum. This had the advantage of fixing the clips, as otherwise they can move around a bit. Next I glued the vinyl to the foam. This has an advantage in that these casings are curved and you can get the vinyl to form the shape of the curvature. If you do them on the worktable in a flat position, the vinyl tends to wrinkle as it takes on the curvature in position. Finally I removed the aluminum/foam/vinyl assembly and wrapped all the edges. At this point, it was simple to install them for the final time.
BTW, before you install these casings you want to install your rear hatch latch hardware. I had disassembled my latch for the hatch for plating and did a poor job of documenting its assembly. Fortunately, with all the parts in hand, I was able to figure it out. I also installed a new cable, since if the 60 year old one snaps, it becomes a bad day. The chrome on the pull handle in the front was good enough that I decided to leave it as is. On the other side, I had the hinges painted and ready. They need to be installed in the correct position before the casing goes on. I installed the hinges and the hatch, with gasket, and set the hinges where they need to be. Then I removed the hatch for safekeeping. You also want to have both the left side and right side wiring harnesses installed before you install the casings. Don’t forget the single wire for the reverse/backup light, which is not in the wrapped harness, rather it runs by itself. This left the back area behind the seats basically done. Most of the chrome bits on the storage area will be sent out to the chrome platers.

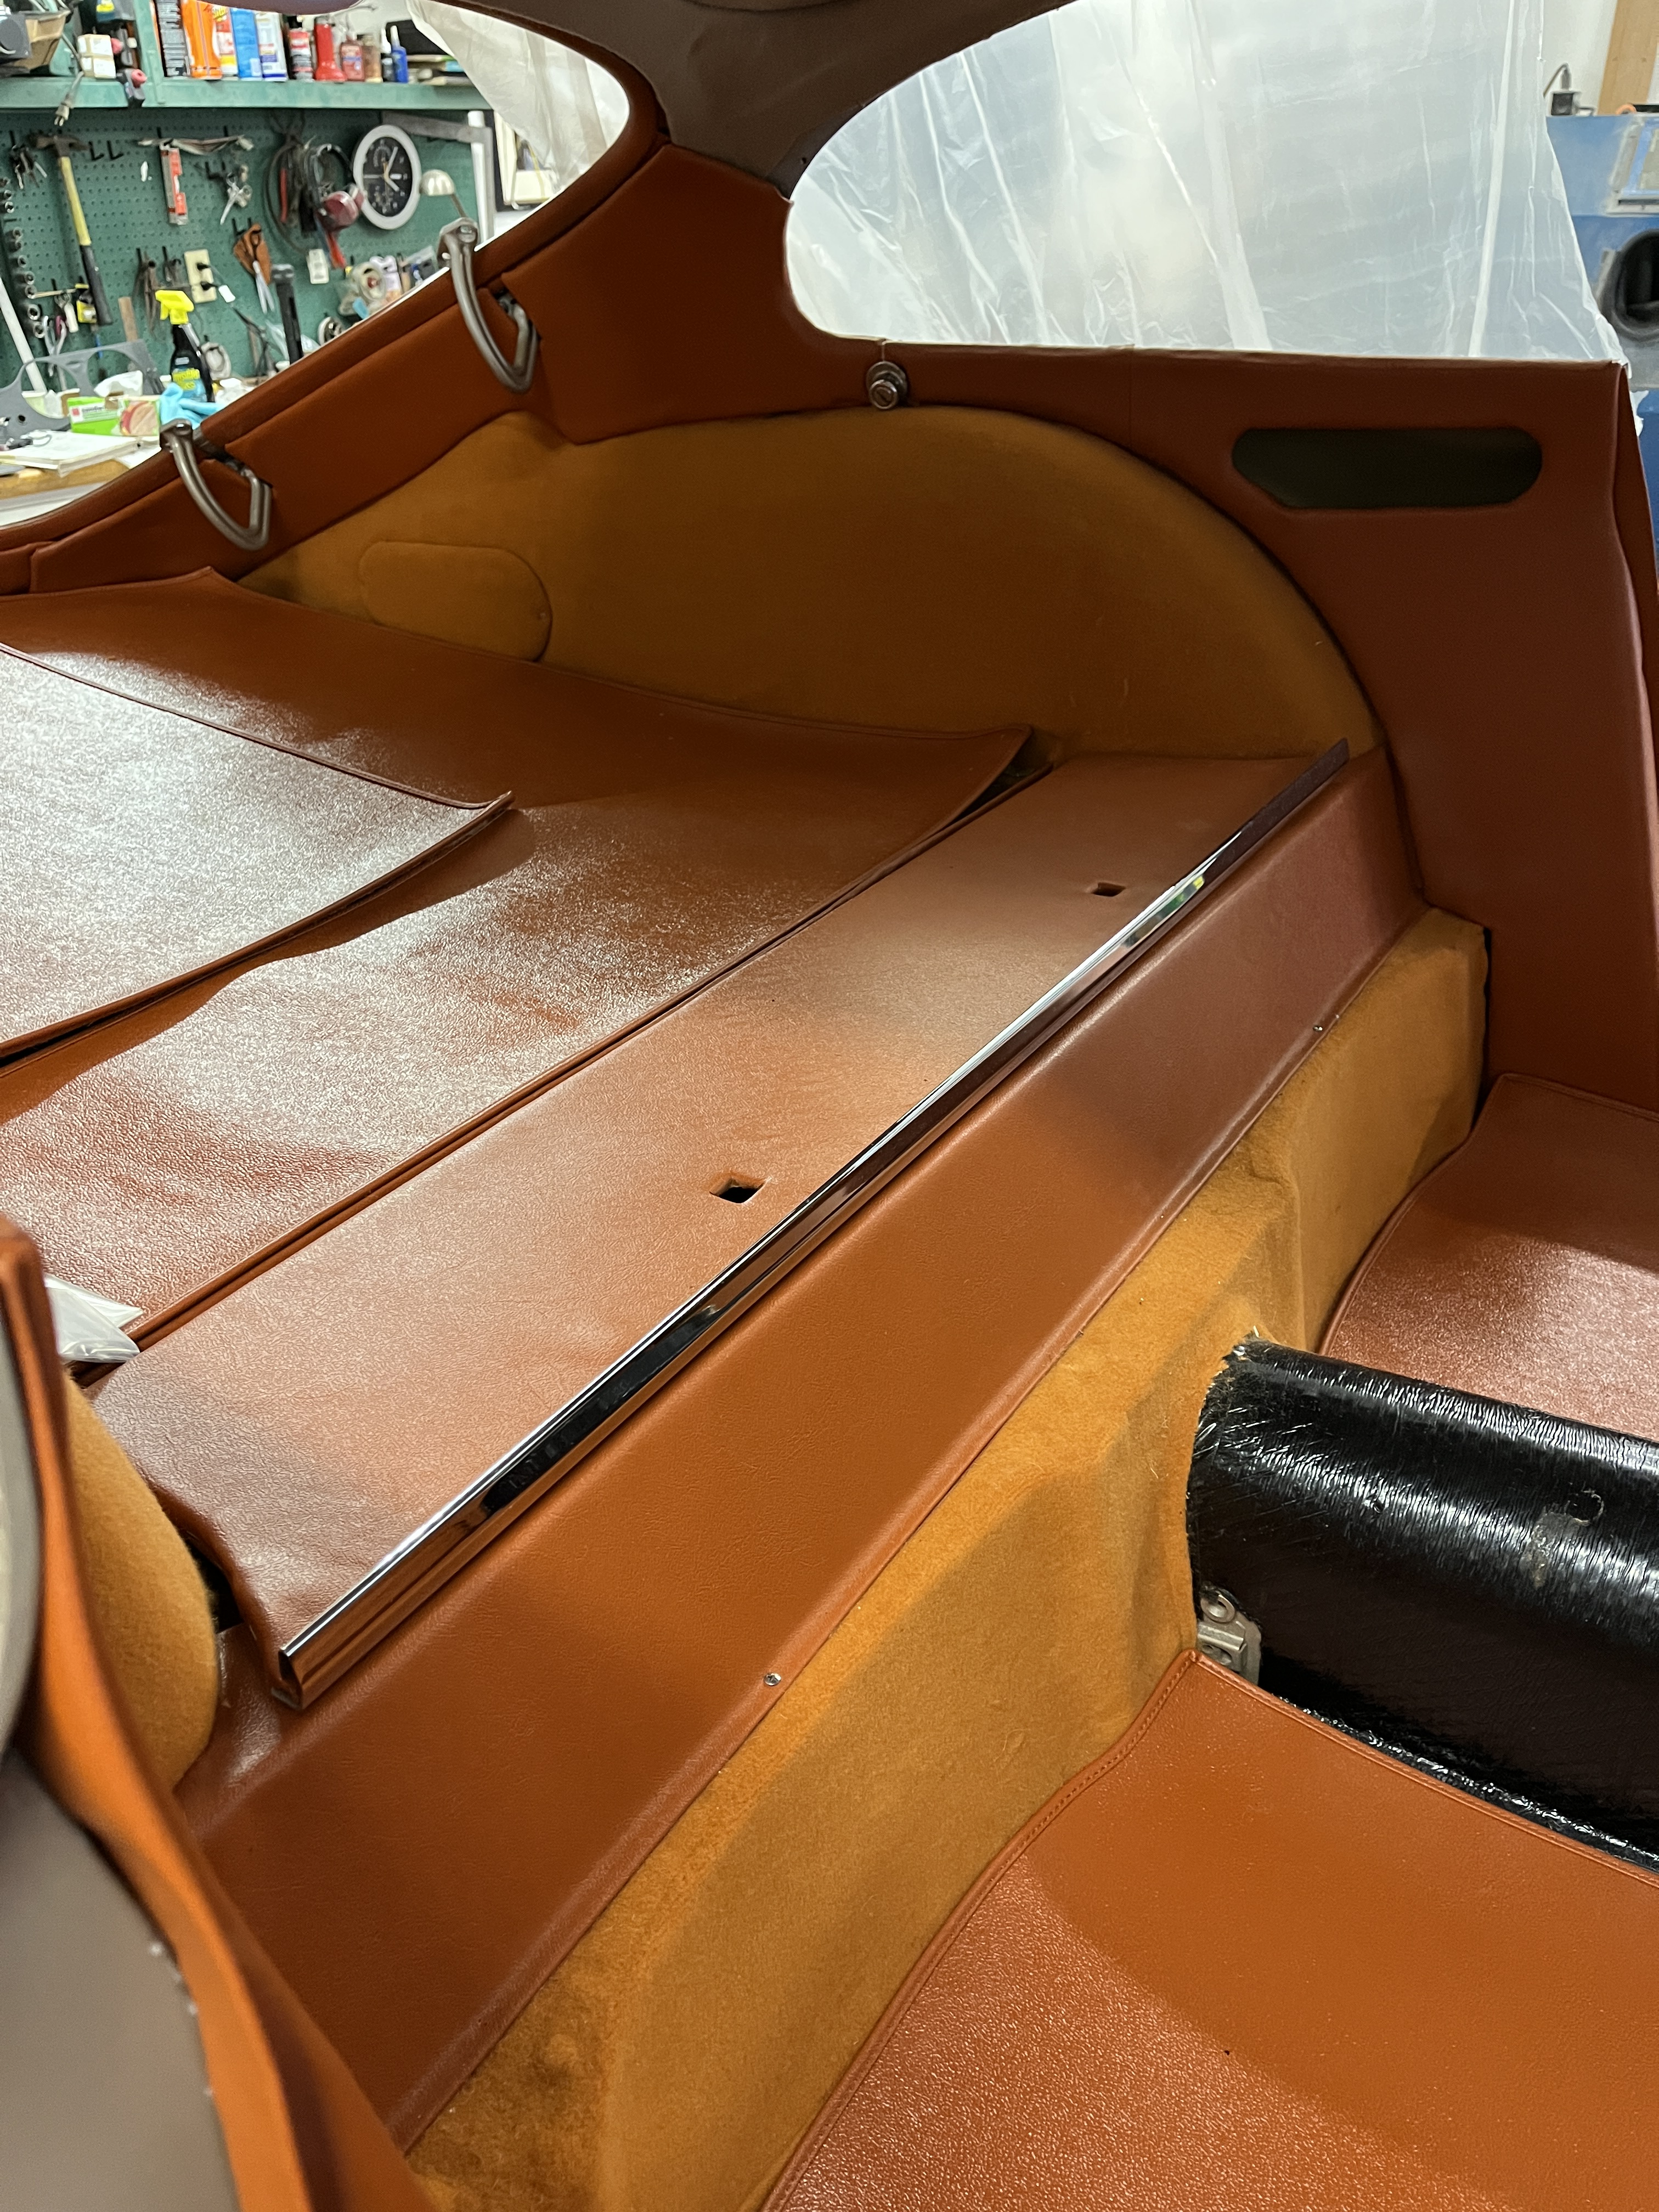
BTW, in the above photo, there is a shiny chrome piece at the top of the wheel arch. This is an attachment point for a shoulder harness. I was surprised to find this in a car built in early 1963 but its existance is mentioned in Haddock/Mueller so it appears to be legit. Also in the photo, the harduras are not neatly fitted. They are fixed with Durable Dot snap fasteners. But I am deferring this step, as these harduras were another example of slight differences in my early car. The ones supplied were not the right shape. GB Classic Trim is going to send me correct ones.
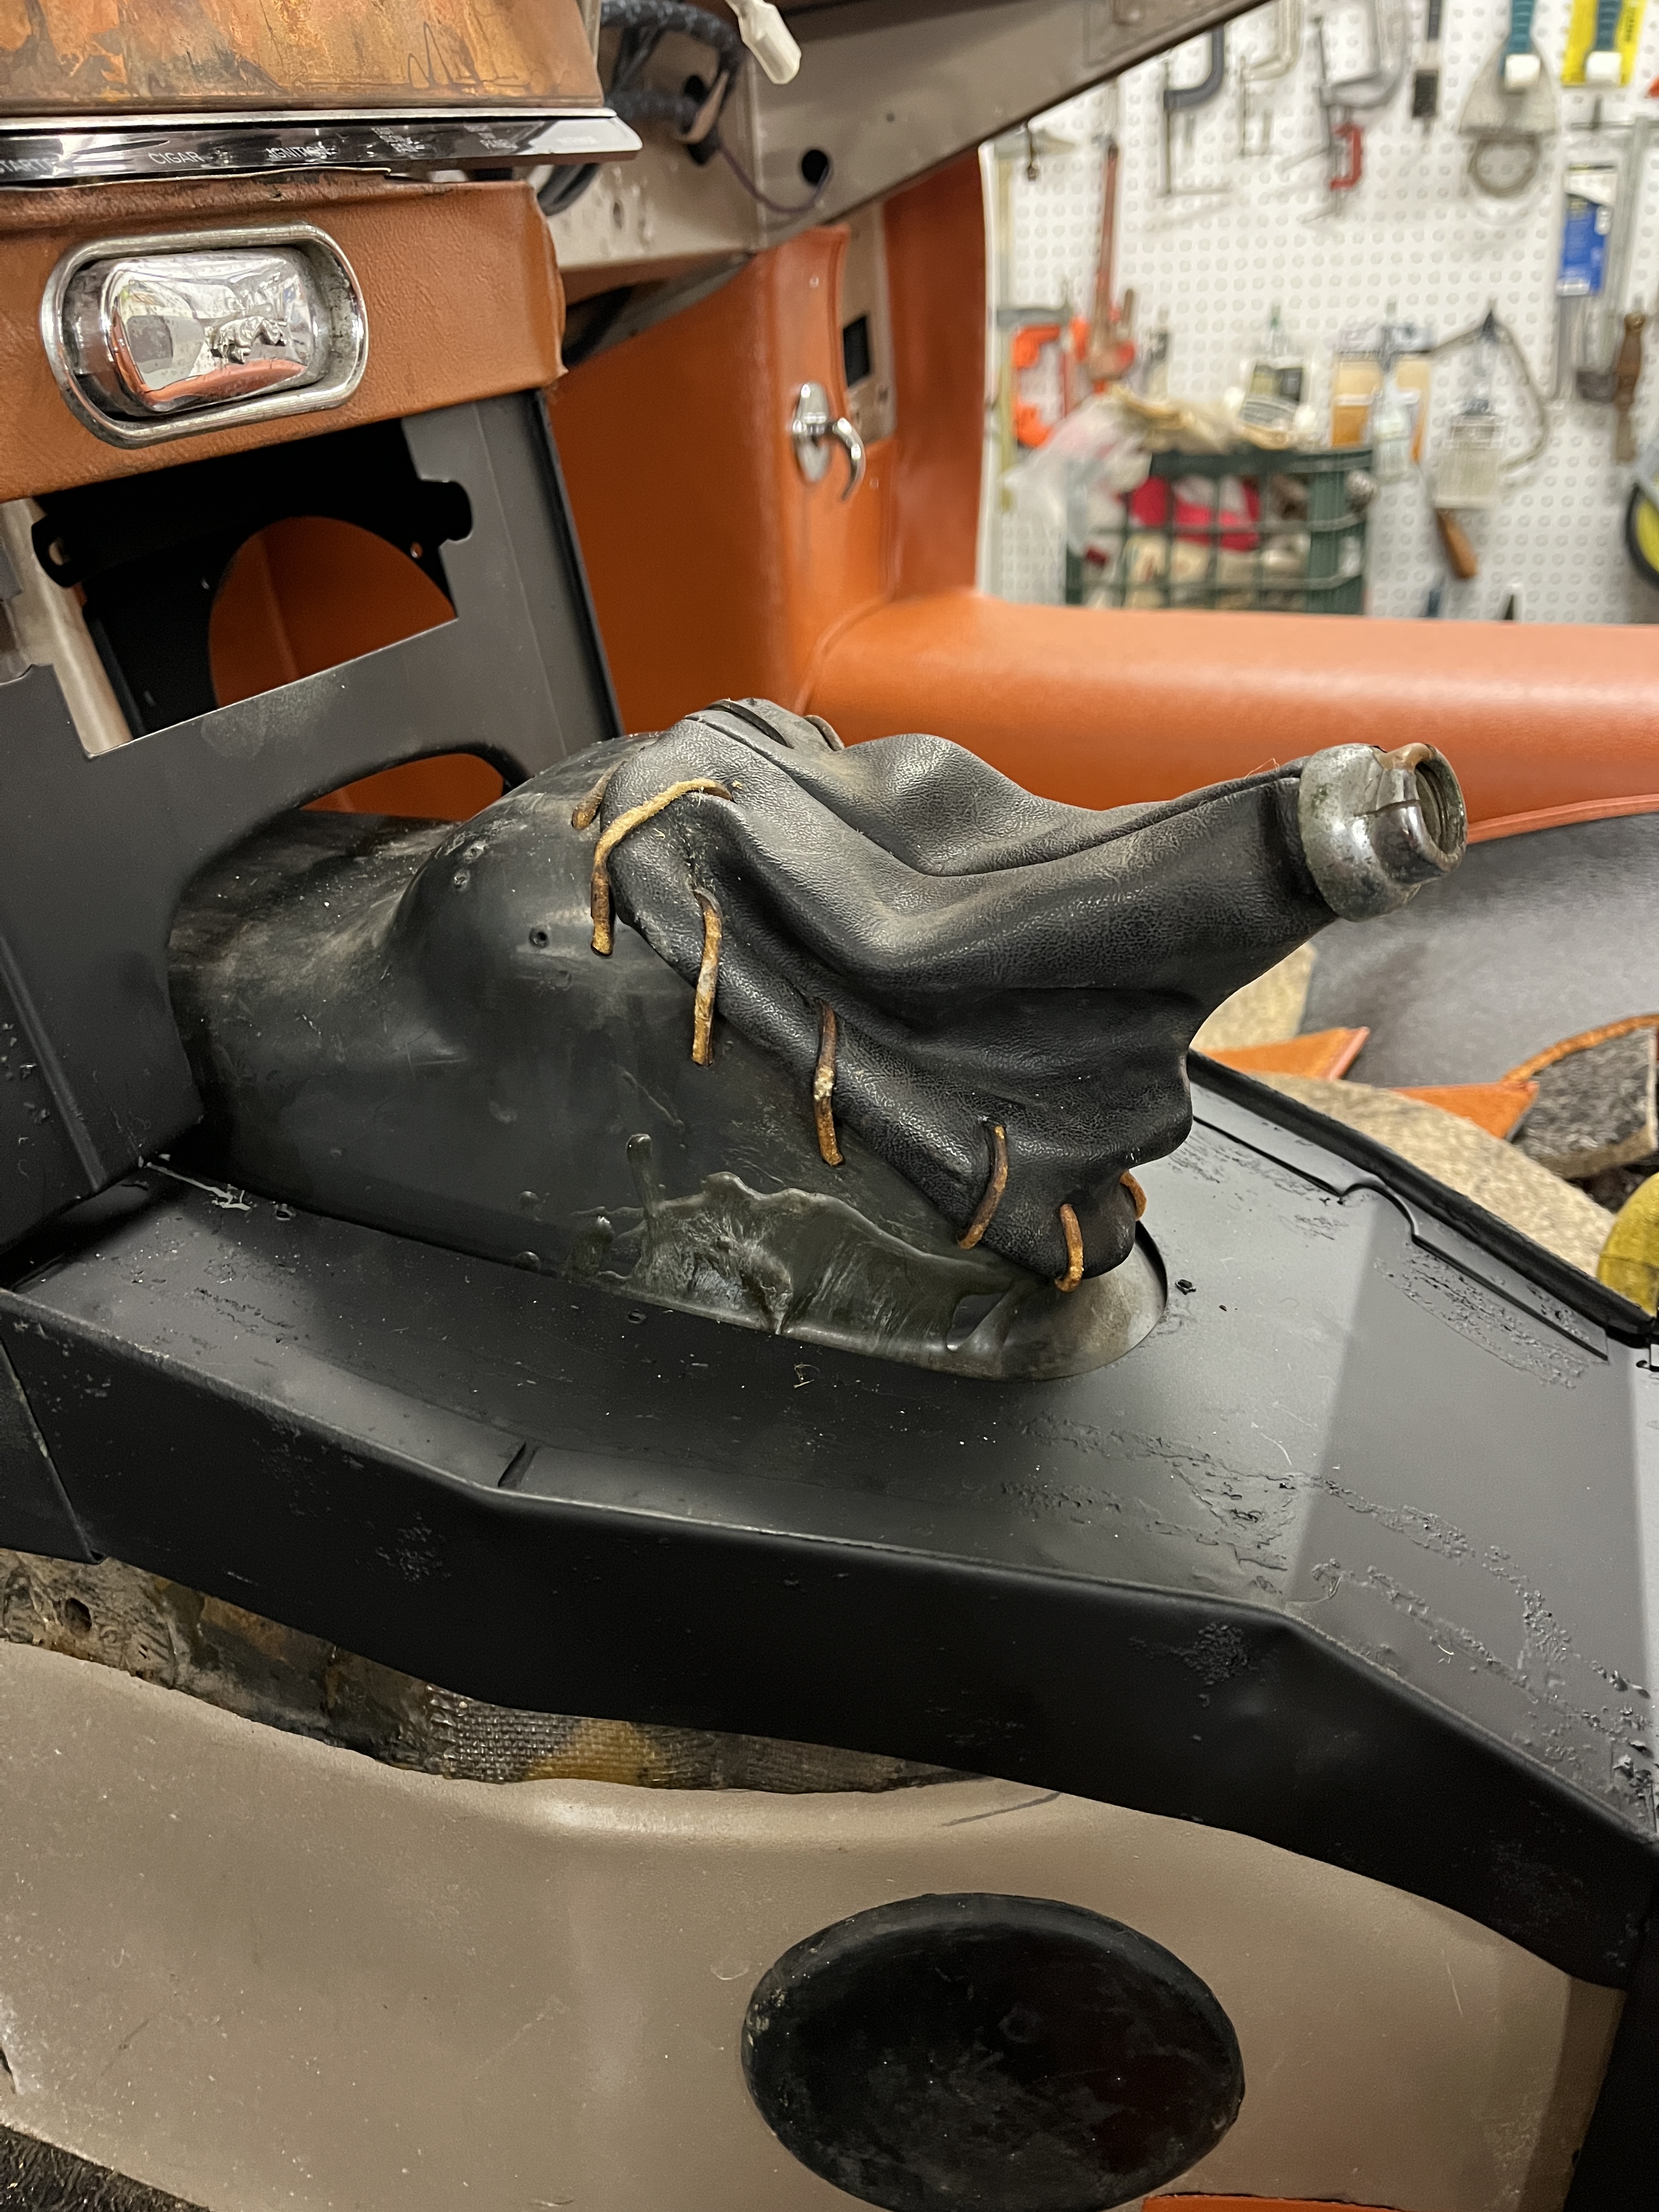
Next I turned my attention to the door sills, the cross member under the seats, and the A-post harduras. There were no significant issues in this regard. Next I got all the underfelt pieces from my kit. They did not come with a diagram. I found that the spare parts catalogue (SPC) has an itemized list for all the felt pieces, although they are not detailed on the related “Plate” diagram. Still, I found the written descriptions in the SPC to be helpful. At this point I was ready to start laying in the carpet. There is a Plate in the SPC that shows the carpet pieces, as well as a written description. But wait a minute. I knew from my experience and that of others that the fitment of the center console could be adversely affected by sound deadener, felt, carpet, etc. The end result is that you can’t lower the center switch panel properly to access the fuse panel. So I decided to stop and mockup the pieces. When I say center console, there are 3 pieces. There is the part between the seats. It has a flat surface that fits around the gear shift lever, sometimes referred to as the “ski slope”. Above this piece and forward of the ski slope is the panel where the radio goes. It has openings for speakers on each side. Above that is a small bracket that holds the ashtray. I bead blasted all these pieces and painted them black. Here they are, with the vinyl already applied to the ski slope.

I installed them in the car. With nothing installed to hold them out of position (felt, carpet, etc), it was a tight but acceptable clearance between the fixed top edge above the ashtray and the legend plate attached to the center switch panel. I was able to rotate it downward without fouling. So I knew that I had to fit my felt and carpet around the sheet metal, not visa versa.
So, I was back to installing carpet. Not quite! I remembered on my 2+2 that one day I realized that the throttle plates were not opening completely. Working backward, I found that the range of motion of the throttle pedal was limited by the buildup of carpet and pad under it. So I decided to install my throttle pedal. First I cleaned up the threads in the captive nuts in the floor. Then I decided to make a spacer to get the base of the pedal up above the thickness of the pad and carpet. Finally, I was ready to install the pads and carpets. This was fairly straightforward, at least compared to the work that preceded it. Test fit the pads, trimming them as required to fit around the console hardware. Glue them in place. Test fit the carpet pieces. Again, trimming them to fit under the console or behind the console hardware. There are spaces to accommodate this, as long as you don’t go crazy. Then glue them in. Well, the vertical pieces get glued (see exception below). The floor pieces just get laid in place and are held with some clips. And suddenly, things are starting to look pretty complete. Except for that center console, which requires trimming with vinyl and the aluminum cross hatch pattern panels. Which is turning out to be a major effort! Stay tuned.

BTW, an obscure (to me) fact. That carpet piece on the side of the transmission tunnel is held in with snaps at its base and is not glued. I gather this is so it can be removed easily if one needs to access the two round openings in the side of the transmission tunnel. One of these openings, sealed with a black rubber plug, is visible in the 2nd picture above. I purchased snaps and installation tools from Sailrite. They have one and only one offering of black snaps. See P/N 121674-10. Their installation tool is P/N 100949. Also helpful is the hole punch P/N 121386. Fortunately the ones they offer are the correct size and profile. I will also use snaps on the hardura mats in the boot area.

Discussion
Comments are closed.