Now that paint is done, I have moved the bodyshell into a 2 bay garage where I will do mechanical assembly. Basically everything else needed to complete the car. This garage is fully weatherproof with heating and cooling and TV/hi-fi/internet. My man cave. As I started in October, I decided to take advantage of the moderate weather and tackle upholstery. This was mainly driven by the fact that upholstery uses contact cement and that stuff is best used with the doors open and the pilot light on the gas heater turned off.
Over a year and a half ago, I embarked on ordering my upholstery “kit”. An upholstery kit gets you a bunch of pieces. What you get depends on who you are dealing with but in general you will get everything they can make short of installing it on the car. The Heritage Certificate said the car was built with a Light Tan interior. It sounds rather innocuous but in reality it was difficult to track down this color, at least how it presented in the day. I discovered that it has a distinct orange tint. I only found one US distributor of Etype upholstery kits that could supply me with this color and they were an outfit that I had promised myself not to deal with again. Alternatelly, based on their excellent reputation, I would have liked to have gone with OSJI in Muncie, Indiana but they could not source the correct color.
My sights turned to the UK. I called Suffolk and Turley, a firm with a good repuation here in the US. I suspect I spoke with one of the original owners. He said that he remembered the color from when he worked for Jaguar and could probably supply it. But negotiations broke down when he said he had an exclusive deal for US customers where I had to go through Classic Jagauar. I have nothing against them but I was trying to avoid a middleman markup.
A few calls later I was speaking with Mr. Graham Watkins at GB Classic Trim, also in the UK. Graham was familiar with the period color light tan. He agreed it has a lot more orange in it than the name would imply. Here is the sample card he sent me.
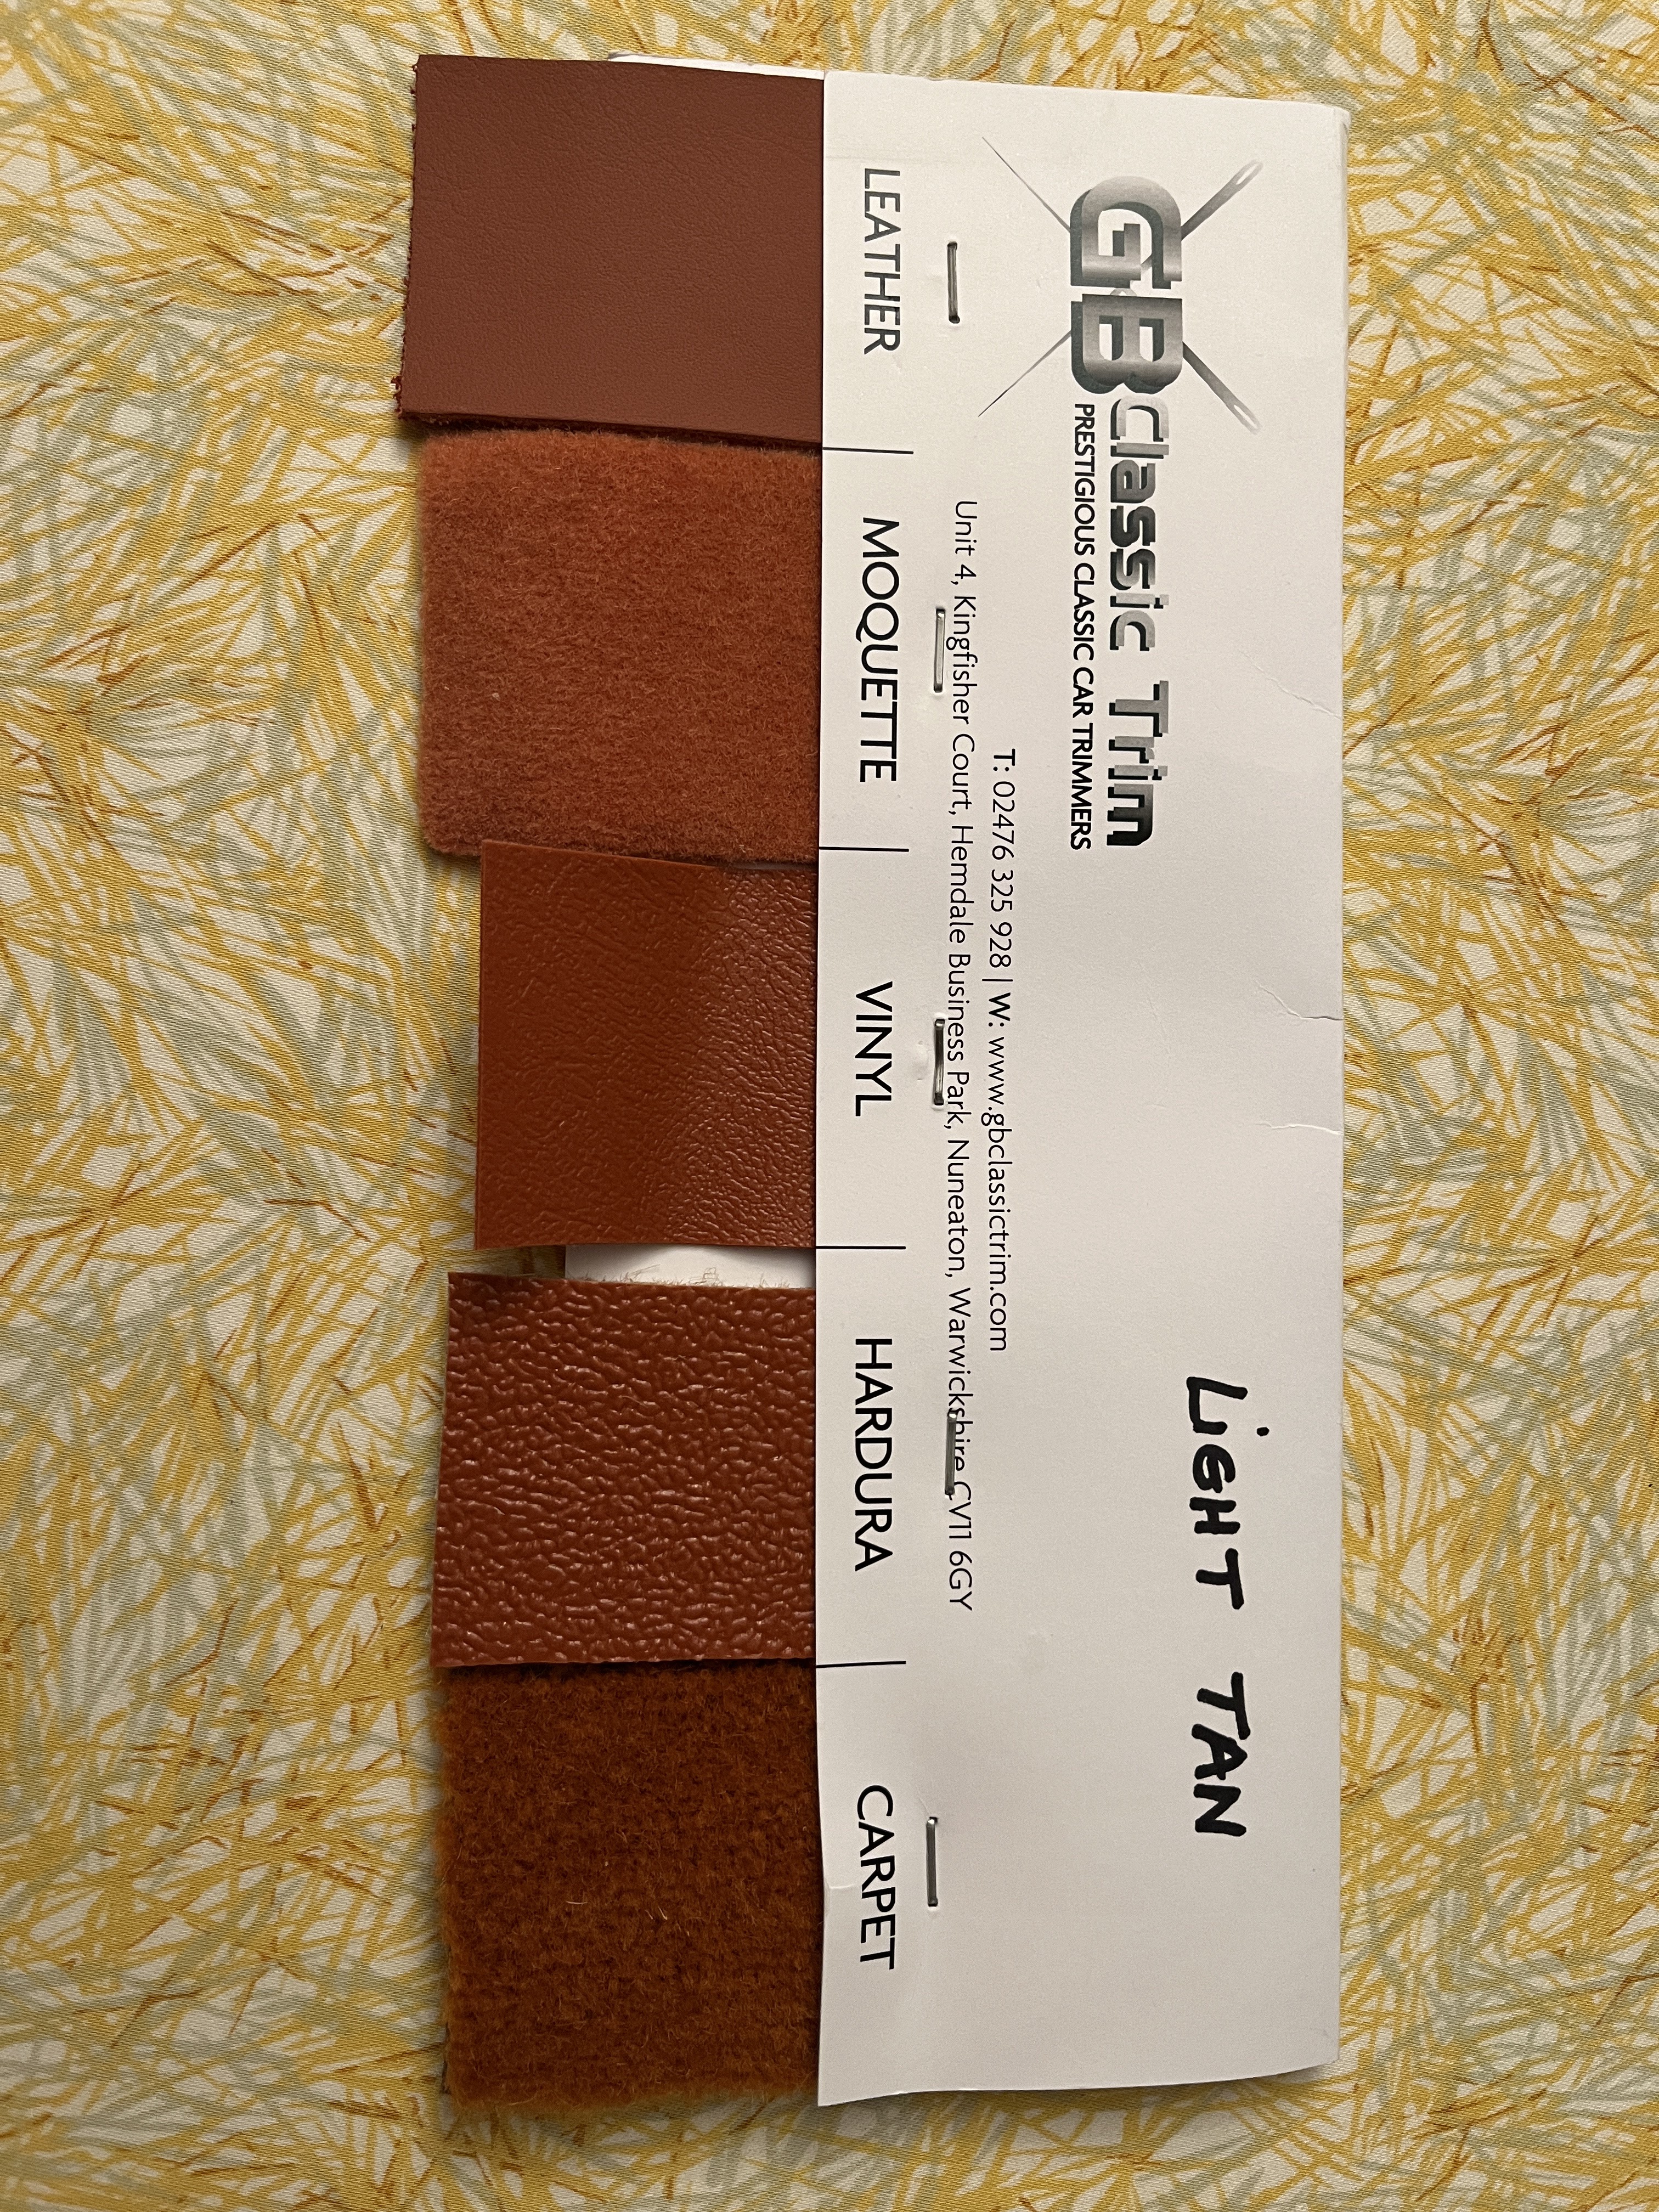
BTW, my wife is not into orange and hates this color! I’m OK with it since it is indeed the color the car was born with. I keep a close eye on other Etypes, typically on Bringatrailer, that go up for auction with Opalescent Golden Sand over a Light Tan interior. I would say that some love it and some hate it. Everybodies brains are wired differently when it comes to color is all I’m going to say. Graham was very helpful and I wound up ordering a kit from him. Interesting to note. I asked him about Connoley leather. He advised me against it. He said their product was surfaced dyed. Authentic but easy to scratch. His source for leather used a through dyed process. And it was less money. Sounded good to me. At the time my order was charged to my credit card, the pound was in the 1.35 range. I got the entire kit, including shipping and customs, for around $5700. This included many extras above the basic kit, including the sunvisors, glove box insert, protective carpet overmats, and extra vinyl for “just in case”. I was very pleased. The large box that everything came in has been sitting in my basement for a year but now I am getting into it.

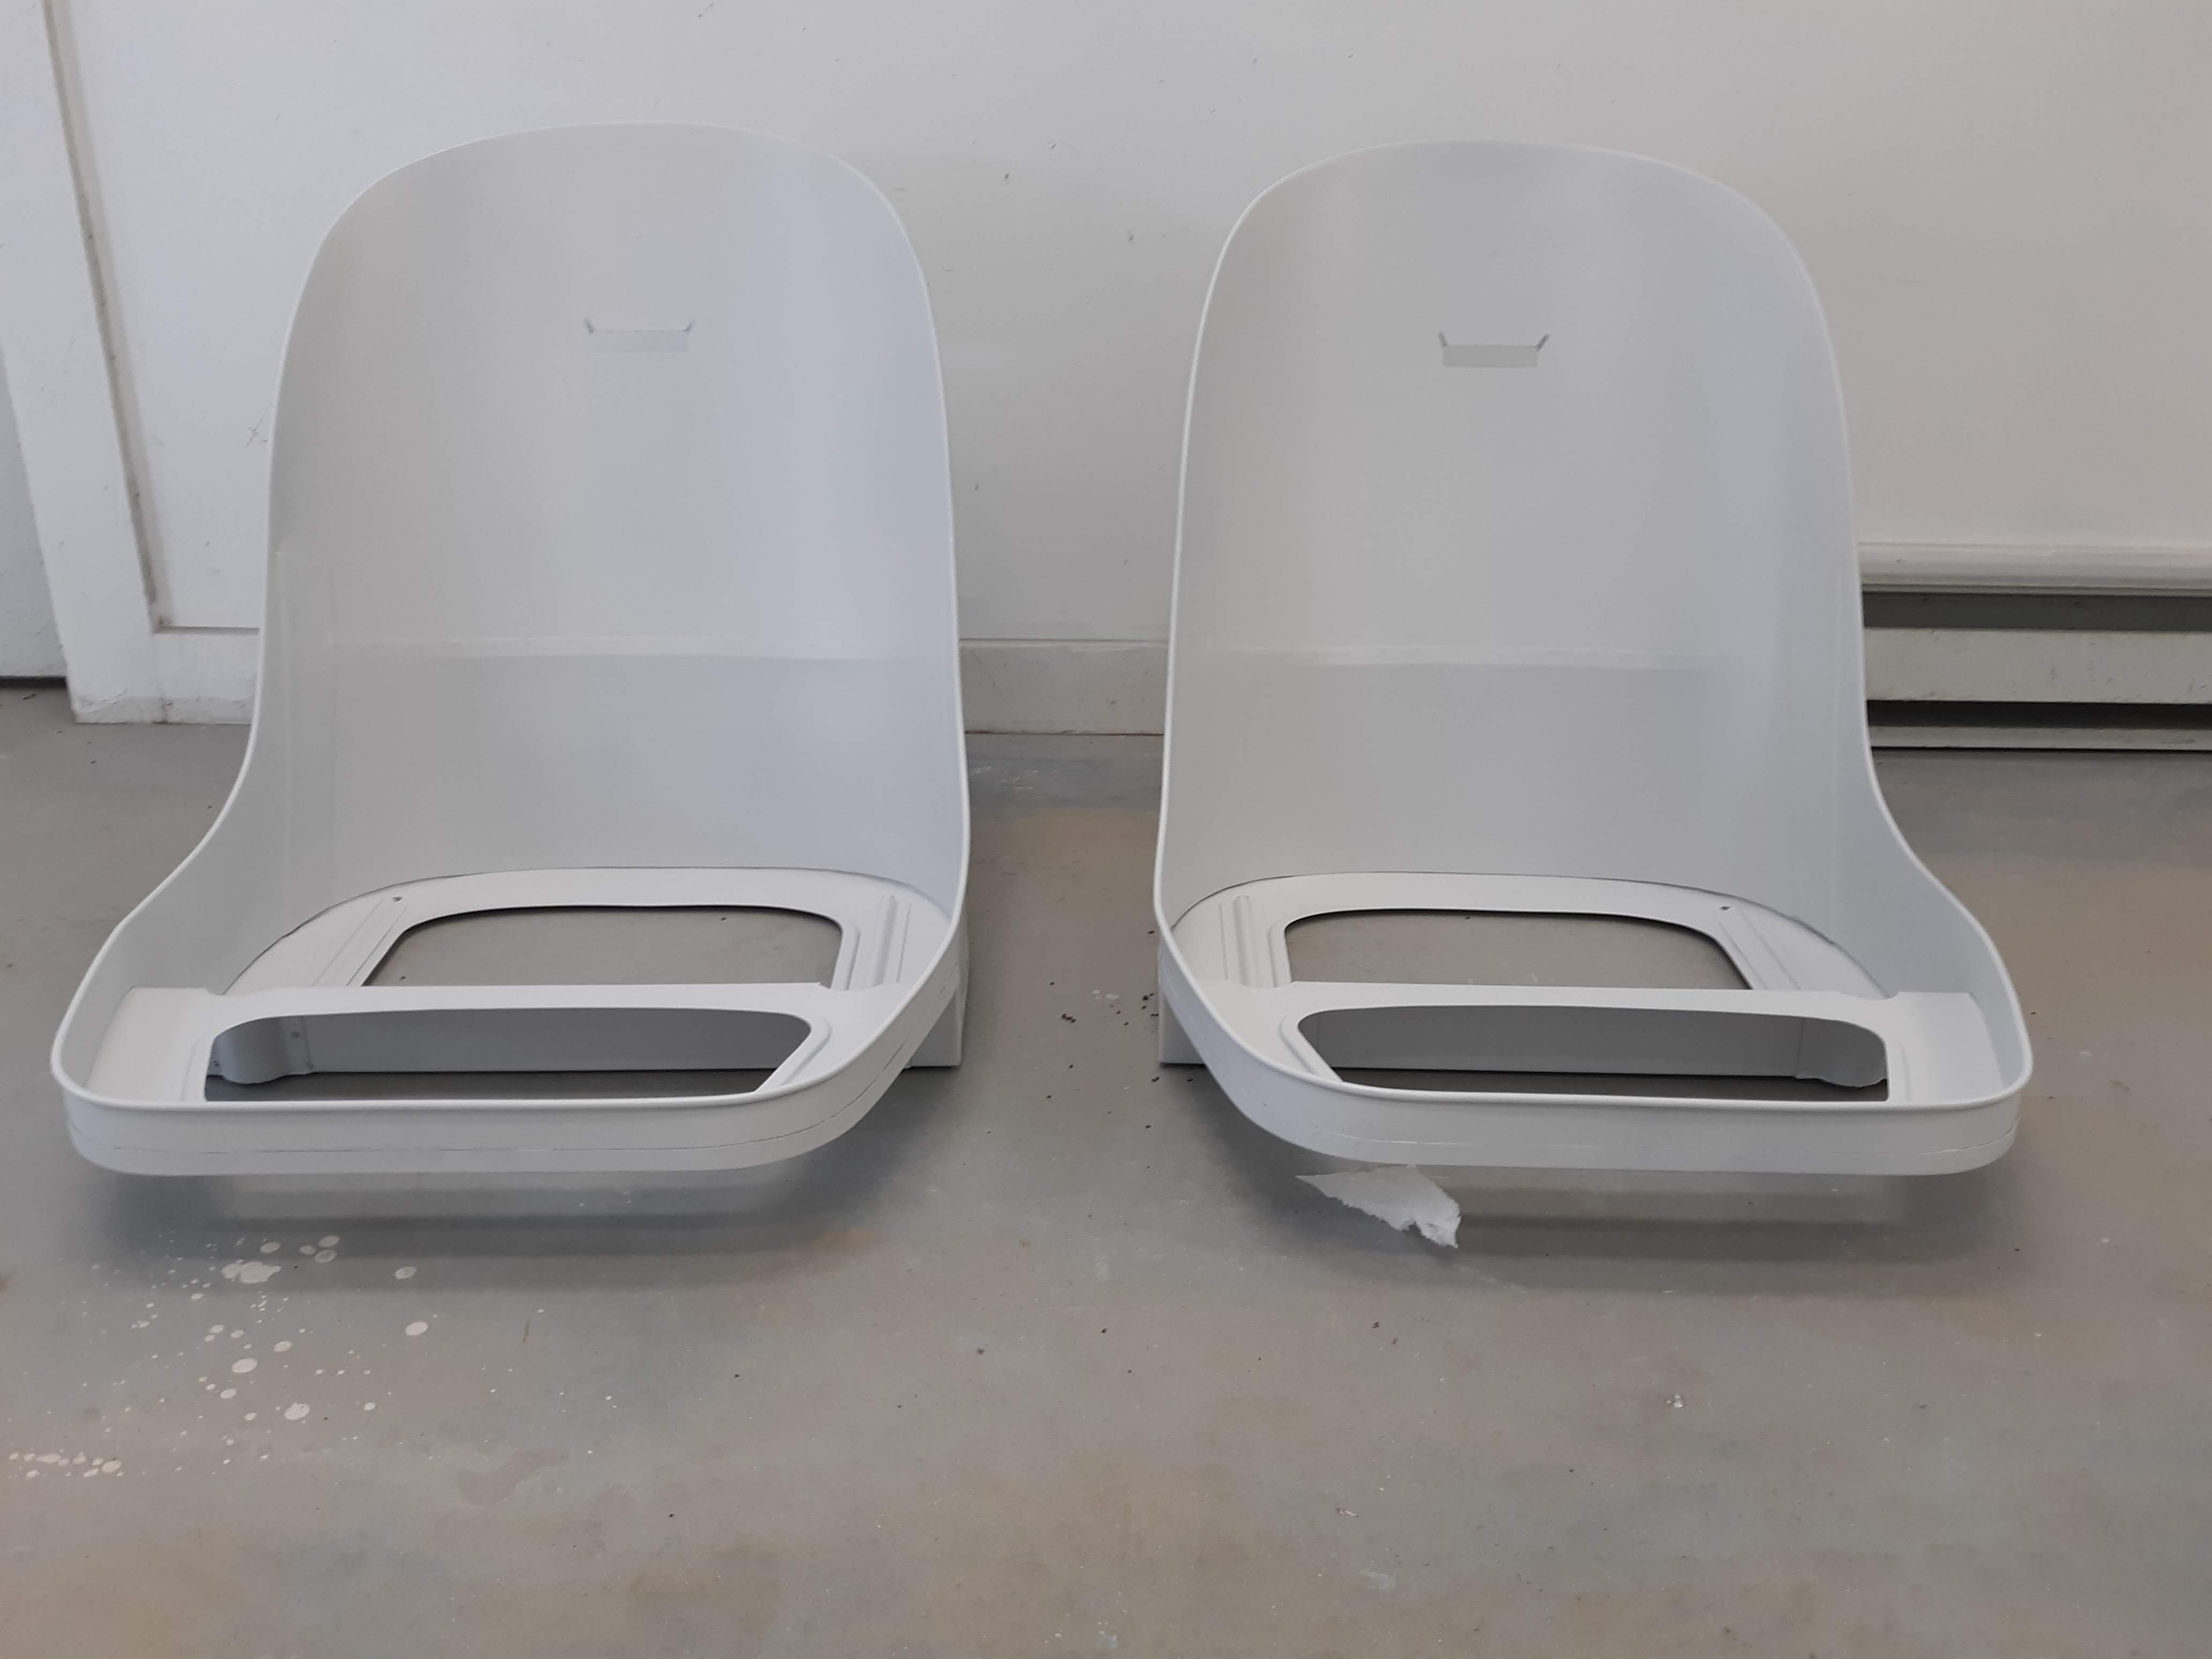
Another thing I did last year was evaluate my existing seats. I think I have written about this before but the seats I had were re-upholstered in black vinyl, with no sign of Light Tan underneath. Also, they were roadster seats, not coupe seats. And the frames exhibited some rust. My originality research led me to believe that although some early FHCs where delivered with roadster seats, my car would have been delivered with the wider and more reclined coupe seat (Ref. McKay Original Jaguar E-Type, pg. 58). I wound up purchasing a pair of nice reproduction coupe seat frames from Chuck at Monocouque Metalworks. As my wife says, the seats are one of the first things you see when you look in a car, so I deferred the application of the seat covers to OSJI in Muncie, Indiana. I shipped the 2 seats and the kit off to them as I started my other upholstery work.
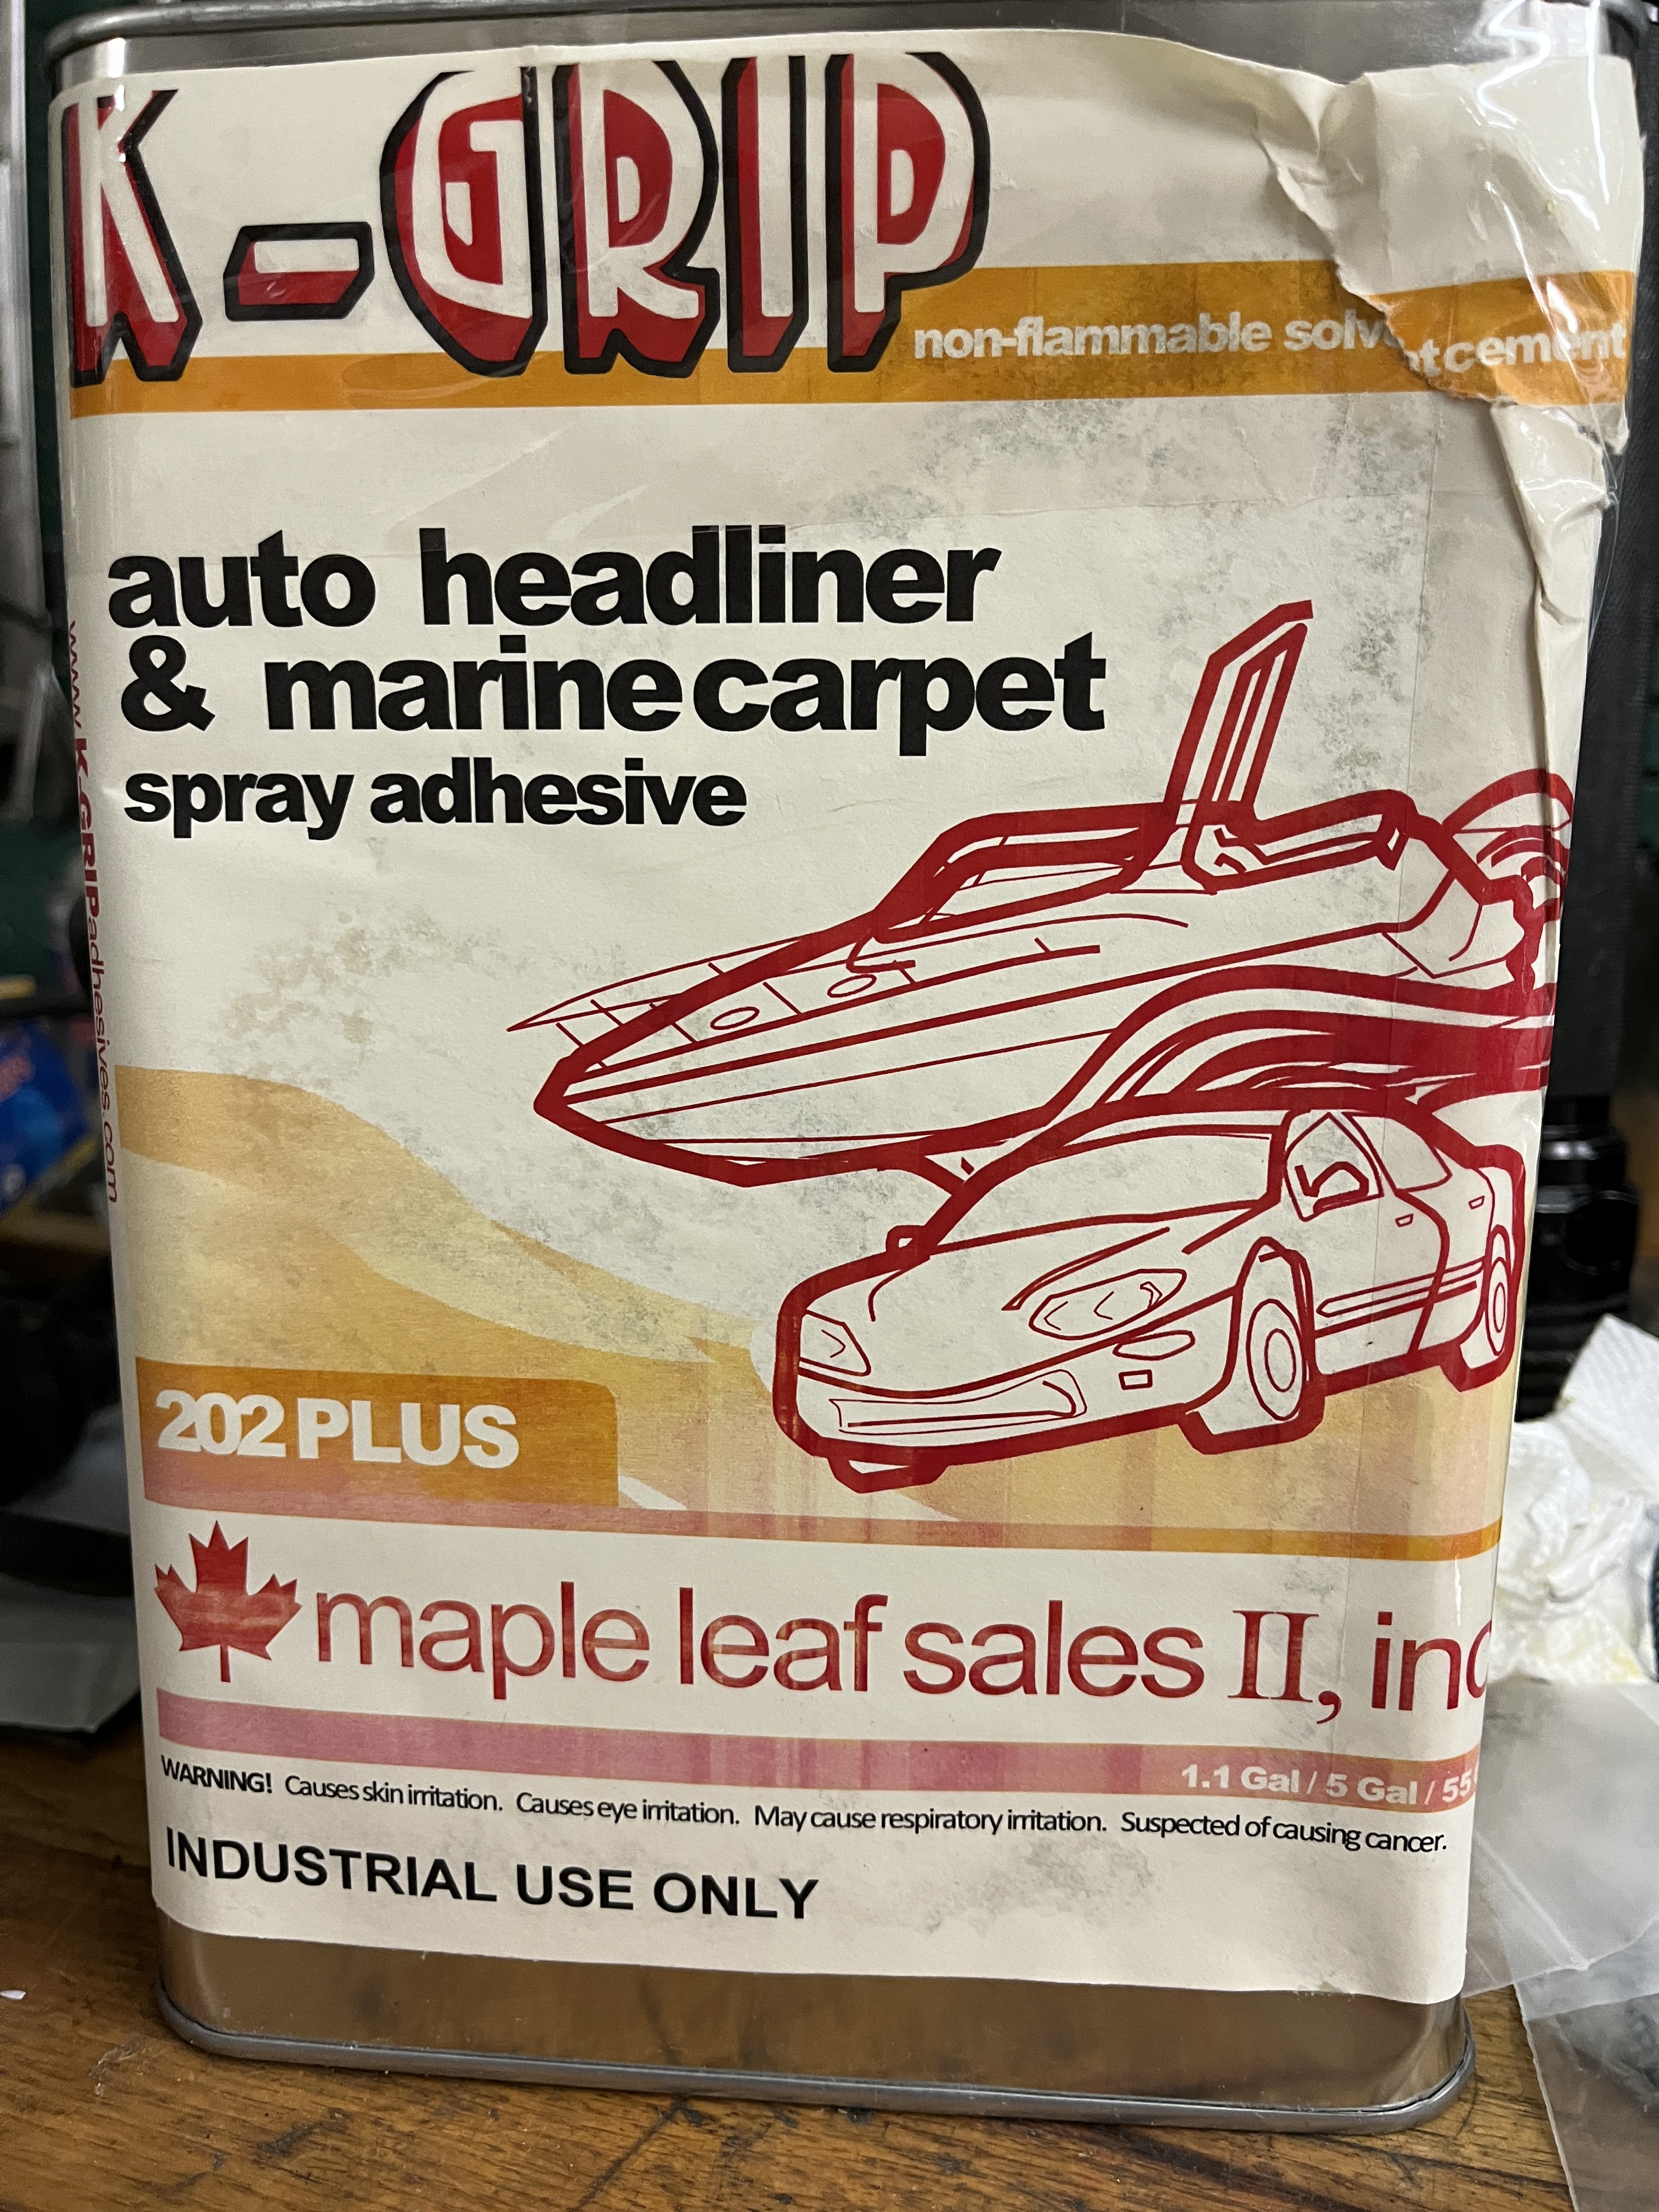
As most people will recommend, one should start from the top down. The first job as to adhere the beige cloth headliner material to the inside of the roof of the car. For this, I use K-Grip Auto Headliner & Marine Adhesive. This adhesive is rated for the high heat environment of a roof. I used it 15 years ago on my 2+2 and the headliner is just fine all these years later. Another advantage is that it has a 4-5 minute cure time versus the 20 minutes for a product like Weldwood. To do an upholstery job to a nice standard, I have to force myself to work small sections at a time. The short cure time lends itself to this way of doing things.
The main section of the headliner comes oversized. It is glued to the bottom of the roof and then trimmed to size. Around the sides are shortish (2″-3″) “curtains” that are stuffed into a space at the roof and glued down. This article about doing the upholstery in my 1967 FHC 2+2 describes the process in detail.
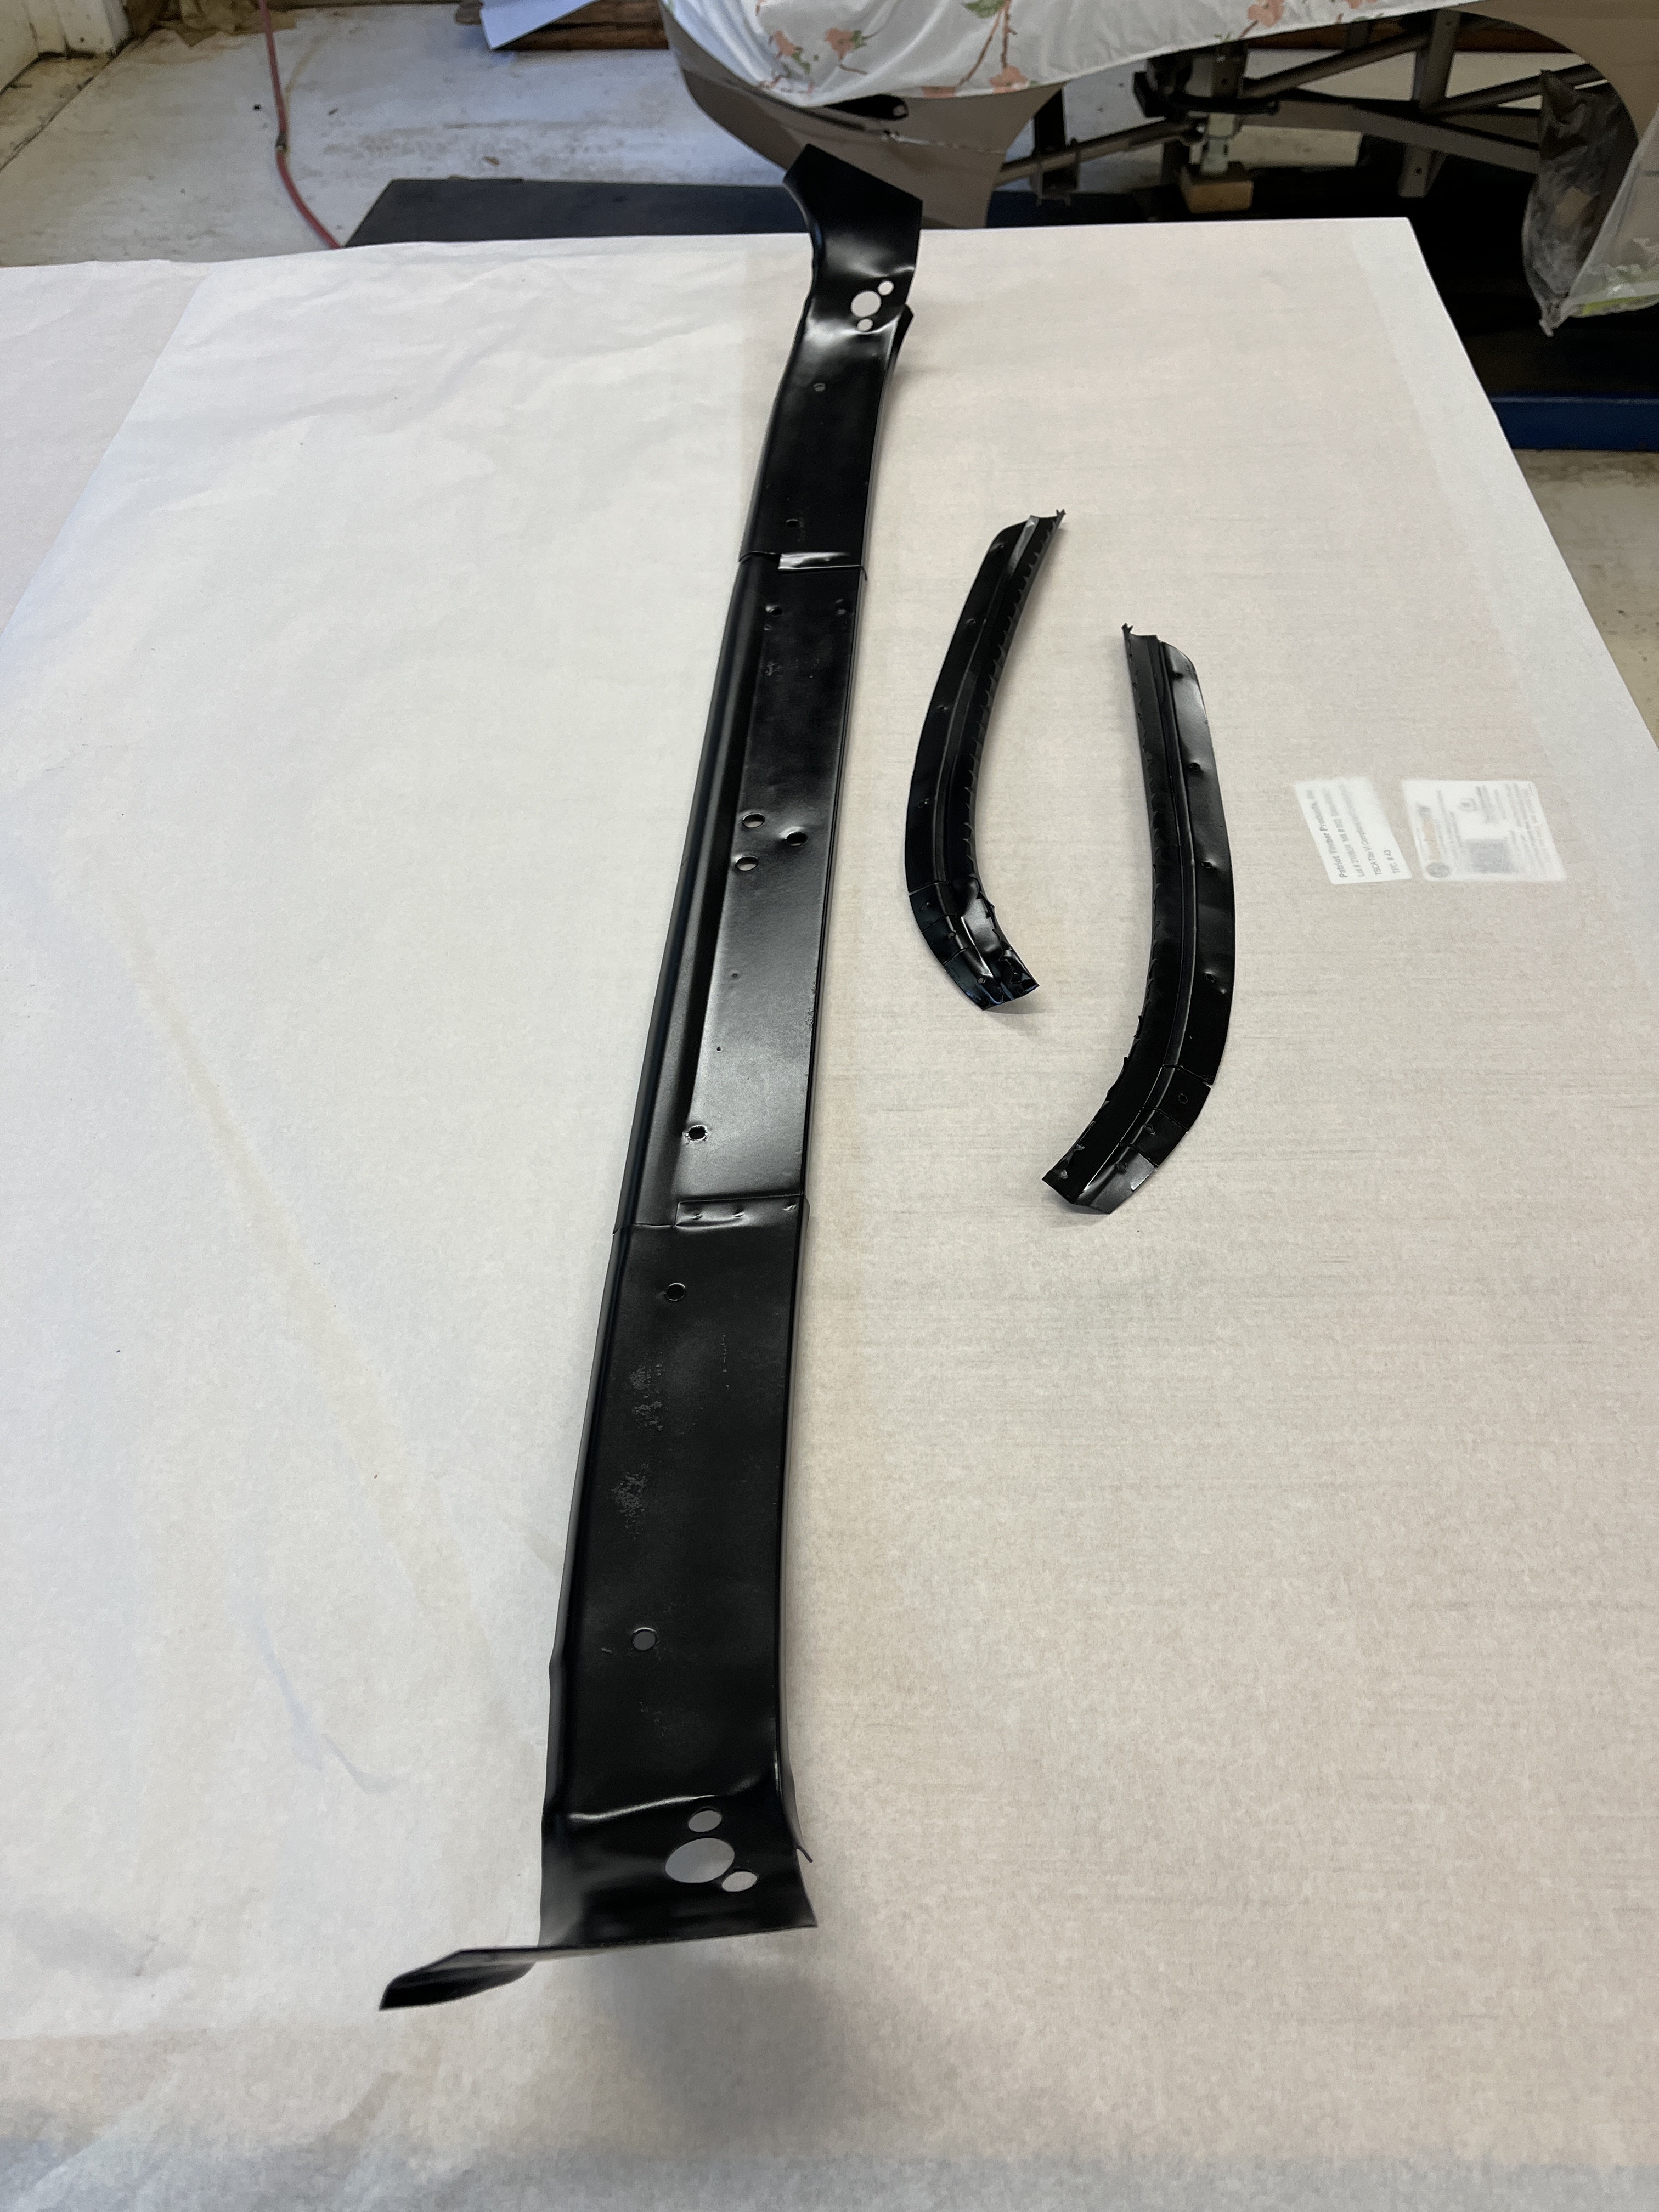
The 63 FHC came in boxes and I have a number of the original upholstery pieces. Thank goodness, as they provide important clues as to the way the car was upholstered in January of 1963, which was a period of change in the construction of the Etype. Also thank goodness in that I have the various metal “substrates” over which the upholstery is glued. Some of these are complex shapes and would be difficult to reproduce. Here are two examples. A header piece that forms the headliner at the front of the cockpit and two sections at the rear which grab the headliner with little teeth.
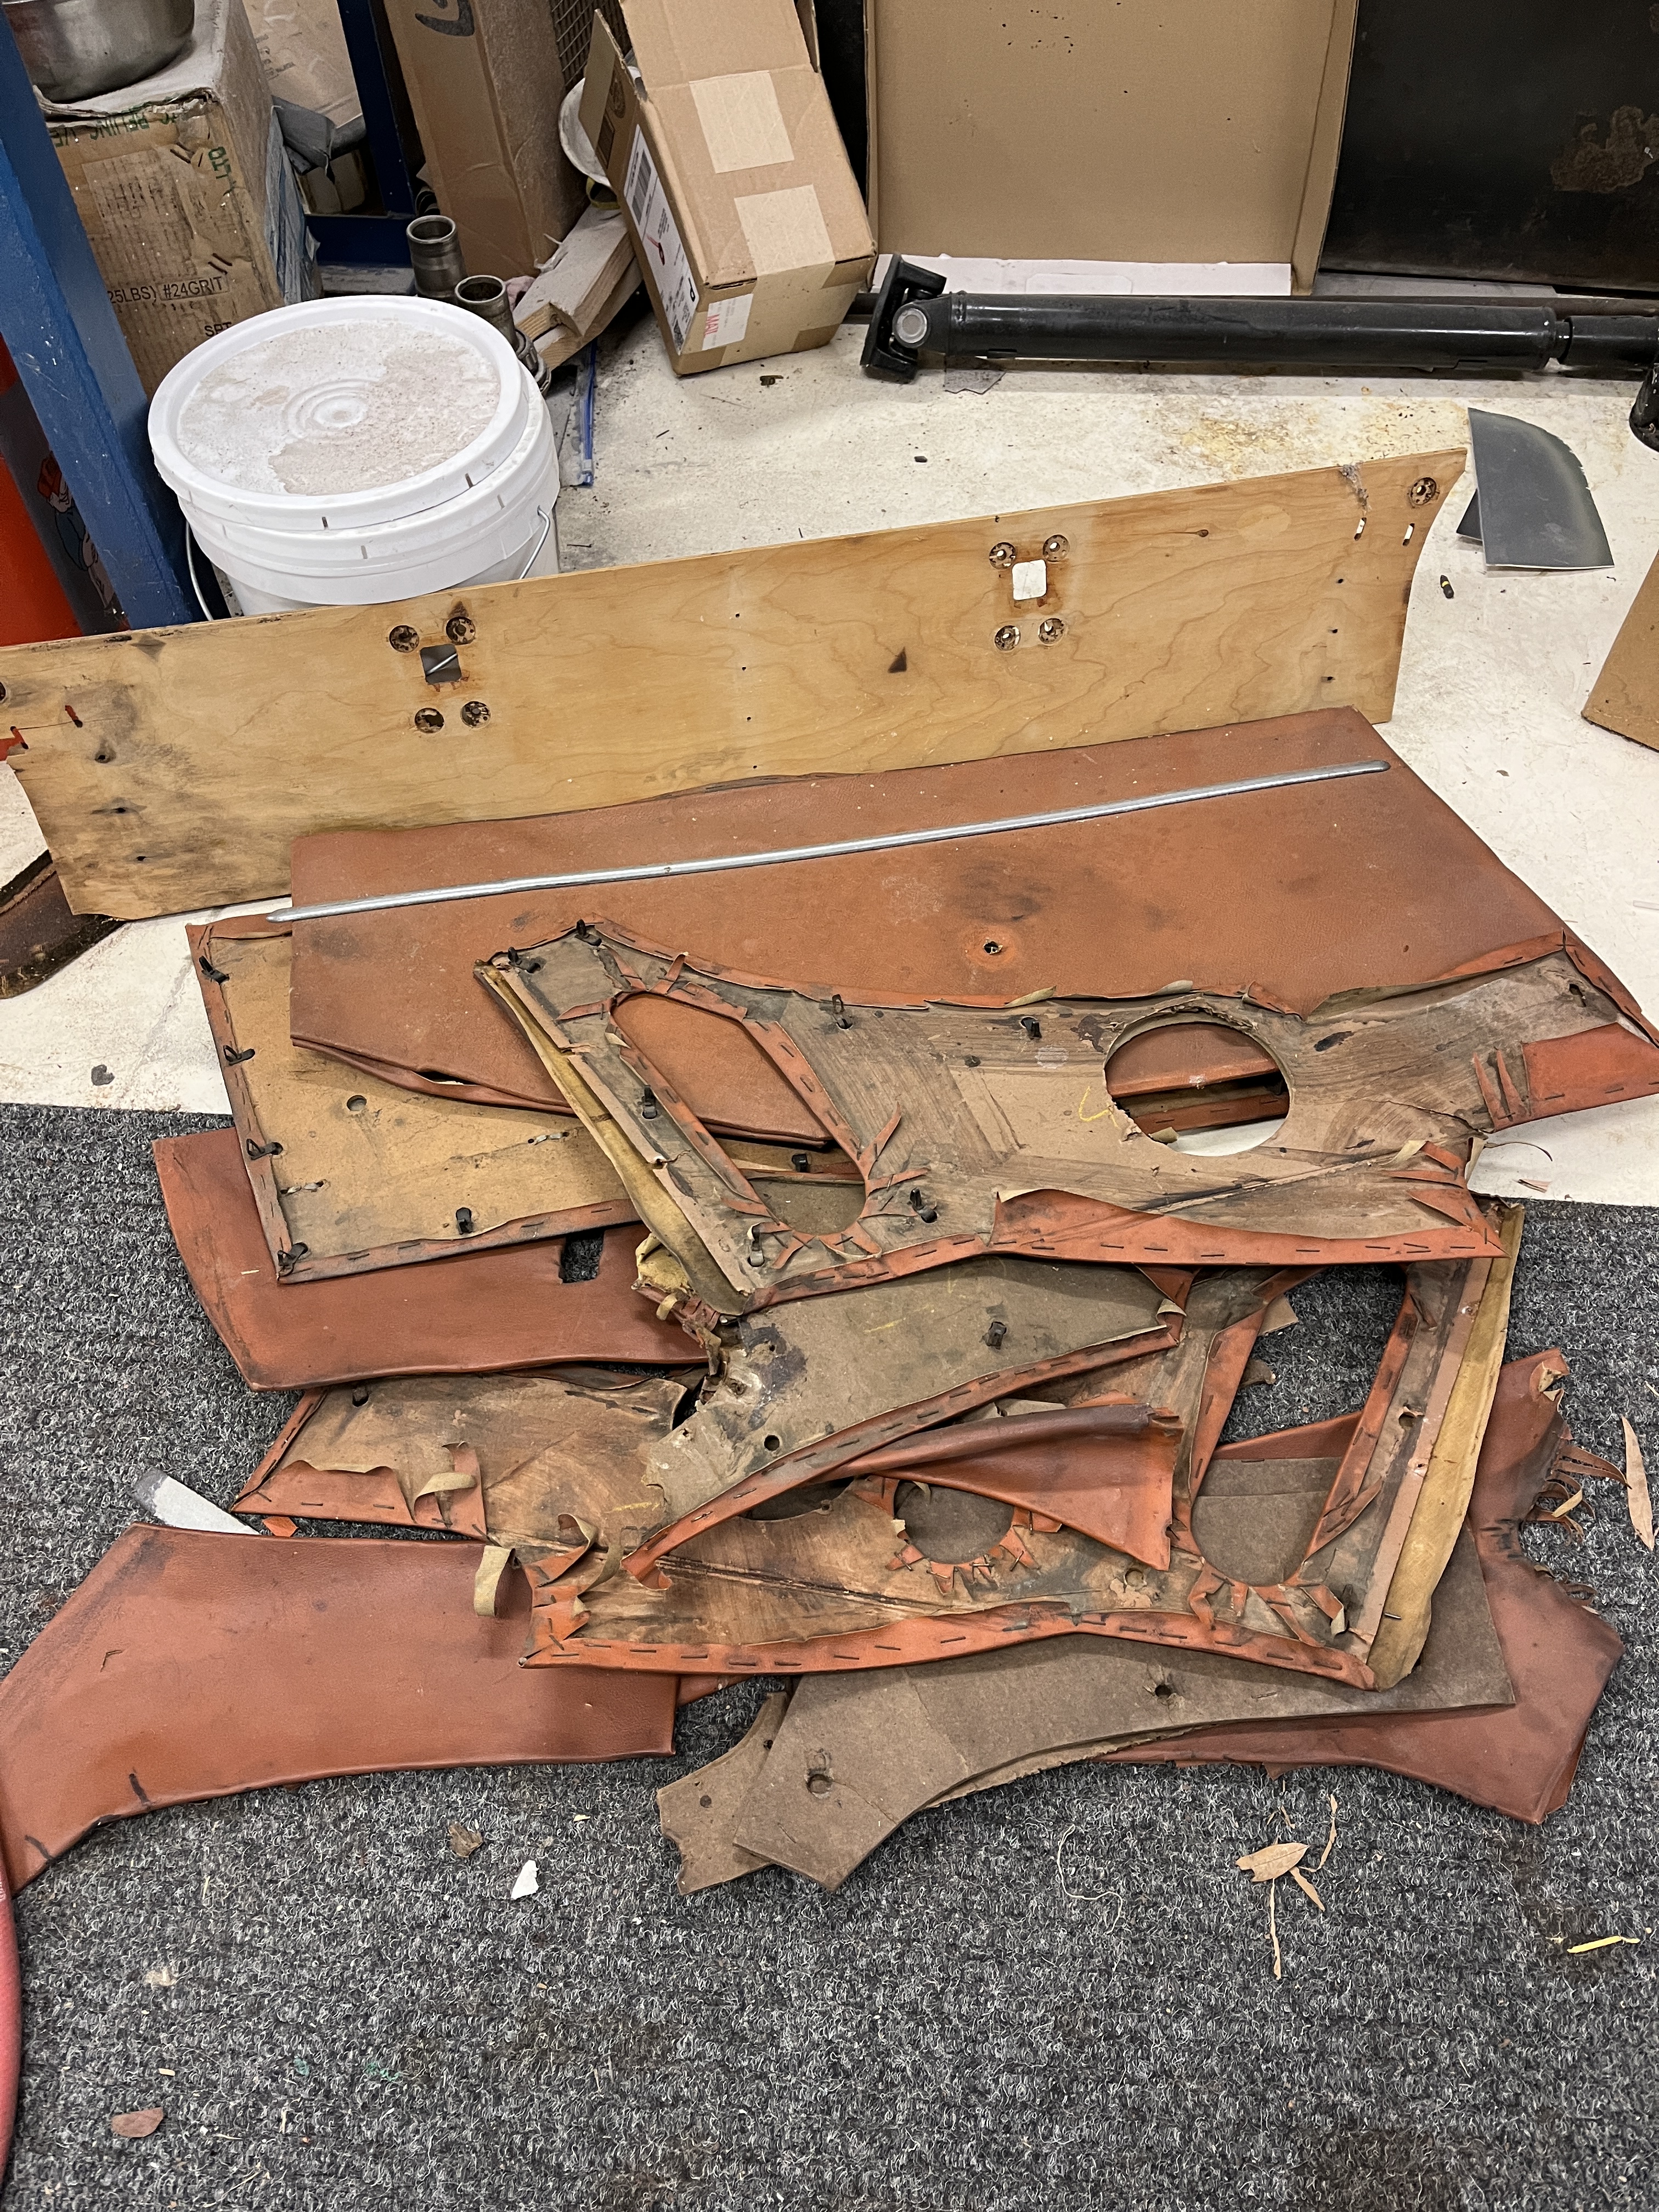
Completion of the headliner at the rear of the cockpit was immediately held up by the need to fit the formed PVC piece that goes around the hatch opening. Modern reproductions are available but seem to be less than correct in shape. Fortunately I had the original piece from the car. Initially, it looked pretty rough. I cleaned it up and applied multiple coats of color matched trim paint that I purchased from Colorplus.com. An initial fit check showed the piece to be too short. Application of heat from a heat gun made it pliable and I was able to install it, gluing short sections at a time, stretching it into the 4 corners of the opening. It can be seen in this photo, along with the moquette pieces applied over the wheel arches, and various items applied to the tool storage box.
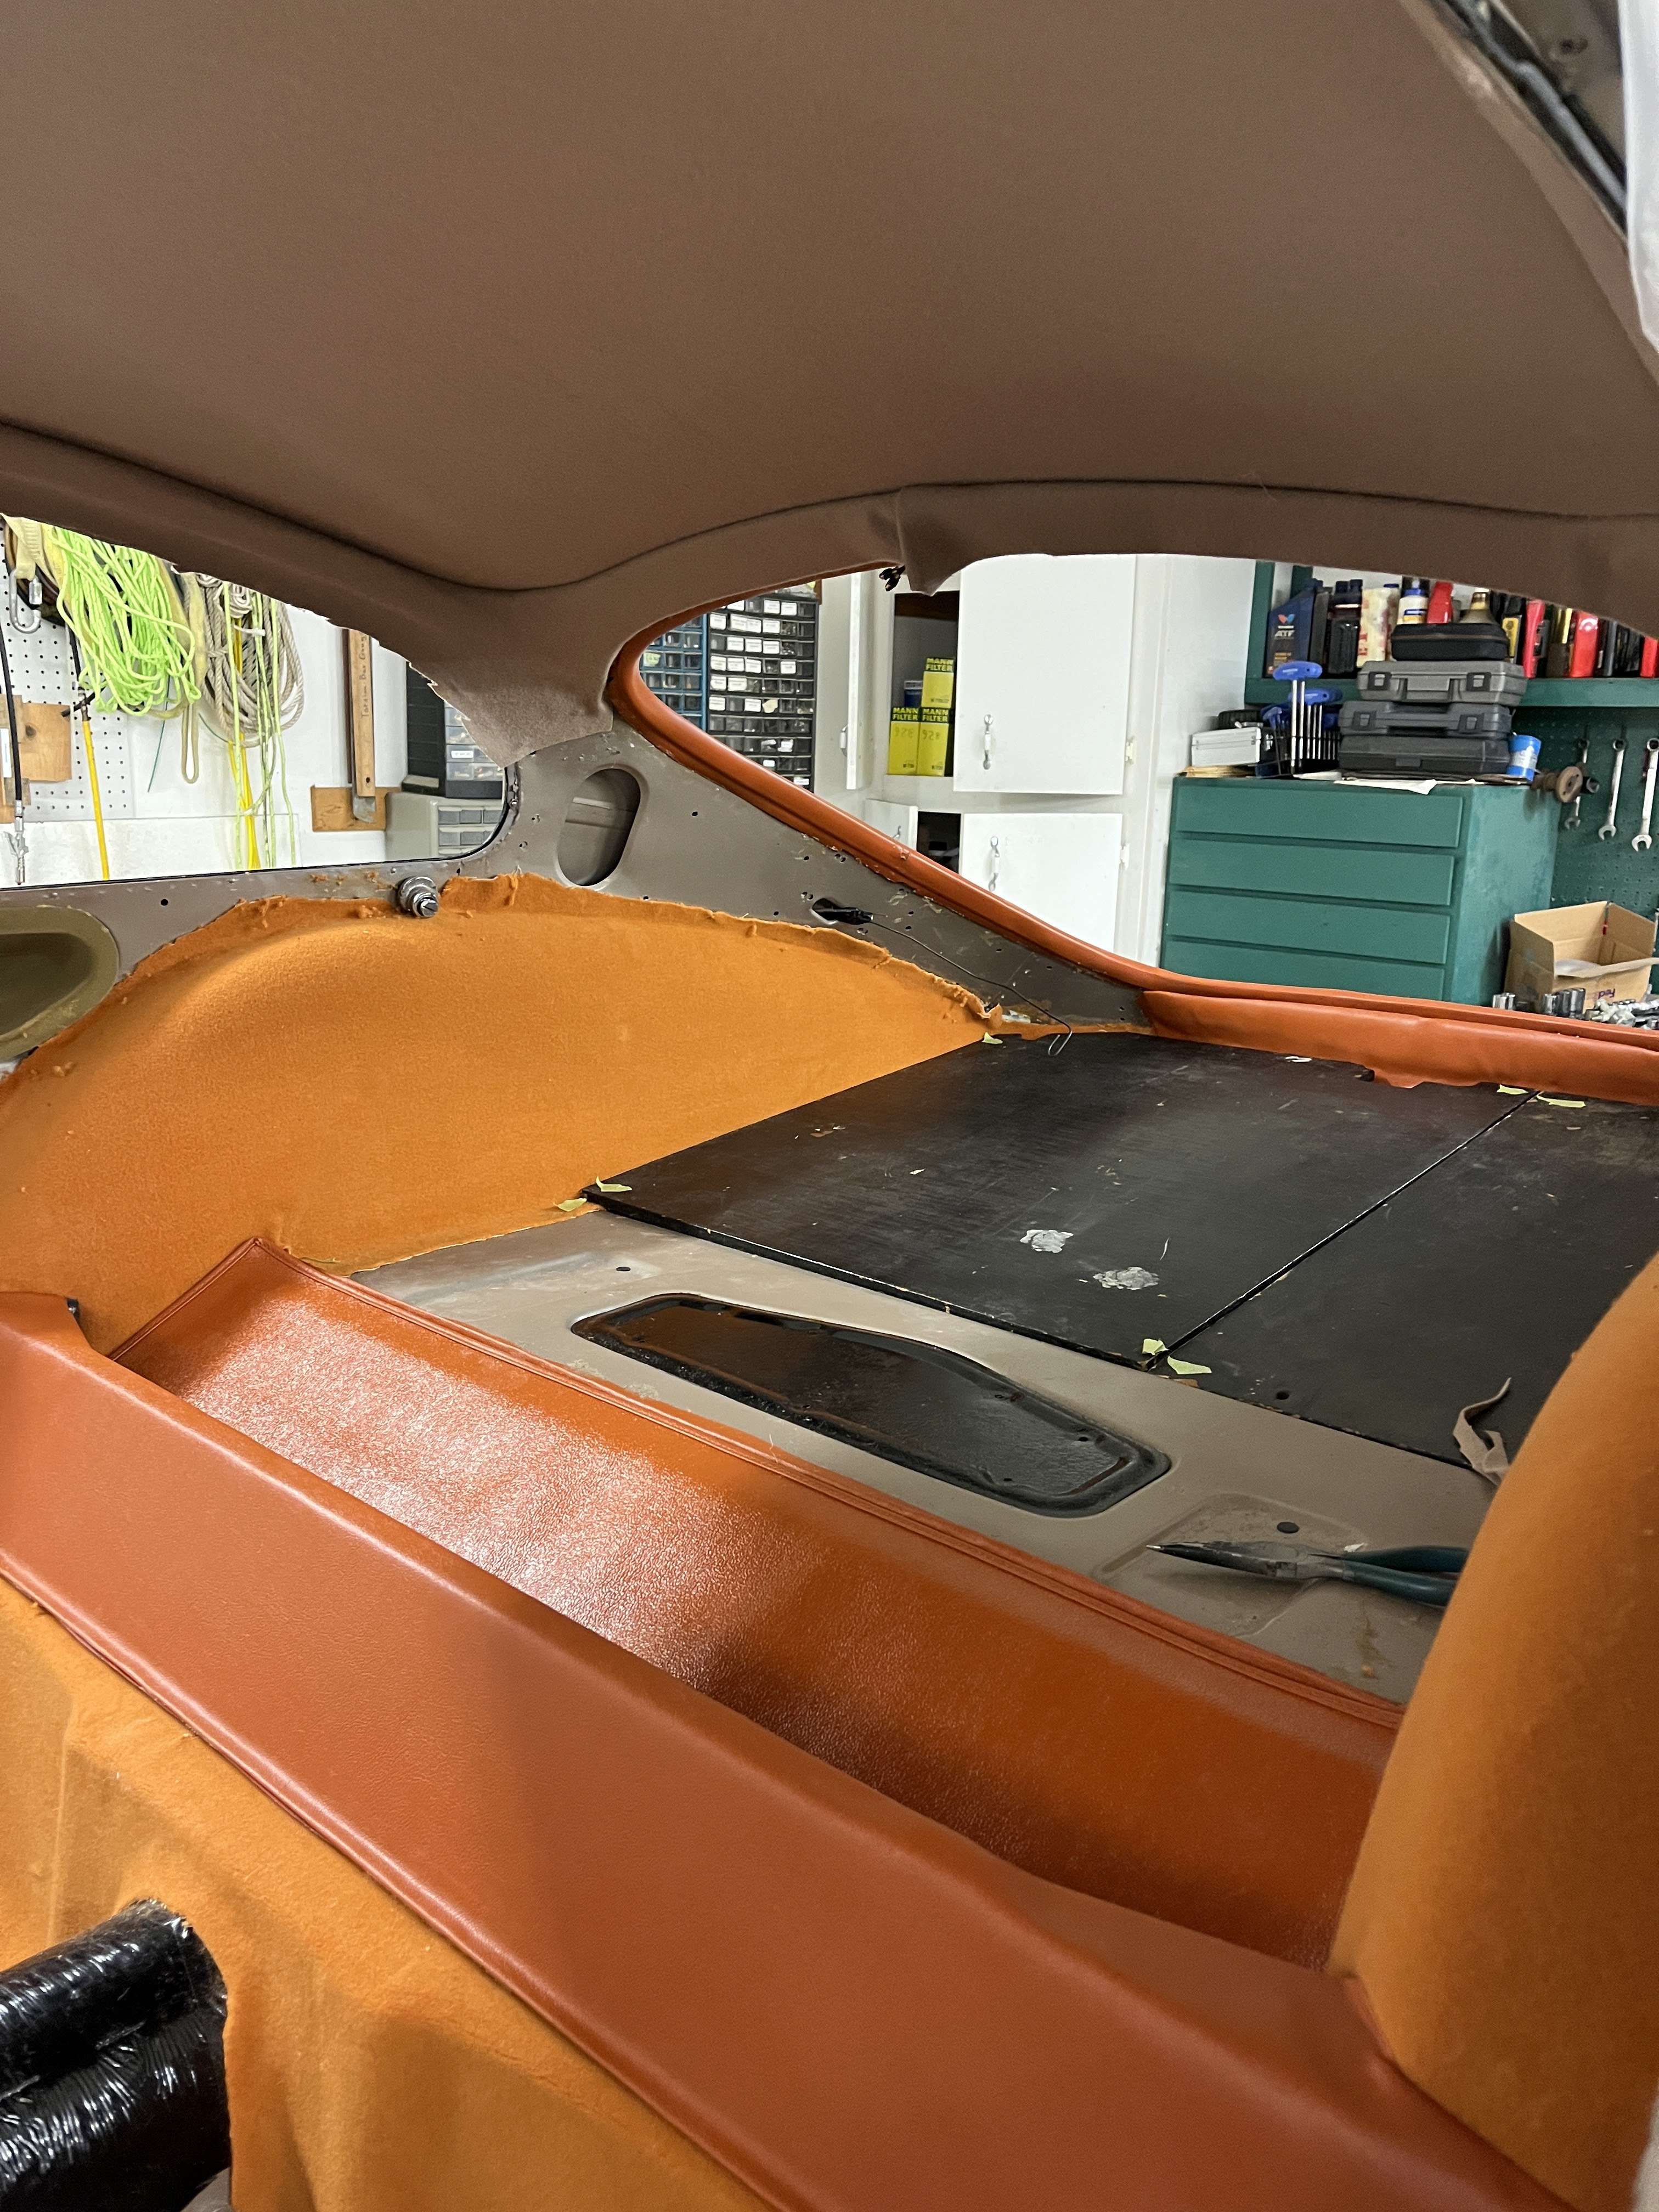
In this photo, you can see 4 of the 6 upholstery materials used in an E-Type. In the foreground, there is vinyl forming the forward side of the tool box. Behind this piece, the material with the pebbled texture is Hardura. Just like it sounds, it is more durable than vinyl and is used in areas where a more rugged material is needed, like in the tool box. On the rear wheelwells and the bulkhead, the lighter orange material is Moquette. It is like a fuzzy carpet with a very thin backing. As such, it will form over 3D shapes more easily than the vinyl will. The light tan cloth headliner material is visible in the overhead. All that is missing is carpet and leather. Those are coming!
Next up were the cantrails. A funny name. They extend from the bottom of the A post, around the top of the door and the rear vent window, terminating at the C pillar. These are also a complex shape. One wag on Jag-Lovers said that cantrail is Latin for “Can’t be Upholstered”. The base is a relatively flat shape, kind of like a hockey stick. But across the top over the doors, there are a hemisphere of rigid foam glued to the metal. I think this was meant to absorb some energy in a side collision where one’s head might strike the door frame. This makes the shape a much more complex 3D shape. Trust me, 2D vinyl does not want to form gracefully over this shape. I made my best attempt to cover them without wrinkles. Upon trial fit on the car, where a 3rd curvature is introduced, as the side of the car they attach to is not a flat plane, additional wrinkles have shown up. I plan to keep what I have for now but I intend to swing back around and redo them later.
Then I started work on the hinged lid to the tool storage box. That turned out to be quite an effort. The lid if made from 3/8″ plywood and at some point mine had become wet and rotted at one end (shown in the picture of old parts above). No problem, I’ll make another. Easier said than done. Jaguar used a plethora of chromed hardware pieces to complete this simple box lid. BTW, the official SPC designation for this lid is “Hinged Extension Assembly for Luggage Compartment Floor”. Even the name is grandiose! There are 3 distinct versions of the the lid in the SPC and each one is a little different. My car number, 888055, is covered by the 2nd version. Major line item hardware pieces listed in the SPC are hinges (3), stud fixing extension in lowered position (2), chrome strip along edge of extension (1), sliding catch securing hinged extension in raised position (2), luggage stop arm assembly (2), and cover plates over luggage stop apertures (2). And a variety of screws. I had most of these pieces on hand, although one of the more expensive items, the chrome strip, had gone missing. Using the old lid as a pattern, I used my router to make pockets for the sliding catches and the luggage stop arm assemblies. I also had to drill recessed holes to accept a variety of nut plates required to attach certain items. Then I had to trial fit the lid to the hinges. In the open position, the lid is very tight to the curvature of the wheel wells. I removed material in small increments until I got it to fit snuggly. Finally I covered it in vinyl. It is now waiting for the missing pieces to arrive and for me to send various items to the chrome platers. I will have hundreds of dollars invested in this lid by the time I am done.
As I write this, I am struggling with the “casings” that go over the wheel arches. Similar to the panels on the doors, these are made from a heavy vinyl covered fibreboard material. On the back side are clips that insert into holes in the sheet metal of the car. This avoids gluing or obvious screws. Well, as I told my wife, these should have been “plug and play”. That didn’t happen. Apparantly, in February of 1963 (one month after my car was built), “detail changes were made to the quarterlight latches and all adjacent trim panels” (McKay, Original Jaguar Etype, pg. 61). The shape of the casings was changed just enough that I could not use the ones provided to me in the upholstery kit. I am currently in the process of revising the shape of the fibreboard material for the rear casing and making a new substrate for the front casing out of aluminum. Sigh!
Finally, a couple of originality notes applicable to this stage of the process. Both McKay and Haddock-Mueller provide timelines of various changes to the 3.8 cars. A few items of note are listed below. Keep in mind my car number is 888055 with a build date of January 2nd, 1963.
- In late winter of 1962, the floor assembly was changed to include footwells. At the same time, Flintkote was added to the front floor (H-M, pg. 477)
- About July 1962, the strikers for the luggage floor hinged extension latches, and the rubber buffers for the extension in its raised position were changed (H-M, pg. 478).
- About June 1962, the body underframe assembly, floor assembly, and rear end body shll were changed. This included modifying the rear bulkhead of the body shell to include recesses to allow the seats 1 1/2″ more rearward travel (H-M, pg. 478).
- On October 1962, the patterns on the aluminum trim panels on the assembly above the gearbox and on the assembly over the gearbox and driveshaft cover were changed. This is likely the change from the etched dot pattern aluminum trim to the embossed cross pattern alumunum trim (H-M, pg. 480).
- On December 1962, the boot lid prop and its bracket were changed (H-M, pg. 480).
These changes agree with the configuration and parts that I am finding/using for my restoration. Now on to some items that occured later and do not apply to my car.
- Feb 63, The coupe’s luggage floor mat changed from two pieces, one L-shaped around the spare wheel cover, the other fitted to the cover, to a one-piece mate secured with Durable Dot fastners. Change to the quarterlight catches and all adjacent trim panels plus luggage floor extension, including chrome finishers and seat belt escrutcheons (McKay, pages 61 & 124).
- April 63, Revised passenger grab handle & brackets (McKay, pg. 124).
- May 63, Cowl trims were fitted around the rear hatch lock and hinges. Armrests were fitted to the doors (McKay, pages 61 and 125).
- September 63, The front finisher trim panel was changed from embossed aluminum to leather (H-M, pg. 482).
Both McKay and Haddock-Mueller provide valuable photo documentation for most of the above changes. Although the internet and Youtube can be very helpful, I would be at a severe disadvantage determining exactly how my car should be restored without these two reference books. If you are restoring a car, buy them. You won’t regret it.
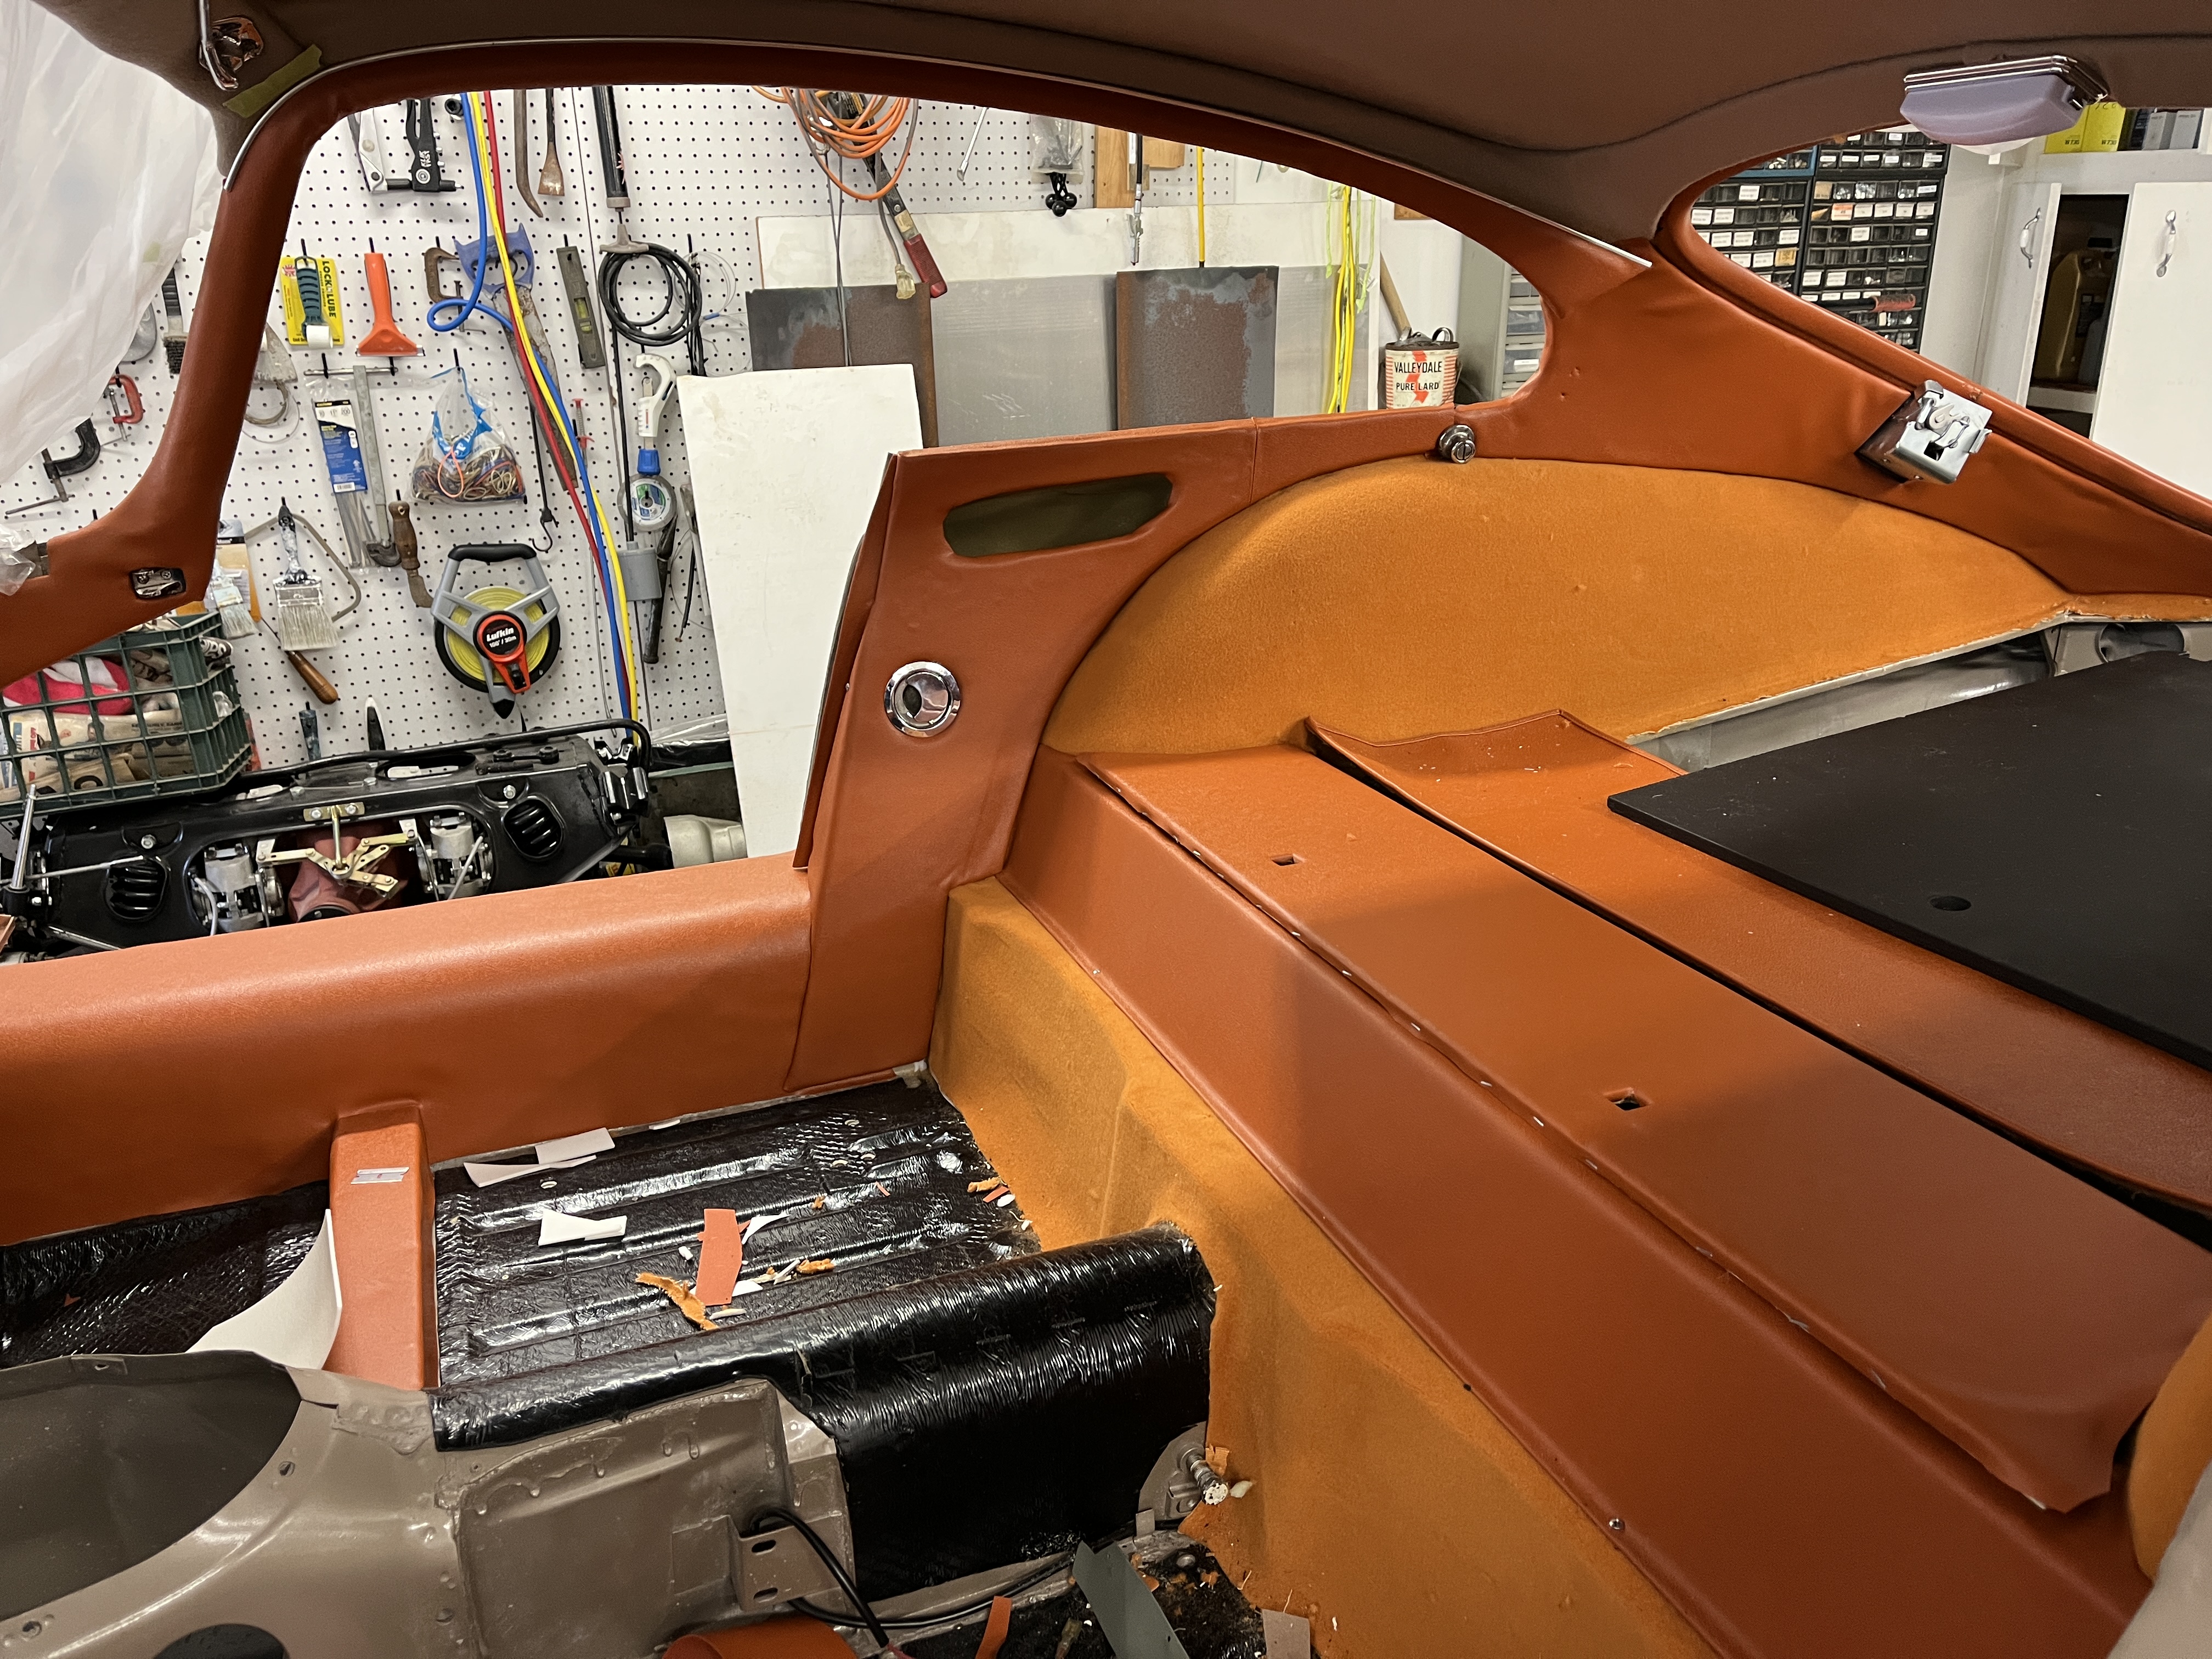
This is where I am going the leave it for now. The photo below was taken at a time when my work log showed I had about 80 hours invested. It is slow going, by necessity, because mistakes will be visible to all.

References:
-Spare Parts Cataloque for Jaguar Etype, Pub. No. J.30 Issued August, 1961
-Jaguar E-Type Six-Cylinder Originality Guide, Dr. Thomas Haddock – Dr. Michael Mueller
-Original Jaguar E-Type, Malcolm McKay

Discussion
Comments are closed.