I had done quite a bit of work getting the mechanical systems on the Porsche 944 up to snuff. As the cosmetics on this car were pretty atrocious, I decided to tackle that side of things next. It is a testament to Porsche that after 30 years the body was in pretty good shape. That said, the paint had failed on the hood, there was some poorly repaired collision damage on the right rear quarter panel, and the overall condition of the silver paint, now severely oxidized, needed attention.

Work Required!
I initially thought about going back with the same color, as this technically saves a lot of work, but at some point I decided that I would like a more dramatic color. I looked at some Porsche paint colors from the 80’s and the Minerva Blue Metallic caught my eye. My local paint store whipped me up a custom recipe that I liked and decided to go with.

So let’s talk about paint. There is a lot to talk about but I will try and stick to the basics as they apply to this car. Whether you are a hobbyist painter or just want to speak knowledgeably to your paint shop, the following information should be helpful. It is safe to say that painting a car to a high level of quality requires time and $$$. Today’s modern automotive paints are not cheap. And the prep work to get to the point where paint can be applied can be significant, especially on an older car. There are several broad categories of paint. Here are some terms that you may have heard about, defined:
1K – Industry shorthand for paint that can be applied with no mixing and that typically air dries. Think “rattle can” enamels, lacquers, and acrylics such as Rustoleum and Duplicolor.
2K – Industry shorthand for paints where 2 or more separate liquids are mixed together right before the paint is applied. These paints are “catalyzed” in that as soon as they are mixed, a chemical reaction starts which will cause the paint to harden, even in the absence of air. These paints have a “pot life” which can vary from 1 hour to 24 hours. After their pot life is exceeded, these paints will harden, in your gun if you are inattentive! 2K paints mainly use urethane as a base chemical and by their chemical nature are much harder than 1K paints and thus more durable.
Single stage, base coat, and clear coat – Single stage is exactly what most people think of with paint. You apply it and are done, in one single application. So let’s talk about base coat/clear coat to understand the distinction. A basecoat is applied first which contains the pigments that give the paint its color. After it is applied, the basecoat with be roughly the final color but it will not have a shine. If you were to squirt some water on the basecoat it would actually look shiny, as long as it is wet. The clear coat is applied over the basecoat as a 2nd step in the process and, as the name implies, this paint is clear. The clear coat applies the shine to the paint job. There are several good reasons that this process was developed. One is that pigments cost money so the basecoat can be optimized to include just enough pigment to provide the necessary coverage and color. The clear coat can then be applied over the basecoat to the required thickness to provide the necessary durability. The clear coat also contains UV blockers, again to make the paint more durable. So in a high volume assembly line process, the basecoats can be optimized (read cost is minimized) to provide just the color required. The clear coat application is the same for every car, regardless of paint color, which certainly simplifies the assembly line process. And with an aggressive catalyst formulation and application of heat, these paints can be dried very quickly, again a benefit in an assembly line environment.
Solvent based paints and water based paints – Solvent based paints have been the standard for years but the solvents can be harmful to the environment. These paints use organic solvents to thin the paint to allow for spray application and good mixing. These solvents mainly evaporate into the air as the paint dries. These VOCs (volatile organic compounds) give these paints their distinctive odor as they dry. They can be harmful to people and in the long term, harmful to air quality. So the paint manufacturers worked hard to develop acceptable paints that minimized the use of solvents and substituted water. In this way, they reduce the adverse environmental effects. There would have been a time in the past when water based automotive paints may have been considered experimental but those days are gone. Most manufacturers, especially those in Europe and the US, have switched to water based, 2K, base coat / clear coat paints.
My dates are very general but roughly speaking 1K enamels and lacquers would have been used from the earliest days of automobiles up until the 70’s, then 2K urethane paints were phased in. The base coat / clear coat concept started to be used in the mid 80’s. As an aside, when you see a car that looks like the paint is dull and peeling like your face after a bad sunburn, that is typically the clear coat that has given up. I see many cars from the 80’s and newer where the clear coat has obviously failed, typically on the horizontal surfaces like the hood and the roof. These surfaces are most affected by the rays of the sun. I suspect as improvements have been made, this has become much less of an issue for newer cars.
So how did all this affect my decision on how to paint my street/track car? I decided to go with 2K single stage paint. I like 2K for its durability. I like single stage as it is easier to repair. The biggest advantage of 2K paint to the hobbyist painter is its ability to be sanded and buffed after the paint is applied. I will discuss this process later in this article but suffice it to say that small blems in the paint due to dust, bugs, runs, overspray, etc can be repaired. One of the biggest disadvantages is that most urethane paints contain potentially cancer causing compounds called isocyanates. These are not to be taken lightly! I use a “supplied air system” which feeds fresh breathing air to a hood that goes over my head. A good quality mask with the proper cartridges can suffice but provides less protection. And you really don’t want to be using urethane paints if your garage is attached to your house, due to the potential for exposure to your loved ones in the house. Actually, if you paint anywhere near your house, you will be the “hated one” as the chemical smell is pretty overpowering!
By the way, although my target color was Minerva Blue Metallic, I declined to go the metallic route. The metallic look is literally small flakes of metal that are suspended in the paint and reflect the light to give you that special metallic look. When you paint a car with metallic paint, you generally have to paint the entire car in one shot (called an overall paint job). Due to the nature of my work space, the color change, and the limited time in the week that I have for my car work, I wanted to take the car apart as much as possible and paint the pieces individually. I have been told that if you do this, it is really hard to get a consistent metallic look. This will only show up when you put the various pieces back together! Also, not an absolute, but most manufacturers will only support metallic colors in a basecoat / clearcoat process.
Unfortunately, spraying of the paint is just one small step in the process. The prep work required is extensive and the post paint work will also take time. Following are the general steps involved. But first a word about paint manufacturers.
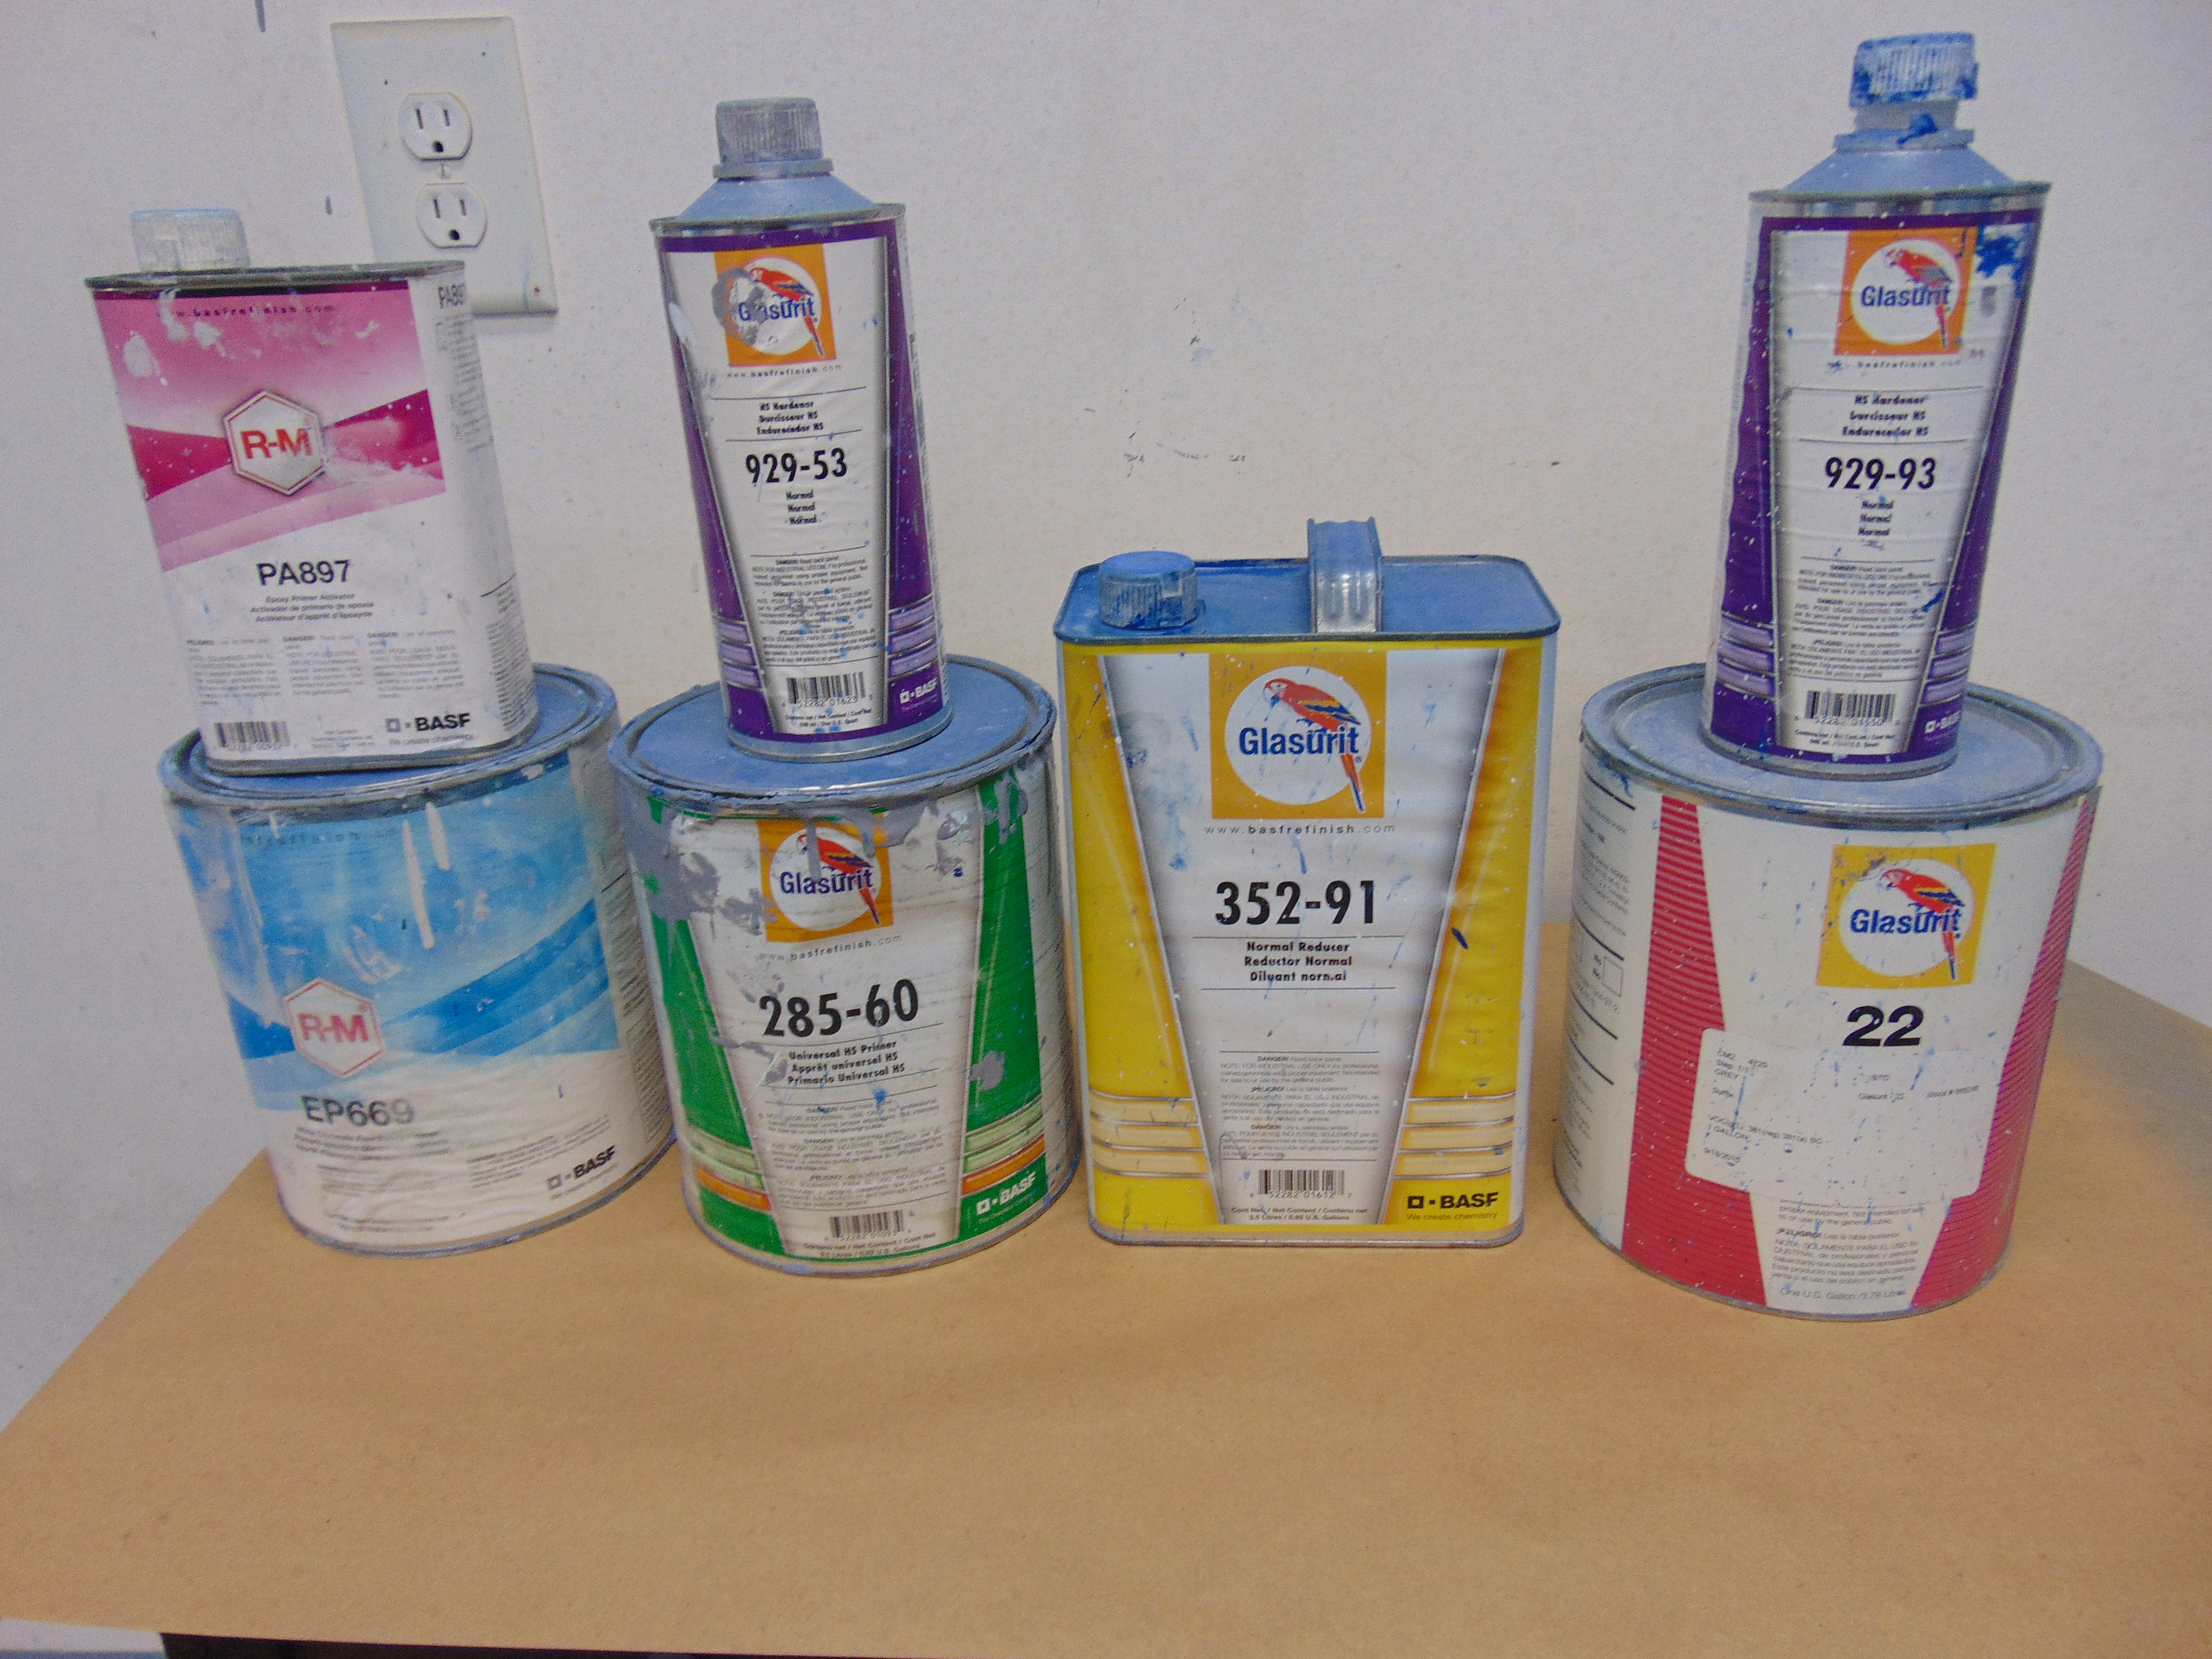
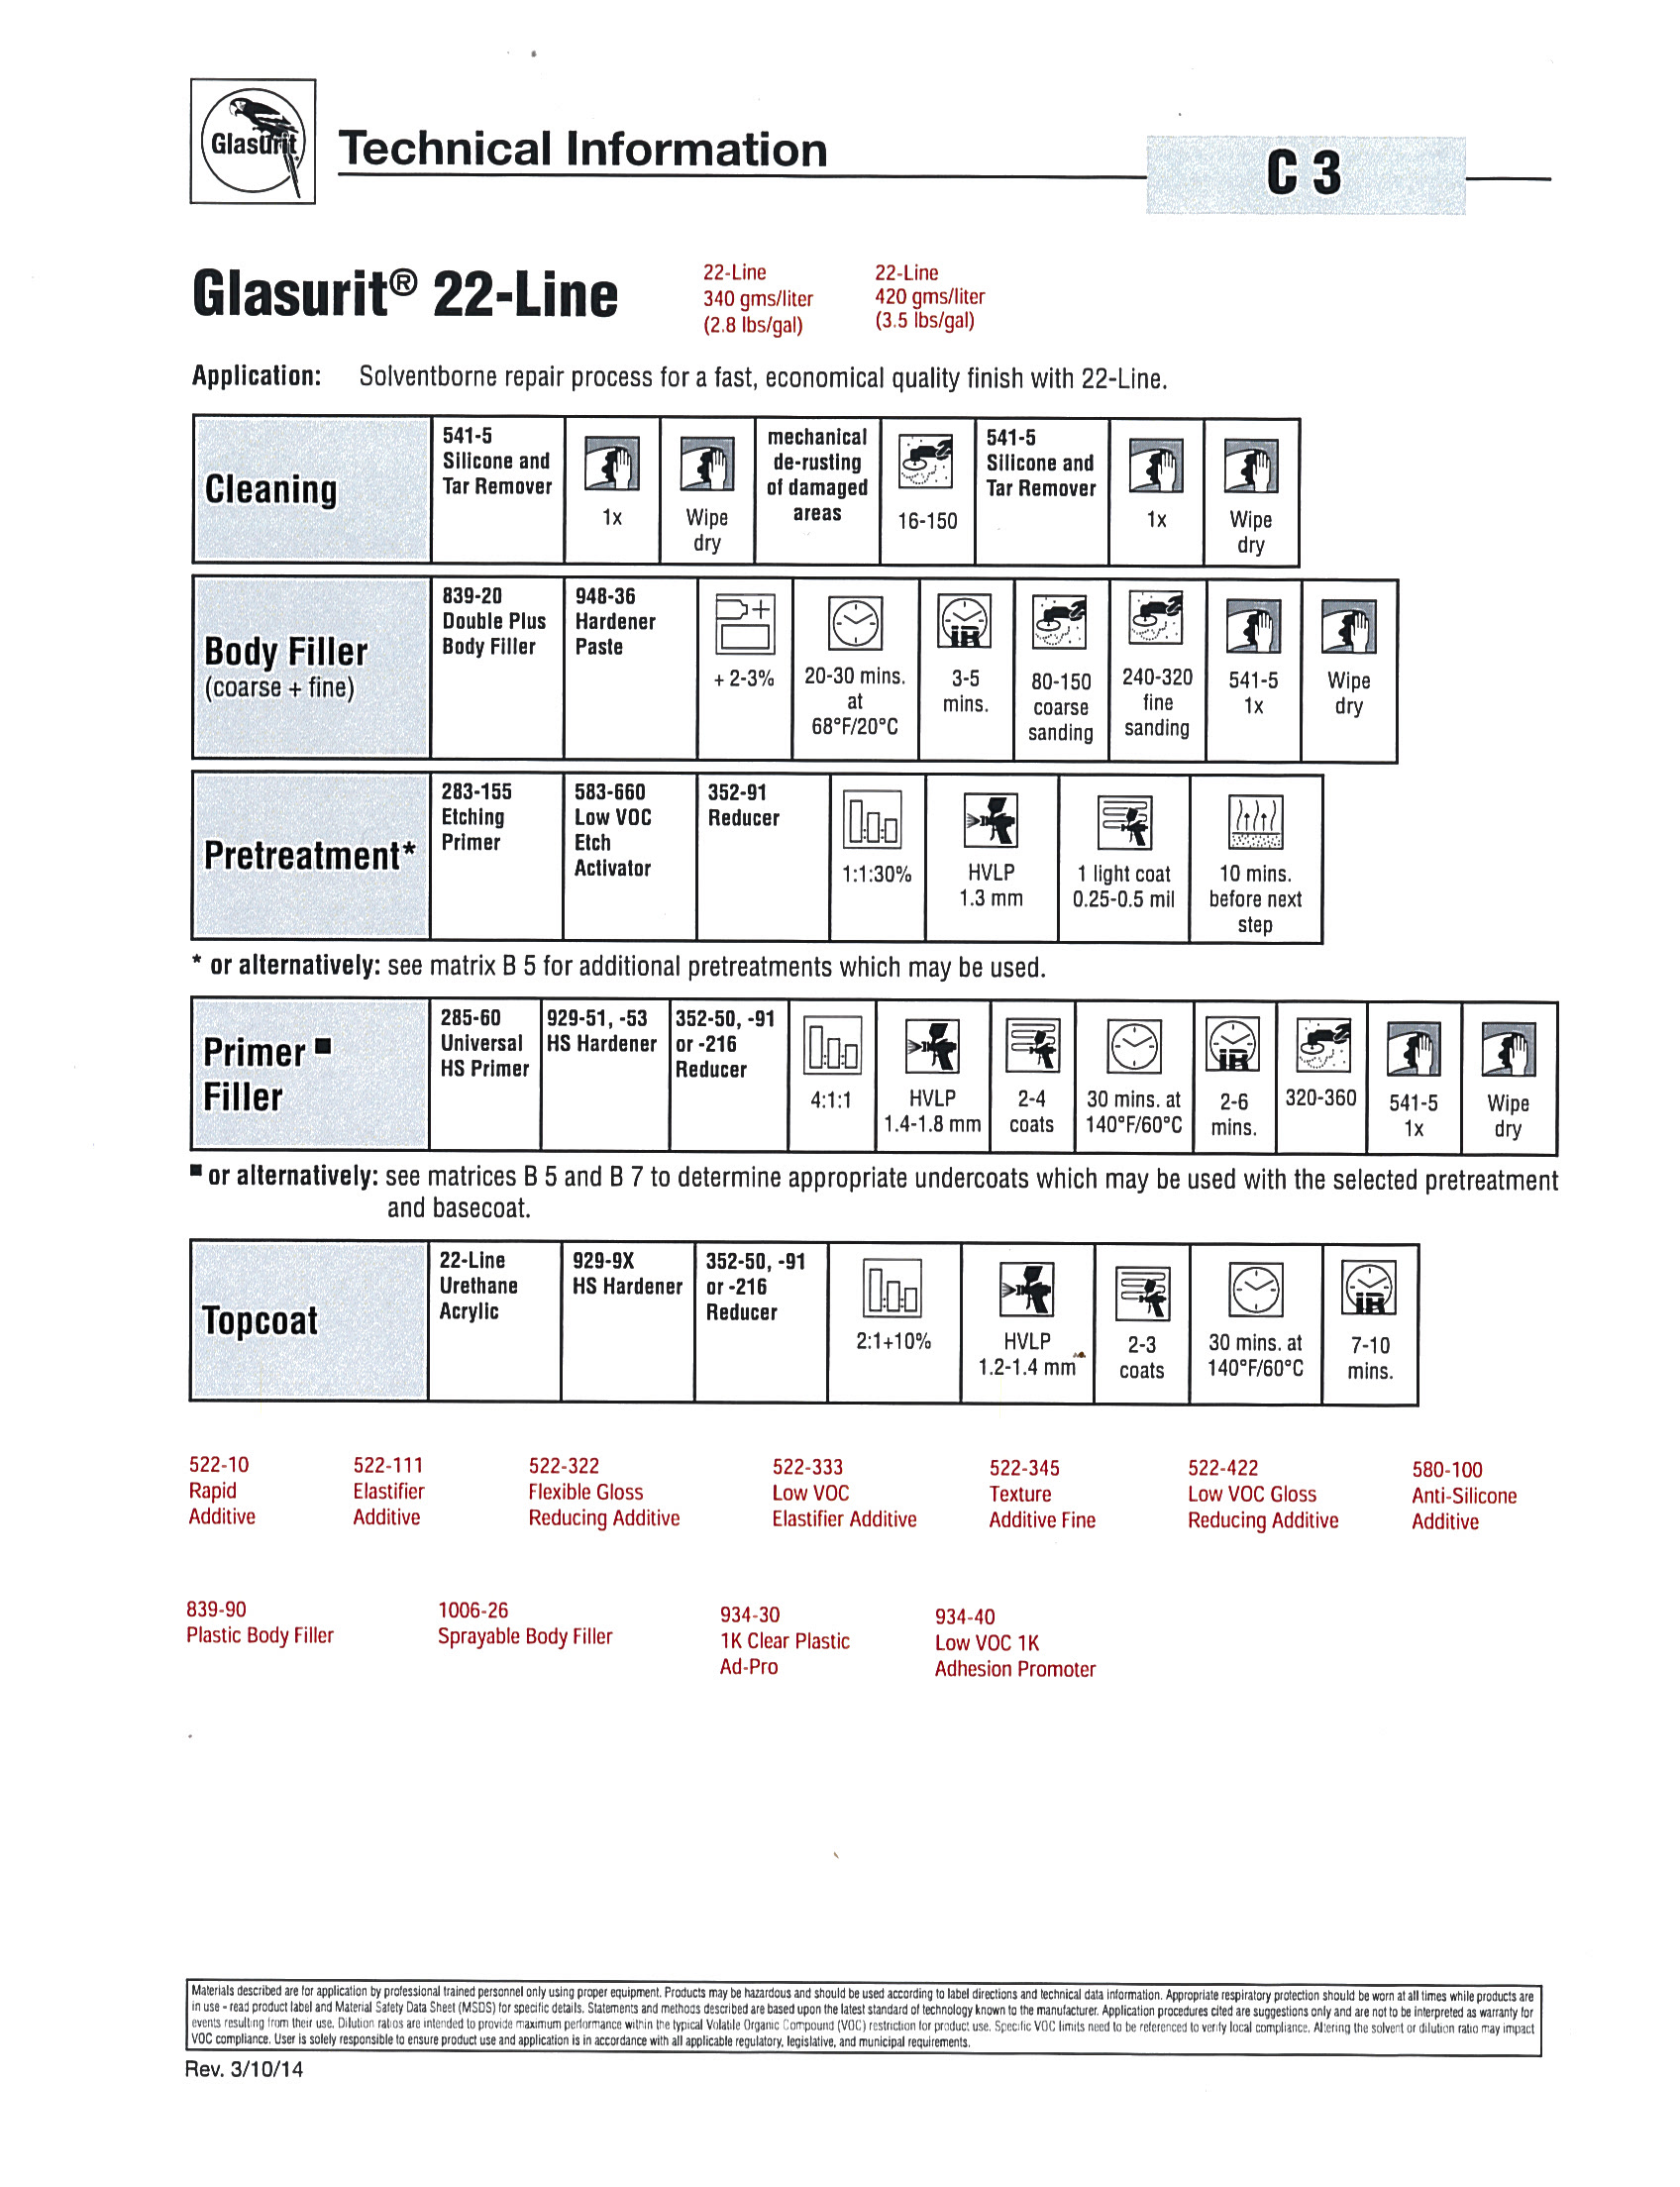
There are multiple manufacturers of automotive paint products. You may have heard of Dupont, Glasurit, Duplicolor, RM, PPG, and/or House of Color. I am not going to recommend any specific brand but I will strongly recommend that once you select a brand, that you stick with their entire product line. Modern automotive paints are a system and work hand in hand. You want to avoid using vendor A’s primer, vendor B’s sealer, and vendor C’s topcoat. The possible adverse interactions could be ugly for you to the point that you have to sand everything off and start over. And yes, anything is available on the internet but if you are fortunate enough to have a local supplier who specializes in automotive paint, your interaction at the counter with the salesperson may prove invaluable to your education and chances of success. I wound up using Glasurit paints purchased from my local supplier Finishmaster. The paint is frightfully expensive, but as Glasurit has been a traditional OEM supplier for Porsche that meant a lot to me. The bigger name suppliers also offer excellent on-line technical manuals for their products. Once you learn how to interpret them, these are your roadmap to the painting process. In my case, I referred extensively to the Glasurit Technical Manual. It can be accessed via their website. The technical manuals contain very detailed information. That said, here is a one page “cheat sheet” that I found in the Glasurit manual that pretty much lays out the entire process, albeit in shorthand and symbols.
 Here are the major steps in the process.
-Clean and wash the car with a detergent soap like Dawn. You are trying to de-grease the car and remove wax. You want to do this before you start tearing the car apart. Later you will want to wipe down the surfaces to be painted again with a combination prep sold by the paint stores that removes tar, grease, and most importantly silicone. Silicone compounds as found in Armor All tire treatment are bad news for paint.
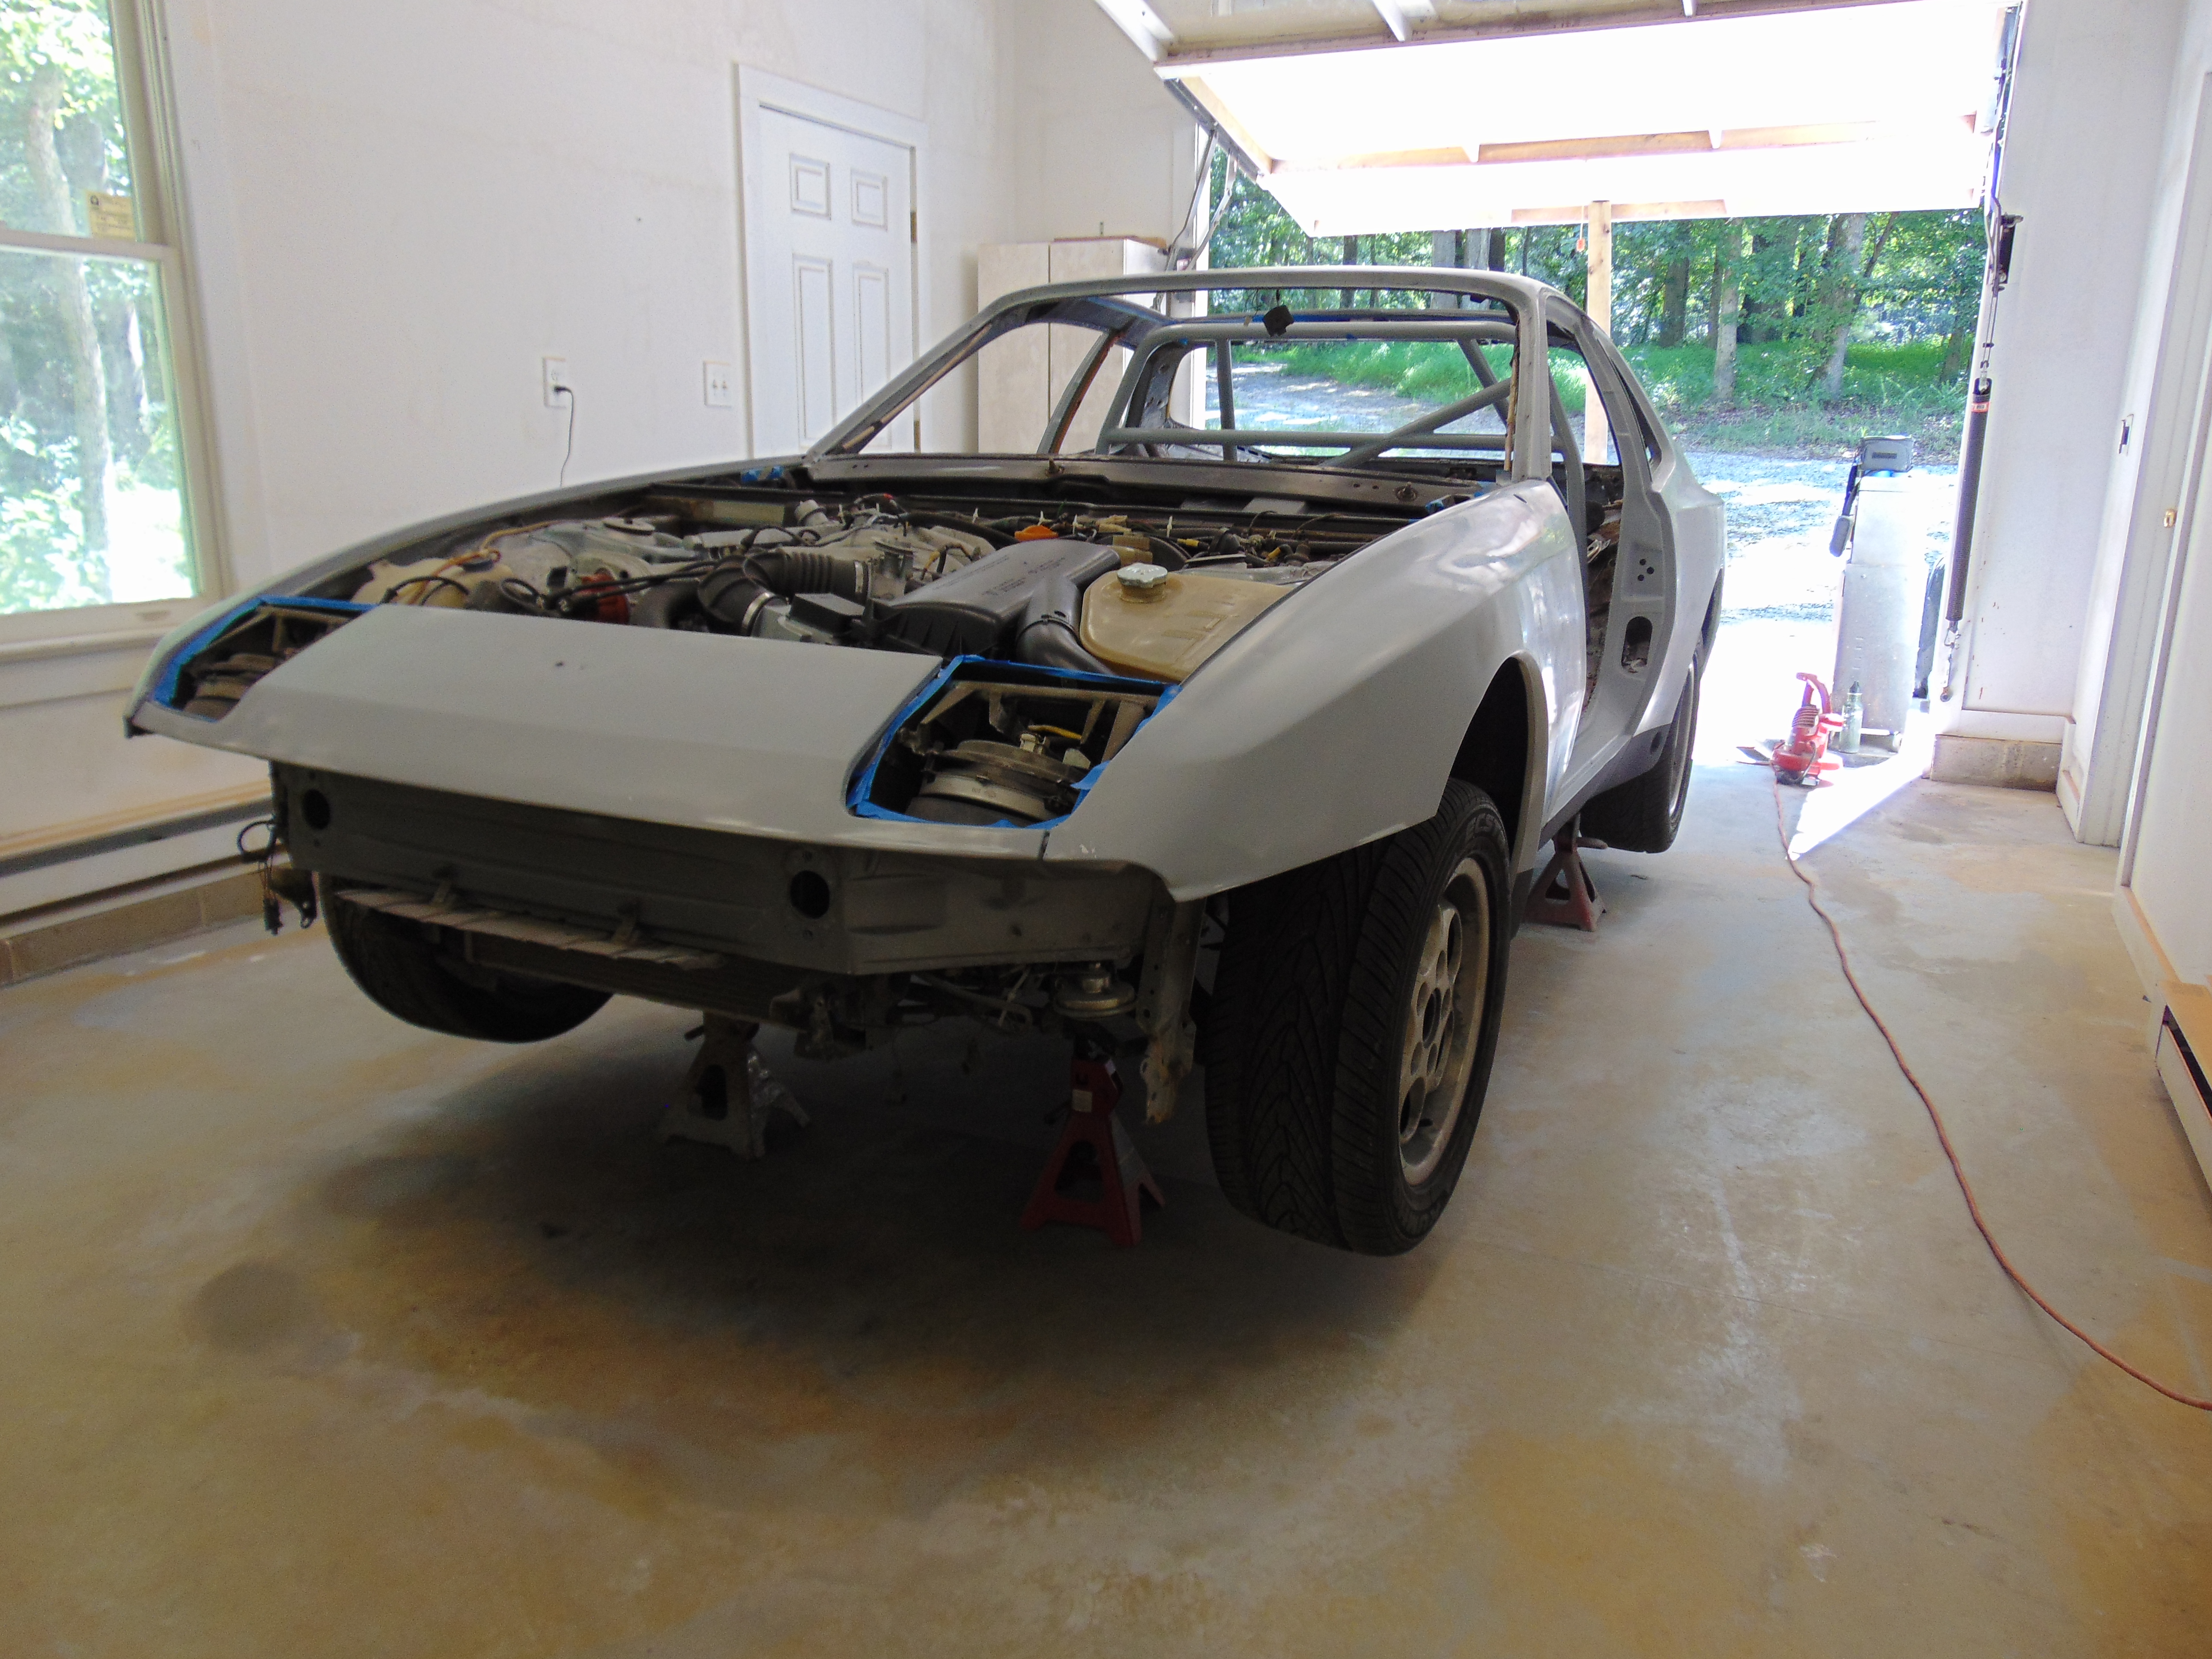
-Remove as many items that you can that you don’t want painted. Many of the trim components on the car overlap onto the painted surfaces of the car. While it is technically feasible to cover everything you don’t want painted with tape and paper, it is impossible to get a nice job by just painting up to metal and rubber trim. Especially because I was doing a color change, I decided to strip the car down in a substantial fashion. The windshield and the small quarter panel windows were removed. All the rubber seals around the doors, the hatch, and the sunroof were removed. The taillights and smaller running lights were removed. The bumpers were removed. The rear hatch, the hood, the doors, and the sunroof panel were removed. The mirrors were removed. The front air dam was removed. You get the picture. This allows you to get very close to the full extent of the original factory paint job. Also, the areas under the rubber and trim are the most likely to be hiding corrosion, which you will want to repair.
-Do your bodywork. You always hear about “bare metal” paint jobs as a sort of a Gold Standard. It is not really necessary or even advisable to take the entire car back to bare metal. Starting in the 80’s, Porsche and other OEMs starting electro depositing a layer of zinc or similar on their entire bodies, basically by dipping them in the zinc solution and applying an electrical charge to the body. This made a tremendous improvement to the corrosion resistance of the metal. So I don’t think you want to grind all of this off. And it can be toxic if you inhale enough of it. One exception is areas where plastic body filler is needed to smooth out collision damage. Plastic body filler sticks the best to roughened bare metal. Don’t be afraid of plastic body filler. It has come a long way and is very durable stuff. Of course, you should try and use traditional metal repair techniques to the get the damaged metal surface back close to the correct profile so the filler thickness stays thin. I would say anything beyond 3/8” is getting scary in my mind. Regardless of whether you need filler or not, the entire body must be substantially sanded down such that you will definitely be through any existing clearcoat and down into the OEM color coat or primer.
-Primer. I like to start with a 2K epoxy based primer. It will stick to anything and provides a great base for your paint job. A little bit goes a long ways so on my car, I applied the epoxy primer to the entire car. The terms get a little confusing but in general you follow the epoxy primer with a urethane based “high build” primer/filler/sealer (the terms differ depending on the manufacture). If you want a nice job, this is the stage where you will spend hours sanding and you may have multiple passes of paint/sand/paint/sand. The high build product is designed to be applied in a fairly thick layer. It is then sanded back smooth. As you sand, you will find high spots and low spots. You sand down the high spots until you are back to your original primer. Then you apply more product and do it again, until the entire surface is level. The “topcoat” paint you are going to apply is very unforgiving. It will not hide any imperfections so in effect you need to get your “primed” surface absolutely perfect. Again, this took me many hours. It is very frustrating as you think you are done and you wipe the surface down with a sanding sludge solvent only to find more pinholes, poor blends, and rough surfaces. But eventually you will reach your personal level of perfectionism and call it good. Ready for the color!


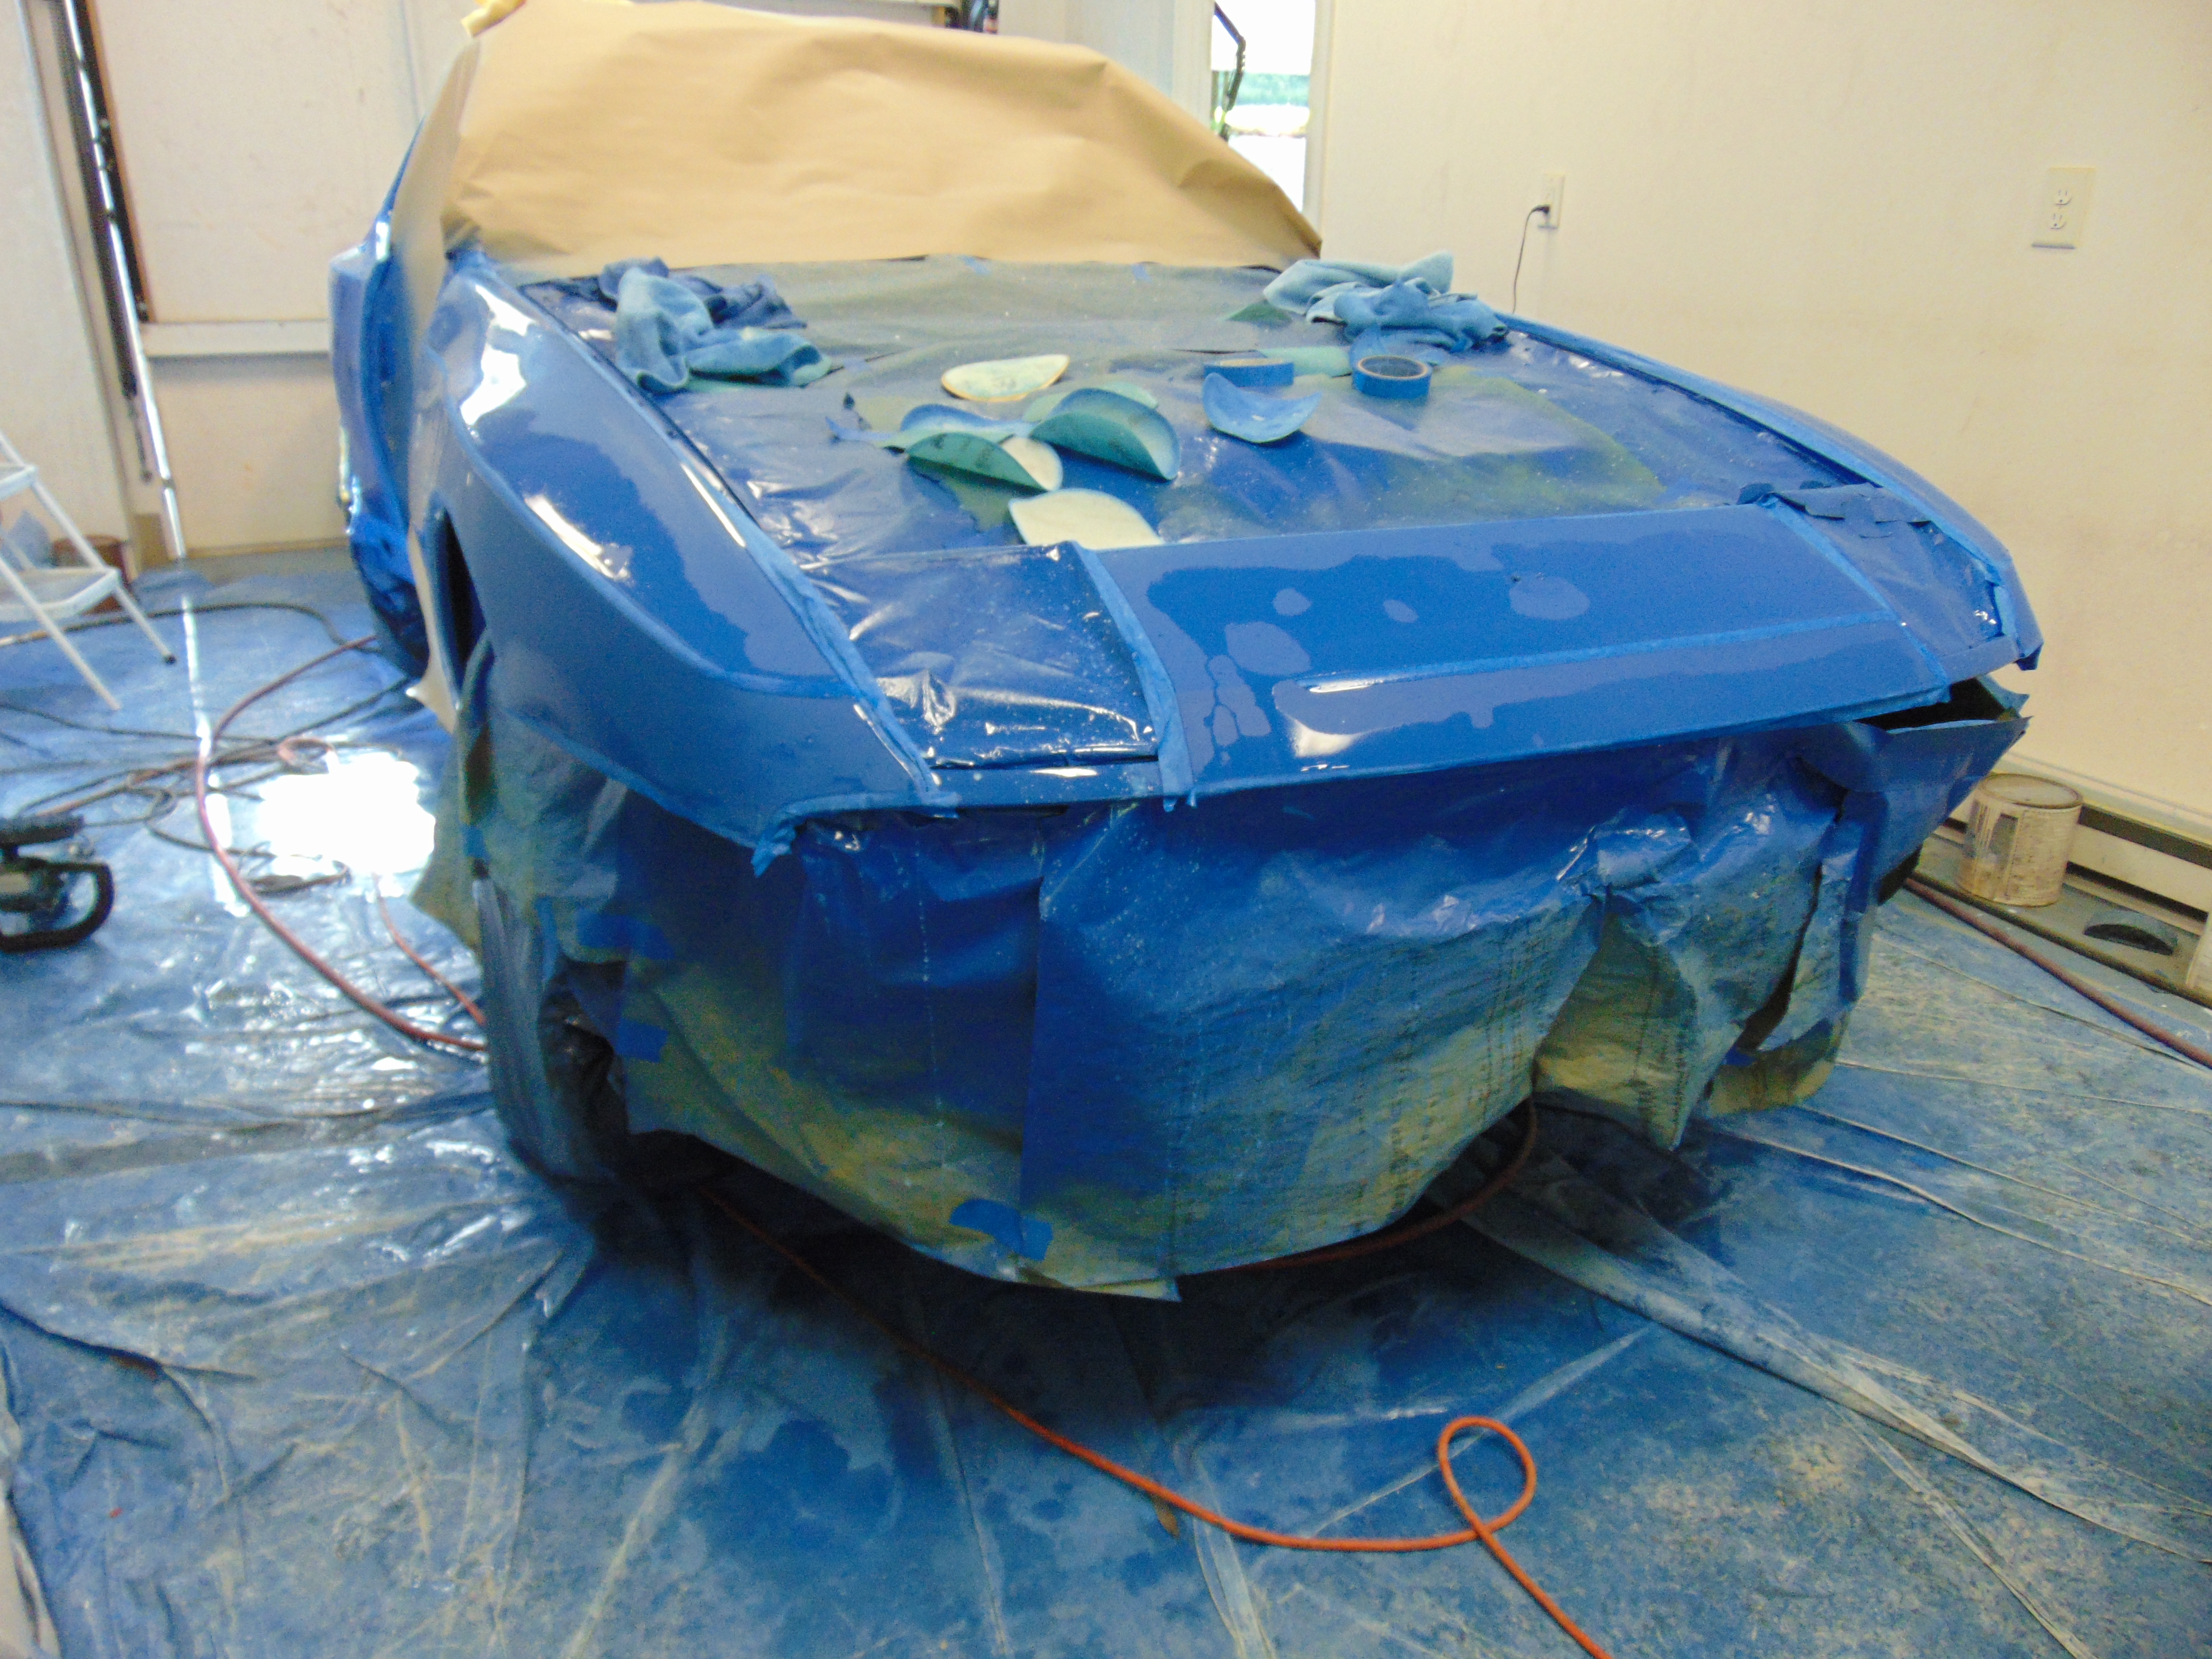
-Topcoat. So you are ready for the basecoat and clearcoat paint to be applied. If like me, your sanding garage and your paint garage are the same space, you need to spend half a day really deep cleaning the space to get rid of all the dirt, debris, and dust that has been generated. If not, it will wind up on your paint job. Next you will spend literally a full day applying masking tape and paper to every surface on the car that will not be painted. Actually, the first thing I like to do is to spread a brand new sheet of clean plastic, right off the roll, on the floor as you will find later that a lot of your expensive paint will settle on the garage floor. Try and buy your paper from the paint store or a home improvement store, versus using newspaper, as newspaper will have a certain amount of loose clag that will wind up in your paint job. Try and buy a better quality of masking tape. I like 3M products in this regard.

And finally the car is ready for PAINT!
Following the mixing instructions and the instructions regarding temperature and humidity provided by your paint supplier as exactly as possible. You’ve spent a lot of time and money up to this point and don’t want to blow it now. As I said, I use a supplied air hood. If you can smell paint fumes, then something is not right and your health may be endangered. Buy and wear a new Tyvek suit the day you paint. It is said that much of the dust in the paint job actually comes off the body of the painter. I like to go over the car once with the gun but no paint, just to blow everything off and get my travel path established. You will want to make a final wipe of the surface with a tack cloth, which is basically cheesecloth with a sticky film on it that picks up the last bit of small particles. Mix your paint, set your spray pattern and volume on something expendable like a piece of paper taped to the wall, and have at it.
It will be very exciting when you are done painting but you will have to leave it alone for a while until the paint has a chance to become dry to the point that the casual dust mote or insect will no longer stick to it. And you will come back to look at your work and damn, there’s a dust particle and a dragon fly and a run and spot where the air hose brushed against the car. Fear not, these items can be salvaged. I haven’t said before but you probably want to put on 2 or 3 more coats than the minimum required because you’re going to be sanding some off. This is called “color sanding” and “buffing”.
Color Sanding and Buffing. I’ve found color sanding to be a strange term and not everyone uses it but the process is the same. 3M calls it Paint Finishing and Detailing. Here is a chart they provide that shows the steps.

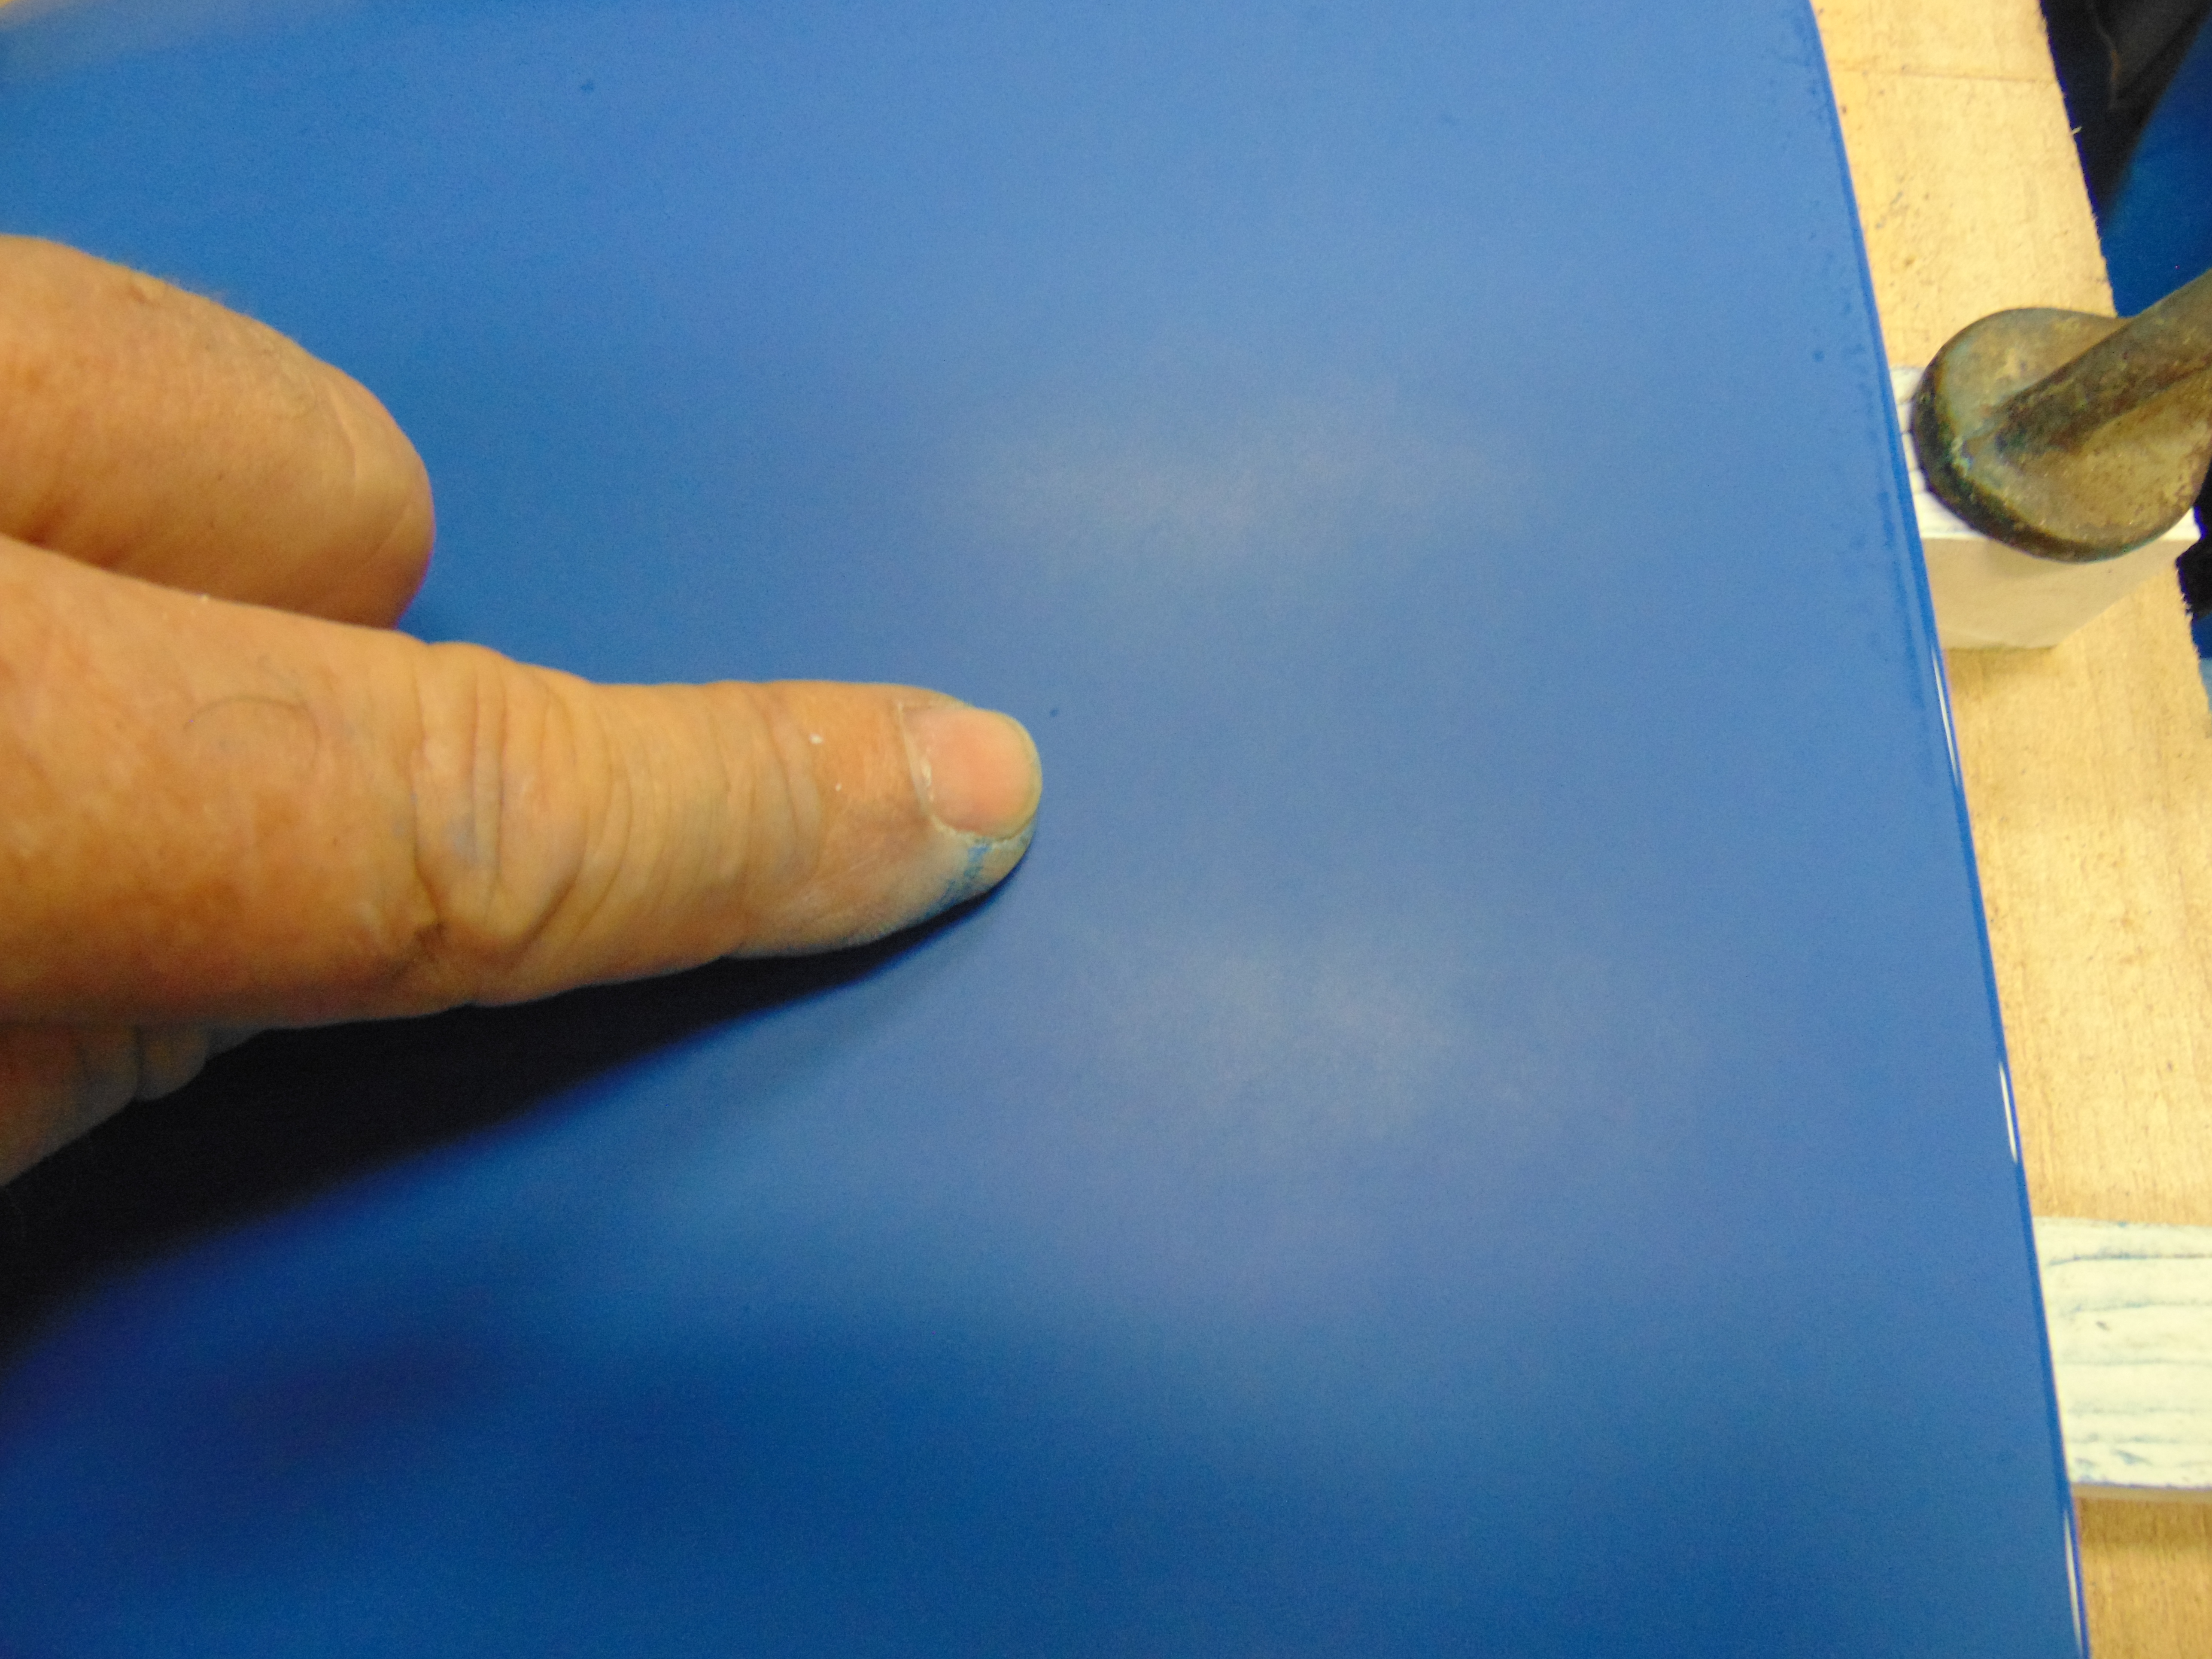
There is actually a ton of info on Youtube that describes this process. Here is the basic process. If you are going after a blemish like an insect or a run, you sand the area using 1500 grit paper until the blemish is resolved. For a really nice paint job, you sand the entire painted area with 1500 grit paper until the surface is absolutely smooth. We have not talked about “orange peel” but now is the time. If you look at almost any modern car’s paint job and treat the paint job like a mirror, you will see that the reflected image is distorted with little waves. That is orange peel. With poorly applied paint, the waves are not little, they literally look like the surface of an orange. Why does it have to be this way? Well, for me, if I apply the paint thick enough for it to flow out very smooth and not have an orange peel appearance, on the vertical surfaces, it runs. I suspect the OEM’s have the same problem. For the surfaces that I paint that are horizontal I can apply an extra heavy coat of paint and when its dry, it looks great! No orange peel. But it’s almost impossible to for me to apply the paint heavy on vertical surfaces without runs. Runs are a major pain to remove so I tend to go just a tad light so as to avoid them. And I get some orange peel. Again, not to fear. With enough work from your 1500 grit paper, you’ll remove all the orange peel and have an absolutely flat surface. But the shine will be gone. Trust me, if you follow up with the necessary steps shown in the 3M chart, at the end your shine will be back and it will be beautiful. The steps are typically 1500, 2000, 3000 grit sanding followed by 3 steps of liquid compound worked with a power buffer. There are variations on this theme but that is the general idea. I have provided some pictures of the process that I applied to the small headlight covers, just to give you an idea. It is hard to capture with a camera but it works.

Blemish

After sanding

1500 grit sanding disk
After more sanding with 2000 and 3000 grit paper
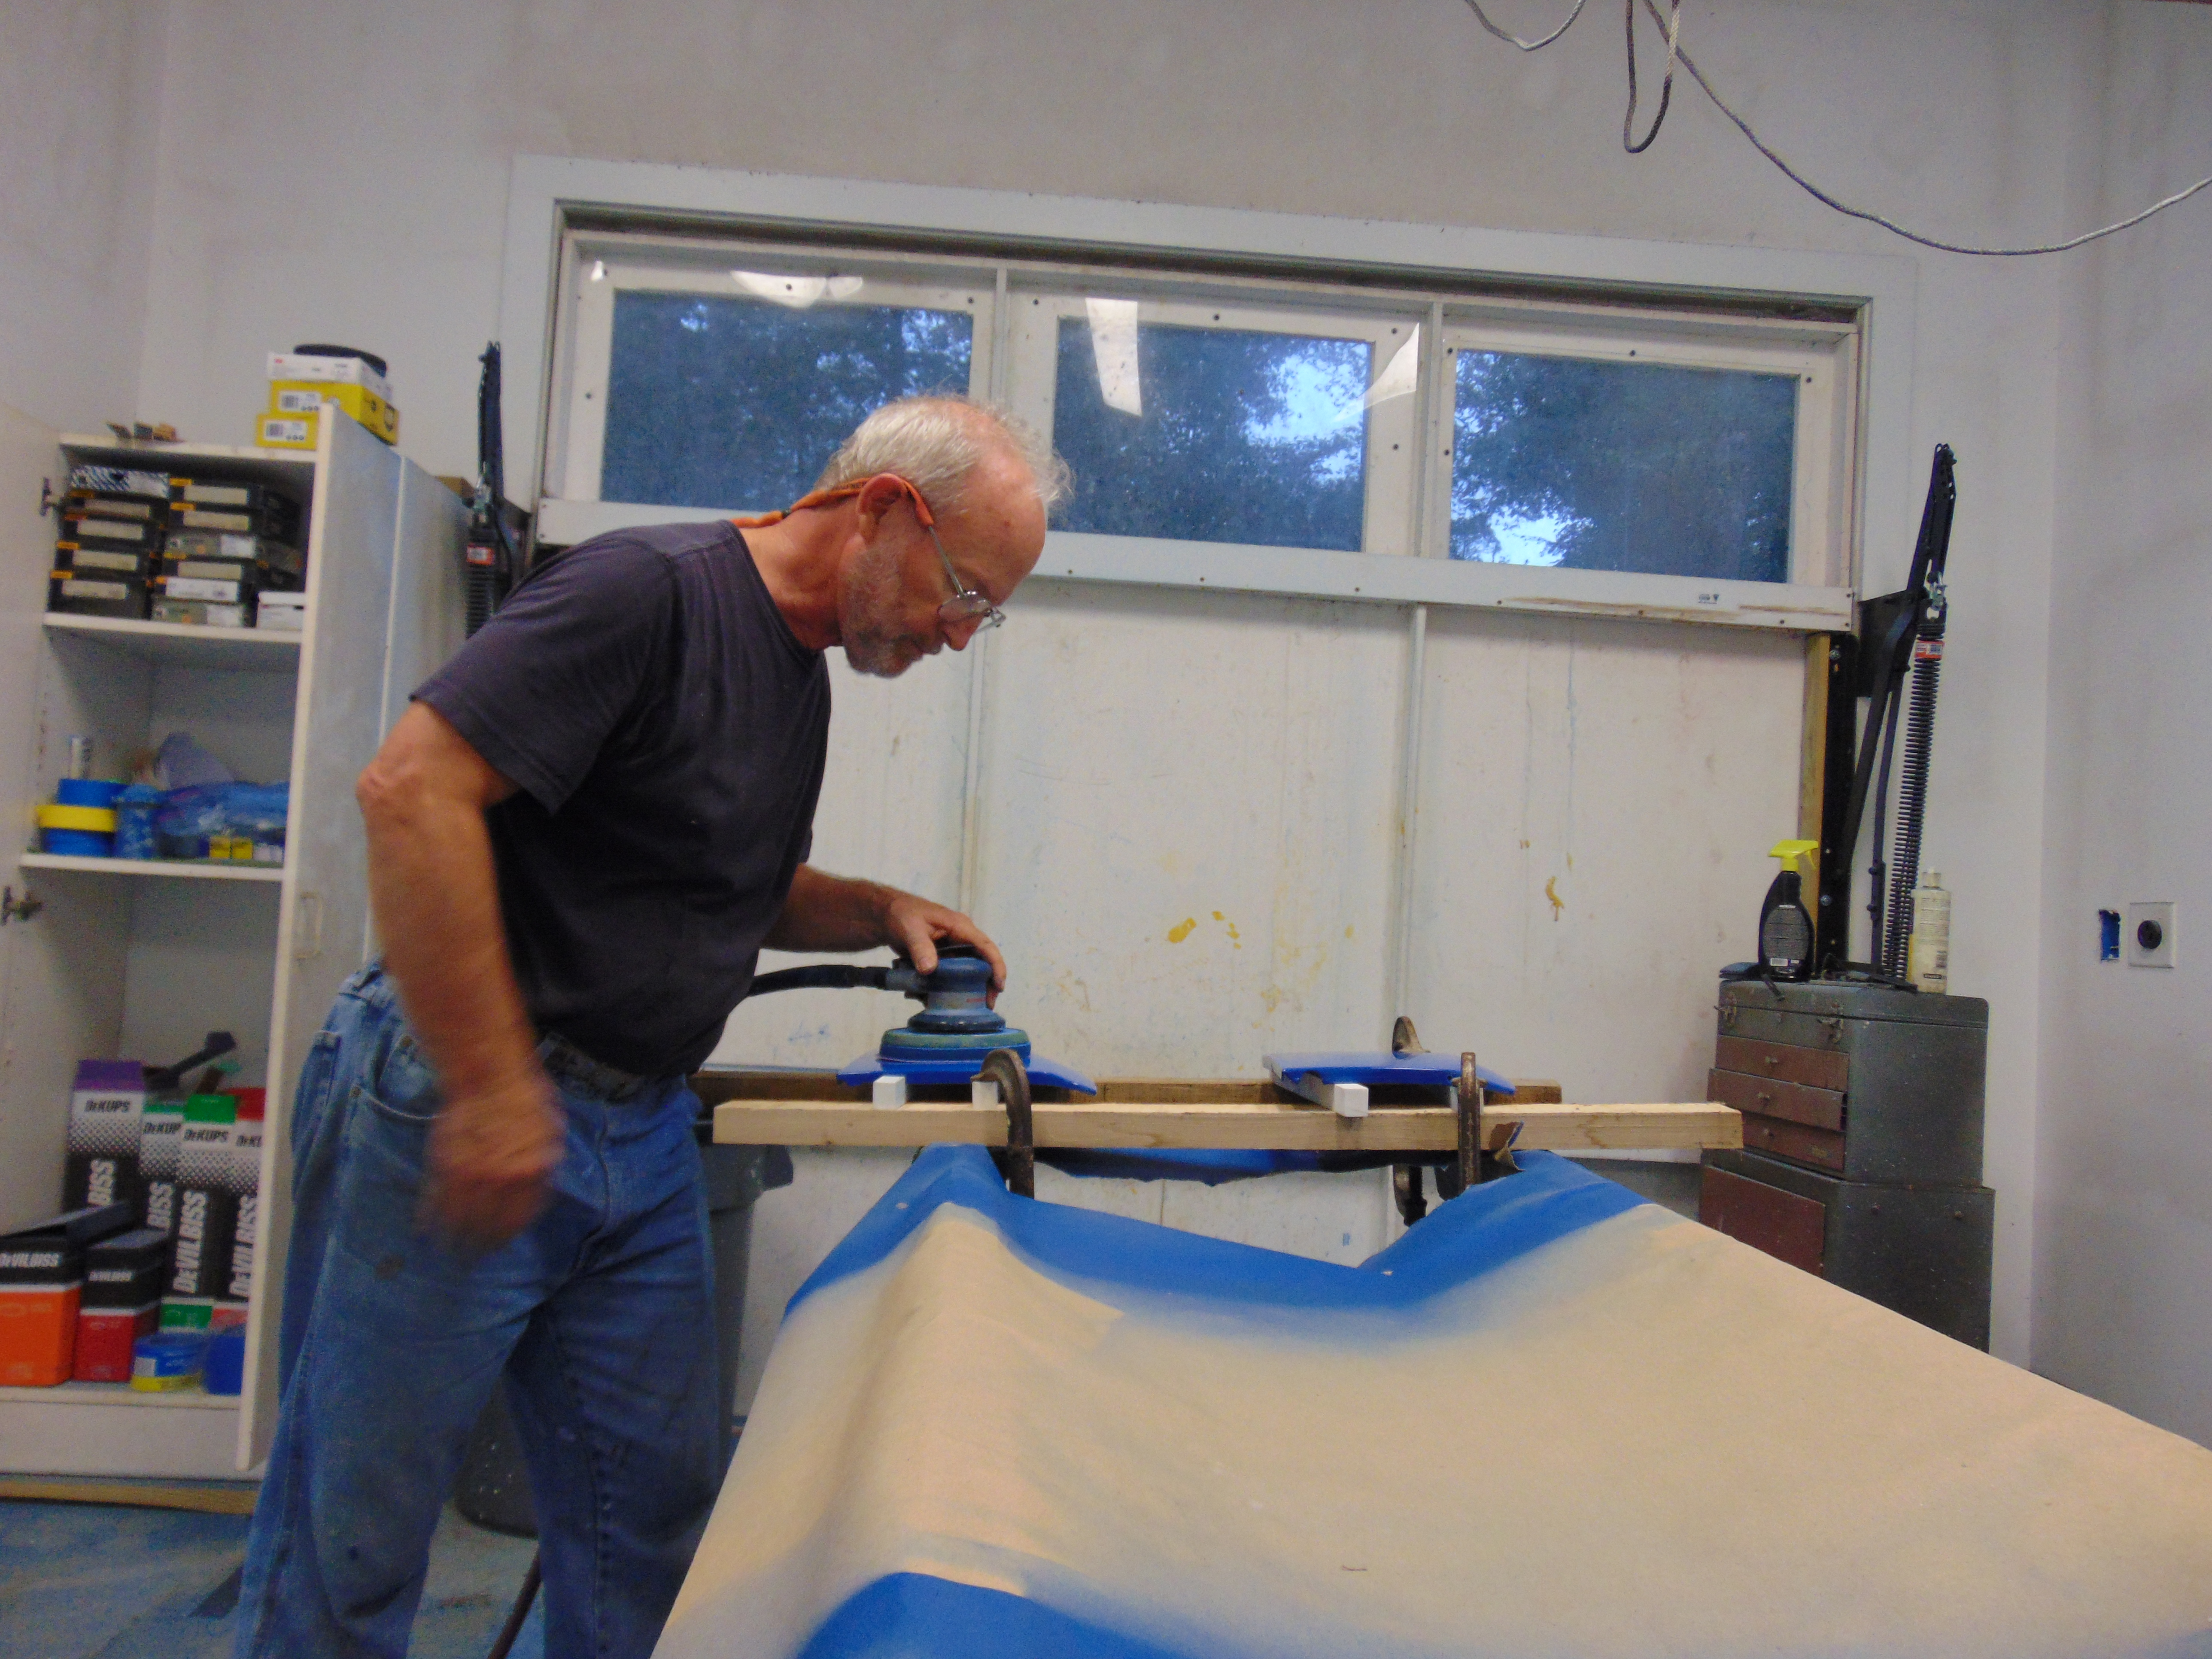
Using a random orbital sander
Now its time for buffing and polishing.
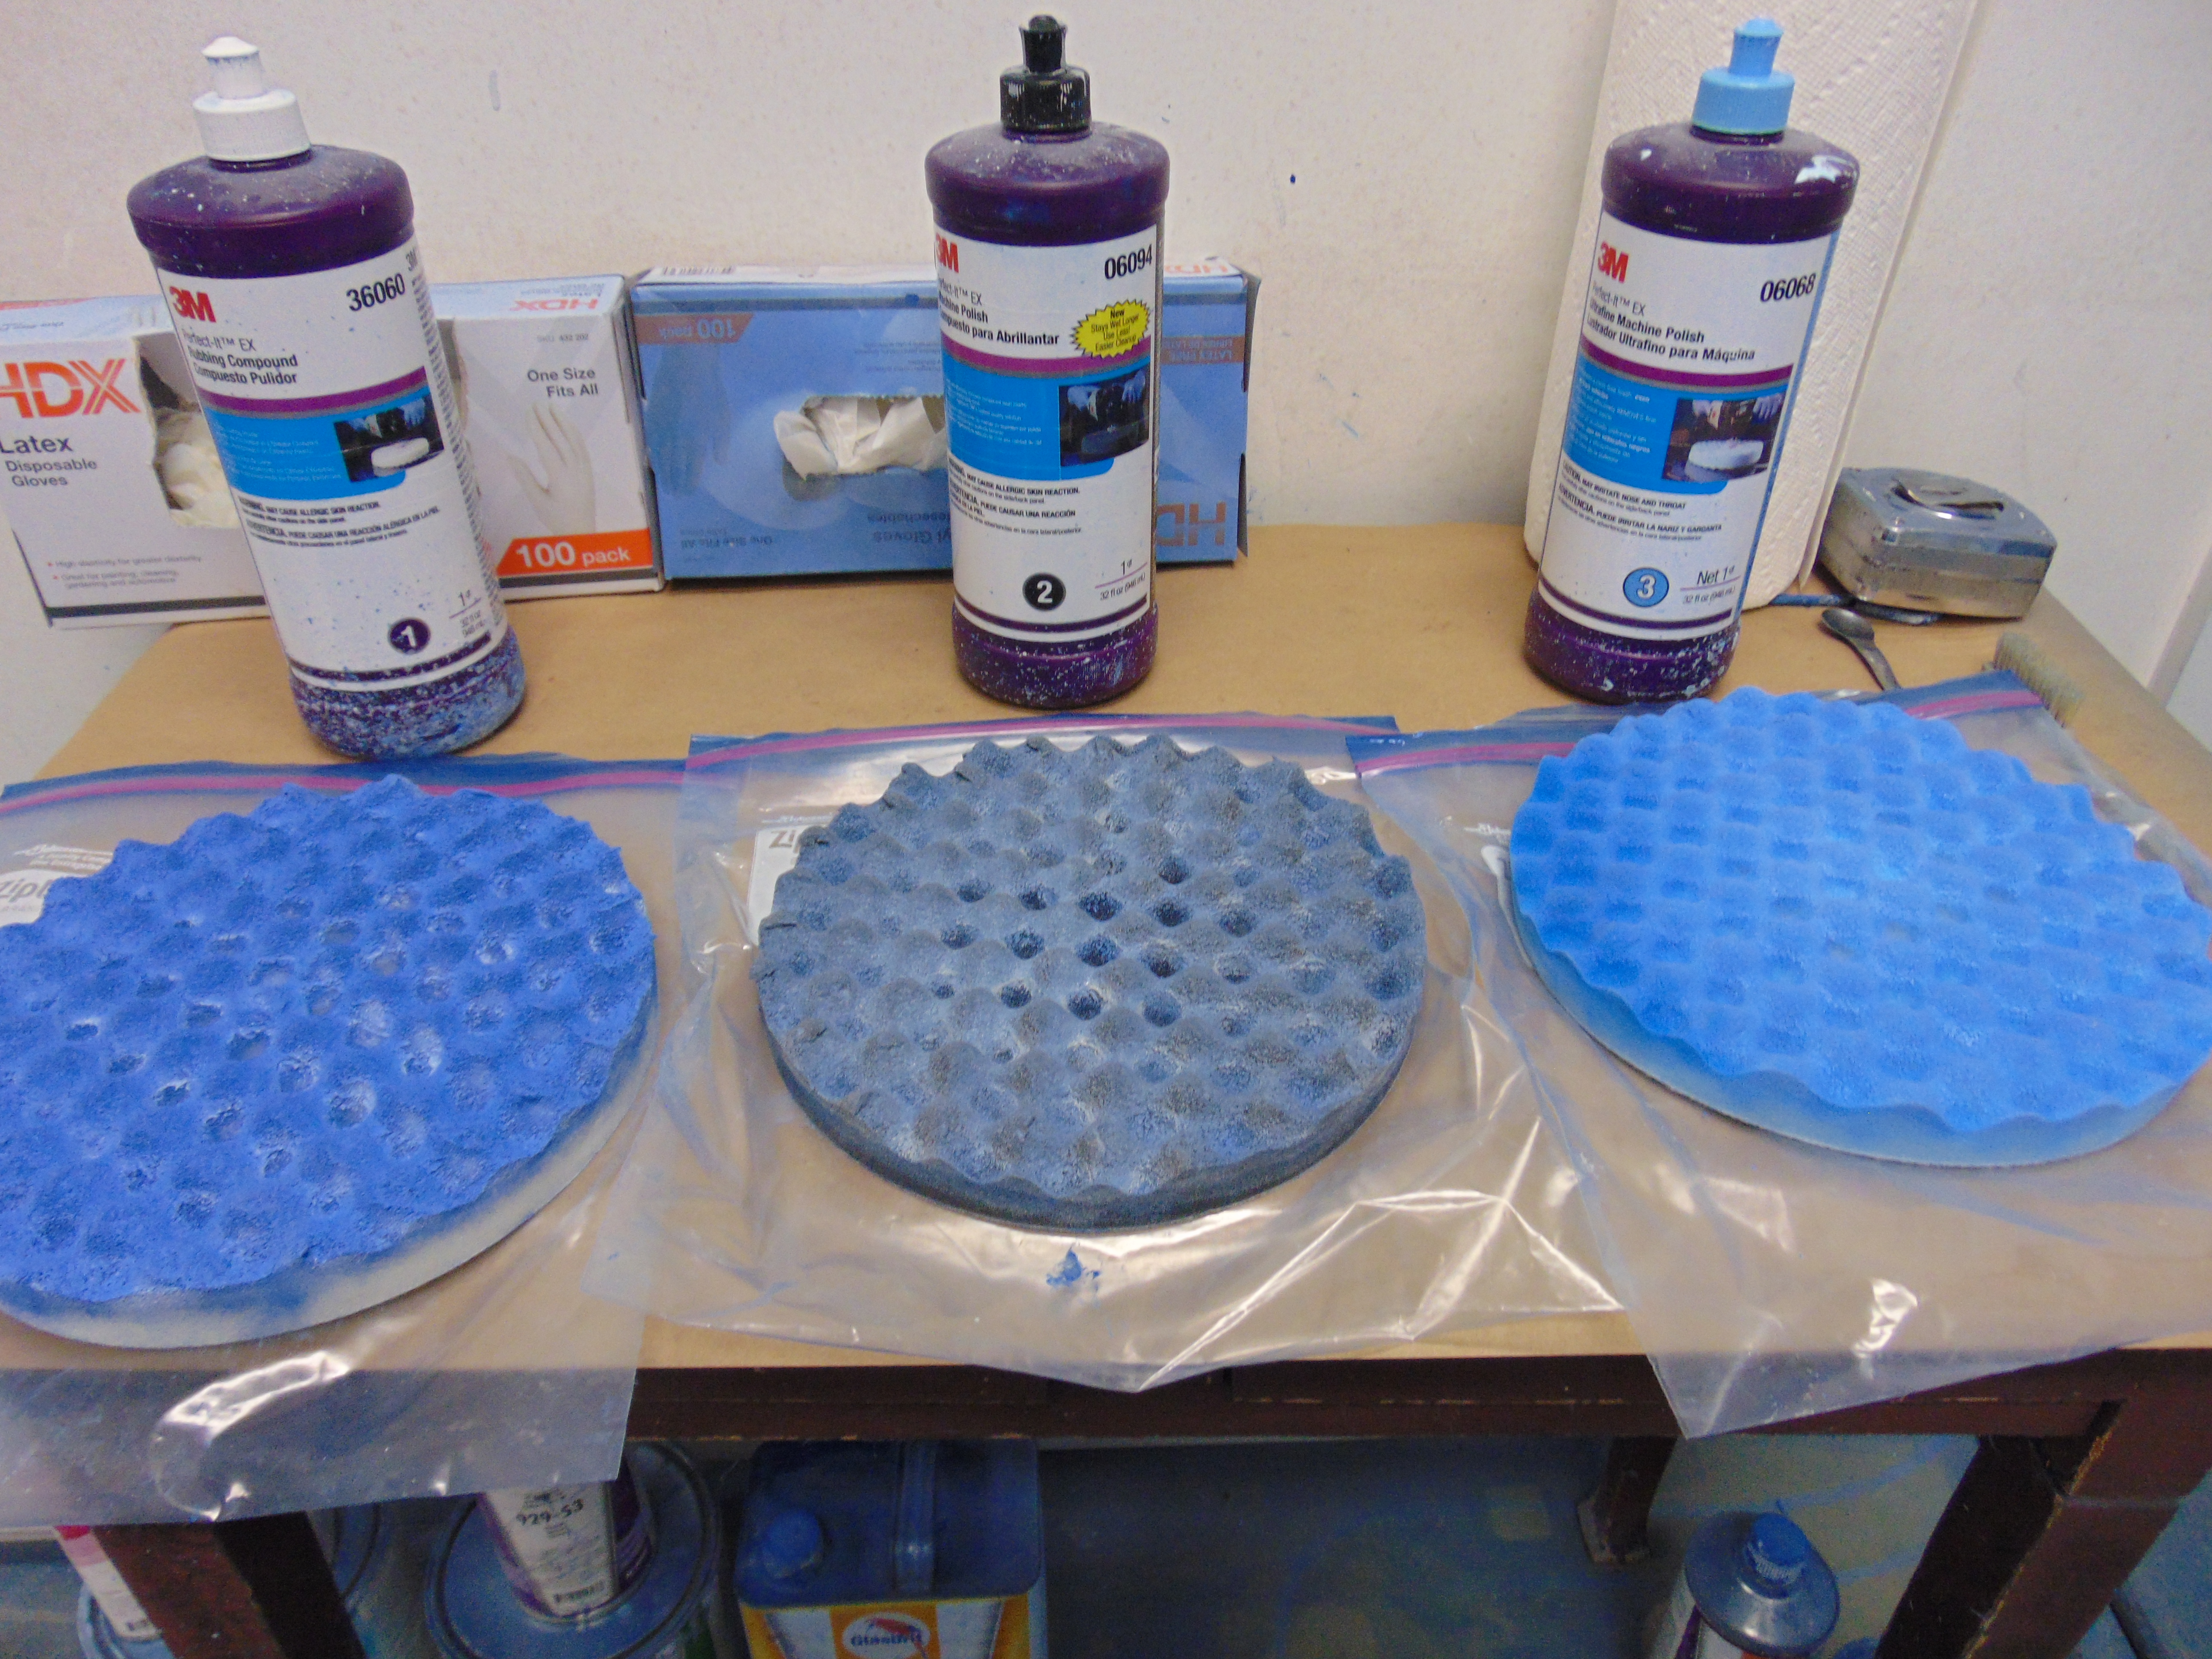
3M buffing products


Blemish removed. Shine restored.
This same process is applied to most of the paint job. You do have to be careful to not cut through your color coat into the primer. There are tricks, such as put a strip of tape along the edges and using a very light touch with “rotation off” the edges. Big areas go pretty quickly and tight areas take more work. Ultimately the entire car has been buffed and most, if not all, of the orange peel is removed.

As I said earlier, I removed many parts of the car and painted them separately, including the doors, hood, sunroof, bumpers, and front air dam. The car came with rub strips, which were removed and filled in. I also removed the rubber bumper parts, leaving just the smooth metal bumper.
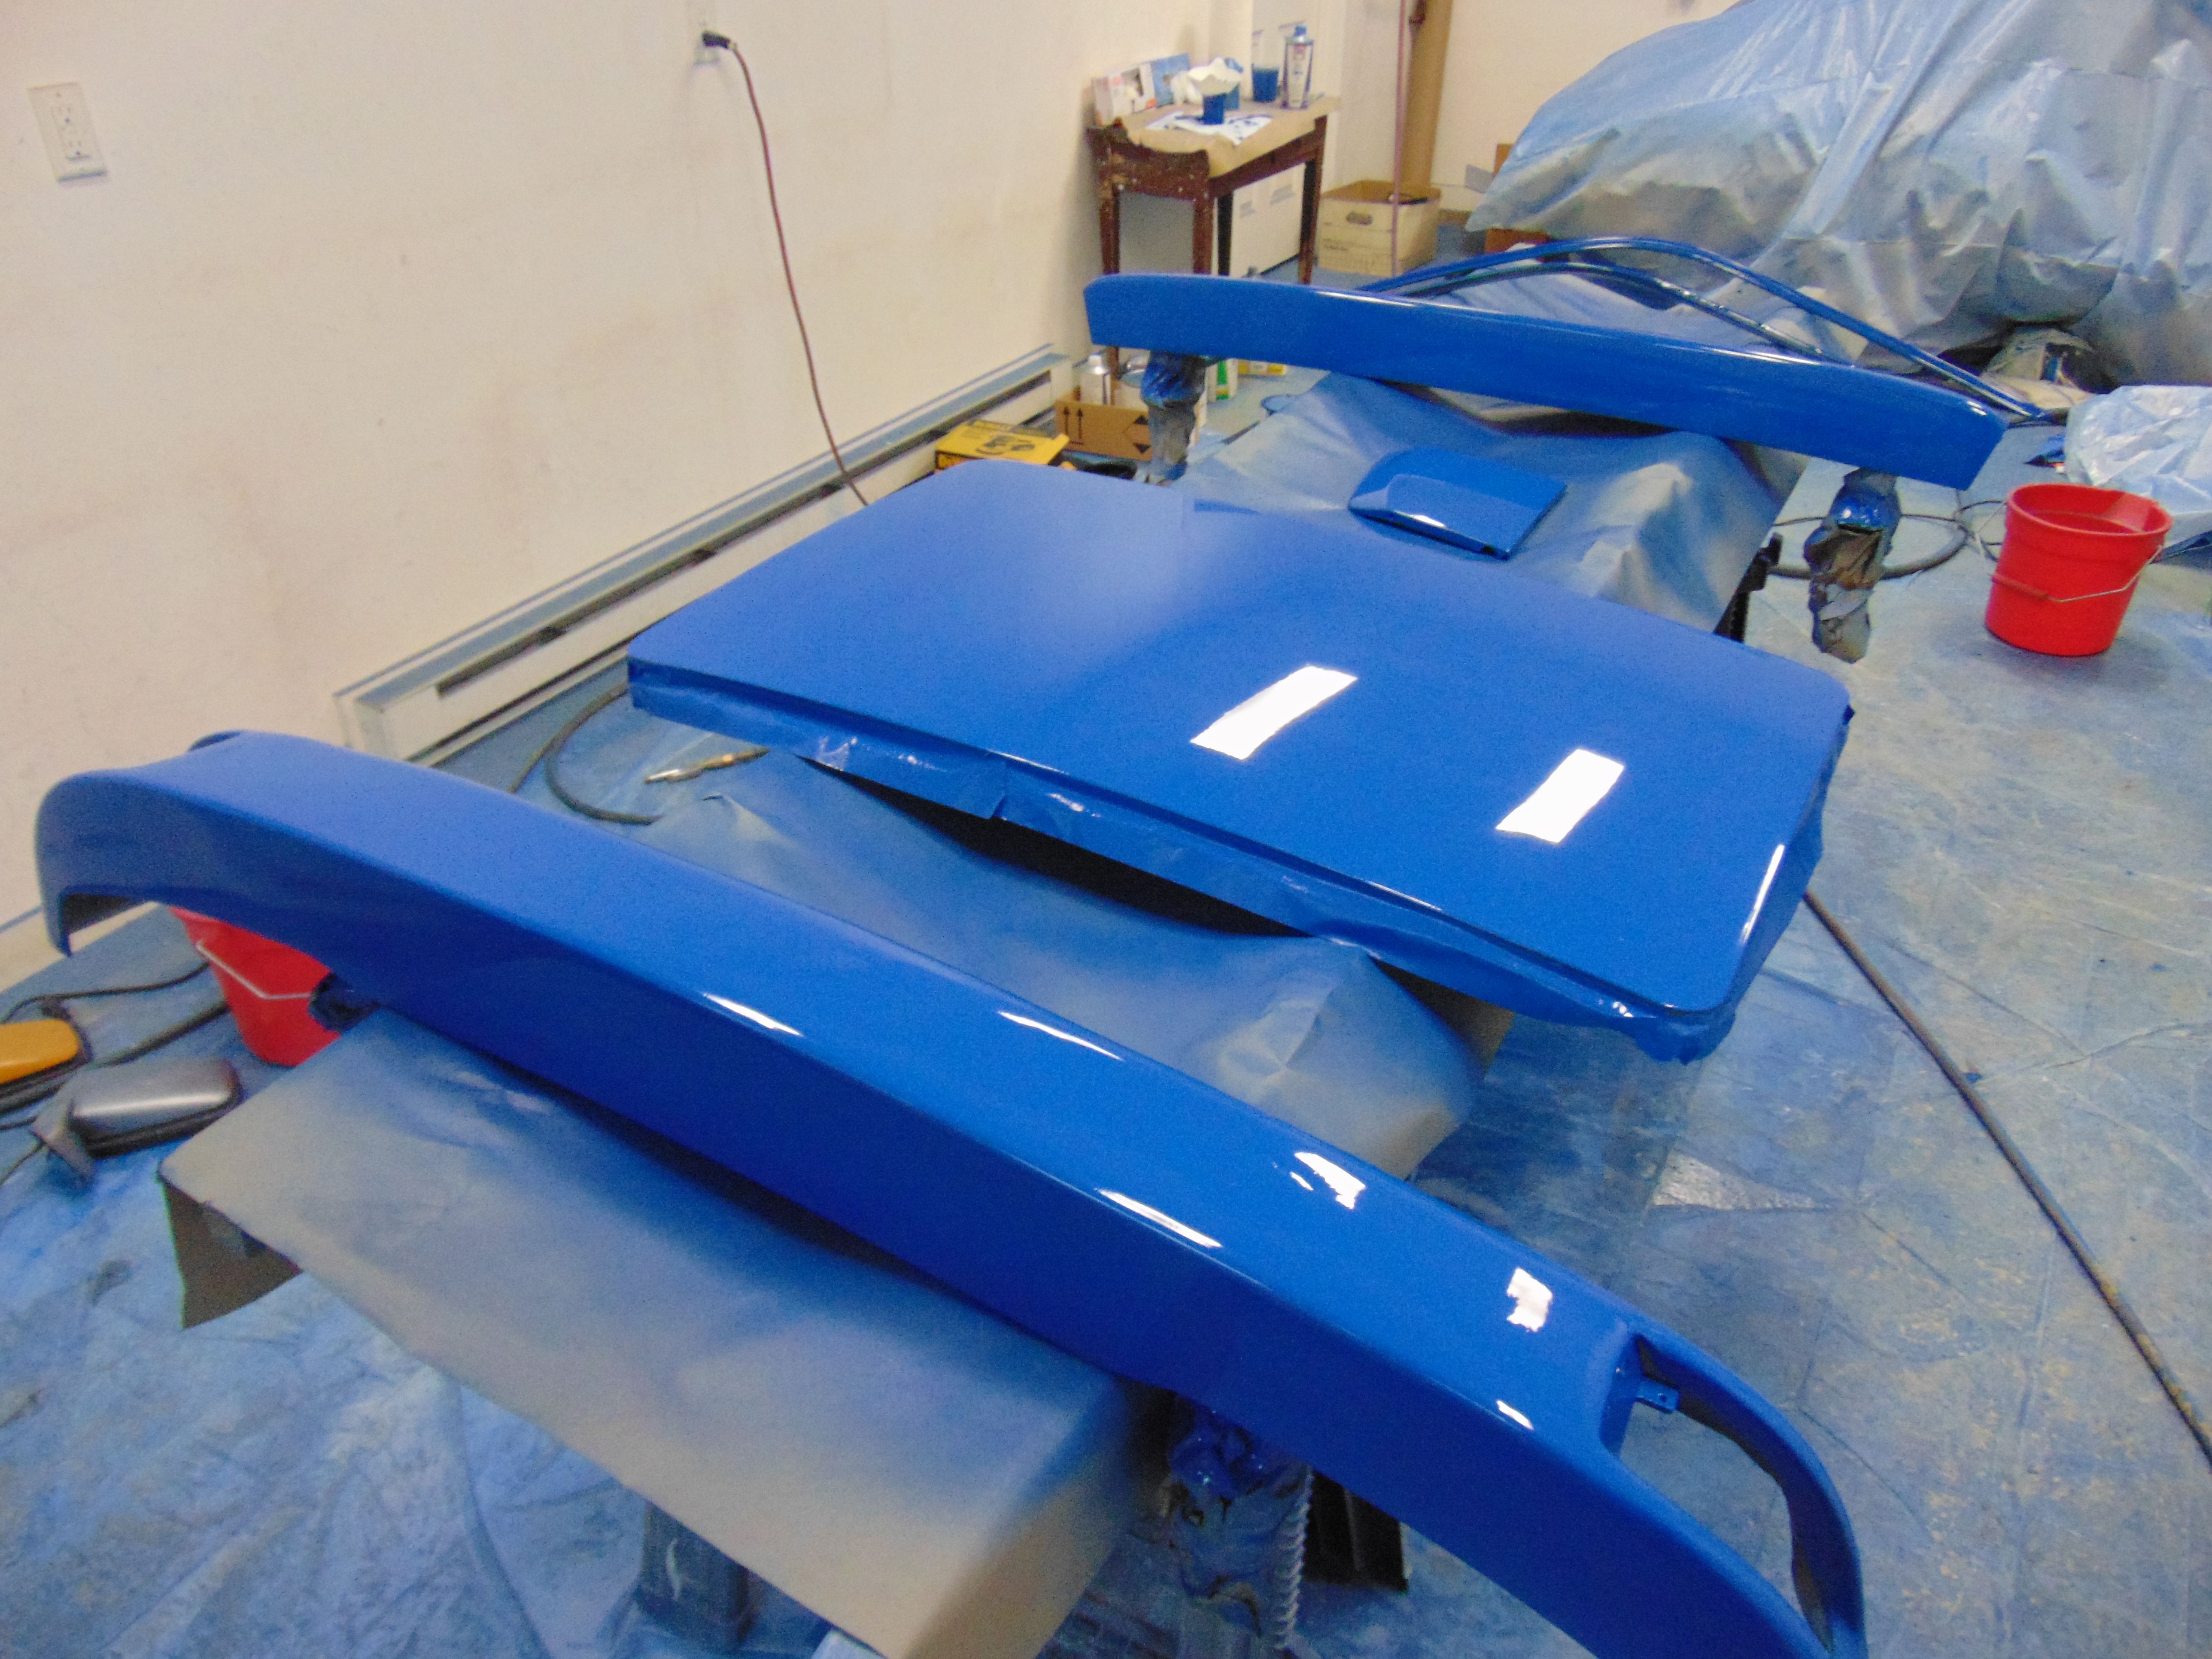
Bumpers. Sunroof.

Hood. Doors.
After applying the paint and performing buffing and polishing, it is time to reassemble the car. This can be a little nerve wracking as you don’t want to scratch your new paint job. Urethane paints become very hard after they fully cure but for the first few days and weeks they are still curing. Actually, this is why it is best to doing your finish sanding and buffing as soon as possible after painting. The Glasurit spec sheet asks you to wait 24 hours and then have at it.
One thing that a new coat of paint does is make other original features of the car look shabby. I ran into this immediately when reviewing the conditions of many of my rubber seals. Those that had the most exposure to weather and the UV light from the sun were in the worst condition. I purchased many new rubber seals as a result. In particular, one would want to change the seal at the rear hatch, to ensure it remains leak free. I bought my seals from Paragon Products. Interestingly, the windshield glass does not use a formed rubber seal. It is held in with a urethane glue.

New rubber seals
I will continue to re-assemble the car but as usual, every step of the way new areas for upgrade to the cars appearance and reliability arise. I plan to recover the dashboard. And having the dash and carpet out reveal areas of the wiring that have been hacked over the years that need attention.
Don’t kid yourself. There are hundreds of manhours in a top quality paint job, between the prep and the work after the paint is sprayed. Paint and materials can cost $1000 to $2000. Special colors like red and metallics are more expensive too. There is a reason why top quality paint jobs cost so much. But when you are done, you’ll have an amazing paint job that you’ll be proud of. And using the single stage urethane products like I did, one that can be repaired if need be.

Discussion
Comments are closed.